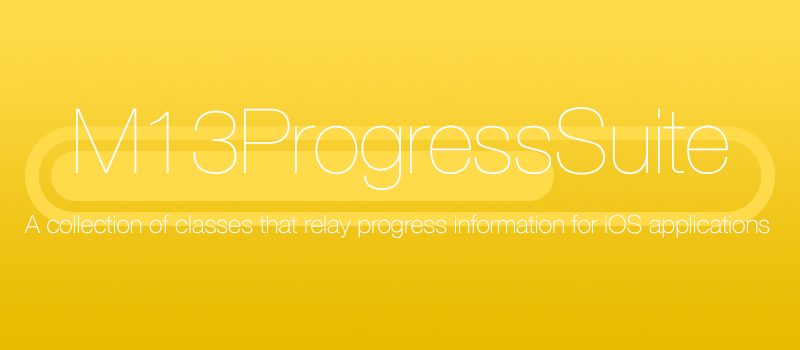
 M13ProgressSuite
A suite containing many tools to display progress information on iOS.
Top Related Projects

:octocat: RAMAnimatedTabBarController is a Swift UI module library for adding animation to iOS tabbar items and icons. iOS library made by @Ramotion

KolodaView is a class designed to simplify the implementation of Tinder like cards on iOS.
Our Guillotine Menu Transitioning Animation implemented in Swift reminds a bit of a notorious killing machine.
Animated side menu with customizable UI
Animated top menu for UITableView / UICollectionView / UIScrollView written in Swift
Quick Overview
The M13ProgressSuite is a collection of progress-related UI components for iOS development, including a progress bar, activity indicator, and other related elements. It provides a set of customizable and extensible UI components to enhance the user experience of progress-related tasks in iOS applications.
Pros
- Customizable: The suite offers a high degree of customization, allowing developers to adjust the appearance and behavior of the progress-related components to match the branding and design of their applications.
- Extensible: The project is designed to be easily extensible, making it possible for developers to create their own custom progress-related components based on the existing ones.
- Well-documented: The project's documentation is comprehensive, providing clear instructions and examples for using the various components.
- Active development: The project is actively maintained, with regular updates and bug fixes, ensuring its continued relevance and compatibility with the latest iOS versions.
Cons
- Limited to iOS: The M13ProgressSuite is designed specifically for iOS development and does not provide support for other platforms, such as Android or web.
- Dependency on external libraries: The project relies on several external libraries, which may increase the overall complexity and size of the application.
- Potential performance impact: Depending on the usage and customization of the progress-related components, there may be a slight performance impact on the application, especially on older or less powerful devices.
- Learning curve: While the documentation is comprehensive, there may be a learning curve for developers who are new to the project or progress-related UI components in general.
Code Examples
// Creating a progress bar
let progressBar = M13ProgressViewRing()
progressBar.progress = 0.5
progressBar.tintColor = .blue
progressBar.backgroundColor = .gray
view.addSubview(progressBar)
// Creating an activity indicator
let activityIndicator = M13ActivityIndicatorView(type: .lineScale)
activityIndicator.startAnimating()
view.addSubview(activityIndicator)
// Creating a custom progress view
class CustomProgressView: M13ProgressViewCircularRing {
    override func draw(_ rect: CGRect) {
        super.draw(rect)
        // Add custom drawing logic here
    }
}

let customProgressView = CustomProgressView()
customProgressView.progress = 0.75
customProgressView.tintColor = .green
view.addSubview(customProgressView)
// Updating the progress of a progress bar
progressBar.setProgress(0.75, animated: true)
Getting Started
To get started with the M13ProgressSuite, follow these steps:
- Add the M13ProgressSuite to your project using a dependency manager like CocoaPods or Carthage.
# CocoaPods
pod 'M13ProgressSuite'
- Import the M13ProgressSuite in your Swift file:
import M13ProgressSuite
-
Create an instance of the progress-related component you want to use, such as
M13ProgressViewRingorM13ActivityIndicatorView, and customize its properties as needed. -
Add the progress-related component to your view hierarchy:
let progressBar = M13ProgressViewRing()
progressBar.progress = 0.5
progressBar.tintColor = .blue
progressBar.backgroundColor = .gray
view.addSubview(progressBar)
-
Update the progress of the component as needed, using methods like
setProgress(_:animated:). -
Explore the other progress-related components and customization options available in the M13ProgressSuite to find the best fit for your application's needs.
Competitor Comparisons
:octocat: RAMAnimatedTabBarController is a Swift UI module library for adding animation to iOS tabbar items and icons. iOS library made by @Ramotion
Pros of Animated Tab Bar
- Provides a visually appealing and interactive tab bar experience with smooth animations.
- Supports customization of tab bar items, including icons, titles, and colors.
- Includes a variety of pre-built animation styles to choose from.
Cons of Animated Tab Bar
- May have a larger footprint in terms of file size and dependencies compared to M13ProgressSuite.
- Requires more setup and configuration to integrate into an existing project.
- Might not be as lightweight and performant as M13ProgressSuite for simple progress indicator use cases.
Code Comparison
Animated Tab Bar
let tabBarController = AnimatedTabBarController()
tabBarController.viewControllers = [
    createViewController(with: "Home", imageName: "home"),
    createViewController(with: "Search", imageName: "search"),
    createViewController(with: "Profile", imageName: "profile")
]
M13ProgressSuite
let progressView = M13ProgressViewRing()
progressView.progress = 0.5
progressView.tintColor = .blue
progressView.backgroundColor = .lightGray
KolodaView is a class designed to simplify the implementation of Tinder like cards on iOS.
Pros of Koloda
- Koloda provides a visually appealing and interactive card-based UI, which can be useful for various types of content presentation.
- The library includes built-in animations and gestures, making it easy to implement a swipe-based interface.
- Koloda is actively maintained and has a large community, ensuring ongoing support and updates.
Cons of Koloda
- Koloda is primarily focused on the card-based UI, which may not be suitable for all types of applications.
- The library may have a steeper learning curve compared to M13ProgressSuite, as it requires understanding the card-based UI and its associated gestures.
- Koloda may have a larger footprint in terms of file size and dependencies, which could be a concern for some projects.
Code Comparison
Koloda:
let card = DraggableCardView(frame: view.bounds)
card.delegate = self
view.addSubview(card)
M13ProgressSuite:
let progressView = M13ProgressViewRing(frame: view.bounds)
progressView.progress = 0.5
view.addSubview(progressView)
Our Guillotine Menu Transitioning Animation implemented in Swift reminds a bit of a notorious killing machine.
Pros of GuillotineMenu
- Provides a unique and visually appealing menu animation, with a "guillotine" style opening and closing effect.
- Supports both portrait and landscape orientations, making it versatile for different device layouts.
- Includes customization options for the menu's appearance and behavior, allowing developers to tailor it to their needs.
Cons of GuillotineMenu
- The library is relatively large in size, which may impact the overall app size and performance, especially on older devices.
- The documentation and examples provided are not as comprehensive as some other open-source projects, which may make it more challenging for new users to get started.
- The project has not been updated in over 2 years, which could indicate a lack of active maintenance and support.
Code Comparison
M13ProgressSuite
let progressView = M13ProgressViewCircular()
progressView.progress = 0.5
progressView.tintColor = .blue
progressView.backgroundColor = .gray
GuillotineMenu
let guillotineMenu = GuillotineMenu(rootViewController: rootViewController)
guillotineMenu.delegate = self
guillotineMenu.menuViewColor = .white
guillotineMenu.menuItemColor = .black
Animated side menu with customizable UI
Pros of Side-Menu.iOS
- Provides a clean and intuitive side menu UI with customizable animations
- Supports both left and right side menus
- Includes a variety of pre-built menu styles and transitions
Cons of Side-Menu.iOS
- May have a steeper learning curve compared to M13ProgressSuite
- Requires more setup and configuration to integrate into an existing project
- May have a larger footprint in terms of file size and dependencies
Code Comparison
M13ProgressSuite
let progressView = M13ProgressViewRing(frame: view.bounds)
progressView.progress = 0.5
progressView.progressTintColor = .blue
view.addSubview(progressView)
Side-Menu.iOS
let menuViewController = SideMenuViewController(leftMenuViewController: leftMenuVC,
                                               rightMenuViewController: rightMenuVC,
                                               centerViewController: centerVC)
window?.rootViewController = menuViewController
Animated top menu for UITableView / UICollectionView / UIScrollView written in Swift
Pros of Persei
- Persei provides a more comprehensive set of features, including support for various types of progress indicators (circular, linear, etc.), as well as customization options.
- The library has a larger community and more active development, with regular updates and bug fixes.
- Persei's documentation is more detailed and provides more examples, making it easier for developers to get started.
Cons of Persei
- Persei has a larger footprint and may be overkill for simple progress indicator use cases.
- The library's API can be more complex and may have a steeper learning curve compared to M13ProgressSuite.
- Persei may have dependencies on other libraries, which could increase the overall project size.
Code Comparison
M13ProgressSuite:
let progressView = M13ProgressViewCircular()
progressView.progress = 0.5
progressView.frame = view.bounds
view.addSubview(progressView)
Persei:
let progressView = PerseiBubbleProgressView(frame: view.bounds)
progressView.progress = 0.5
view.addSubview(progressView)
Convert  designs to code with AI

Introducing Visual Copilot: A new AI model to turn Figma designs to high quality code using your components.
Try Visual CopilotREADME
 M13ProgressSuite
================
M13ProgressSuite
================
A set of classes used to display progress information to users on iOS.
Includes:
- A interchangeable set of progress view of diffrent styles. All the progress views are based on the same superclass, allowing any of them to be switched with any other easily.
- A progress bar for UINavigationBar that works like Apple's Messages app. It also has the added feature of having an indeterminate style.
- A HUD overlay that works over any UIView. Uses the M13ProgressView class to allow easy customizablility of the progress view.
- A progress view that is styled like terminal.
- Complete documentation of each class.
UINavigationController (M13ProgressViewBar)
Adds a progress bar to the UINavigationController's UINavigationBar. The progress bar is controlled through the UINavigationController.


M13ProgressHUD
A customizable HUD that displays progress, and status information to the user. It uses the M13ProgressView class to allow easy changing of the progress view style.

M13ProgressConsole
A progress view styled like Terminal on OS X.


M13ProgressViews
A set of progess view based off of the same superclass. Allowing easy switching between progress view. Each progress view has success and failure actions, an indeterminate mode, and appearance customization features.
Bar


Bordered Bar

Filtered Image

Image


Pie


Ring


Segmented Bar*


Segmented Ring


Striped Bar


Progress View Usage:
All progress bars follow the same general usage:
// Create the progress view.
M13ProgressViewBar *progressView = [[M13ProgressViewBar alloc] initWithFrame:CGRectMake(0.0, 0.0, 50.0, 5.0)];

// Configure the progress view here.

// Add it to the view.
[self.view addSubview: progressView];

// Update the progress as needed
[progressView setProgress: 0.1 animated: YES];
HUD Usage:
// Create the HUD
M13ProgressHUD *HUD = [[M13ProgressHUD alloc] initWithProgressView:[[M13ProgressViewRing alloc] init]];

// Configure the progress view
HUD.progressViewSize = CGSizeMake(60.0, 60.0);
HUD.animationPoint = CGPointMake([UIScreen mainScreen].bounds.size.width / 2, [UIScreen mainScreen].bounds.size.height / 2);

// Add the HUD to the window. (Or any UIView)
UIWindow *window = ((AppDelegate *)[UIApplication sharedApplication].delegate).window;
[window addSubview:HUD];

// Show the HUD
[HUD show:YES];

//Update the HUD progress
[HUD setProgress:0.5 animated:YES];

// Update the HUD status
HUD.status = @"Processing";

// Hide the HUD
[HUD show:NO];
Contact Me:
If you have any questions comments or suggestions, send me a message. If you find a bug, or want to submit a pull request, let me know.
License:
MIT License
Copyright (c) 2013 Brandon McQuilkin
Permission is hereby granted, free of charge, to any person obtaining a copy of this software and associated documentation files (the
"Software"), to deal in the Software without restriction, including without limitation the rights to use, copy, modify, merge, publish, distribute, sublicense, and/or sell copies of the Software, and to permit persons to whom the Software is furnished to do so, subject to
the following conditions:The above copyright notice and this permission notice shall be included in all copies or substantial portions of the Software.
THE SOFTWARE IS PROVIDED "AS IS", WITHOUT WARRANTY OF ANY KIND, EXPRESS OR IMPLIED, INCLUDING BUT NOT LIMITED TO THE WARRANTIES OF MERCHANTABILITY, FITNESS FOR A PARTICULAR PURPOSE AND NONINFRINGEMENT. IN NO EVENT SHALL THE AUTHORS OR COPYRIGHT HOLDERS BE LIABLE FOR ANY CLAIM, DAMAGES OR OTHER LIABILITY, WHETHER IN AN ACTION OF CONTRACT, TORT OR OTHERWISE, ARISING FROM, OUT OF OR IN CONNECTION WITH THE SOFTWARE OR THE USE OR OTHER DEALINGS IN THE SOFTWARE.
Top Related Projects
:octocat: RAMAnimatedTabBarController is a Swift UI module library for adding animation to iOS tabbar items and icons. iOS library made by @Ramotion
KolodaView is a class designed to simplify the implementation of Tinder like cards on iOS.
Our Guillotine Menu Transitioning Animation implemented in Swift reminds a bit of a notorious killing machine.
Animated side menu with customizable UI
Animated top menu for UITableView / UICollectionView / UIScrollView written in Swift
Convert designs to code with AI
Introducing Visual Copilot: A new AI model to turn Figma designs to high quality code using your components.
Try Visual Copilot