 mineflayer
Create Minecraft bots with a powerful, stable, and high level JavaScript API.
Top Related Projects
Parse and serialize minecraft packets, plus authentication and encryption.

Brigadier is a command parser & dispatcher, designed and developed for Minecraft: Java Edition.

A lightweight, fast and extensible game server for Minecraft

BungeeCord, the 6th in a generation of server portal suites. Efficiently proxies and maintains connections and transport between multiple Minecraft servers.
Quick Overview
Mineflayer is a powerful, flexible, and feature-rich JavaScript library for creating Minecraft bots. It provides a high-level API for interacting with Minecraft servers, allowing developers to create automated players, chat bots, and other custom functionality within the game.
Pros
- Extensive API covering most Minecraft interactions
- Active community and regular updates
- Cross-platform compatibility (works with Node.js)
- Supports multiple Minecraft versions
Cons
- Steep learning curve for beginners
- Performance can be an issue with complex bots
- Limited documentation for advanced features
- Potential for abuse if used improperly on public servers
Code Examples
- Connecting to a server and logging chat messages:
const mineflayer = require('mineflayer')

const bot = mineflayer.createBot({
  host: 'localhost',
  username: 'bot'
})

bot.on('chat', (username, message) => {
  if (username === bot.username) return
  console.log(`${username}: ${message}`)
})
- Making the bot move and jump:
bot.on('spawn', () => {
  bot.setControlState('forward', true)
  bot.setControlState('jump', true)
  setTimeout(() => {
    bot.setControlState('forward', false)
    bot.setControlState('jump', false)
  }, 5000)
})
- Crafting an item:
const mcData = require('minecraft-data')(bot.version)
const Item = require('prismarine-item')(bot.version)

bot.craft(new Item(mcData.itemsByName.stick.id, 4), 1, null, (err) => {
  if (err) {
    console.log(err)
  } else {
    console.log('Crafted 4 sticks')
  }
})
Getting Started
To get started with Mineflayer, follow these steps:
- Install Node.js and npm
- Create a new directory for your project
- Initialize a new npm project:
npm init -y - Install Mineflayer:
npm install mineflayer - Create a new file (e.g.,
bot.js) and add the following code:const mineflayer = require('mineflayer') const bot = mineflayer.createBot({ host: 'localhost', // Change this to your server's address username: 'MyBot', port: 25565 // Change if your server uses a different port }) bot.on('spawn', () => { console.log('Bot has spawned!') }) bot.on('chat', (username, message) => { if (username === bot.username) return bot.chat(`Hello, ${username}! You said: ${message}`) }) - Run your bot:
node bot.js
This basic setup will create a bot that connects to a local Minecraft server and responds to chat messages.
Competitor Comparisons
Parse and serialize minecraft packets, plus authentication and encryption.
Pros of node-minecraft-protocol
- Lower-level protocol implementation, offering more flexibility and control
- Lighter weight and potentially faster for specific use cases
- Suitable for building custom clients or servers from scratch
Cons of node-minecraft-protocol
- Requires more manual implementation of game mechanics and features
- Steeper learning curve for beginners
- Less out-of-the-box functionality for common bot tasks
Code Comparison
mineflayer:
const mineflayer = require('mineflayer')
const bot = mineflayer.createBot({ username: 'Player' })

bot.on('chat', (username, message) => {
  if (message === 'hello') bot.chat('Hi!')
})
node-minecraft-protocol:
const mc = require('minecraft-protocol')
const client = mc.createClient({ username: 'Player' })

client.on('chat', (packet) => {
  if (packet.message === 'hello') client.write('chat', { message: 'Hi!' })
})
Both libraries are part of the PrismarineJS ecosystem, but serve different purposes. mineflayer provides a high-level API for creating Minecraft bots with built-in functionality, while node-minecraft-protocol offers a low-level implementation of the Minecraft protocol. Choose mineflayer for quick bot development and node-minecraft-protocol for more granular control over network communication.
Brigadier is a command parser & dispatcher, designed and developed for Minecraft: Java Edition.
Pros of brigadier
- Official Minecraft command parsing library, ensuring compatibility with Mojang standards
- Lightweight and focused solely on command parsing and dispatching
- Highly extensible and customizable for various command structures
Cons of brigadier
- Limited to command parsing functionality, not a full Minecraft bot framework
- Requires more setup and integration for complex Minecraft interactions
- Less community-driven development compared to mineflayer
Code Comparison
mineflayer example:
const mineflayer = require('mineflayer')
const bot = mineflayer.createBot({ username: 'Player' })
bot.on('chat', (username, message) => {
  if (message === 'hello') bot.chat('Hi!')
})
brigadier example:
LiteralArgumentBuilder<CommandSource> command = LiteralArgumentBuilder
    .<CommandSource>literal("hello")
    .executes(context -> {
        context.getSource().sendMessage("Hi!");
        return 1;
    });
mineflayer offers a higher-level API for bot creation and interaction, while brigadier focuses on command parsing and execution. mineflayer is more suitable for creating complex Minecraft bots, whereas brigadier is ideal for implementing custom command systems within Minecraft-related projects.
A lightweight, fast and extensible game server for Minecraft
Pros of Cuberite
- Written in C++, potentially offering better performance for server hosting
- Designed as a full server implementation, providing more control over game mechanics
- Supports plugins written in Lua, offering flexibility for server customization
Cons of Cuberite
- Smaller community and ecosystem compared to Mineflayer
- Less frequent updates and potentially slower adoption of new Minecraft features
- Steeper learning curve for developers not familiar with C++ or Lua
Code Comparison
Mineflayer (JavaScript):
const mineflayer = require('mineflayer')
const bot = mineflayer.createBot({ username: 'Player' })
bot.on('chat', (username, message) => {
  if (message === 'hello') bot.chat('Hi!')
})
Cuberite (Lua plugin):
function OnPlayerJoined(Player)
  Player:SendMessage("Welcome to the server!")
end

function Initialize(Plugin)
  Plugin:SetName("WelcomePlugin")
  Plugin:BindHook(cPluginManager.HOOK_PLAYER_JOINED, OnPlayerJoined)
  return true
end
Mineflayer is focused on creating bot clients, while Cuberite is a full server implementation. Mineflayer offers easier bot creation in JavaScript, whereas Cuberite provides more comprehensive server control using C++ and Lua plugins.
BungeeCord, the 6th in a generation of server portal suites. Efficiently proxies and maintains connections and transport between multiple Minecraft servers.
Pros of BungeeCord
- Designed specifically for Minecraft server networking and proxy functionality
- Supports multiple Minecraft server versions and implementations
- Highly scalable for large Minecraft server networks
Cons of BungeeCord
- Limited to server-side operations and cannot interact with the client directly
- Requires more setup and configuration compared to Mineflayer
- Less flexible for general-purpose Minecraft bot development
Code Comparison
Mineflayer (JavaScript):
const mineflayer = require('mineflayer')
const bot = mineflayer.createBot({ username: 'Bot' })
bot.on('chat', (username, message) => {
  if (message === 'hello') bot.chat('Hi!')
})
BungeeCord (Java):
public class MyPlugin extends Plugin {
    @EventHandler
    public void onChat(ChatEvent event) {
        if (event.getMessage().equals("hello")) {
            event.getSender().sendMessage("Hi!");
        }
    }
}
Mineflayer is more suitable for creating Minecraft bots and automation scripts, while BungeeCord is better for managing server networks and implementing proxy functionality. Mineflayer offers easier bot creation with a simpler API, whereas BungeeCord provides more robust server management capabilities but requires more setup and Java knowledge.
Convert  designs to code with AI

Introducing Visual Copilot: A new AI model to turn Figma designs to high quality code using your components.
Try Visual CopilotREADME
Mineflayer


![]()
| EN English | RU ÑÑÑÑкий | ES Español | FR Français | TR Türkçe | ZH ä¸æ | BR Português |
|---|
Create Minecraft bots with a powerful, stable, and high level JavaScript API, also usable from Python.
First time using Node.js? You may want to start with the tutorial. Know Python? Checkout some Python examples and try out Mineflayer on Google Colab.
Features
- Supports Minecraft 1.8 to 1.21 (1.8, 1.9, 1.10, 1.11, 1.12, 1.13, 1.14, 1.15, 1.16, 1.17, 1.18, 1.19, 1.20, 1.21)
- Entity knowledge and tracking.
- Block knowledge. You can query the world around you. Milliseconds to find any block.
- Physics and movement - handle all bounding boxes
- Attacking entities and using vehicles.
- Inventory management.
- Crafting, chests, dispensers, enchantment tables.
- Digging and building.
- Miscellaneous stuff such as knowing your health and whether it is raining.
- Activating blocks and using items.
- Chat.
Roadmap
Checkout this page to see what our current projects are.
Installation
First install Node.js >= 18 from nodejs.org then:
npm install mineflayer
To update mineflayer (or any Node.js) package and its dependencies, use
npm update
Documentation
| link | description |
|---|---|
| tutorial | Begin with Node.js and mineflayer |
| FAQ.md | Got a question ? go there first |
| api.md unstable_api.md | The full API reference |
| history.md | The changelog for mineflayer |
| examples/ | Checkout all the mineflayer examples |
Contribute
Please read CONTRIBUTING.md and prismarine-contribute
Usage
Videos
A tutorial video explaining the basic set up process for a bot can be found here.
If you want to learn more, more video tutorials are there, and the corresponding source codes for those bots is there.

Getting Started
Without a version specified, the version of the server will be guessed automatically. Without auth specified, the mojang auth style will be guessed.
Echo Example
const mineflayer = require('mineflayer')

const bot = mineflayer.createBot({
  host: 'localhost', // minecraft server ip
  username: 'Bot', // username to join as if auth is `offline`, else a unique identifier for this account. Switch if you want to change accounts
  auth: 'microsoft' // for offline mode servers, you can set this to 'offline'
  // port: 25565,              // set if you need a port that isn't 25565
  // version: false,           // only set if you need a specific version or snapshot (ie: "1.8.9" or "1.16.5"), otherwise it's set automatically
  // password: '12345678'      // set if you want to use password-based auth (may be unreliable). If specified, the `username` must be an email
})

bot.on('chat', (username, message) => {
  if (username === bot.username) return
  bot.chat(message)
})

// Log errors and kick reasons:
bot.on('kicked', console.log)
bot.on('error', console.log)
If auth is set to microsoft, you will be prompted to login to microsoft.com with a code in your browser. After signing in on your browser,
the bot will automatically obtain and cache authentication tokens (under your specified username) so you don't have to sign-in again.
To switch the account, update the supplied username. By default, cached tokens will be stored in your user's .minecraft folder, or if profilesFolder is specified, they'll instead be stored there.
For more information on bot options see node-minecraft-protocol's API doc.
Connecting to a Realm
To join a Realm that your Minecraft account has been invited to, you can pass a realms object with a selector function like below.
const client = mineflayer.createBot({
  username: 'email@example.com', // minecraft username
  realms: {
    // This function is called with an array of Realms the account can join. It should return the one it wants to join.
    pickRealm: (realms) => realms[0]
  },
  auth: 'microsoft'
})
See what your bot is doing
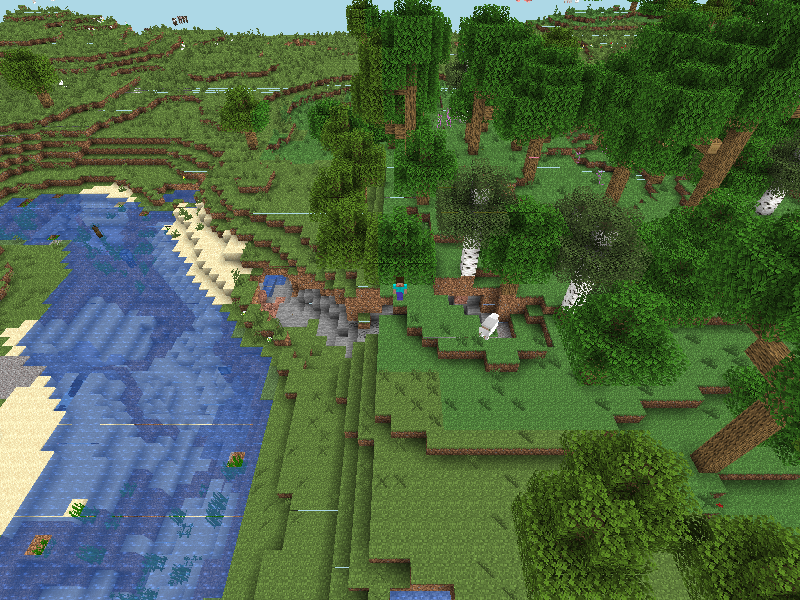
Thanks to the prismarine-viewer project, it's possible to display in a browser window what your bot is doing.
Just run npm install prismarine-viewer and add this to your bot:
const { mineflayer: mineflayerViewer } = require('prismarine-viewer')
bot.once('spawn', () => {
  mineflayerViewer(bot, { port: 3007, firstPerson: true }) // port is the minecraft server port, if first person is false, you get a bird's-eye view
})
And you'll get a live view looking like this:
More Examples
| example | description |
|---|---|
| viewer | Display your bot world view in the browser |
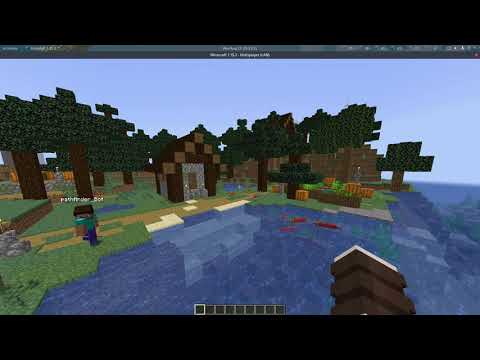
| pathfinder | Make your bot go to any location automatically |
| chest | Use chests, furnaces, dispensers, enchantment tables |
| digger | Learn how to create a simple bot that is capable of digging blocks |
| discord | Connect a discord bot with a mineflayer bot |
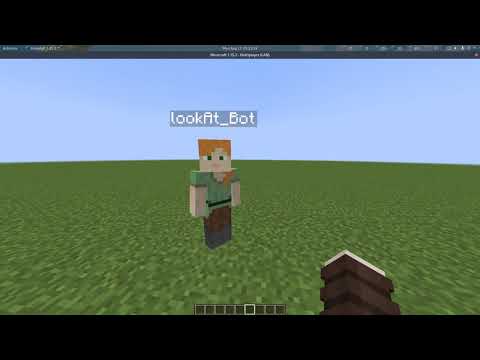
| jumper | Learn how to move, jump, ride vehicles, attack nearby entities |
| ansi | Display your bot's chat with all of the chat colors shown in your terminal |
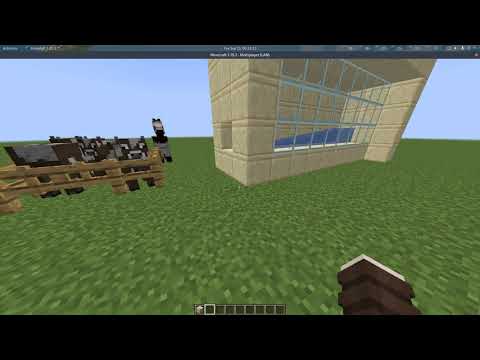
| guard | Make a bot guard a defined area from nearby mobs |
| multiple-from-file | Add a text file with accounts and have them all login |
And many more in the examples folder.
Modules
A lot of the active development is happening inside of small npm packages which are used by mineflayer.
The Node Way™
"When applications are done well, they are just the really application-specific, brackish residue that can't be so easily abstracted away. All the nice, reusable components sublimate away onto github and npm where everybody can collaborate to advance the commons." â substack from "how I write modules"
Modules
These are the main modules that make up mineflayer:
| module | description |
|---|---|
| minecraft-protocol | Parse and serialize minecraft packets, plus authentication and encryption. |
| minecraft-data | Language independent module providing minecraft data for minecraft clients, servers and libraries. |
| prismarine-physics | Provide the physics engine for minecraft entities |
| prismarine-chunk | A class to hold chunk data for Minecraft |
| node-vec3 | 3d vector math with robust unit tests |
| prismarine-block | Represent a minecraft block with its associated data |
| prismarine-chat | A parser for a minecraft chat message (extracted from mineflayer) |
| node-yggdrasil | Node.js library to interact with Mojang's authentication system, known as Yggdrasil |
| prismarine-world | The core implementation of worlds for prismarine |
| prismarine-windows | Represent minecraft windows |
| prismarine-item | Represent a minecraft item with its associated data |
| prismarine-nbt | An NBT parser for node-minecraft-protocol |
| prismarine-recipe | Represent minecraft recipes |
| prismarine-biome | Represent a minecraft biome with its associated data |
| prismarine-entity | Represent a minecraft entity |
Debug
You can enable some protocol debugging output using DEBUG environment variable:
DEBUG="minecraft-protocol" node [...]
On windows :
set DEBUG=minecraft-protocol
node your_script.js
Third Party Plugins
Mineflayer is pluggable; anyone can create a plugin that adds an even higher level API on top of Mineflayer.
The most updated and useful are :
- minecraft-mcp-server A MCP server for mineflayer, allowing using mineflayer from an LLM
- pathfinder - advanced A* pathfinding with a lot of configurable features
- prismarine-viewer - simple web chunk viewer
- web-inventory - web based inventory viewer
- statemachine - A state machine API for more complex bot behaviors
- Armor Manager - automatic armor management
- Dashboard - Frontend dashboard for mineflayer bot
- PVP - Easy API for basic PVP and PVE.
- Auto Eat - Automatic eating of food.
- Auto Crystal - Automatic placing & breaking of end crystals.
- Tool - A utility for automatic tool/weapon selection with a high level API.
- Hawkeye - A utility for using auto-aim with bows.
- GUI - Interact with nested GUI windows using async/await
- Projectile - Get the required launch angle for projectiles
- Movement - Smooth and realistic player movement, best suited for PvP
- Collect Block - Quick and simple block collection API.
But also check out :
- radar - web based radar interface using canvas and socket.io. YouTube Demo
- auto-auth - chat-based bot authentication
- Bloodhound - determine who and what is responsible for damage to another entity
- tps - get the current tps (processed tps)
- panorama - take Panorama Images of your world
- player-death-event - emit player death event in Mineflayer.
Projects Using Mineflayer
- Voyager An Open-Ended Embodied Agent with Large Language Models
- mindcraft Lib for using mineflayer with LLMs
- rom1504/rbot
- Darthfett/Helperbot
- vogonistic/voxel - visualize what the bot is up to using voxel.js
- JonnyD/Skynet - log player activity onto an online API
- MinecraftChat (last open source version, built by AlexKvazos) - Minecraft web based chat client
- Cheese Bot - Plugin based bot with a clean GUI. Made with Node-Webkit.
- Chaoscraft - Minecraft bot using genetic algorithms, see its youtube videos
- hexatester/minetelegram - Minecraft - Telegram bridge, build on top of mineflayer & telegraf.
- PrismarineJS/mineflayer-builder - Prints minecraft schematics in survival, keeping orientation
- SilkePilon/OpenDeliveryBot - Minecraft bot in python to deliver items from place to place.
- and hundreds more - All the projects that github detected are using mineflayer
Testing
Testing everything
Simply run:
npm test
Testing specific version
Run
npm run mocha_test -- -g <version>
where <version> is a minecraft version like 1.12, 1.15.2...
Testing specific test
Run
npm run mocha_test -- -g <test_name>
where <test_name> is a name of the test like bed, useChests, rayTrace...
Example
npm run mocha_test -- -g "1.18.1.*BlockFinder"
to run the block finder test for 1.18.1
License
Top Related Projects
Parse and serialize minecraft packets, plus authentication and encryption.
Brigadier is a command parser & dispatcher, designed and developed for Minecraft: Java Edition.
A lightweight, fast and extensible game server for Minecraft
BungeeCord, the 6th in a generation of server portal suites. Efficiently proxies and maintains connections and transport between multiple Minecraft servers.
Convert designs to code with AI
Introducing Visual Copilot: A new AI model to turn Figma designs to high quality code using your components.
Try Visual Copilot