 MockingBird
🚀AI拟声: 5秒内克隆您的声音并生成任意语音内容 Clone a voice in 5 seconds to generate arbitrary speech in real-time
Top Related Projects
Clone a voice in 5 seconds to generate arbitrary speech in real-time
:robot: :speech_balloon: Deep learning for Text to Speech (Discussion forum: https://discourse.mozilla.org/c/tts)
Facebook AI Research Sequence-to-Sequence Toolkit written in Python.
Tacotron 2 - PyTorch implementation with faster-than-realtime inference
A python package to analyze and compare voices with deep learning
Quick Overview
MockingBird is an AI-powered voice cloning system that can synthesize speech in a target voice using a small amount of sample audio. It's based on the paper "Transfer Learning from Speaker Verification to Multispeaker Text-To-Speech Synthesis" and aims to provide an open-source implementation for voice cloning.
Pros
- Requires only a small amount of target voice audio (as little as 3 seconds)
- Supports multiple languages, including English and Chinese
- Provides a user-friendly web interface for easy interaction
- Open-source project with active community support
Cons
- Requires significant computational resources for training and inference
- May produce lower quality results compared to commercial voice cloning solutions
- Limited documentation and setup instructions for beginners
- Potential ethical concerns regarding voice cloning technology
Code Examples
# Load pre-trained model and synthesize speech
from synthesizer.inference import Synthesizer
from encoder import inference as encoder
from vocoder import inference as vocoder

encoder.load_model("encoder.pt")
synthesizer = Synthesizer("synthesizer.pt")
vocoder.load_model("vocoder.pt")

text = "Hello, this is a cloned voice speaking."
embed = encoder.embed_utterance(encoder.preprocess_wav("target_voice.wav"))
specs = synthesizer.synthesize_spectrograms([text], [embed])
generated_wav = vocoder.infer_waveform(specs[0])
# Fine-tune the model with custom data
from synthesizer.train import train
from pathlib import Path

train(run_id="my_custom_model",
      syn_dir=Path("data/SV2TTS/synthesizer"),
      models_dir=Path("saved_models/"),
      save_every=10000,
      backup_every=50000,
      force_restart=False)
# Use the web interface to clone a voice
from webui import create_app

app = create_app()
app.run(host="0.0.0.0", port=8080)
Getting Started
-
Clone the repository:
git clone https://github.com/babysor/MockingBird.git cd MockingBird -
Install dependencies:
pip install -r requirements.txt -
Download pre-trained models:
python download_models.py -
Run the web interface:
python webui.py -
Open a web browser and navigate to
http://localhost:8080to start using MockingBird.
Competitor Comparisons
Clone a voice in 5 seconds to generate arbitrary speech in real-time
Pros of Real-Time-Voice-Cloning
- More comprehensive documentation and setup instructions
- Includes a pre-trained model for immediate use
- Offers a graphical user interface for easier interaction
Cons of Real-Time-Voice-Cloning
- Requires more computational resources
- Less frequent updates and maintenance
- More complex codebase, potentially harder for beginners to modify
Code Comparison
MockingBird:
def preprocess_wav(fpath_or_wav):
    wav, source_sr = librosa.load(fpath_or_wav, sr=None)
    wav = librosa.resample(wav, source_sr, sampling_rate)
    return wav
Real-Time-Voice-Cloning:
def preprocess_wav(fpath_or_wav: Union[str, Path, np.ndarray],
                   source_sr: Optional[int] = None):
    # Load the wav from disk if needed
    if isinstance(fpath_or_wav, str) or isinstance(fpath_or_wav, Path):
        wav, source_sr = librosa.load(str(fpath_or_wav), sr=None)
    else:
        wav = fpath_or_wav
Both projects aim to provide voice cloning capabilities, but Real-Time-Voice-Cloning offers a more user-friendly experience with its GUI and pre-trained model. However, it may be more resource-intensive and complex for developers to modify. MockingBird, while potentially less feature-rich, might be more accessible for those looking to understand and customize the underlying code. The code comparison shows that Real-Time-Voice-Cloning's implementation is more flexible, accepting various input types for preprocessing.
:robot: :speech_balloon: Deep learning for Text to Speech (Discussion forum: https://discourse.mozilla.org/c/tts)
Pros of TTS
- More comprehensive and feature-rich, offering multiple TTS models and voice conversion capabilities
- Better documentation and community support, with regular updates and maintenance
- Supports multiple languages and has a wider range of pre-trained models available
Cons of TTS
- More complex setup and usage, requiring more technical knowledge
- Heavier resource requirements due to its broader scope and functionality
- May be overkill for simple voice cloning tasks, where MockingBird is more focused
Code Comparison
MockingBird (inference):
from synthesizer.inference import Synthesizer
from encoder import inference as encoder
from vocoder import inference as vocoder

encoder.load_model(args.enc_model_fpath)
synthesizer = Synthesizer(args.syn_model_fpath)
vocoder.load_model(args.voc_model_fpath)
TTS (inference):
from TTS.utils.synthesizer import Synthesizer

synthesizer = Synthesizer(
    tts_checkpoint="path/to/tts_model.pth",
    tts_config_path="path/to/tts_config.json",
    vocoder_checkpoint="path/to/vocoder_model.pth",
    vocoder_config="path/to/vocoder_config.json"
)
The code comparison shows that TTS requires more configuration and setup, while MockingBird's approach is more straightforward for voice cloning tasks.
Facebook AI Research Sequence-to-Sequence Toolkit written in Python.
Pros of fairseq
- More comprehensive and versatile, supporting a wide range of sequence modeling tasks
- Backed by Facebook AI Research, ensuring regular updates and maintenance
- Extensive documentation and examples for various use cases
Cons of fairseq
- Steeper learning curve due to its broader scope and complexity
- Requires more computational resources for training and inference
- May be overkill for simple voice cloning tasks
Code Comparison
MockingBird (voice cloning focus):
def synthesize(model, text, speaker_embed, alpha=1):
    x = text_to_sequence(text)
    x = np.array([x])
    speaker_embed = np.array([speaker_embed])
    return model.synthesize(x, speaker_embed, alpha)
fairseq (general sequence modeling):
from fairseq.models.transformer import TransformerModel

model = TransformerModel.from_pretrained('/path/to/model')
tokens = model.encode('Hello world')
translations = model.translate(tokens)
MockingBird is specifically designed for voice cloning, with a simpler API focused on that task. fairseq, on the other hand, provides a more general-purpose toolkit for various sequence modeling tasks, including machine translation, speech recognition, and text generation. The code examples highlight this difference in focus and complexity.
Tacotron 2 - PyTorch implementation with faster-than-realtime inference
Pros of Tacotron2
- More established and widely recognized in the research community
- Backed by NVIDIA, providing robust support and resources
- Offers high-quality speech synthesis with natural-sounding results
Cons of Tacotron2
- Requires more computational resources and training time
- Less focus on voice cloning capabilities
- May be more complex to set up and use for beginners
Code Comparison
MockingBird:
def create_encoder_model(model_dir):
    model = SpeakerEncoder(device="cuda" if torch.cuda.is_available() else "cpu")
    model.load_state_dict(torch.load(model_dir))
    return model
Tacotron2:
def load_model(hparams):
    model = Tacotron2(hparams).cuda()
    if hparams.fp16_run:
        model.decoder.attention_layer.score_mask_value = finfo('float16').min
    return model
Both repositories focus on text-to-speech synthesis, but MockingBird emphasizes voice cloning capabilities, while Tacotron2 provides a more general-purpose speech synthesis framework. MockingBird may be more accessible for users interested in quick voice cloning experiments, while Tacotron2 offers a more comprehensive solution for advanced speech synthesis tasks.
A python package to analyze and compare voices with deep learning
Pros of Resemblyzer
- Focuses on speaker diarization and voice cloning, offering more specialized functionality
- Provides pre-trained models for quick implementation
- Has a more active development community with frequent updates
Cons of Resemblyzer
- Limited to voice-related tasks, less versatile than MockingBird
- Requires more computational resources for processing
- Steeper learning curve for beginners
Code Comparison
MockingBird:
from synthesizer.inference import Synthesizer
from encoder import inference as encoder
from vocoder import inference as vocoder

encoder.load_model(encoder_path)
synthesizer = Synthesizer(synthesizer_path)
vocoder.load_model(vocoder_path)
Resemblyzer:
from resemblyzer import VoiceEncoder, preprocess_wav
from pathlib import Path

encoder = VoiceEncoder()
wav = preprocess_wav(Path("path/to/audio.wav"))
embedding = encoder.embed_utterance(wav)
Both repositories focus on voice-related tasks, but MockingBird offers a more comprehensive solution for voice cloning and synthesis. Resemblyzer, on the other hand, specializes in speaker diarization and voice embedding. MockingBird provides a full pipeline for voice synthesis, while Resemblyzer concentrates on generating voice embeddings for various applications.
Convert  designs to code with AI

Introducing Visual Copilot: A new AI model to turn Figma designs to high quality code using your components.
Try Visual CopilotREADME
ð§ While I no longer actively update this repo, you can find me continuously pushing this tech forward to good side and open-source. Join me at https://discord.gg/wrAGwSH5 .

English | ä¸æ| ä¸æLinux
Features
ð Chinese supported mandarin and tested with multiple datasets: aidatatang_200zh, magicdata, aishell3, data_aishell, and etc.
𤩠PyTorch worked for pytorch, tested in version of 1.9.0(latest in August 2021), with GPU Tesla T4 and GTX 2060
ð Windows + Linux run in both Windows OS and linux OS (even in M1 MACOS)
𤩠Easy & Awesome effect with only newly-trained synthesizer, by reusing the pretrained encoder/vocoder
ð Webserver Ready to serve your result with remote calling
DEMO VIDEO
Quick Start
1. Install Requirements
1.1 General Setup
Follow the original repo to test if you got all environment ready. **Python 3.7 or higher ** is needed to run the toolbox.
- Install PyTorch.
If you get an
ERROR: Could not find a version that satisfies the requirement torch==1.9.0+cu102 (from versions: 0.1.2, 0.1.2.post1, 0.1.2.post2 )This error is probably due to a low version of python, try using 3.9 and it will install successfully
- Install ffmpeg.
- Run
pip install -r requirements.txtto install the remaining necessary packages.
The recommended environment here is
Repo Tag 0.0.1Pytorch1.9.0 with Torchvision0.10.0 and cudatoolkit10.2requirements.txtwebrtcvad-wheelsbecauserequiremants. txtwas exported a few months ago, so it doesn't work with newer versions
- Install webrtcvad
pip install webrtcvad-wheels(If you need)
or
-
install dependencies withÂ
conda orÂmambaconda env create -n env_name -f env.ymlmamba env create -n env_name -f env.ymlwill create a virtual environment where necessary dependencies are installed. Switch to the new environment byÂ
conda activate env_name and enjoy it.env.yml only includes the necessary dependencies to run the projectï¼temporarily without monotonic-align. You can check the official website to install the GPU version of pytorch.
1.2 Setup with a M1 Mac
The following steps are a workaround to directly use the original
demo_toolbox.pywithout the changing of codes.Since the major issue comes with the PyQt5 packages used in
demo_toolbox.pynot compatible with M1 chips, were one to attempt on training models with the M1 chip, either that person can forgodemo_toolbox.py, or one can try theweb.pyin the project.
1.2.1 Install PyQt5, with ref here.
- Create and open a Rosetta Terminal, with ref here.
- Use system Python to create a virtual environment for the project
/usr/bin/python3 -m venv /PathToMockingBird/venv source /PathToMockingBird/venv/bin/activate - Upgrade pip and install
PyQt5pip install --upgrade pip pip install pyqt5
1.2.2 Install pyworld and ctc-segmentation
Both packages seem to be unique to this project and are not seen in the original Real-Time Voice Cloning project. When installing with
pip install, both packages lack wheels so the program tries to directly compile from c code and could not findPython.h.
-
Install
pyworldbrew install pythonPython.hcan come with Python installed by brewexport CPLUS_INCLUDE_PATH=/opt/homebrew/Frameworks/Python.framework/HeadersThe filepath of brew-installedPython.his unique to M1 MacOS and listed above. One needs to manually add the path to the environment variables.pip install pyworldthat should do.
-
Install
ctc-segmentationSame method does not apply to
ctc-segmentation, and one needs to compile it from the source code on github.git clone https://github.com/lumaku/ctc-segmentation.gitcd ctc-segmentationsource /PathToMockingBird/venv/bin/activateIf the virtual environment hasn't been deployed, activate it.cythonize -3 ctc_segmentation/ctc_segmentation_dyn.pyx/usr/bin/arch -x86_64 python setup.py buildBuild with x86 architecture./usr/bin/arch -x86_64 python setup.py install --optimize=1 --skip-buildInstall with x86 architecture.
1.2.3 Other dependencies
/usr/bin/arch -x86_64 pip install torch torchvision torchaudioPip installingPyTorchas an example, articulate that it's installed with x86 architecturepip install ffmpegInstall ffmpegpip install -r requirements.txtInstall other requirements.
1.2.4 Run the Inference Time (with Toolbox)
To run the project on x86 architecture. ref.
vim /PathToMockingBird/venv/bin/pythonM1Create an executable filepythonM1to condition python interpreter at/PathToMockingBird/venv/bin.- Write in the following content:
#!/usr/bin/env zsh
mydir=${0:a:h}
/usr/bin/arch -x86_64 $mydir/python "$@"
chmod +x pythonM1Set the file as executable.- If using PyCharm IDE, configure project interpreter to
pythonM1(steps here), if using command line python, run/PathToMockingBird/venv/bin/pythonM1 demo_toolbox.py
2. Prepare your models
Note that we are using the pretrained encoder/vocoder but not synthesizer, since the original model is incompatible with the Chinese symbols. It means the demo_cli is not working at this moment, so additional synthesizer models are required.
You can either train your models or use existing ones:
2.1 Train encoder with your dataset (Optional)
-
Preprocess with the audios and the mel spectrograms:
python encoder_preprocess.py <datasets_root>Allowing parameter--dataset {dataset}to support the datasets you want to preprocess. Only the train set of these datasets will be used. Possible names: librispeech_other, voxceleb1, voxceleb2. Use comma to sperate multiple datasets. -
Train the encoder:
python encoder_train.py my_run <datasets_root>/SV2TTS/encoder
For training, the encoder uses visdom. You can disable it with
--no_visdom, but it's nice to have. Run "visdom" in a separate CLI/process to start your visdom server.
2.2 Train synthesizer with your dataset
-
Download dataset and unzip: make sure you can access all .wav in folder
-
Preprocess with the audios and the mel spectrograms:
python pre.py <datasets_root>Allowing parameter--dataset {dataset}to support aidatatang_200zh, magicdata, aishell3, data_aishell, etc.If this parameter is not passed, the default dataset will be aidatatang_200zh. -
Train the synthesizer:
python train.py --type=synth mandarin <datasets_root>/SV2TTS/synthesizer -
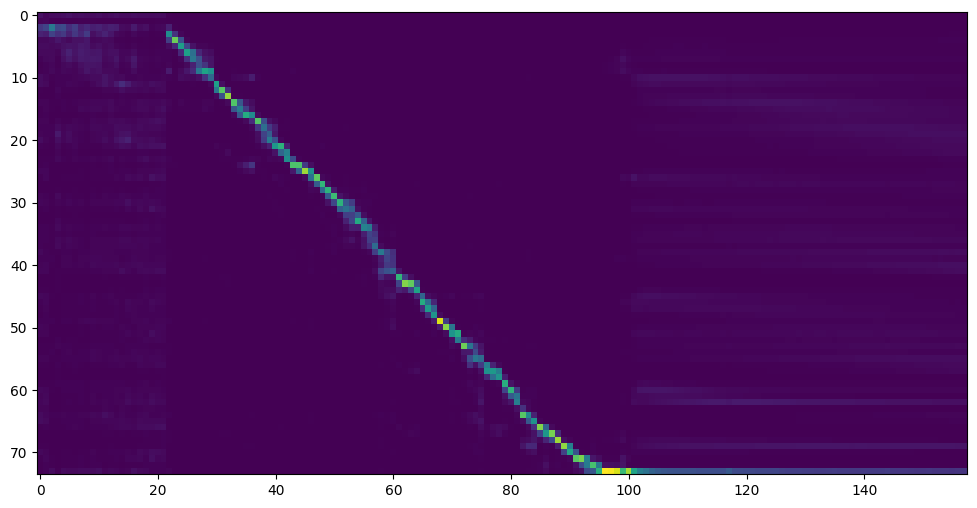
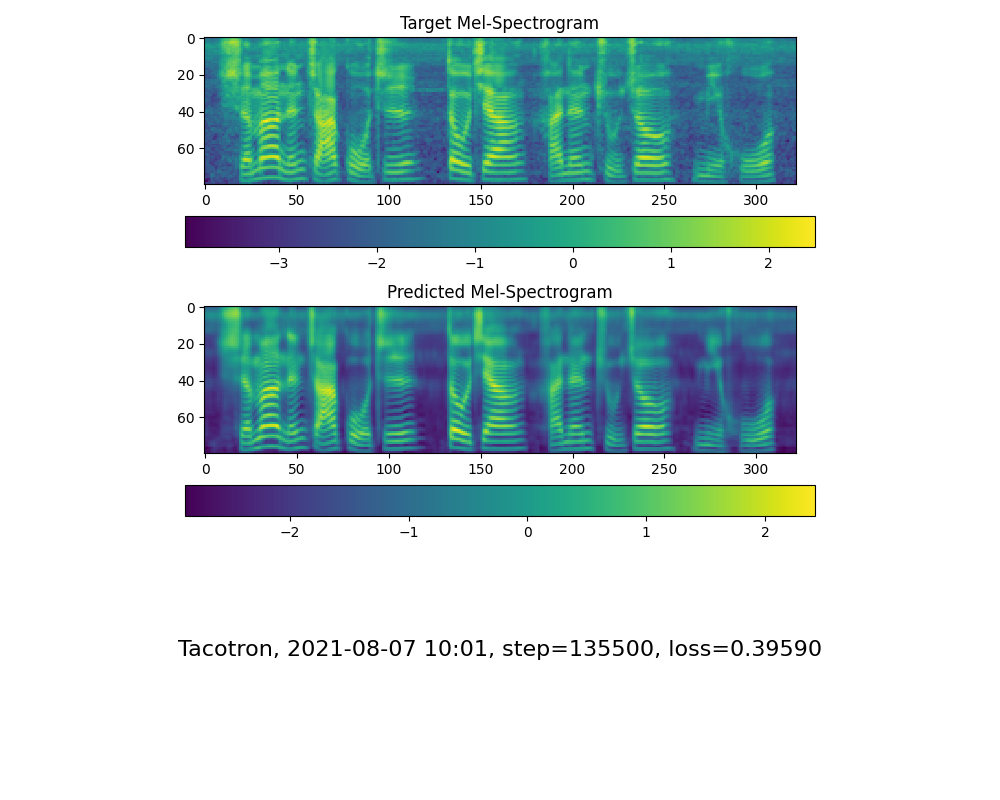
Go to next step when you see attention line show and loss meet your need in training folder synthesizer/saved_models/.
2.3 Use pretrained model of synthesizer
Thanks to the community, some models will be shared:
| author | Download link | Preview Video | Info |
|---|---|---|---|
| @author | https://pan.baidu.com/s/1iONvRxmkI-t1nHqxKytY3g Baidu 4j5d | 75k steps trained by multiple datasets | |
| @author | https://pan.baidu.com/s/1fMh9IlgKJlL2PIiRTYDUvw Baidu codeï¼om7f | 25k steps trained by multiple datasets, only works under version 0.0.1 | |
| @FawenYo | https://yisiou-my.sharepoint.com/:u:/g/personal/lawrence_cheng_fawenyo_onmicrosoft_com/EWFWDHzee-NNg9TWdKckCc4BC7bK2j9cCbOWn0-_tK0nOg?e=n0gGgC | input output | 200k steps with local accent of Taiwan, only works under version 0.0.1 |
| @miven | https://pan.baidu.com/s/1PI-hM3sn5wbeChRryX-RCQ code: 2021 https://www.aliyundrive.com/s/AwPsbo8mcSP code: z2m0 | https://www.bilibili.com/video/BV1uh411B7AD/ | only works under version 0.0.1 |
2.4 Train vocoder (Optional)
note: vocoder has little difference in effect, so you may not need to train a new one.
- Preprocess the data:
python vocoder_preprocess.py <datasets_root> -m <synthesizer_model_path>
<datasets_root>replace with your dataset rootï¼<synthesizer_model_path>replace with directory of your best trained models of sythensizer, e.g. sythensizer\saved_mode\xxx
-
Train the wavernn vocoder:
python vocoder_train.py mandarin <datasets_root> -
Train the hifigan vocoder
python vocoder_train.py mandarin <datasets_root> hifigan
3. Launch
3.1 Using the web server
You can then try to run:python web.py and open it in browser, default as http://localhost:8080
3.2 Using the Toolbox
You can then try the toolbox:
python demo_toolbox.py -d <datasets_root>
3.3 Using the command line
You can then try the command:
python gen_voice.py <text_file.txt> your_wav_file.wav
you may need to install cn2an by "pip install cn2an" for better digital number result.
Reference
This repository is forked from Real-Time-Voice-Cloning which only support English.
| URL | Designation | Title | Implementation source |
|---|---|---|---|
| 1803.09017 | GlobalStyleToken (synthesizer) | Style Tokens: Unsupervised Style Modeling, Control and Transfer in End-to-End Speech Synthesis | This repo |
| 2010.05646 | HiFi-GAN (vocoder) | Generative Adversarial Networks for Efficient and High Fidelity Speech Synthesis | This repo |
| 2106.02297 | Fre-GAN (vocoder) | Fre-GAN: Adversarial Frequency-consistent Audio Synthesis | This repo |
| 1806.04558 | SV2TTS | Transfer Learning from Speaker Verification to Multispeaker Text-To-Speech Synthesis | This repo |
| 1802.08435 | WaveRNN (vocoder) | Efficient Neural Audio Synthesis | fatchord/WaveRNN |
| 1703.10135 | Tacotron (synthesizer) | Tacotron: Towards End-to-End Speech Synthesis | fatchord/WaveRNN |
| 1710.10467 | GE2E (encoder) | Generalized End-To-End Loss for Speaker Verification | This repo |
F Q&A
1.Where can I download the dataset?
| Dataset | Original Source | Alternative Sources |
|---|---|---|
| aidatatang_200zh | OpenSLR | Google Drive |
| magicdata | OpenSLR | Google Drive (Dev set) |
| aishell3 | OpenSLR | Google Drive |
| data_aishell | OpenSLR |
After unzip aidatatang_200zh, you need to unzip all the files under
aidatatang_200zh\corpus\train
2.What is<datasets_root>?
If the dataset path is D:\data\aidatatang_200zh,then <datasets_root> isD:\data
3.Not enough VRAM
Train the synthesizerï¼adjust the batch_size in synthesizer/hparams.py
//Before
tts_schedule = [(2,  1e-3,  20_000,  12),   # Progressive training schedule
                (2,  5e-4,  40_000,  12),   # (r, lr, step, batch_size)
                (2,  2e-4,  80_000,  12),   #
                (2,  1e-4, 160_000,  12),   # r = reduction factor (# of mel frames
                (2,  3e-5, 320_000,  12),   #     synthesized for each decoder iteration)
                (2,  1e-5, 640_000,  12)],  # lr = learning rate
//After
tts_schedule = [(2,  1e-3,  20_000,  8),   # Progressive training schedule
                (2,  5e-4,  40_000,  8),   # (r, lr, step, batch_size)
                (2,  2e-4,  80_000,  8),   #
                (2,  1e-4, 160_000,  8),   # r = reduction factor (# of mel frames
                (2,  3e-5, 320_000,  8),   #     synthesized for each decoder iteration)
                (2,  1e-5, 640_000,  8)],  # lr = learning rate
Train Vocoder-Preprocess the dataï¼adjust the batch_size in synthesizer/hparams.py
//Before
### Data Preprocessing
        max_mel_frames = 900,
        rescale = True,
        rescaling_max = 0.9,
        synthesis_batch_size = 16,                  # For vocoder preprocessing and inference.
//After
### Data Preprocessing
        max_mel_frames = 900,
        rescale = True,
        rescaling_max = 0.9,
        synthesis_batch_size = 8,                  # For vocoder preprocessing and inference.
Train Vocoder-Train the vocoderï¼adjust the batch_size in vocoder/wavernn/hparams.py
//Before
# Training
voc_batch_size = 100
voc_lr = 1e-4
voc_gen_at_checkpoint = 5
voc_pad = 2

//After
# Training
voc_batch_size = 6
voc_lr = 1e-4
voc_gen_at_checkpoint = 5
voc_pad =2
4.If it happens RuntimeError: Error(s) in loading state_dict for Tacotron: size mismatch for encoder.embedding.weight: copying a param with shape torch.Size([70, 512]) from checkpoint, the shape in current model is torch.Size([75, 512]).
Please refer to issue #37
5. How to improve CPU and GPU occupancy rate?
Adjust the batch_size as appropriate to improve
6. What if it happens the page file is too small to complete the operation
Please refer to this video and change the virtual memory to 100G (102400), for example : When the file is placed in the D disk, the virtual memory of the D disk is changed.
7. When should I stop during training?
FYI, my attention came after 18k steps and loss became lower than 0.4 after 50k steps.


Top Related Projects
Clone a voice in 5 seconds to generate arbitrary speech in real-time
:robot: :speech_balloon: Deep learning for Text to Speech (Discussion forum: https://discourse.mozilla.org/c/tts)
Facebook AI Research Sequence-to-Sequence Toolkit written in Python.
Tacotron 2 - PyTorch implementation with faster-than-realtime inference
A python package to analyze and compare voices with deep learning
Convert  designs to code with AI

Introducing Visual Copilot: A new AI model to turn Figma designs to high quality code using your components.
Try Visual Copilot