
Top Related Projects

A reference example for TypeScript and Node with a detailed README describing how to use the two together.

Minimalistic project template to jump start a Node.js back-end application in TypeScript. ESLint, Vitest and type definitions included.

Starter kit with zero-config for building a library in TypeScript, featuring RollupJS, Jest, Prettier, TSLint, Semantic Release, and more!

The most basic TypeScript starter I could think of

:books: The definitive guide to TypeScript and possibly the best TypeScript book :book:. Free and Open Source 🌹

TypeScript execution and REPL for node.js
Quick Overview
The typescript-starter repository is a boilerplate project for creating TypeScript libraries. It provides a comprehensive setup with modern tooling, testing frameworks, and documentation generation, allowing developers to quickly start building high-quality TypeScript packages.
Pros
- Comprehensive setup with TypeScript, Jest, ESLint, and Prettier
- Automated documentation generation using TypeDoc
- Continuous Integration (CI) setup with GitHub Actions
- Includes VSCode debugging configuration
Cons
- May be overwhelming for beginners due to its extensive configuration
- Some included tools might not be necessary for smaller projects
- Requires understanding of multiple tools and configurations
Code Examples
- Basic TypeScript class:
export class Greeter {
  private name: string;

  constructor(name: string) {
    this.name = name;
  }

  greet(): string {
    return `Hello, ${this.name}!`;
  }
}
- Async function with error handling:
export async function fetchData(url: string): Promise<any> {
  try {
    const response = await fetch(url);
    if (!response.ok) {
      throw new Error(`HTTP error! status: ${response.status}`);
    }
    return await response.json();
  } catch (error) {
    console.error('Error fetching data:', error);
    throw error;
  }
}
- Generic function with type constraints:
export function merge<T extends object, U extends object>(obj1: T, obj2: U): T & U {
  return { ...obj1, ...obj2 };
}
Getting Started
-
Clone the repository:
git clone https://github.com/bitjson/typescript-starter.git cd typescript-starter -
Install dependencies:
npm install -
Start development:
npm run watch -
Run tests:
npm test -
Build the project:
npm run build
Competitor Comparisons
A reference example for TypeScript and Node with a detailed README describing how to use the two together.
Pros of TypeScript-Node-Starter
- More comprehensive, including Express.js setup and MongoDB integration
- Includes authentication features and user management
- Provides a full-fledged web application structure with views and controllers
Cons of TypeScript-Node-Starter
- Potentially overwhelming for simpler projects or beginners
- Less focus on build optimization and modern tooling
- May include unnecessary components for certain use cases
Code Comparison
TypeScript-Node-Starter (server setup):
import express from 'express';
import compression from 'compression';
import session from 'express-session';
import bodyParser from 'body-parser';
import lusca from 'lusca';
typescript-starter (build configuration):
import { defineConfig } from 'rollup';
import typescript from '@rollup/plugin-typescript';
import commonjs from '@rollup/plugin-commonjs';
import resolve from '@rollup/plugin-node-resolve';
Summary
TypeScript-Node-Starter is better suited for full-stack web applications with authentication and database integration. It provides a more opinionated structure but may be overkill for simpler projects.
typescript-starter focuses on creating flexible TypeScript libraries or applications with modern build tools and optimizations. It's more lightweight and adaptable to various project types but lacks specific web application features out of the box.
Choose TypeScript-Node-Starter for comprehensive web applications, and typescript-starter for versatile TypeScript projects with a focus on build optimization and modern tooling.
Minimalistic project template to jump start a Node.js back-end application in TypeScript. ESLint, Vitest and type definitions included.
Pros of node-typescript-boilerplate
- More frequent updates and active maintenance
- Includes Jest for testing out of the box
- Supports both CommonJS and ES modules
Cons of node-typescript-boilerplate
- Less comprehensive documentation
- Fewer pre-configured tools and features
- No built-in continuous integration setup
Code Comparison
node-typescript-boilerplate:
import { Delays, greeter } from '../src/main';

describe('greeter function', () => {
  const name = 'John';
  let hello: string;

  let timeoutSpy: jest.SpyInstance;
typescript-starter:
import { Greeter } from '../src/index';

describe('Greeter', () => {
  it('should greet with message', () => {
    const greeter = new Greeter('friend');
    expect(greeter.greet()).toBe('Hello, friend!');
  });
});
The code comparison shows that node-typescript-boilerplate uses a more functional approach with imported functions, while typescript-starter uses a class-based structure. Both repositories utilize Jest for testing, but their testing styles differ slightly.
Overall, node-typescript-boilerplate offers a more lightweight and frequently updated solution, while typescript-starter provides a more comprehensive set of tools and configurations out of the box. The choice between the two depends on the specific needs of the project and the developer's preferences.
Starter kit with zero-config for building a library in TypeScript, featuring RollupJS, Jest, Prettier, TSLint, Semantic Release, and more!
Pros of typescript-library-starter
- Includes a wider range of tools and configurations out-of-the-box (e.g., Prettier, Semantic Release, Travis CI)
- Provides a more comprehensive documentation setup with TypeDoc
- Offers automatic generation of API documentation
Cons of typescript-library-starter
- May be overwhelming for simpler projects due to its extensive feature set
- Requires more setup and configuration for users who don't need all the included tools
- Has a steeper learning curve for developers new to some of the integrated technologies
Code Comparison
typescript-library-starter:
{
  "scripts": {
    "lint": "tslint  --project tsconfig.json -t codeFrame 'src/**/*.ts' 'test/**/*.ts'",
    "prebuild": "rimraf dist",
    "build": "tsc --module commonjs && rollup -c rollup.config.ts && typedoc --out docs --target es6 --theme minimal --mode file src"
  }
}
typescript-starter:
{
  "scripts": {
    "build": "run-p build:*",
    "build:main": "tsc -p tsconfig.json",
    "build:module": "tsc -p tsconfig.module.json"
  }
}
The code comparison shows that typescript-library-starter includes more comprehensive build and lint scripts, while typescript-starter opts for a simpler, parallel build process.
The most basic TypeScript starter I could think of
Pros of simple-typescript-starter
- Simpler setup with fewer dependencies, making it easier for beginners
- Includes Jest for testing out of the box
- Provides a basic Express server example
Cons of simple-typescript-starter
- Less comprehensive tooling and configuration options
- Fewer advanced features like automatic API documentation generation
- Less active maintenance and community support
Code Comparison
simple-typescript-starter:
import express from 'express';

const app = express();
const port = 3000;

app.get('/', (req, res) => {
  res.send('Hello World!');
});
typescript-starter:
export function double(x: number): number {
  return x * 2;
}

export function power(base: number, exponent: number): number {
  return Math.pow(base, exponent);
}
The simple-typescript-starter provides a basic Express server setup, while typescript-starter focuses on more general-purpose TypeScript functions. This reflects the different goals of each starter: simple-typescript-starter aims for a quick web server setup, while typescript-starter provides a more flexible foundation for various TypeScript projects.
typescript-starter offers a more comprehensive set of tools and configurations, including automatic API documentation, continuous integration setup, and more advanced TypeScript configurations. However, this comes at the cost of increased complexity.
simple-typescript-starter, on the other hand, provides a more straightforward setup that may be more approachable for beginners or those looking for a quick start with minimal overhead. It includes Jest for testing, which is a popular choice among developers.
Ultimately, the choice between these starters depends on the project requirements and the developer's familiarity with TypeScript and various development tools.
:books: The definitive guide to TypeScript and possibly the best TypeScript book :book:. Free and Open Source 🌹
Pros of typescript-book
- Comprehensive learning resource for TypeScript
- Regularly updated with new TypeScript features and best practices
- Includes interactive code examples and exercises
Cons of typescript-book
- Not a project starter or boilerplate
- Lacks build configuration and tooling setup
- May be overwhelming for beginners looking for a quick start
Code Comparison
typescript-book (example from the book):
interface Point {
  x: number;
  y: number;
}

function printPoint(p: Point) {
  console.log(`${p.x}, ${p.y}`);
}
typescript-starter (example from the project):
export function double(x: number): number {
  return x * 2;
}

export function power(base: number, exponent: number): number {
  return Math.pow(base, exponent);
}
typescript-book focuses on teaching TypeScript concepts with simple examples, while typescript-starter provides a project structure with practical utility functions.
typescript-book is an extensive learning resource covering TypeScript in-depth, making it ideal for developers wanting to master the language. However, it doesn't provide a ready-to-use project setup.
typescript-starter, on the other hand, offers a complete project boilerplate with testing, linting, and build configurations, making it more suitable for developers who want to quickly start a new TypeScript project with best practices already in place.
TypeScript execution and REPL for node.js
Pros of ts-node
- Simpler setup and usage for quick TypeScript execution
- Supports REPL for interactive TypeScript development
- Integrates well with existing Node.js tooling and ecosystems
Cons of ts-node
- Less comprehensive project structure and tooling out-of-the-box
- May require additional configuration for production-ready builds
- Limited built-in support for advanced TypeScript features and optimizations
Code Comparison
ts-node:
// Execute TypeScript directly
ts-node src/index.ts
typescript-starter:
// Build and run TypeScript
npm run build
node build/main/index.js
Key Differences
- ts-node focuses on runtime execution of TypeScript, while typescript-starter provides a complete project structure
- typescript-starter includes more comprehensive tooling for testing, linting, and documentation
- ts-node is better suited for quick prototyping and development, while typescript-starter is geared towards production-ready projects
Use Cases
-
Choose ts-node for:
- Quick scripts and prototypes
- Interactive TypeScript development
- Integrating TypeScript into existing Node.js projects
-
Choose typescript-starter for:
- Starting new, production-ready TypeScript projects
- Projects requiring comprehensive tooling and best practices
- Developing libraries or applications with complex build requirements
Convert  designs to code with AI

Introducing Visual Copilot: A new AI model to turn Figma designs to high quality code using your components.
Try Visual CopilotREADME


Start Now
Run one simple command to install and use the interactive project generator. You'll need Node v10 or later.
npx typescript-starter
The interactive CLI will help you create and configure your project automatically.
Since this repo includes the CLI and it's tests, you'll only need to fork or clone this project if you want to contribute. If you find this project useful, please consider leaving a star so others can find it. Thanks!
Features
- Write standard, future javascript â with stable ESNext features â today (stage 3 or finished features)
- Optionally use typescript to improve tooling, linting, and documentation generation
- Export as a javascript module, making your work fully tree-shakable for consumers capable of using es6 imports (like Rollup, Webpack, or Parcel)
- Export type declarations to improve your downstream development experience
- Backwards compatibility for Node.js-style (CommonJS) imports
- Both strict and flexible typescript configurations available
So we can have nice things:
- Generate API documentation (HTML or JSON) without a mess of JSDoc tags to maintain
- Collocated, atomic, concurrent unit tests with AVA
- Source-mapped code coverage reports with nyc
- Configurable code coverage testing (for continuous integration)
- Automatic linting and formatting using
typescript-eslintand Prettier
But first, a good editor
Before you start, consider using an editor with good typescript support.
VS Code (below) is a popular option. Editors with typescript support can provide helpful autocomplete, inline documentation, and code refactoring features.
Also consider installing editor extensions for ESLint and Prettier. These extensions automatically format your code each time you save, and may quickly become invaluable.

Developing with typescript-starter
Development zen
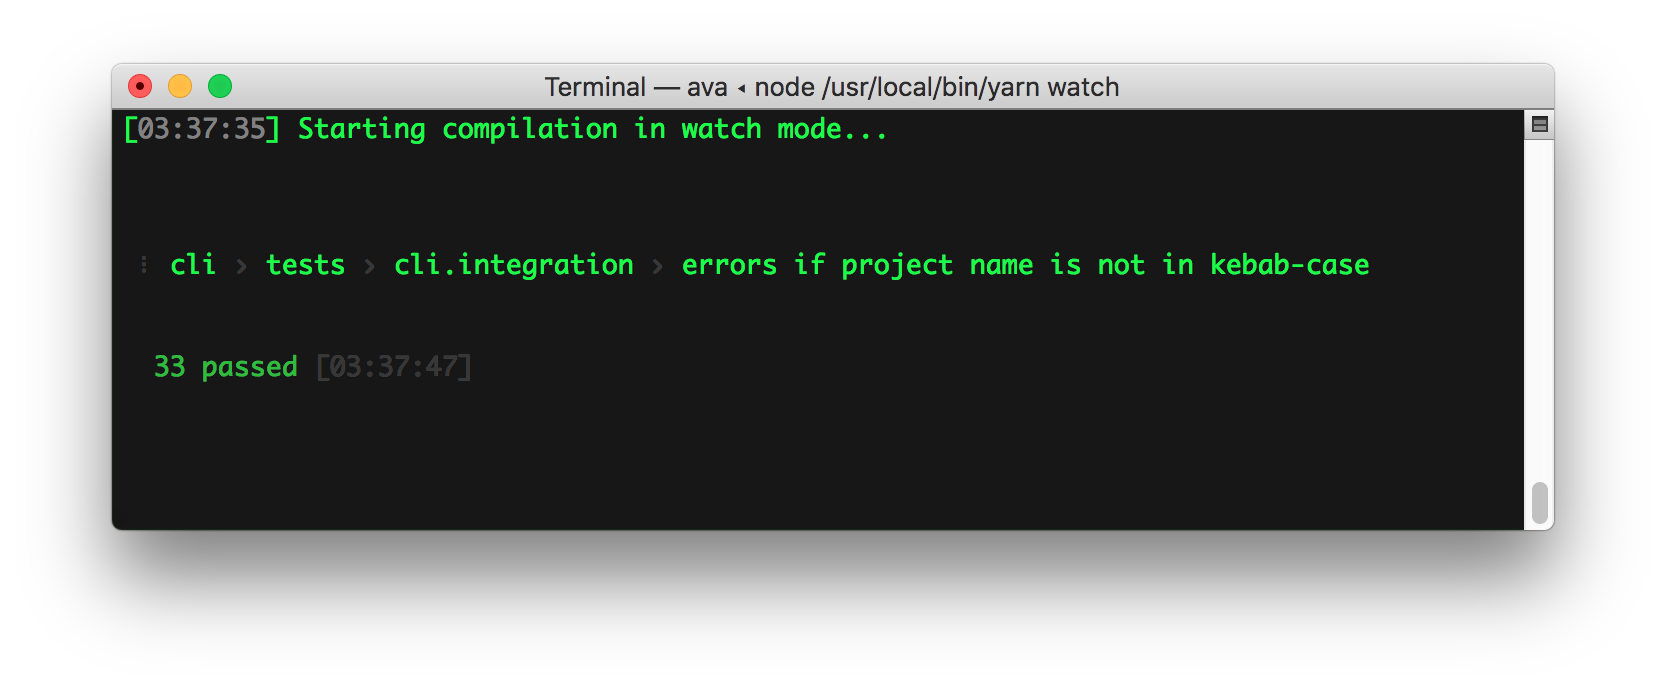
To start working, run the watch:build task using npm or yarn.
npm run watch:build
In another terminal tab/window, run the watch:test task:
npm run watch:test
These watch tasks make development much faster and more interactive. They're particularly helpful for TDD/BDD workflows.
These watch tasks will build and watch the entire project for changes (to both the library source files and test source files). As you develop, you can add tests for new functionality â which will initially fail â before developing the new functionality. Each time you save, any changes will be rebuilt and retested.
Since only changed files are rebuilt and retested, this workflow remains fast even for large projects.
Enable stronger type checking (recommended)
To make getting started easier, the default tsconfig.json is using a very flexible configuration. This will allow you to get started without many warnings from Typescript.
To enable additional Typescript type checking features (a good idea for mission-critical or large projects), review the commented-out lines in your typescript compiler options.
Auto-fix and format project
To automatically fix eslint and prettier formatting issues, run:
npm run fix
View test coverage
To generate and view test coverage, run:
npm run cov
This will create an HTML report of test coverage â source-mapped back to Typescript â and open it in your default browser.

Generate your API docs
The src folder is analyzed and documentation is automatically generated using TypeDoc.
npm run doc
This command generates API documentation for your library in HTML format and opens it in a browser.
Since types are tracked by Typescript, there's no need to indicate types in JSDoc format. For more information, see the TypeDoc documentation.
To generate and publish your documentation to GitHub Pages use the following command:
npm run doc:publish
Once published, your documentation should be available at the proper GitHub Pages URL for your repo. See typescript-starter's GitHub Pages for an example.

For more advanced documentation generation, you can provide your own TypeDoc theme, or build your own documentation using the JSON TypeDoc export:
npm run doc:json
Bump version, update changelog, commit, & tag release
It's recommended that you install commitizen to make commits to your project.
npm install -g commitizen

# commit your changes:
git cz
This project is tooled for conventional changelog to make managing releases easier. See the standard-version documentation for more information on the workflow, or CHANGELOG.md for an example.
# bump package.json version, update CHANGELOG.md, git tag the release
npm run version
You may find a tool like wip helpful for managing work in progress before you're ready to create a meaningful commit.
One-step publish preparation script
Bringing together many of the steps above, this repo includes a one-step release preparation command.
# Prepare a standard release:
npm run prepare-release
This command runs the following tasks:
hard-reset: cleans the repo by removing all untracked files and resetting--hardto the latest commit. (Note: this could be destructive.)test: build and fully test the projectdocs:html: generate the latest version of the documentationdocs:publish: publish the documentation to GitHub Pagesversion: bump package.json version, update CHANGELOG.md, and git tag the release
When the script finishes, it will log the final command needed to push the release commit to the repo and publish the package on the npm registry:
git push --follow-tags origin master; npm publish
Look over the release if you'd like, then execute the command to publish everything.
You can also prepare a non-standard release:
# Or a non-standard release:

# Reset the repo to the latest commit and build everything
npm run hard-reset && npm run test && npm run cov:check && npm run doc:html

# Then version it with standard-version options. e.g.:
# don't bump package.json version
npm run version -- --first-release

# Other popular options include:

# PGP sign it:
# $ npm run version -- --sign

# alpha release:
# $ npm run version -- --prerelease alpha

# And don't forget to push the docs to GitHub pages:
npm run doc:publish
FAQs
Why are there two builds? (main and module)
The src of typescript-starter is compiled into two separate builds: main and module. The main build is configured to use the CommonJS module system. The module build uses the new es6 module system.
Because Node.js LTS releases do not yet support the es6 module system, some projects which depend on your project will follow the main field in package.json. Tools which support the new system (like Rollup, Webpack, or Parcel) will follow the module field, giving them the ability to statically analyze your project. These tools can tree-shake your module build to import only the code they need.
Why put tests next to the source code?
By convention, sample tests in this project are adjacent to the files they test.
- Such tests are easy to find.
- You see at a glance if a part of your project lacks tests.
- Nearby tests can reveal how a part works in context.
- When you move the source (inevitable), you remember to move the test.
- When you rename the source file (inevitable), you remember to rename the test file.
(Bullet points taken from the Angular Testing Guide.)
Can I move the tests?
Yes. For some projects, separating tests from the code they test may be desirable. This project is already configured to test any *.spec.ts files located in the src directory, so reorganize your tests however you'd like. You can put them all in a single folder, add tests that test more than one file, or mix and match strategies (e.g. for other types of tests, like integration or e2e tests).
Can I use ts-node for all the things?
Tests are compiled and performed on the final builds in the standard Node.js runtime (rather than an alternative like ts-node) to ensure that they pass in that environment. If you are build a Node.js application, and you are using ts-node in production, you can modify this project to use ts-node rather than a build step.
However, if you're building any kind of library, you should always compile to javascript.
Library authors sometimes make the mistake of distributing their libraries in typescript. Intuitively, this seems like a reasonable course of action, especially if all of your intended consumers will be using typescript as well.
TypeScript has versions, and different versions of TypeScript may not be compatible. Upgrading to a new major version of TypeScript sometimes requires code changes, and must be done project-by-project. Additionally, if you're using the latest version of TypeScript to build your library, and one of your consumers is using an older version in their application, their compiler will be unable to compile your library.
How do I bundle my library for the browser?
The short answer is: don't pre-bundle your library.
Previous versions of typescript-starter included browser bundling using Rollup. This feature has since been removed, since very few libraries should ever be pre-bundled.
If the consumer of your library is using Node.js, bundling is especially unnecessary, since Node.js can reliably resolve dependencies, and bundling may even make debugging more difficult.
If the consumer of your library is a browser application, the application likely has its own build tooling. Very few serious applications are manually bundling their javascript, especially with easy to use, no configuration tools like Parcel available.
Your library is most useful to downstream consumers as a clean, modular codebase, properly exporting features using es6 exports. Consumers can import the exact es6 exports they need from your library, and tree-shake the rest.
How can my library provide different functionality between Node.js and the browser?
In the past, complex javascript libraries have used solutions like Browserify to bundle a version of their application for the browser. Most of these solutions work by allowing library developers to extensively configure and manually override various dependencies with respective browser versions.
For example, where a Node.js application might use Node.js' built-in crypto module, a browser version would need to fall back to a polyfill-like alternative dependency like crypto-browserify.
With es6, this customization and configuration is no longer necessary. Your library can now export different functionality for different consumers. While browser consumers may import a native JavaScript crypto implementation which your library exports, Node.js users can choose to import a different, faster implementation which your library exports.
See hash.ts for a complete example. Two different functions are exported, sha256, and sha256Native. Browser consumers will not be able to import sha256Native, since their bundler will be unable to resolve the built-in Node.js dependency (their bundler will throw an error). Node.js users, however, will be able to import it normally. Each consumer can import the exact functionality they need.
One perceived downside of this solution is that it complicates the library's API. Browser consumers will sometimes import one feature while Node.js users import another. While this argument has merit, we should weigh it against the benefits.
Providing a public API where consumer code is the same between browsers and Node.js is desirable, but it comes at the cost of significant configuration and complexity. In many cases, it requires that code be aware of its environment at runtime, requiring additional complexity and testing.
A better way to provide this developer experience is to provide similar APIs for each environment, and then encourage the use of es6 import aliasing to standardize between them.
For example, in the documentation for typescript-starter, we encourage Node.js users to import sha256Native as sha256. With this convention, we get a standard API without loaders or dependency substitution hacks.
// browser-application.js
import { sha256 } from 'typescript-starter';

// fully-portable code
console.log(sha256('test'));
// node-application.js
import { sha256Native as sha256 } from 'typescript-starter';

// fully-portable code
console.log(sha256('test'));
What about Git hooks to validate commit messages?
This project uses standard-version to automatically update the changelog based on commit messages since the last release. To do this, each relevant commit must be properly formatted.
To ensure all commits follow the proper conventions, you can use a package like commitlint with Husky. However, keep in mind that commit hooks can be confusing, especially for new contributors. They also interfere with some development tools and workflows.
If your project is private, or will primarily receive contributions from long-running contributors, this may be a good fit. Otherwise, this setup may raise the barrier to one-off contributions slightly.
Note, as a maintainer, if you manage your project on GitHub or a similar website, you can now use the Squash and Merge option to add a properly formatted, descriptive commit messages when merging each pull request. This is likely to be more valuable than trying to force one-time contributors to adhere to commit conventions, since you can also maintain a more consistent language style. Because this is the best choice for the vast majority of projects, typescript-starter does not bundle any commit message validation.
Contributing
Pull Requests welcome! To work on the CLI, clone and build the repo, then use npm link to install it globally.
git clone https://github.com/bitjson/typescript-starter.git
cd typescript-starter
npm install
npm test
npm link
Manual testing
To manually test the CLI, you can use the TYPESCRIPT_STARTER_REPO_URL environment variable to test a clone from your local repo. Run npm run build:main -- -w as you're developing, then in a different testing directory:
mkdir typescript-starter-testing
cd typescript-starter-testing
TYPESCRIPT_STARTER_REPO_URL='/local/path/to/typescript-starter' typescript-starter
You can also set TYPESCRIPT_STARTER_REPO_URL to any valid Git URL, such as your fork of this repo:
TYPESCRIPT_STARTER_REPO_URL='https://github.com/YOUR_USERNAME/typescript-starter.git' typescript-starter
If TYPESCRIPT_STARTER_REPO_BRANCH is not provided, it will default to master.
Debug in VS Code
If you're using VS Code, the Debug CLI launch configuration also allows you to immediately build and step through execution of the CLI.
Integration Test Result Diffs
You can compare the integration test results before and after a change by running check-cli before and after applying your changes:
npm run check-cli
Each time you run check-cli, the test results will be committed to the diff directory, allowing you to easily review the differences with git diff HEAD or an interactive Git client like GitHub for Desktop or SourceTree.
If you already have changes in the working directory, try:
git stash && npm run check-cli && git stash pop && npm run check-cli
Top Related Projects
A reference example for TypeScript and Node with a detailed README describing how to use the two together.
Minimalistic project template to jump start a Node.js back-end application in TypeScript. ESLint, Vitest and type definitions included.
Starter kit with zero-config for building a library in TypeScript, featuring RollupJS, Jest, Prettier, TSLint, Semantic Release, and more!
The most basic TypeScript starter I could think of
:books: The definitive guide to TypeScript and possibly the best TypeScript book :book:. Free and Open Source 🌹
TypeScript execution and REPL for node.js
Convert designs to code with AI
Introducing Visual Copilot: A new AI model to turn Figma designs to high quality code using your components.
Try Visual Copilot