Top Related Projects
✨ #PTerm is a modern Go module to easily beautify console output. Featuring charts, progressbars, tables, trees, text input, select menus and much more 🚀 It's completely configurable and 100% cross-platform compatible.
Interactive prompt for command-line applications
A golang library for building interactive and accessible prompts with full support for windows and posix terminals.
Building powerful interactive prompts in Go, inspired by python-prompt-toolkit.
Advanced ANSI style & color support for your terminal applications
Quick Overview
Gum is a tool for glamorous shell scripts. It provides a collection of customizable, interactive components for use in command-line interfaces, making it easy to create beautiful and user-friendly terminal applications. Gum is designed to enhance the user experience of shell scripts and command-line tools.
Pros
- Easy to use and integrate into existing shell scripts
- Provides a wide range of interactive components (e.g., input, confirm, choose, spin)
- Highly customizable with support for theming and styling
- Cross-platform compatibility (Linux, macOS, Windows)
Cons
- Requires installation of an additional tool, which may not be suitable for all environments
- Learning curve for users unfamiliar with interactive CLI components
- May introduce dependencies in shell scripts that could affect portability
Code Examples
- Prompt for user input:
name=$(gum input --placeholder "Enter your name")
echo "Hello, $name!"
- Create a multi-select menu:
choices=$(gum choose --multiple "Option 1" "Option 2" "Option 3")
echo "You selected: $choices"
- Display a spinner while running a command:
gum spin --title "Processing..." -- sleep 5
echo "Done!"
- Confirm an action:
if gum confirm "Are you sure you want to proceed?"; then
    echo "Proceeding..."
else
    echo "Cancelled."
fi
Getting Started
To get started with Gum, follow these steps:
-
Install Gum using one of the following methods:
- Homebrew:
brew install gum - Go:
go install github.com/charmbracelet/gum@latest - Download pre-built binaries from the GitHub releases page
- Homebrew:
-
Use Gum in your shell scripts by calling the
gumcommand followed by the desired component and options. For example:
#!/bin/bash

name=$(gum input --placeholder "What's your name?")
color=$(gum choose "red" "green" "blue")

echo "Hello, $name! Your favorite color is $color."
- Run your script and enjoy the enhanced interactive experience!
For more detailed information and advanced usage, refer to the official Gum documentation on GitHub.
Competitor Comparisons
✨ #PTerm is a modern Go module to easily beautify console output. Featuring charts, progressbars, tables, trees, text input, select menus and much more 🚀 It's completely configurable and 100% cross-platform compatible.
Pros of pterm
- More comprehensive and feature-rich library for terminal output styling
- Offers a wider range of components and utilities (e.g., progress bars, tables, trees)
- Provides cross-platform support with consistent behavior
Cons of pterm
- Steeper learning curve due to more extensive API
- Larger codebase and potentially higher memory footprint
- May be overkill for simpler CLI applications
Code Comparison
pterm example:
pterm.DefaultHeader.WithFullWidth().Println("Welcome to pterm!")
pterm.Info.Println("This is a simple example")
pterm.Println("Goodbye!")
gum example:
gum style --foreground 212 --border double --align center --width 50 --margin "1 2" --padding "2 4" "Welcome to gum!"
gum log --level info "This is a simple example"
echo "Goodbye!" | gum style --foreground 99
Both libraries aim to enhance terminal output, but pterm offers a more comprehensive Go-based solution, while gum provides a simpler, shell-friendly approach. pterm is better suited for complex Go applications, whereas gum excels in shell scripts and simpler CLI tools. The choice between them depends on the specific project requirements and the developer's preferred workflow.
Interactive prompt for command-line applications
Pros of promptui
- More mature and established project with a longer history
- Extensive documentation and examples available
- Wider range of input types and customization options
Cons of promptui
- Less actively maintained, with fewer recent updates
- More complex API, potentially steeper learning curve
- Limited styling options compared to gum's rich text formatting
Code Comparison
promptui:
prompt := promptui.Select{
    Label: "Select Day",
    Items: []string{"Monday", "Tuesday", "Wednesday", "Thursday", "Friday"},
}
_, result, err := prompt.Run()
gum:
SELECTED=$(gum choose "Monday" "Tuesday" "Wednesday" "Thursday" "Friday")
echo "You selected: $SELECTED"
Both gum and promptui are Go libraries for creating interactive command-line interfaces. gum focuses on simplicity and ease of use, offering a more modern and visually appealing approach with rich text formatting. It's designed to be used directly from shell scripts or as a Go library.
promptui, on the other hand, provides a more comprehensive set of features for building complex prompts and interactive CLI applications. It offers more input types and validation options but may require more setup and code for basic use cases.
While gum excels in quick, visually appealing prompts with minimal code, promptui shines in scenarios requiring advanced input handling and extensive customization.
A golang library for building interactive and accessible prompts with full support for windows and posix terminals.
Pros of Survey
- More mature and established project with a longer history
- Extensive documentation and examples available
- Supports a wide range of question types out-of-the-box
Cons of Survey
- Less visually appealing output compared to Gum
- Requires more code to set up and customize prompts
- Limited styling options for terminal output
Code Comparison
Survey:
prompt := &survey.Input{
    Message: "What's your name?",
}
survey.AskOne(prompt, &name)
Gum:
name=$(gum input --placeholder "What's your name?")
Survey focuses on providing a programmatic approach to creating interactive prompts, while Gum offers a more streamlined command-line interface. Survey requires more setup but provides greater flexibility in terms of question types and validation. Gum, on the other hand, emphasizes simplicity and visual appeal, making it easier to create attractive prompts with minimal code.
Both tools have their strengths, and the choice between them depends on the specific requirements of your project and your preferred development approach.
Building powerful interactive prompts in Go, inspired by python-prompt-toolkit.
Pros of go-prompt
- Focused specifically on interactive command-line prompts
- Provides more advanced prompt features like auto-completion and syntax highlighting
- Offers more fine-grained control over prompt behavior
Cons of go-prompt
- Limited to command-line prompts, less versatile for general CLI tools
- Steeper learning curve due to more complex API
- Less actively maintained compared to gum
Code Comparison
go-prompt example:
p := prompt.New(
    executor,
    completer,
    prompt.OptionPrefix(">>> "),
    prompt.OptionTitle("My CLI"),
)
p.Run()
gum example:
name, _ := gum.Input("What's your name?", gum.WithPlaceholder("Enter your name"))
fmt.Printf("Hello, %s!\n", name)
gum provides a simpler, more declarative API for basic CLI interactions, while go-prompt offers more advanced features for building interactive command-line interfaces. gum is part of a larger ecosystem of CLI tools, making it more versatile for various use cases. go-prompt excels in creating sophisticated prompt experiences but is more limited in scope. Both libraries have their strengths, and the choice depends on the specific requirements of your CLI application.
Advanced ANSI style & color support for your terminal applications
Pros of termenv
- More focused on terminal environment manipulation and color handling
- Provides lower-level control over terminal capabilities
- Lighter weight and more specialized for terminal-specific tasks
Cons of termenv
- Less feature-rich for interactive CLI elements
- Requires more manual implementation for complex UI components
- Limited built-in styling options compared to Gum's pre-designed components
Code Comparison
termenv:
output := termenv.String("Hello, World!")
output = output.Foreground(termenv.ANSIBrightRed)
fmt.Println(output)
Gum:
text := gum.Style("Hello, World!").Foreground(lipgloss.Color("205")).Render()
fmt.Println(text)
Summary
termenv is a more specialized library for terminal environment manipulation and color handling, offering lower-level control. It's lighter weight but requires more manual implementation for complex UI components. Gum, on the other hand, provides a richer set of pre-designed interactive CLI elements and styling options, making it easier to create polished command-line interfaces quickly. The choice between the two depends on the specific needs of your project and the level of control you require over terminal interactions.
Convert  designs to code with AI

Introducing Visual Copilot: A new AI model to turn Figma designs to high quality code using your components.
Try Visual CopilotREADME
Gum
A tool for glamorous shell scripts. Leverage the power of Bubbles and Lip Gloss in your scripts and aliases without writing any Go code!
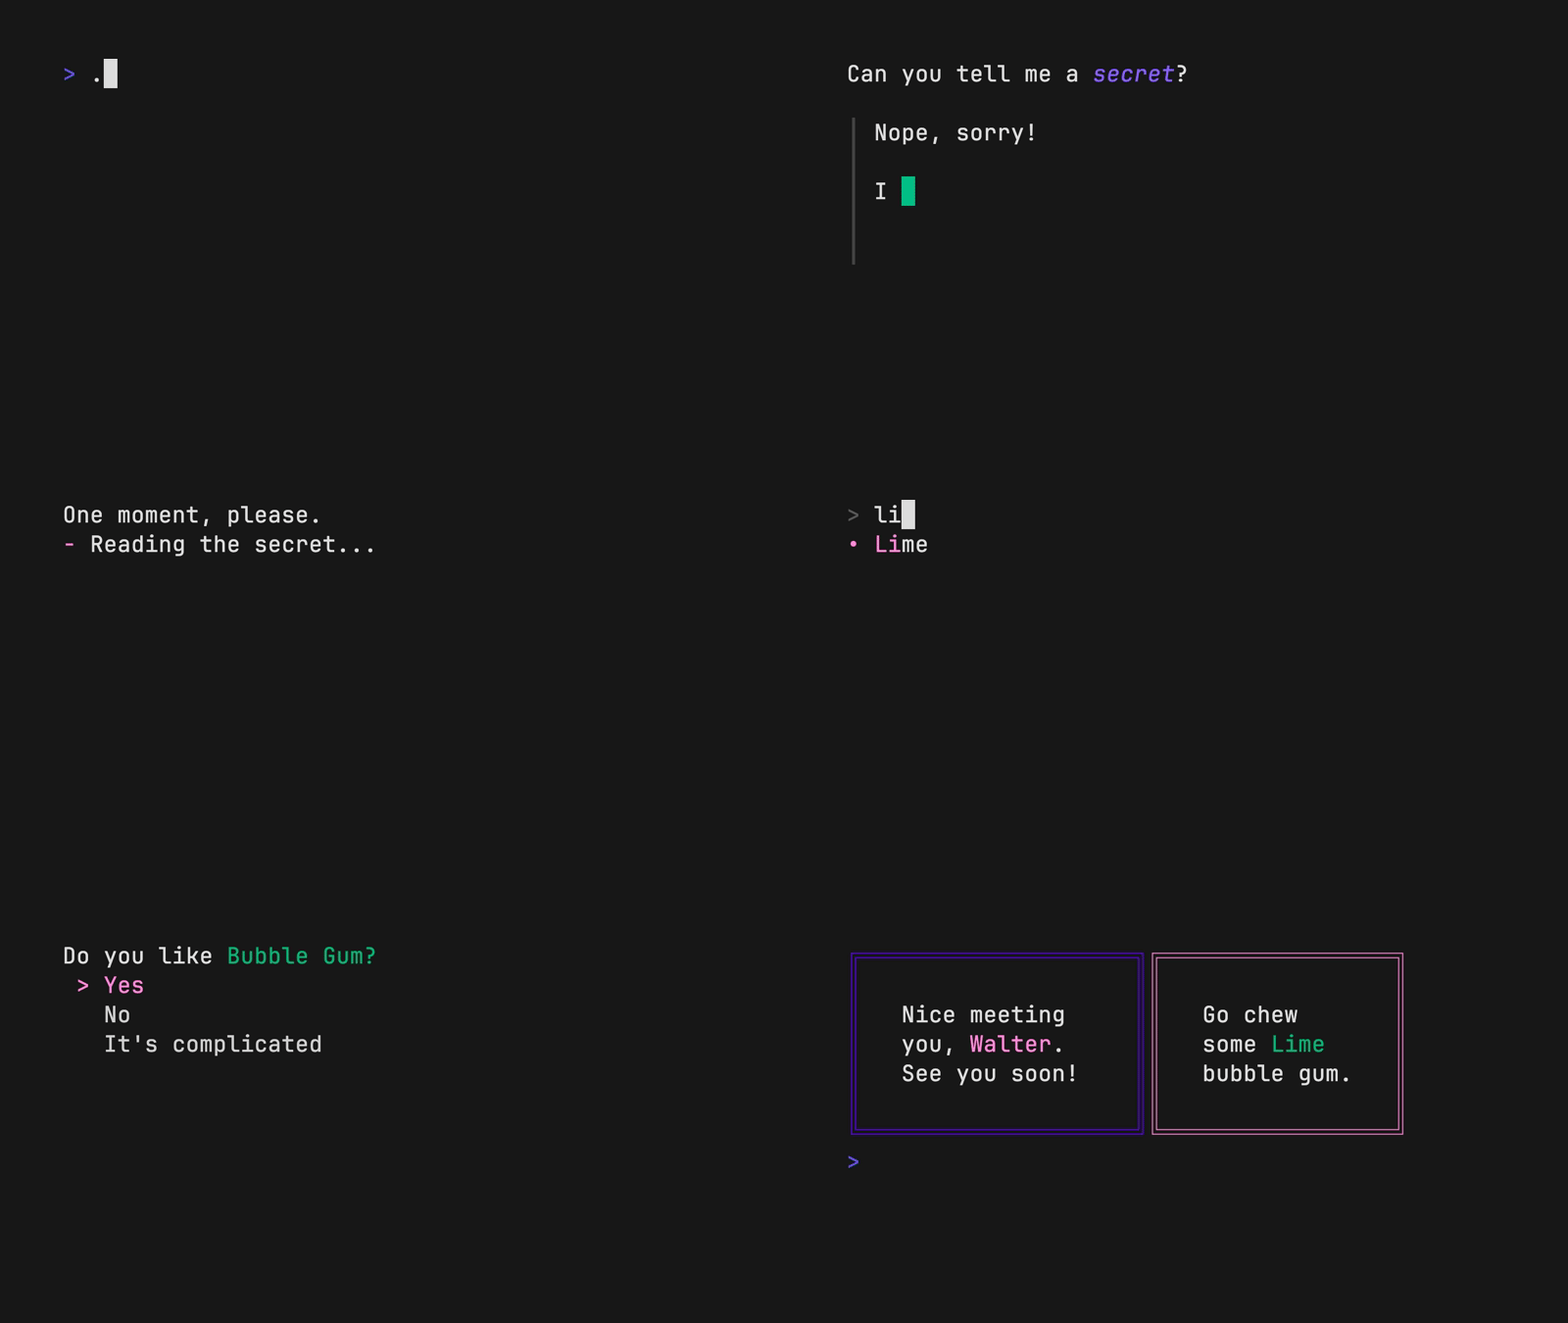
The above example is running from a single shell script (source).
Tutorial
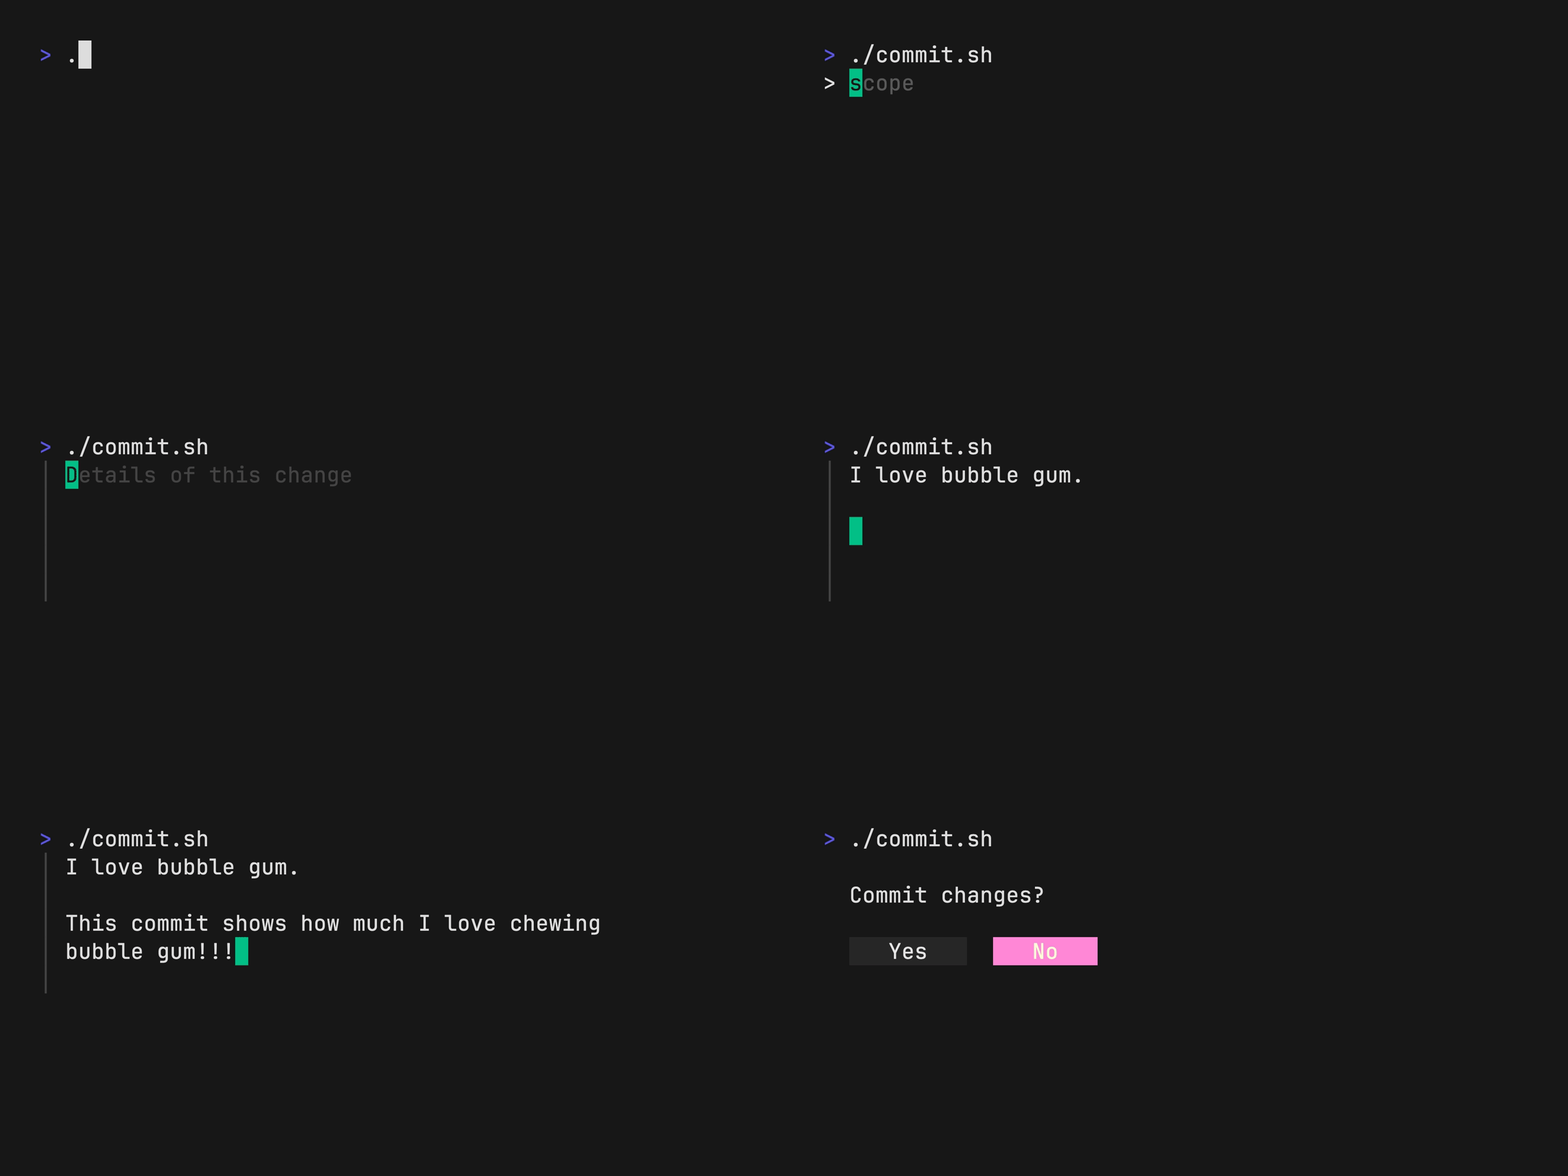
Gum provides highly configurable, ready-to-use utilities to help you write useful shell scripts and dotfiles aliases with just a few lines of code. Let's build a simple script to help you write Conventional Commits for your dotfiles.
Ask for the commit type with gum choose:
gum choose "fix" "feat" "docs" "style" "refactor" "test" "chore" "revert"
[!NOTE] This command itself will print to stdout which is not all that useful. To make use of the command later on you can save the stdout to a
$VARIABLEorfile.txt.
Prompt for the scope of these changes:
gum input --placeholder "scope"
Prompt for the summary and description of changes:
gum input --value "$TYPE$SCOPE: " --placeholder "Summary of this change"
gum write --placeholder "Details of this change"
Confirm before committing:
gum confirm "Commit changes?" && git commit -m "$SUMMARY" -m "$DESCRIPTION"
Check out the complete example for combining these commands in a single script.
Installation
Use a package manager:
# macOS or Linux
brew install gum

# Arch Linux (btw)
pacman -S gum

# Nix
nix-env -iA nixpkgs.gum

# Flox
flox install gum

# Windows (via WinGet or Scoop)
winget install charmbracelet.gum
scoop install charm-gum
Debian/Ubuntu
sudo mkdir -p /etc/apt/keyrings
curl -fsSL https://repo.charm.sh/apt/gpg.key | sudo gpg --dearmor -o /etc/apt/keyrings/charm.gpg
echo "deb [signed-by=/etc/apt/keyrings/charm.gpg] https://repo.charm.sh/apt/ * *" | sudo tee /etc/apt/sources.list.d/charm.list
sudo apt update && sudo apt install gum
Fedora/RHEL/OpenSuse
echo '[charm]
name=Charm
baseurl=https://repo.charm.sh/yum/
enabled=1
gpgcheck=1
gpgkey=https://repo.charm.sh/yum/gpg.key' | sudo tee /etc/yum.repos.d/charm.repo
sudo rpm --import https://repo.charm.sh/yum/gpg.key

# yum
sudo yum install gum

# zypper
sudo zypper refresh
sudo zypper install gum
FreeBSD
# packages
sudo pkg install gum

# ports
cd /usr/ports/devel/gum && sudo make install clean
Or download it:
- Packages are available in Debian, RPM, and Alpine formats
- Binaries are available for Linux, macOS, Windows, FreeBSD, OpenBSD, and NetBSD
Or just install it with go:
go install github.com/charmbracelet/gum@latest
Commands
choose: Choose an option from a list of choicesconfirm: Ask a user to confirm an actionfile: Pick a file from a folderfilter: Filter items from a listformat: Format a string using a templateinput: Prompt for some inputjoin: Join text vertically or horizontallypager: Scroll through a filespin: Display spinner while running a commandstyle: Apply coloring, borders, spacing to texttable: Render a table of datawrite: Prompt for long-form textlog: Log messages to output
Customization
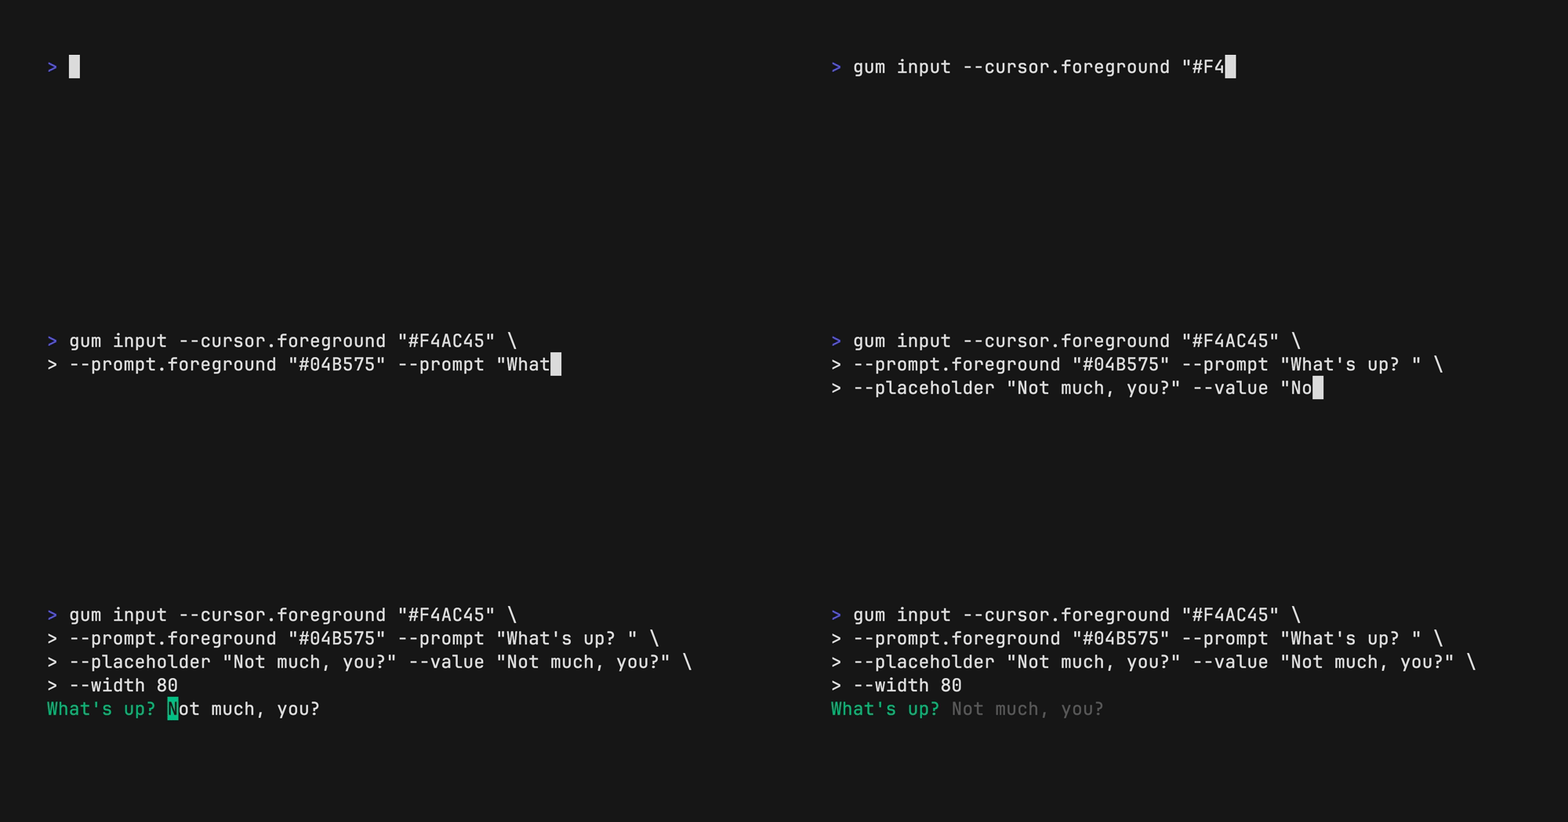
You can customize gum options and styles with --flags and $ENVIRONMENT_VARIABLES.
See gum <command> --help for a full view of each command's customization and configuration options.
Customize with --flags:
gum input --cursor.foreground "#FF0" \
          --prompt.foreground "#0FF" \
          --placeholder "What's up?" \
          --prompt "* " \
          --width 80 \
          --value "Not much, hby?"
Customize with ENVIRONMENT_VARIABLES:
export GUM_INPUT_CURSOR_FOREGROUND="#FF0"
export GUM_INPUT_PROMPT_FOREGROUND="#0FF"
export GUM_INPUT_PLACEHOLDER="What's up?"
export GUM_INPUT_PROMPT="* "
export GUM_INPUT_WIDTH=80

# --flags can override values set with environment
gum input
Input
Prompt for input with a simple command.
gum input > answer.txt
gum input --password > password.txt

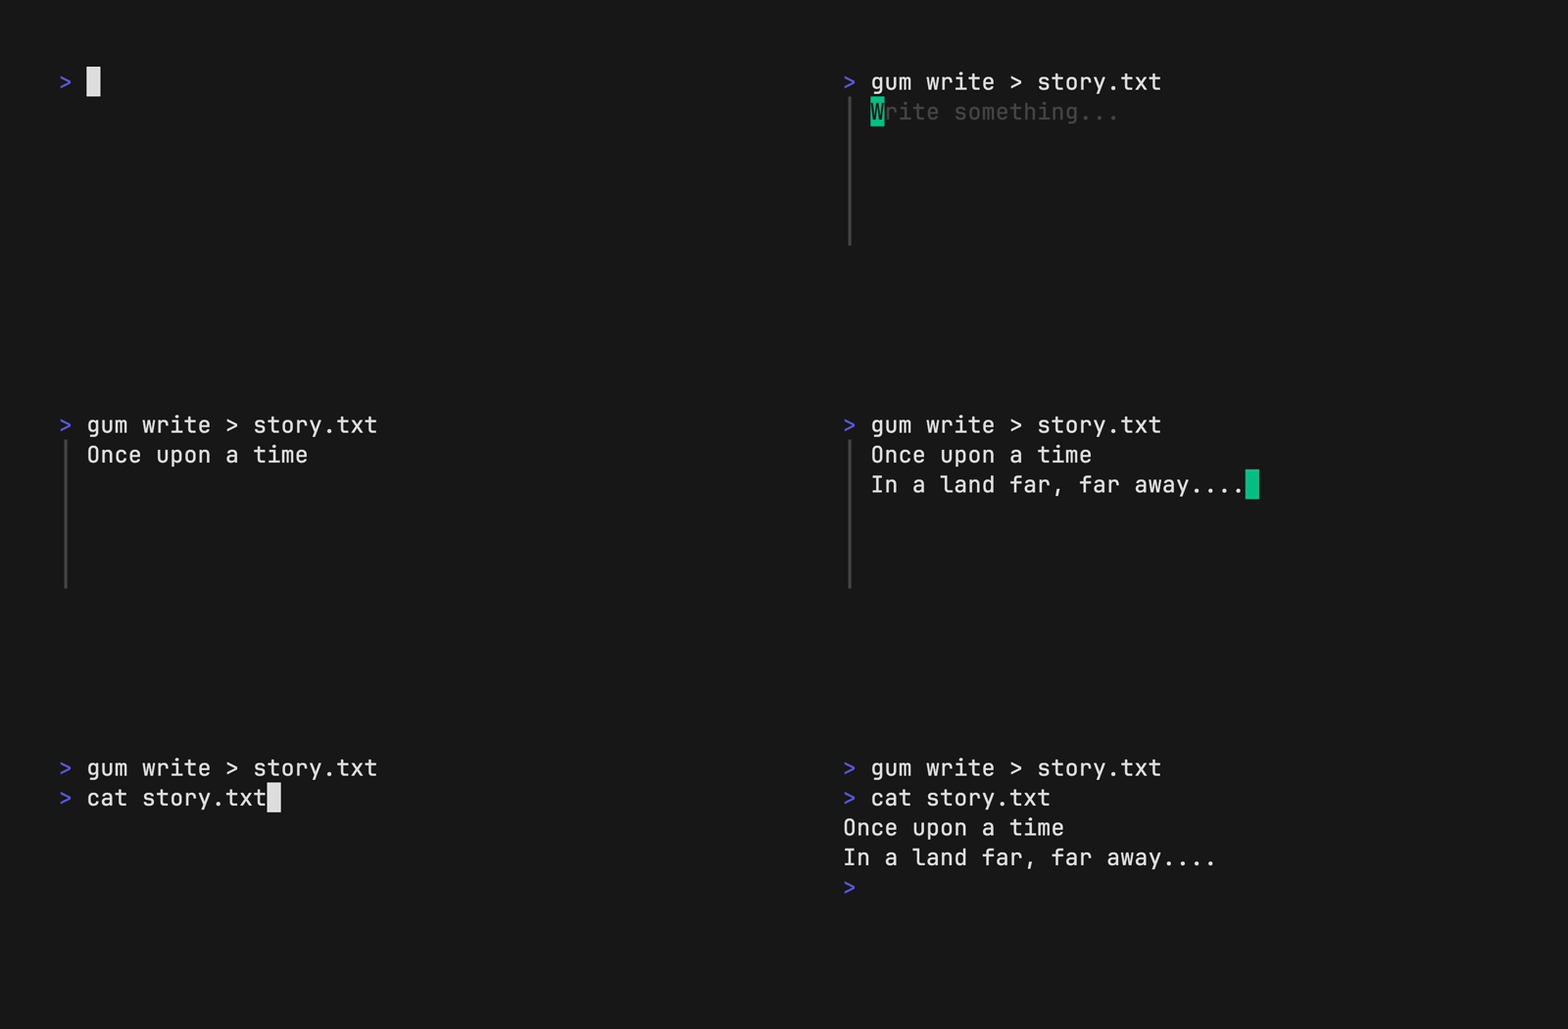
Write
Prompt for some multi-line text (ctrl+d to complete text entry).
gum write > story.txt
Filter
Filter a list of values with fuzzy matching:
echo Strawberry >> flavors.txt
echo Banana >> flavors.txt
echo Cherry >> flavors.txt
gum filter < flavors.txt > selection.txt
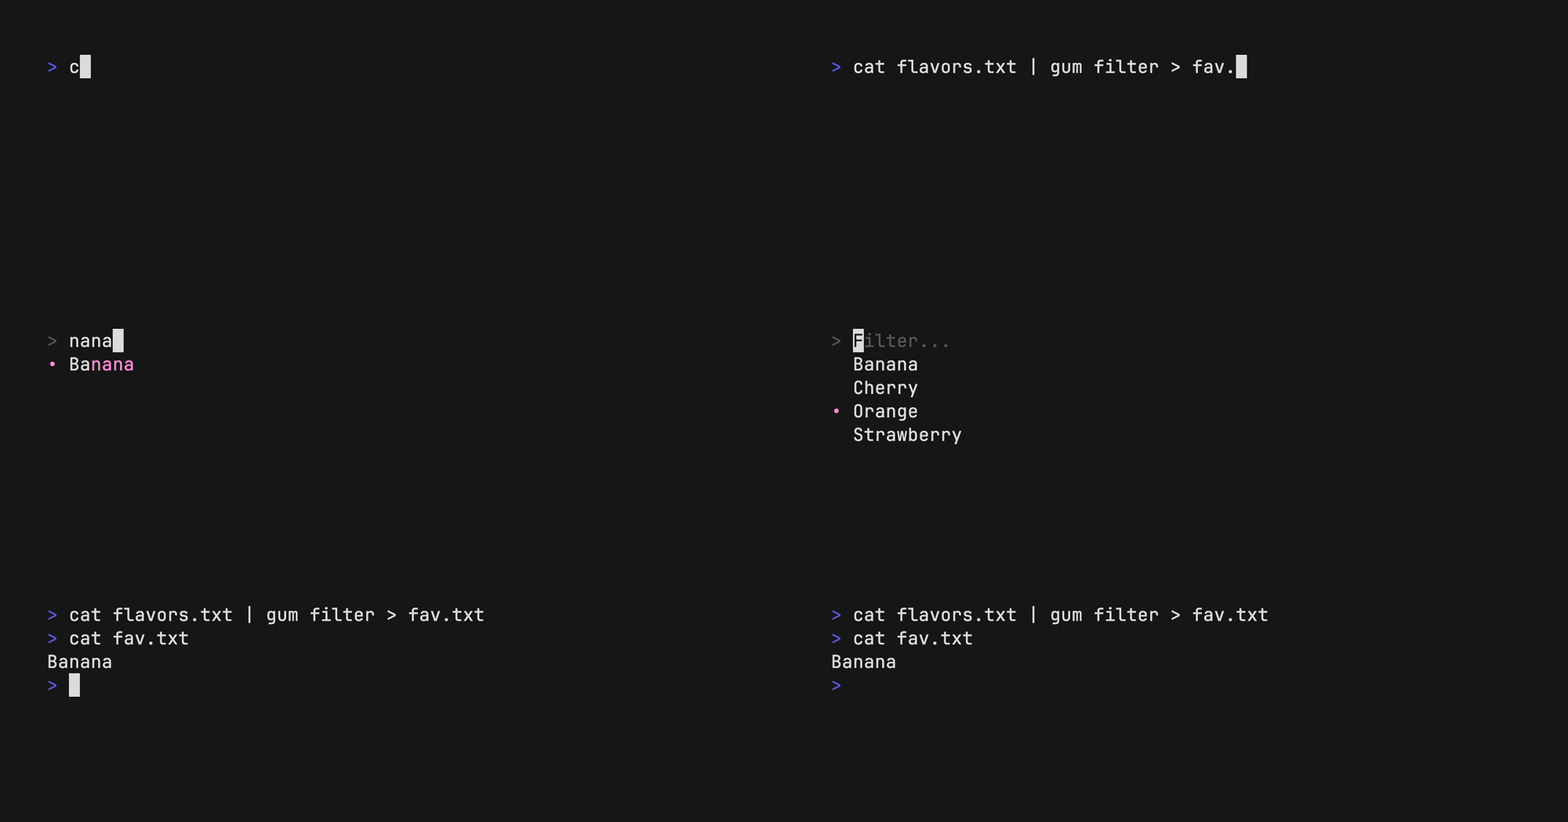
Select multiple options with the --limit flag or --no-limit flag. Use tab or ctrl+space to select, enter to confirm.
cat flavors.txt | gum filter --limit 2
cat flavors.txt | gum filter --no-limit
Choose
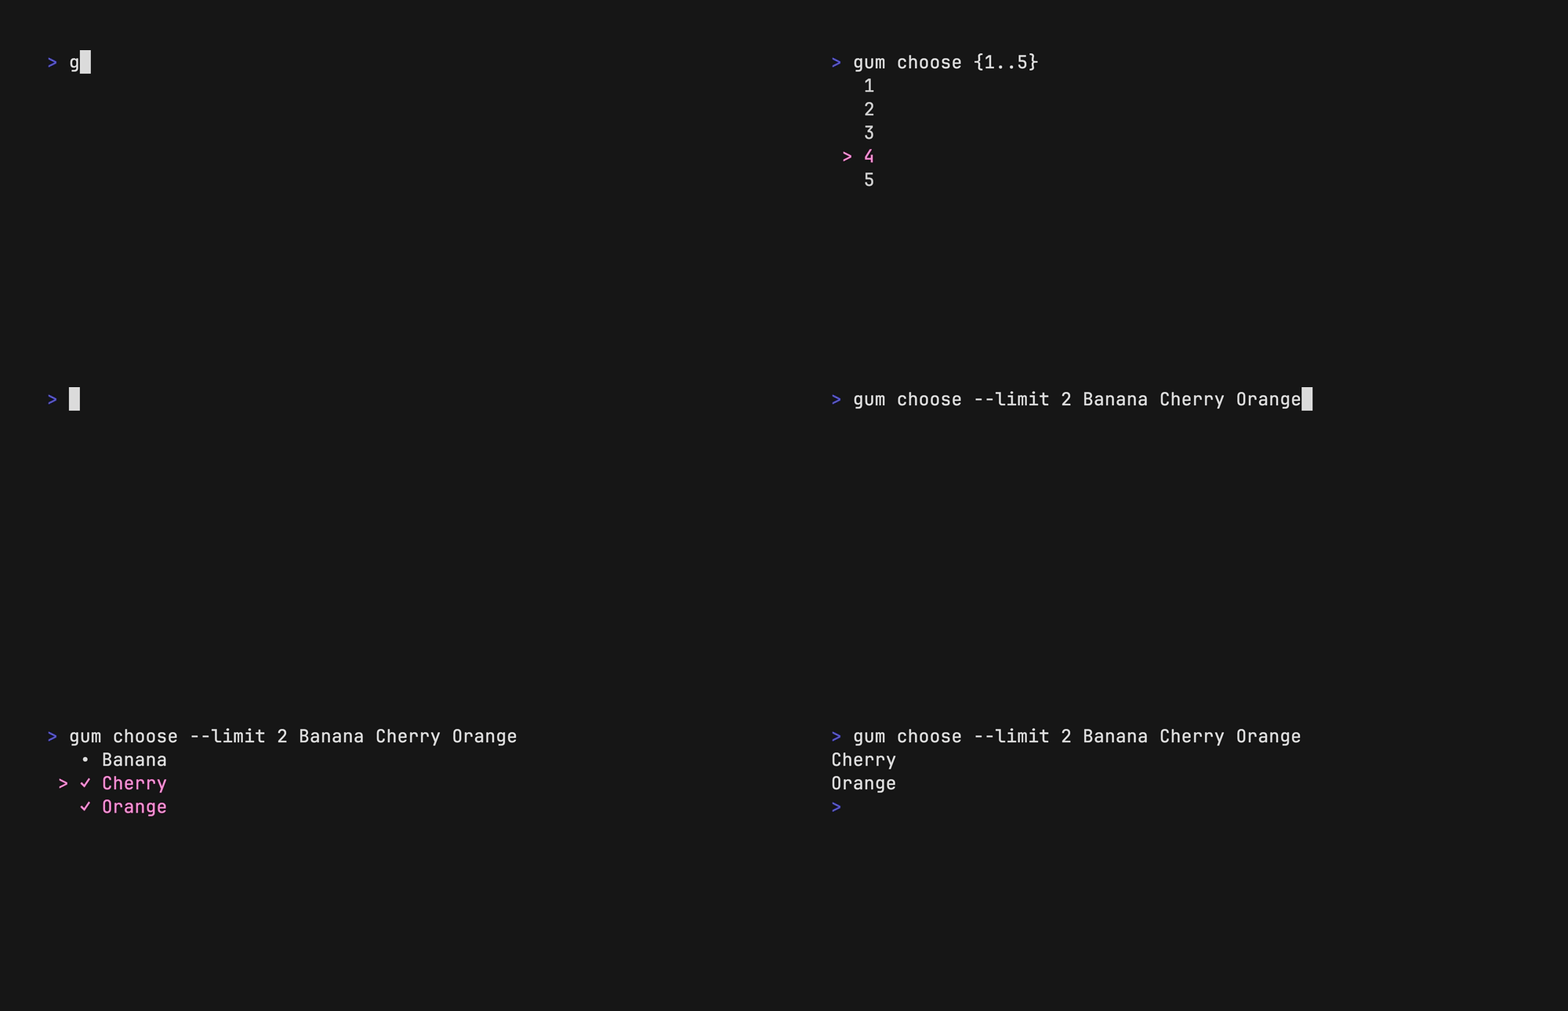
Choose an option from a list of choices.
echo "Pick a card, any card..."
CARD=$(gum choose --height 15 {{A,K,Q,J},{10..2}}" "{â ,â¥,â£,â¦})
echo "Was your card the $CARD?"
You can also select multiple items with the --limit or --no-limit flag, which determines
the maximum of items that can be chosen.
cat songs.txt | gum choose --limit 5
cat foods.txt | gum choose --no-limit --header "Grocery Shopping"
Confirm
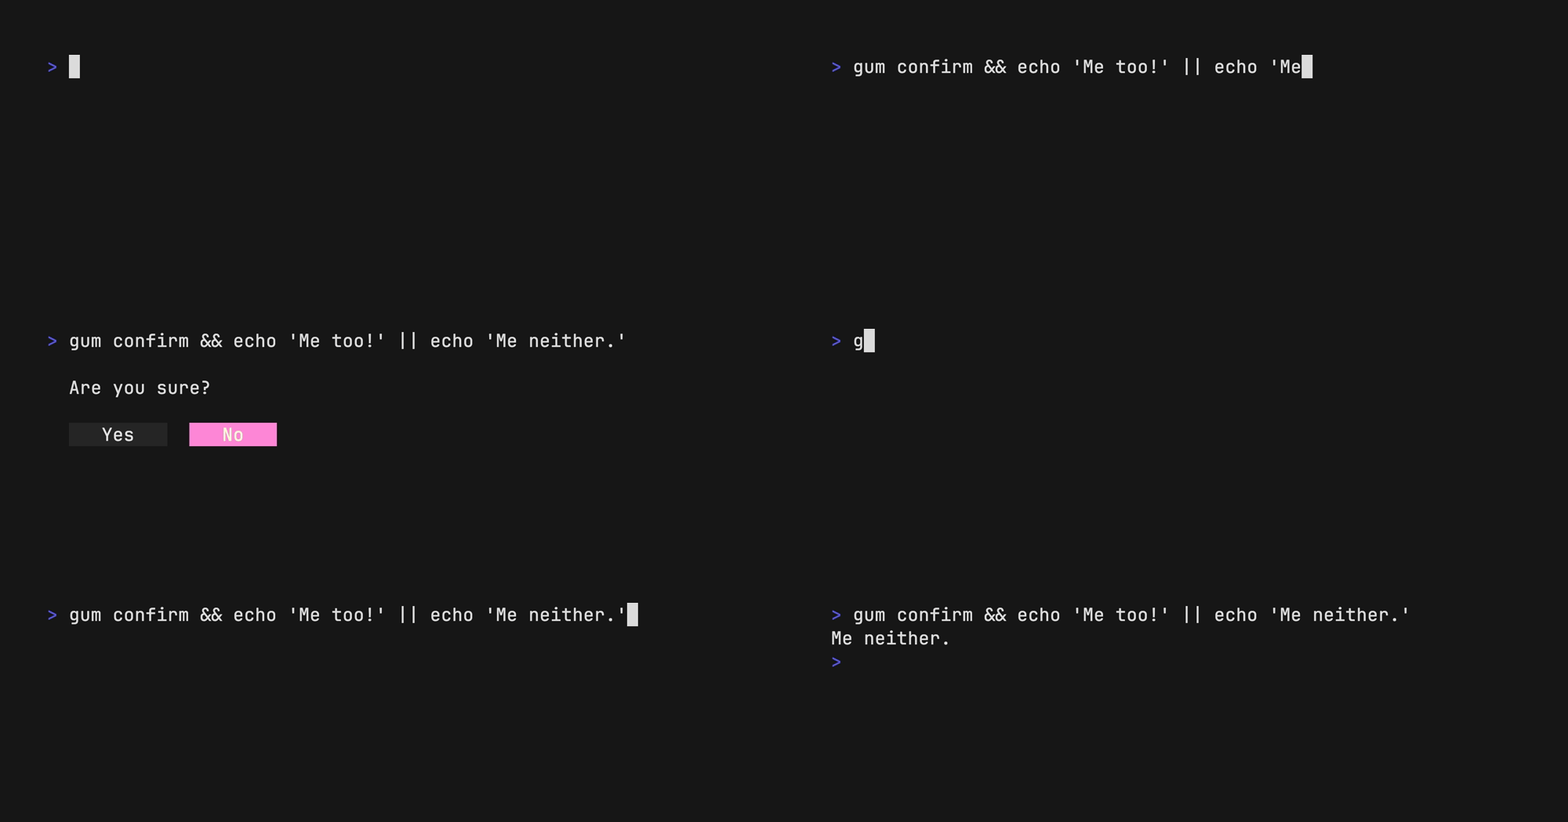
Confirm whether to perform an action. Exits with code 0 (affirmative) or 1
(negative) depending on selection.
gum confirm && rm file.txt || echo "File not removed"
File
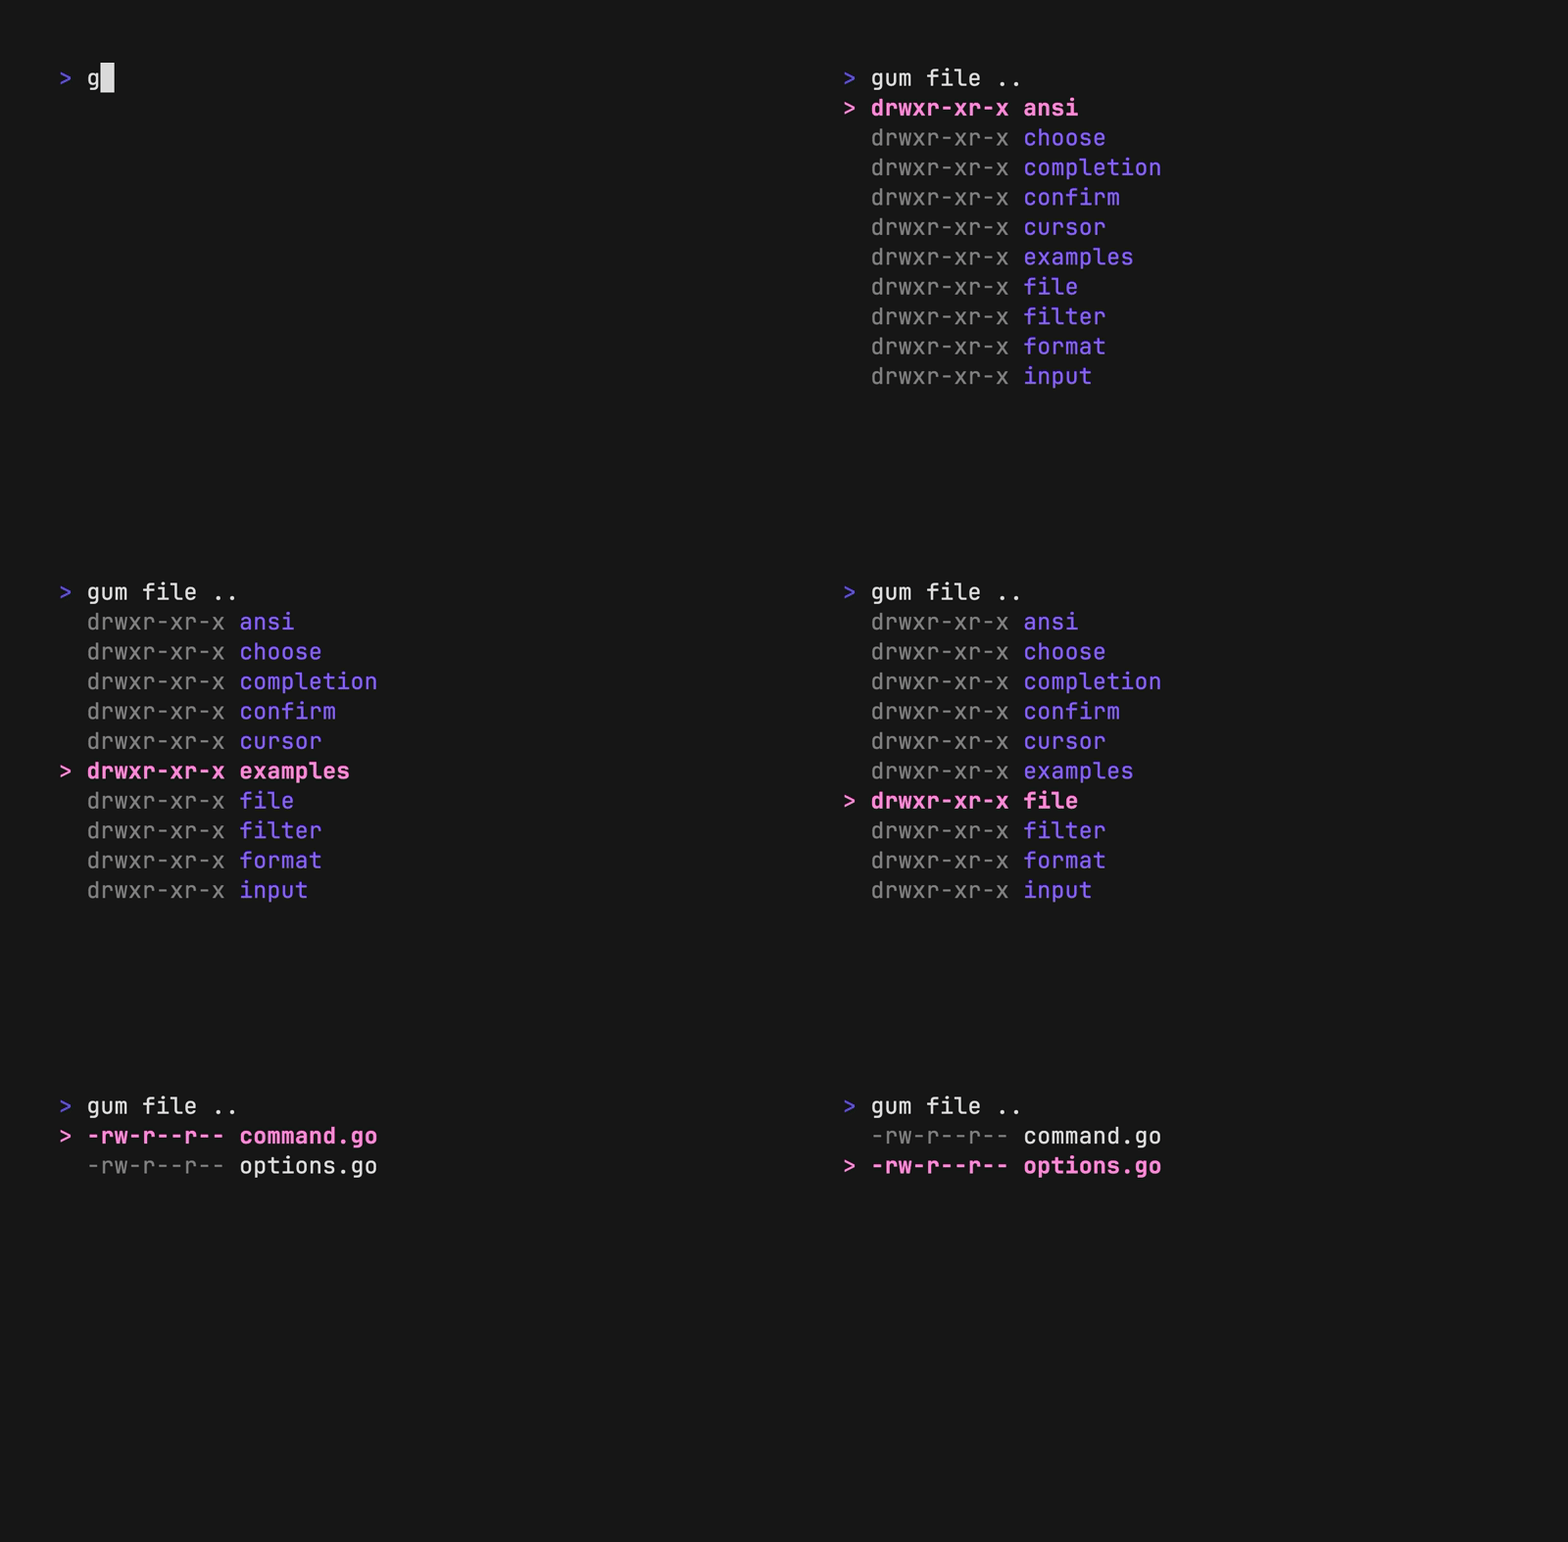
Prompt the user to select a file from the file tree.
$EDITOR $(gum file $HOME)
Pager
Scroll through a long document with line numbers and a fully customizable viewport.
gum pager < README.md

Spin
Display a spinner while running a script or command. The spinner will automatically stop after the given command exits.
To view or pipe the command's output, use the --show-output flag.
gum spin --spinner dot --title "Buying Bubble Gum..." -- sleep 5

Available spinner types include: line, dot, minidot, jump, pulse, points, globe, moon, monkey, meter, hamburger.
Table
Select a row from some tabular data.
gum table < flavors.csv | cut -d ',' -f 1
Style
Pretty print any string with any layout with one command.
gum style \
	--foreground 212 --border-foreground 212 --border double \
	--align center --width 50 --margin "1 2" --padding "2 4" \
	'Bubble Gum (1¢)' 'So sweet and so fresh!'
Join
Combine text vertically or horizontally. Use this command with gum style to
build layouts and pretty output.
Tip: Always wrap the output of gum style in quotes to preserve newlines
(\n) when using it as an argument in the join command.
I=$(gum style --padding "1 5" --border double --border-foreground 212 "I")
LOVE=$(gum style --padding "1 4" --border double --border-foreground 57 "LOVE")
BUBBLE=$(gum style --padding "1 8" --border double --border-foreground 255 "Bubble")
GUM=$(gum style --padding "1 5" --border double --border-foreground 240 "Gum")

I_LOVE=$(gum join "$I" "$LOVE")
BUBBLE_GUM=$(gum join "$BUBBLE" "$GUM")
gum join --align center --vertical "$I_LOVE" "$BUBBLE_GUM"
Format
format processes and formats bodies of text. gum format can parse markdown,
template strings, and named emojis.
# Format some markdown
gum format -- "# Gum Formats" "- Markdown" "- Code" "- Template" "- Emoji"
echo "# Gum Formats\n- Markdown\n- Code\n- Template\n- Emoji" | gum format

# Syntax highlight some code
cat main.go | gum format -t code

# Render text any way you want with templates
echo '{{ Bold "Tasty" }} {{ Italic "Bubble" }} {{ Color "99" "0" " Gum " }}' \
    | gum format -t template

# Display your favorite emojis!
echo 'I :heart: Bubble Gum :candy:' | gum format -t emoji
For more information on template helpers, see the Termenv docs. For a full list of named emojis see the GitHub API.
Log
log logs messages to the terminal at using different levels and styling using
the charmbracelet/log library.
# Log some debug information.
gum log --structured --level debug "Creating file..." name file.txt
# DEBUG Unable to create file. name=temp.txt

# Log some error.
gum log --structured --level error "Unable to create file." name file.txt
# ERROR Unable to create file. name=temp.txt

# Include a timestamp.
gum log --time rfc822 --level error "Unable to create file."
See the Go time package for acceptable --time formats.
See charmbracelet/log for more usage.

Examples
How to use gum in your daily workflows:
See the examples directory for more real world use cases.
- Write a commit message:
git commit -m "$(gum input --width 50 --placeholder "Summary of changes")" \
           -m "$(gum write --width 80 --placeholder "Details of changes")"
- Open files in your
$EDITOR
$EDITOR $(gum filter)
- Connect to a
tmuxsession
SESSION=$(tmux list-sessions -F \#S | gum filter --placeholder "Pick session...")
tmux switch-client -t "$SESSION" || tmux attach -t "$SESSION"
- Pick a commit hash from
githistory
git log --oneline | gum filter | cut -d' ' -f1 # | copy
- Simple
skatepassword selector.
skate list -k | gum filter | xargs skate get
- Uninstall packages
brew list | gum choose --no-limit | xargs brew uninstall
- Clean up
gitbranches
git branch | cut -c 3- | gum choose --no-limit | xargs git branch -D
- Checkout GitHub pull requests with
gh
gh pr list | cut -f1,2 | gum choose | cut -f1 | xargs gh pr checkout
- Copy command from shell history
gum filter < $HISTFILE --height 20
sudoreplacement
alias please="gum input --password | sudo -nS"
Contributing
See contributing.
Feedback
Weâd love to hear your thoughts on this project. Feel free to drop us a note!
License
Part of Charm.
Charmçç±å¼æº ⢠Charm loves open source
Top Related Projects
✨ #PTerm is a modern Go module to easily beautify console output. Featuring charts, progressbars, tables, trees, text input, select menus and much more 🚀 It's completely configurable and 100% cross-platform compatible.
Interactive prompt for command-line applications
A golang library for building interactive and accessible prompts with full support for windows and posix terminals.
Building powerful interactive prompts in Go, inspired by python-prompt-toolkit.
Advanced ANSI style & color support for your terminal applications
Convert  designs to code with AI

Introducing Visual Copilot: A new AI model to turn Figma designs to high quality code using your components.
Try Visual Copilot

