 ParticleEffectsButtons
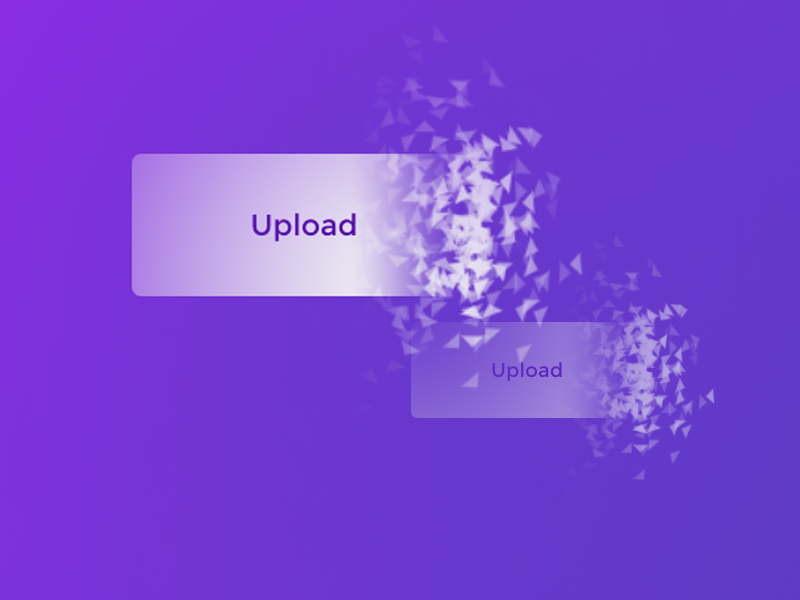
A little library that can be used for bursting particles effects on buttons and other elements
Top Related Projects

tsParticles - Easily create highly customizable JavaScript particles effects, confetti explosions and fireworks animations and use them as animated backgrounds for your website. Ready to use components available for React.js, Vue.js (2.x and 3.x), Angular, Svelte, jQuery, Preact, Inferno, Solid, Riot and Web Components.

A lightweight JavaScript library for creating particles

The HTML5 Creation Engine: Create beautiful digital content with the fastest, most flexible 2D WebGL renderer.

Phaser is a fun, free and fast 2D game framework for making HTML5 games for desktop and mobile web browsers, supporting Canvas and WebGL rendering.

JavaScript 3D Library.

JavaScript animation engine
Quick Overview
ParticleEffectsButtons is a collection of interactive button styles with impressive particle effects. These buttons are designed to enhance user interaction and provide visually appealing feedback when clicked. The project showcases various particle animations that can be applied to buttons, creating engaging and dynamic user interfaces.
Pros
- Adds visual interest and interactivity to web interfaces
- Customizable particle effects for different button styles
- Lightweight and easy to implement
- Cross-browser compatible
Cons
- May be distracting in certain user interface contexts
- Requires JavaScript, which might not be ideal for all projects
- Performance impact on low-end devices or with many buttons
- Limited documentation for advanced customization
Code Examples
- Basic button initialization:
const button = new ParticleButton(document.querySelector('.button'));
- Customizing particle colors:
const button = new ParticleButton(document.querySelector('.button'), {
    color: ['#FF0000', '#00FF00', '#0000FF']
});
- Adjusting particle size and speed:
const button = new ParticleButton(document.querySelector('.button'), {
    size: { min: 1, max: 5 },
    speed: { min: 1, max: 3 }
});
Getting Started
To use ParticleEffectsButtons in your project:
- Include the necessary files in your HTML:
<link rel="stylesheet" href="path/to/particleeffectsbuttons.css">
<script src="path/to/particleeffectsbuttons.js"></script>
- Add the button markup to your HTML:
<button class="particle-button">Click me</button>
- Initialize the button in your JavaScript:
document.addEventListener('DOMContentLoaded', () => {
    const buttons = document.querySelectorAll('.particle-button');
    buttons.forEach(button => new ParticleButton(button));
});
This will create basic particle effect buttons. You can further customize the appearance and behavior by passing options to the ParticleButton constructor.
Competitor Comparisons
tsParticles - Easily create highly customizable JavaScript particles effects, confetti explosions and fireworks animations and use them as animated backgrounds for your website. Ready to use components available for React.js, Vue.js (2.x and 3.x), Angular, Svelte, jQuery, Preact, Inferno, Solid, Riot and Web Components.
Pros of tsparticles
- More comprehensive and feature-rich particle system
- Supports multiple rendering engines (Canvas, WebGL, SVG)
- Actively maintained with frequent updates and a large community
Cons of tsparticles
- Steeper learning curve due to its extensive configuration options
- Larger file size and potentially higher performance overhead
- May be overkill for simple particle effects on buttons
Code Comparison
ParticleEffectsButtons:
new Particles(this.DOM.el, {
  type: 'circle',
  style: 'fill',
  count: 10,
  radius: {min: 10, max: 20},
  // ...
});
tsparticles:
tsParticles.load("tsparticles", {
  particles: {
    number: { value: 80 },
    color: { value: "#ffffff" },
    shape: { type: "circle" },
    // ...
  },
});
ParticleEffectsButtons focuses specifically on button effects, while tsparticles offers a more versatile and customizable particle system for various use cases. tsparticles provides more advanced features and rendering options but may require more setup and configuration. ParticleEffectsButtons is simpler to implement for basic button particle effects but has limited customization compared to tsparticles.
A lightweight JavaScript library for creating particles
Pros of particles.js
- More versatile and customizable, allowing for a wide range of particle effects beyond buttons
- Supports multiple shapes and behaviors for particles
- Extensive documentation and active community support
Cons of particles.js
- Larger file size and potentially higher performance impact
- May require more setup and configuration for simple button effects
- Less focused on specific button interactions
Code Comparison
particles.js:
particlesJS("particles-js", {
  particles: {
    number: { value: 80, density: { enable: true, value_area: 800 } },
    color: { value: "#ffffff" },
    shape: { type: "circle" },
    // ... more configuration options
  }
});
ParticleEffectsButtons:
new ParticleButton(document.querySelector('.button'), {
  type: 'rectangle',
  size: 3,
  style: 'stroke',
  duration: 1500,
  easing: 'easeOutQuad',
  // ... fewer configuration options
});
particles.js offers more extensive configuration options, while ParticleEffectsButtons focuses on simpler, button-specific implementations. particles.js is better suited for creating diverse particle effects across entire web pages, whereas ParticleEffectsButtons is optimized for interactive button animations with particles.
The HTML5 Creation Engine: Create beautiful digital content with the fastest, most flexible 2D WebGL renderer.
Pros of PixiJS
- More comprehensive and feature-rich library for creating interactive graphics and animations
- Supports WebGL rendering for better performance with complex graphics
- Extensive documentation and large community support
Cons of PixiJS
- Steeper learning curve due to its broader scope and functionality
- Larger file size, which may impact load times for simpler projects
- Potentially overkill for basic particle effects or button animations
Code Comparison
ParticleEffectsButtons:
this.particles = [];
for (let i = 0; i < this.numParticles; i++) {
    this.particles.push(new Particle(this));
}
PixiJS:
const particles = new PIXI.ParticleContainer(1000, {
    scale: true,
    position: true,
    rotation: true,
    uvs: true,
    alpha: true
});
Summary
ParticleEffectsButtons is a focused library for creating particle effects on buttons, while PixiJS is a more comprehensive 2D rendering engine. ParticleEffectsButtons is simpler to use for specific button effects, but PixiJS offers greater flexibility and performance for complex graphics and animations. The choice between them depends on the project's requirements and complexity.
Phaser is a fun, free and fast 2D game framework for making HTML5 games for desktop and mobile web browsers, supporting Canvas and WebGL rendering.
Pros of Phaser
- Full-featured game framework with extensive capabilities
- Large, active community and extensive documentation
- Supports multiple rendering methods (WebGL, Canvas)
Cons of Phaser
- Steeper learning curve due to its comprehensive nature
- Larger file size and potentially higher resource usage
- May be overkill for simple particle effects or button animations
Code Comparison
ParticleEffectsButtons:
this.particles = new Particles(this.DOM.el);
this.particles.disintegrate();
this.particles.integrate();
Phaser:
const particles = this.add.particles('particle');
const emitter = particles.createEmitter({
    speed: 100,
    scale: { start: 1, end: 0 },
    blendMode: 'ADD'
});
Summary
ParticleEffectsButtons is a lightweight library focused specifically on creating particle effects for buttons, making it ideal for simple web projects requiring interactive button animations. Phaser, on the other hand, is a comprehensive game development framework that includes particle systems among its many features. While Phaser offers more versatility and power, it may be excessive for projects only needing basic particle effects. The choice between the two depends on the scope and requirements of your project.
JavaScript 3D Library.
Pros of three.js
- Comprehensive 3D graphics library with extensive features and capabilities
- Large, active community with frequent updates and extensive documentation
- Supports a wide range of 3D rendering techniques and effects
Cons of three.js
- Steeper learning curve due to its complexity and extensive API
- Larger file size and potentially higher performance overhead
- May be overkill for simple particle effects or button animations
Code Comparison
three.js:
const scene = new THREE.Scene();
const camera = new THREE.PerspectiveCamera(75, window.innerWidth / window.innerHeight, 0.1, 1000);
const renderer = new THREE.WebGLRenderer();
renderer.setSize(window.innerWidth, window.innerHeight);
document.body.appendChild(renderer.domElement);
ParticleEffectsButtons:
const button = document.querySelector('button');
const particles = new Particles(button, {
    type: 'triangle',
    style: 'stroke',
    size: 3,
    color: '#000000',
    duration: 1400,
    easing: 'easeInCubic'
});
The code comparison shows that three.js requires more setup for basic 3D rendering, while ParticleEffectsButtons offers a simpler API focused specifically on button particle effects. three.js provides greater flexibility and power for complex 3D graphics, whereas ParticleEffectsButtons is more specialized and easier to implement for its specific use case.
JavaScript animation engine
Pros of anime
- More versatile animation library, not limited to particle effects
- Supports a wider range of animation targets (CSS properties, SVG, DOM attributes)
- Larger community and more frequent updates
Cons of anime
- Steeper learning curve due to more complex API
- Requires more setup for specific effects like particle animations
- Larger file size, which may impact performance for simpler projects
Code Comparison
ParticleEffectsButtons:
this.particles = [];
for (let i = 0; i < this.options.numParticles; i++) {
  this.particles.push(new Particle(this));
}
anime:
anime({
  targets: '.particle',
  translateX: anime.random(-100, 100),
  translateY: anime.random(-100, 100),
  scale: [1, 0],
  easing: 'easeOutExpo',
  duration: 1000,
  delay: anime.stagger(10)
});
Summary
ParticleEffectsButtons is a specialized library for creating particle effect buttons, while anime is a more general-purpose animation library. ParticleEffectsButtons offers a simpler API for specific particle effects, but anime provides greater flexibility for various animation needs. The choice between the two depends on the project requirements and the developer's preference for simplicity versus versatility.
Convert  designs to code with AI

Introducing Visual Copilot: A new AI model to turn Figma designs to high quality code using your components.
Try Visual CopilotREADME
Particle Effects for Buttons
Bursting particles effects for buttons. By Luis Manuel.
Credits
Basic usage
The Particles library depends on anime.js to perform animations, so you need to include it before Particles. Also, please make sure to include all the scripts at the end of the body element.
Then you can start disintegrating/integrating things like:
<!-- Normal HTML element to disintegrate -->
<button class="button">Button</button>

<script src="anime.min.js"></script>
<script src="dist/particles.min.js"></script>
<script>
    // Initialize a new instance of Particles to disintegrate/integrate the button
    var particles = new Particles('.button');

    // Disintegrate the button into particles
    particles.disintegrate();

    // particles.integrate(); // would do the opposite
</script>
Options
For customization, you can pass options to Particles constructor. That options will override the default values, and will be used for any future operation (disintegrate or integrate). You can also override the options for a specific operation. Here is the complete list of options available:
| Name | Type | Default | Description |
|---|---|---|---|
canvasPadding | Integer | 150 | Padding for the generated canvas that will be positioned right behind the target element. A canvasPadding = 0 will cause the canvas and the target element to have the same dimensions. |
duration | Integer | 1000 | Duration (ms) to perform the animations of target element and particles. |
easing | String or Function | easeInOutCubic | Easing function to perform the animation of target element. It will be passed directly to anime.js. |
type | String | circle | Type of particle. Could be any of the following values: circle, rectangle, triangle |
style | String | fill | Style of particle. Could be any of the following values: fill, stroke. |
direction | String | left | Direction to start disintegrating the element. Could be any of the following values: left, right, top, bottom. The opposite direction will be used to perform the integrate operation. |
size | Float or Function | Random from 1 to 4 | Size (px) for particles. |
speed | Float or Function | Random from -2 to 2 | Pixels per frame that a particle will be moved. It could be a function to set it randomly per particle (as default value). |
color | String | Target's background-color | Color used to fill the particles. |
particlesAmountCoefficient | Float | 3 | A coefficient to calculate the amount of particles to animate. A particlesAmountCoefficient = 0 will result in 0 particles, while bigger values will increase the amount of particles. |
oscilationCoefficient | Float | 20 | A coefficient to calculate the oscilation of particles while animating. A oscilationCoefficient = 0 will result in no oscilation (straight movements), while bigger values will increase the oscilation, resulting in a kind of randomness. |
begin | Function | undefined | Execute a function at the beginning of the animation. |
complete | Function | undefined | Execute a function at the end of the animation. |
Wrapper for popular Javascript frameworks
Thanks to amazing contributors, the library can be used easily in the following popular Javascript frameworks:
- React: react-particle-effect-button, by Travis Fischer.
- Angular: angular-particle-effect-button, by Daniel Popa.
- Vue: vue-particle-effect-buttons, by Vincent Guo.
License
This resource can be used freely if integrated or build upon in personal or commercial projects such as websites, web apps and web templates intended for sale. It is not allowed to take the resource "as-is" and sell it, redistribute, re-publish it, or sell "pluginized" versions of it. Free plugins built using this resource should have a visible mention and link to the original work. Always consider the licenses of all included libraries, scripts and images used.
Misc
Follow Codrops: Twitter, Facebook, Google+, GitHub, Pinterest, Instagram
Top Related Projects
tsParticles - Easily create highly customizable JavaScript particles effects, confetti explosions and fireworks animations and use them as animated backgrounds for your website. Ready to use components available for React.js, Vue.js (2.x and 3.x), Angular, Svelte, jQuery, Preact, Inferno, Solid, Riot and Web Components.
A lightweight JavaScript library for creating particles
The HTML5 Creation Engine: Create beautiful digital content with the fastest, most flexible 2D WebGL renderer.
Phaser is a fun, free and fast 2D game framework for making HTML5 games for desktop and mobile web browsers, supporting Canvas and WebGL rendering.
JavaScript 3D Library.
JavaScript animation engine
Convert designs to code with AI
Introducing Visual Copilot: A new AI model to turn Figma designs to high quality code using your components.
Try Visual Copilot