
Top Related Projects

:sunflower: A Vim alignment plugin

Vim script for text filtering and alignment

Draw ASCII diagrams in Neovim

A Filetype plugin for csv files

Markdown Vim Mode
Quick Overview
vim-table-mode is a Vim plugin that provides an easy way to create and manipulate tables in plain text files. It offers automatic table formatting, alignment, and cell navigation, making it particularly useful for writing documentation, READMEs, or any text that requires tabular data.
Pros
- Seamless integration with Vim's editing workflow
- Automatic table formatting and alignment
- Easy cell navigation and manipulation
- Support for various table styles (e.g., Markdown, reStructuredText)
Cons
- Learning curve for users unfamiliar with Vim plugins
- Limited functionality compared to dedicated spreadsheet software
- May not be suitable for very large or complex tables
- Requires manual activation of table mode
Code Examples
- Creating a table:
" Start table mode
:TableModeToggle

" Type the following, using | as column separators
| Name | Age | City |
| John | 30  | New York |
| Jane | 25  | London |
- Realigning a table:
" Place cursor inside the table
:TableModeRealign
- Adding a new row:
" Place cursor at the end of a row and press Enter
| Name | Age | City |
| John | 30  | New York |
| Jane | 25  | London |
|
- Deleting a column:
" Place cursor in the column you want to delete
:TableModeDeleteColumn
Getting Started
- Install the plugin using your preferred Vim plugin manager. For example, with vim-plug:
Plug 'dhruvasagar/vim-table-mode'
- Add the following to your
.vimrcfile:
" Enable table mode
let g:table_mode_corner='|'

" Optional: Map a key to toggle table mode
nnoremap <leader>tm :TableModeToggle<CR>
-
Reload your Vim configuration or restart Vim.
-
In a text file, start table mode by running
:TableModeToggleor using your mapped key. -
Begin creating tables using the
|character as a column separator.
Competitor Comparisons
:sunflower: A Vim alignment plugin
Pros of vim-easy-align
- More versatile, can align various types of content beyond tables
- Simpler syntax for basic alignment tasks
- Supports live interactive alignment with visual feedback
Cons of vim-easy-align
- Less specialized for table creation and manipulation
- Doesn't offer automatic table formatting or cell adjustment
- May require more manual input for complex table structures
Code Comparison
vim-easy-align:
" Align GitHub-flavored Markdown tables
vmap <Enter> <Plug>(EasyAlign)
nmap ga <Plug>(EasyAlign)
vim-table-mode:
" Enable Table Mode
let g:table_mode_corner='|'
function! s:isAtStartOfLine(mapping)
  let text_before_cursor = getline('.')[0 : col('.')-1]
  let mapping_pattern = '\V' . escape(a:mapping, '\')
  let comment_pattern = '\V' . escape(substitute(&l:commentstring, '%s.*$', '', ''), '\')
  return (text_before_cursor =~? '^' . ('\v(' . comment_pattern . '\v)?') . '\s*\v' . mapping_pattern . '\v$')
endfunction
Summary
vim-easy-align is a more general-purpose alignment tool, offering flexibility for various alignment tasks. It's simpler to use for basic alignments but may require more effort for complex table structures. vim-table-mode, on the other hand, is specifically designed for table creation and manipulation, providing automatic formatting and cell adjustment features. The choice between the two depends on whether you need a specialized table tool or a more versatile alignment solution.
Vim script for text filtering and alignment
Pros of Tabular
- More versatile, can align text based on various patterns, not just tables
- Simpler to use for quick alignments without entering a specific mode
- Supports more complex alignment patterns with custom regular expressions
Cons of Tabular
- Lacks dedicated table editing features like vim-table-mode
- Requires manual realignment when table contents change
- No automatic formatting or cell navigation within tables
Code Comparison
vim-table-mode:
" Enable table mode
:TableModeToggle

" Create a table
| Header 1 | Header 2 |
| -------- | -------- |
| Cell 1   | Cell 2   |
Tabular:
" Align text
:Tabularize /|

" Align with custom pattern
:Tabularize /,\zs

" Align in visual mode
:'<,'>Tabularize /=
Summary
vim-table-mode is specifically designed for creating and editing tables in Vim, offering features like automatic formatting and cell navigation. Tabular, on the other hand, is a more general-purpose alignment tool that can handle various text alignment tasks beyond just tables. While vim-table-mode excels in table-specific operations, Tabular provides greater flexibility for aligning text based on different patterns and custom regular expressions.
Draw ASCII diagrams in Neovim
Pros of venn.nvim
- Specialized for drawing ASCII diagrams and flowcharts
- Supports both drawing modes and keyboard shortcuts for efficient diagram creation
- Integrates seamlessly with Neovim's Lua ecosystem
Cons of venn.nvim
- Limited to ASCII-based diagrams, lacking support for complex table structures
- Requires Neovim, not compatible with regular Vim
- Steeper learning curve for users unfamiliar with ASCII art or diagram creation
Code Comparison
venn.nvim:
require("venn").setup()
vim.keymap.set('n', '<leader>v', function()
    require("venn").toggle()
    vim.b.venn_enabled = not vim.b.venn_enabled
end)
vim-table-mode:
let g:table_mode_corner='|'
function! s:isAtStartOfLine(mapping)
  let text_before_cursor = getline('.')[0 : col('.')-1]
  let mapping_pattern = '\V' . escape(a:mapping, '\')
  let comment_pattern = '\V' . escape(substitute(&l:commentstring, '%s.*$', '', ''), '\')
  return (text_before_cursor =~? '^' . ('\v(' . comment_pattern . '\v)?') . '\s*\v' . mapping_pattern . '\v$')
endfunction
Both plugins enhance Vim/Neovim's capabilities for creating structured content. vim-table-mode excels in table creation and manipulation, while venn.nvim focuses on ASCII diagrams. The choice depends on the user's specific needs and preferred Vim variant.
A Filetype plugin for csv files
Pros of csv.vim
- Specialized for CSV file handling with advanced features like column sorting and arithmetic operations
- Offers robust CSV file detection and automatic filetype recognition
- Provides comprehensive documentation and extensive configuration options
Cons of csv.vim
- Limited to CSV format, less versatile for other table types or markup languages
- May have a steeper learning curve due to its numerous features and commands
- Lacks real-time table formatting capabilities for non-CSV files
Code Comparison
csv.vim:
:let g:csv_delim=','
:let g:csv_no_conceal=1
:CSVInit
:CSVSort 2
vim-table-mode:
:TableModeEnable
:TableModeRealign
:Tableize/,
Summary
csv.vim excels in handling CSV files with powerful features, while vim-table-mode offers more versatile table creation and formatting across various file types. csv.vim is ideal for users working extensively with CSV data, whereas vim-table-mode provides a more flexible solution for general table manipulation in Vim.
Markdown Vim Mode
Pros of vim-markdown
- Broader Markdown support: Handles various Markdown elements beyond tables
- Syntax highlighting for Markdown files
- Folding support for Markdown headers
Cons of vim-markdown
- Less specialized table functionality compared to vim-table-mode
- May have a steeper learning curve for users primarily interested in table editing
Code Comparison
vim-markdown:
" Enable TOC window auto-fit
let g:vim_markdown_toc_autofit = 1

" Disable folding
let g:vim_markdown_folding_disabled = 1
vim-table-mode:
" Enable table mode
function! s:isAtStartOfLine(mapping)
  let text_before_cursor = getline('.')[0 : col('.')-1]
  let mapping_pattern = '\V' . escape(a:mapping, '\')
  let comment_pattern = '\V' . escape(substitute(&l:commentstring, '%s.*$', '', ''), '\')
  return (text_before_cursor =~? '^' . ('\v(' . comment_pattern . '\v)?') . '\s*\v' . mapping_pattern . '\v$')
endfunction

inoreabbrev <expr> <bar><bar>
          \ <SID>isAtStartOfLine('\|\|') ?
          \ '<c-o>:TableModeEnable<cr><bar><space><bar><left><left>' : '<bar><bar>'
Both plugins enhance Vim's Markdown editing capabilities, but vim-markdown offers a more comprehensive Markdown support, while vim-table-mode specializes in table creation and manipulation. The code examples show vim-markdown's configuration options for TOC and folding, whereas vim-table-mode demonstrates its table creation functionality.
Convert  designs to code with AI

Introducing Visual Copilot: A new AI model to turn Figma designs to high quality code using your components.
Try Visual CopilotREADME
VIM Table Mode v4.8.1 
An awesome automatic table creator & formatter allowing one to create neat tables as you type.
Getting Started
Installation
Vim 8+ native package manager
clone into .vim/pack/plugins/start (the plugins folder can have any name)
Add packloadall in your ~/.vimrc.
NeoBundle
Add NeoBundle 'dhruvasagar/vim-table-mode' to your ~/.vimrc.
pathogen.vim
Add a git submodule for your plugin:
$ cd ~/.vim
$ git submodule add git@github.com:dhruvasagar/vim-table-mode.git bundle/table-mode
Copy all files under autoload/, plugin/, and doc/ to respective
~/.vim/autoload/, ~/.vim/plugin and ~/.vim/doc under UNIX, or
vimfiles/autoload/, vimfiles/plugin/ and vimfiles/doc under WINDOWS and
restart Vim.
vim-plug
Add Plug 'dhruvasagar/vim-table-mode' to your ~/.vimrc.
Creating table on-the-fly
To start using the plugin in the on-the-fly mode use :TableModeToggle mapped to <Leader>tm by default (which means \ t m if you didn't override the :let mapleader = ',' to have , t m).
Tip:
You can use the following to quickly enable / disable table mode in insert mode by using || or __:
function! s:isAtStartOfLine(mapping)
  let text_before_cursor = getline('.')[0 : col('.')-1]
  let mapping_pattern = '\V' . escape(a:mapping, '\')
  let comment_pattern = '\V' . escape(substitute(&l:commentstring, '%s.*$', '', ''), '\')
  return (text_before_cursor =~? '^' . ('\v(' . comment_pattern . '\v)?') . '\s*\v' . mapping_pattern . '\v$')
endfunction

inoreabbrev <expr> <bar><bar>
          \ <SID>isAtStartOfLine('\|\|') ?
          \ '<c-o>:TableModeEnable<cr><bar><space><bar><left><left>' : '<bar><bar>'
inoreabbrev <expr> __
          \ <SID>isAtStartOfLine('__') ?
          \ '<c-o>:silent! TableModeDisable<cr>' : '__'
Enter the first line, delimiting columns by the | symbol. The plugin reacts by inserting spaces between the text and the separator if you omit them:
| name | address | phone |
In the second line (without leaving Insert mode), enter | twice. The plugin will write a properly formatted horizontal line:
| name | address | phone |
|------+---------+-------|
When you enter the subsequent lines, the plugin will automatically adjust the formatting to match the text youâre entering every time you press |:
| name       | address | phone |
|------------+---------+-------|
| John Adams |
Go on until the table is ready:
| name            | address                  | phone      |
|-----------------+--------------------------+------------|
| John Adams      | 1600 Pennsylvania Avenue | 0123456789 |
|-----------------+--------------------------+------------|
| Sherlock Holmes | 221B Baker Street        | 0987654321 |
|-----------------+--------------------------+------------|
Then you can return to the first line and above it enter ||:
|-----------------+--------------------------+------------|
| name            | address                  | phone      |
|-----------------+--------------------------+------------|
| John Adams      | 1600 Pennsylvania Avenue | 0123456789 |
|-----------------+--------------------------+------------|
| Sherlock Holmes | 221B Baker Street        | 0987654321 |
|-----------------+--------------------------+------------|
Corner separators are adjustable:
For Markdown-compatible tables use
let g:table_mode_corner='|'


|-----------------|--------------------------|------------|
| name            | address                  | phone      |
|-----------------|--------------------------|------------|
| John Adams      | 1600 Pennsylvania Avenue | 0123456789 |
|-----------------|--------------------------|------------|
| Sherlock Holmes | 221B Baker Street        | 0987654321 |
|-----------------|--------------------------|------------|
To get ReST-compatible tables use
let g:table_mode_corner_corner='+'
let g:table_mode_header_fillchar='='


+-----------------+--------------------------+------------+
| name            | address                  | phone      |
+=================+==========================+============+
| John Adams      | 1600 Pennsylvania Avenue | 0123456789 |
+-----------------+--------------------------+------------+
| Sherlock Holmes | 221B Baker Street        | 0987654321 |
+-----------------+--------------------------+------------+
Markdown and ReST filetypes have automatically configured corners.
If you wish to override their configurations, it should be done in an after plugin, for example :
In a
$VIM/after/ftplugin/markdown/custom.vimyou can add the following :let b:table_mode_corner='+'
You can also define in a table header border how its content should be
aligned, whether center, right or left by using a : character defined by
g:table_mode_align_char option.
If you manipulate the table when table mode is disabled or copy paste a table
from clipboard from outside and it ends up being misaligned, you can realign
it using :TableModeRealign or using the default mapping
<Leader>tr (defined by the option g:table_mode_relign_map).
Formatting existing content into a table
Table Mode wouldn't justify its name if it didn't allow formatting
existing content into a table. And it does as promised. Like table creation typing on the fly,
formatting existing content into a table is equally
simple. You can visually select multiple lines and call :Tableize on it.
Alternatively, the mapping <Leader>tt can be used (defined by the
option g:table_mode_tableize_map). This converts CSV (Comma-separated
Values) data into a table.
If however you wish to use a different delimiter, you can use the command
:Tableize/{pattern} in a similar fashion as you tabulate (e.g.
:Tableize/; uses ';' as the delimiter) or use the mapping <Leader>T
(defined by the option g:table_mode_tableize_op_map) which takes input in the
cmd-line and uses the {pattern} input as the delimiter.
:Tableize also accepts a range. Call it by giving
lines manually like :line1,line2Tableize. However this may not be intuitive.
You can use the mapping <Leader>T with a [count] to apply it to the
next [count] lines in standard vim style.
Moving around
Now you can move between cells using table mode motions [|, ]|, {| & }| to move left | right | up | down cells respectively. The left | right motions wrap around the table and move to the next | previous row after the last | first cell in the current row if one exists.
Manipulating Table
-
Cell Text Object :
Tableize provides a text object for manipulating table cells. Following the vim philosophy the you have i| & a| for the inner and around (including the immediate right table separator) the table cell.
-
Delete Row :
You can use the <Leader>tdd mapping (defined by the option
g:table_mode_delete_row_map) to delete the current table row (provided you are within a table row). This can be preceeded with a[count]to delete multiple rows as per Vim command grammar. -
Delete Column :
You can use the <Leader>tdc mapping (defined by the option
g:table_mode_delete_column_map) to delete the entire current column (provided you are within a table row), this can also be preceeded with a[count]to delete multiple columns. -
Insert Column :
You can use the <Leader>tic mapping (defined by the option
g:table_mode_insert_column_after_map) to insert a column after the cursor (provided you are within a table row). Of course you can use the <Leader>tiC mapping defined byg:table_mode_insert_column_before_mapto insert a column before the cursor. Both can also be preceeded with a [count] to insert multiple columns.
Highlight cells based on content
You can highlight cells based on content by setting let g:table_mode_color_cells : - cells starting with yes will use the yesCell highlight group. - cells starting with no will use the noCell highlight group. - cells starting with ? will use the maybeCell hightlight group.
You can overwrite any highlight group. For exemple use hi yesCell ctermfg=2 to remove the background color.
Advanced Usage: Spreadsheet Capabilities
Table Formulas
Table Mode now has support for formulas like a spreadsheet. There are 2 ways of defining formulas :
-
You can add formulas using
:TableAddFormulaor the mapping <Leader>tfa (defined by the optiong:table_mode_add_formula_map) from within a table cell, which will ask for input on the cmd-line with af=prompt. The input formula will be appended to the formula line if one exists or a new one will be created with the input formula taking the current cell as the target cell. The formula line is evaluated immidiately to reflect the results. -
You can directly add / manipulate formula expressions in the formula line. The formula line is a commented line right after the table, or optionally separated from the table by a single empty line. It begins with 'tmf:' (table mode formula). eg)
# tmf: $3=$2*$1. You can add multiple formulas on the line separated with a ';' eg)# tmf: $3=$2*$1;$4=$3/3.14
You can evaluate the formula line using :TableEvalFormulaLine or the
mapping <Leader>tfe (defined by the option g:table_mode_eval_expr_map)
from anywhere inside the table or while on the formula line.
NOTE: You can now use the mapping <Leader>t?
Formula Expressions
Expressions are of the format $target = formula.
-
The
targetcan be of 2 forms :-
$n: This matches the table column numbern. So theformulawould be evaluated for each cell in that column and the result would be placed in it. You can use negative indice to represent column relative to the last, -1 being the last. -
$n,m: This matches the table cell n,m (row, column). So in this case the formula would be evaluated and the result will be placed in this cell. You can also use negative values to refer to cells relative to the size, -1 being the last (row or column).
-
-
The
formulacan be a simple mathematical expression involving cells which are also defined by the same format as that of the target cell. You can use all native vim functions within the formula. Apart from that table mode also provides 2 special functionsSumandAverage. Both these functions take a range as input. A range can be of two forms:-
r1:r2: This represents cells in the current column from rowr1throughr2. Ifr2is negative it representsr2rows above the current row (of the target cell). -
r1,c1:r2,c2: This represents cells in the table from cell r1,c1 through cell r2,c2 (row, column).
-
-
Examples :
$2 = $1 * $1$2 = pow($1, 5)NOTE: Remember to put space between the $1, and 5 here otherwise it will be treated like a table cell.$2 = $1 / $1,3$1,2 = $1,1 * $1,1$5,1 = Sum(1:-1)$5,1 = float2nr(Sum(1:-1))$5,3 = Sum(1,2:5,2)$5,3 = Sum(1,2:5,2)/$5,1$5,3 = Average(1,2:5,2)/$5,1
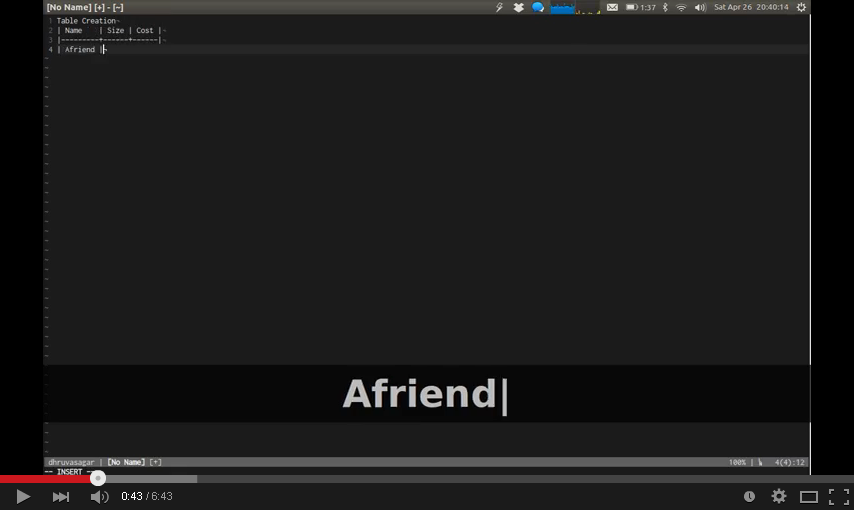
Demo
Change Log
See CHANGELOG.md
Contributing
Reporting an Issue :
Contributing to code :
- Fork it.
- Commit your changes and give your commit message some love.
- Push to your fork on github.
- Open a Pull Request.
Credit
I must thank Tim Pope for inspiration. The initial concept was created by him named cucumbertables.vim.
Also a shout out to godlygeek who developed the incredible Tabular plugin.
Contributors
Code Contributors
This project exists thanks to all the people who contribute. [Contribute].

Financial Contributors
Become a financial contributor and help us sustain our community. [Contribute]
Individuals

Organizations
Support this project with your organization. Your logo will show up here with a link to your website. [Contribute]
![]()
![]()
![]()
![]()
![]()
![]()
![]()
![]()
![]()
![]()
Top Related Projects
:sunflower: A Vim alignment plugin
Vim script for text filtering and alignment
Draw ASCII diagrams in Neovim
A Filetype plugin for csv files
Markdown Vim Mode
Convert designs to code with AI
Introducing Visual Copilot: A new AI model to turn Figma designs to high quality code using your components.
Try Visual Copilot