
Top Related Projects

[EXPERIMENTAL] Graceful morphing effects for UILabel written in Swift.

A drop-in replacement for UILabel that supports attributes, data detectors, links, and more

A Swift Autolayout DSL for iOS & OS X

The better way to deal with JSON data in Swift.

Elegant HTTP Networking in Swift
Quick Overview
YYText is a powerful text rendering and layout engine for iOS. It provides a high-performance alternative to Apple's TextKit, offering advanced text rendering capabilities, rich text editing features, and asynchronous rendering for improved performance.
Pros
- High performance text rendering and layout
- Rich text editing capabilities with support for various attributes
- Asynchronous rendering for smooth scrolling and improved user experience
- Extensive customization options for text containers, exclusion paths, and attachments
Cons
- Limited to iOS platform, not available for other operating systems
- Steeper learning curve compared to native UIKit text components
- May require more setup and configuration for basic use cases
- Documentation is primarily in Chinese, which may be challenging for non-Chinese speakers
Code Examples
- Creating a YYLabel with attributed text:
YYLabel *label = [[YYLabel alloc] initWithFrame:CGRectMake(10, 10, 300, 200)];
NSMutableAttributedString *text = [[NSMutableAttributedString alloc] initWithString:@"Hello, YYText!"];
[text setColor:[UIColor blueColor] range:NSMakeRange(0, 5)];
[text setFont:[UIFont boldSystemFontOfSize:18] range:NSMakeRange(7, 6)];
label.attributedText = text;
[self.view addSubview:label];
- Adding a custom highlight to text:
YYTextHighlight *highlight = [YYTextHighlight new];
highlight.color = [UIColor redColor];
highlight.backgroundColor = [UIColor yellowColor];
[text setTextHighlight:highlight range:NSMakeRange(0, 5)];

label.highlightTapAction = ^(UIView *containerView, NSAttributedString *text, NSRange range, CGRect rect) {
    NSLog(@"Tapped on highlighted text: %@", [text.string substringWithRange:range]);
};
- Using asynchronous rendering:
YYLabel *label = [[YYLabel alloc] initWithFrame:CGRectMake(10, 10, 300, 0)];
label.displaysAsynchronously = YES;
label.ignoreCommonProperties = YES;
label.fadeOnAsynchronouslyDisplay = NO;
label.fadeOnHighlight = NO;

NSMutableAttributedString *text = [[NSMutableAttributedString alloc] initWithString:@"Long text content..."];
// Add attributes to text...

label.attributedText = text;
[label sizeToFit];
[self.view addSubview:label];
Getting Started
-
Install YYText using CocoaPods by adding the following to your Podfile:
pod 'YYText' -
Import YYText in your Objective-C file:
#import <YYText/YYText.h> -
Create a simple YYLabel:
YYLabel *label = [[YYLabel alloc] initWithFrame:CGRectMake(10, 10, 300, 100)]; label.text = @"Hello, YYText!"; [self.view addSubview:label]; -
Run
pod installin your project directory and open the.xcworkspacefile to build and run your project.
Competitor Comparisons
[EXPERIMENTAL] Graceful morphing effects for UILabel written in Swift.
Pros of LTMorphingLabel
- Focuses on text animation and morphing effects, providing visually appealing transitions
- Offers a variety of pre-built morphing effects, making it easy to implement dynamic text changes
- Lightweight and specifically designed for label animations
Cons of LTMorphingLabel
- Limited to label animations, lacking the extensive text handling capabilities of YYText
- Does not provide advanced text layout or rich text editing features
- May have higher performance overhead for simple text displays due to animation calculations
Code Comparison
LTMorphingLabel:
let label = LTMorphingLabel()
label.text = "Hello"
label.morphingEffect = .evaporate
label.text = "World"
YYText:
YYLabel *label = [YYLabel new];
label.attributedText = [[NSAttributedString alloc] initWithString:@"Hello World" attributes:@{NSFontAttributeName:[UIFont systemFontOfSize:16]}];
label.textVerticalAlignment = YYTextVerticalAlignmentCenter;
LTMorphingLabel excels in creating animated text transitions, while YYText offers more comprehensive text handling and layout capabilities. LTMorphingLabel is ideal for projects requiring eye-catching label animations, whereas YYText is better suited for complex text rendering and editing tasks.
A drop-in replacement for UILabel that supports attributes, data detectors, links, and more
Pros of TTTAttributedLabel
- Lightweight and easy to integrate
- Supports automatic data detection (e.g., links, phone numbers)
- Well-established and widely used in the iOS community
Cons of TTTAttributedLabel
- Limited customization options compared to YYText
- Lacks advanced text rendering features
- Less frequent updates and maintenance
Code Comparison
TTTAttributedLabel:
TTTAttributedLabel *label = [[TTTAttributedLabel alloc] initWithFrame:CGRectZero];
label.font = [UIFont systemFontOfSize:14];
label.textColor = [UIColor darkGrayColor];
label.lineBreakMode = NSLineBreakByWordWrapping;
label.numberOfLines = 0;
YYText:
YYLabel *label = [YYLabel new];
label.font = [UIFont systemFontOfSize:14];
label.textColor = [UIColor darkGrayColor];
label.numberOfLines = 0;
label.textContainerInset = UIEdgeInsetsMake(10, 10, 10, 10);
label.textVerticalAlignment = YYTextVerticalAlignmentCenter;
Both libraries provide similar basic functionality for creating and styling labels. However, YYText offers more advanced features and customization options, such as text container insets and vertical alignment, which are not available in TTTAttributedLabel. YYText also provides better performance for complex text rendering and animations, making it more suitable for applications with demanding text display requirements.
A Swift Autolayout DSL for iOS & OS X
Pros of SnapKit
- Focused on auto layout constraints, making it easier to create responsive UI layouts
- Provides a concise, chainable syntax for defining constraints
- Widely adopted in the iOS development community with extensive documentation
Cons of SnapKit
- Limited to layout constraints, lacking rich text rendering capabilities
- May require additional libraries for complex text handling and styling
- Less suitable for projects requiring advanced text manipulation
Code Comparison
SnapKit:
view.snp.makeConstraints { make in
    make.top.equalTo(superview).offset(20)
    make.left.right.equalTo(superview).inset(16)
    make.height.equalTo(44)
}
YYText:
YYTextView *textView = [YYTextView new];
textView.text = @"Hello, YYText!";
textView.font = [UIFont systemFontOfSize:16];
textView.textColor = [UIColor blackColor];
textView.textContainerInset = UIEdgeInsetsMake(10, 10, 10, 10);
Summary
SnapKit excels in creating auto layout constraints with a clean, Swift-friendly syntax, making it ideal for responsive UI design. YYText, on the other hand, focuses on rich text rendering and manipulation, offering more advanced text-related features. While SnapKit is more widely adopted for general layout purposes, YYText is better suited for projects requiring complex text handling and styling.
The better way to deal with JSON data in Swift.
Pros of SwiftyJSON
- Specifically designed for JSON parsing in Swift, offering a more streamlined and Swift-friendly API
- Provides type-safe access to JSON data, reducing the likelihood of runtime errors
- Lightweight and easy to integrate into Swift projects
Cons of SwiftyJSON
- Limited to JSON parsing, while YYText offers a broader range of text-related functionalities
- May require additional libraries for more complex text rendering or manipulation tasks
- Less suitable for projects that require advanced text layout and styling capabilities
Code Comparison
SwiftyJSON:
let json = JSON(data: dataFromNetworking)
if let name = json["user"]["name"].string {
    // Do something with name
}
YYText:
YYTextView *textView = [YYTextView new];
textView.text = @"Hello, YYText!";
textView.font = [UIFont systemFontOfSize:16];
[self.view addSubview:textView];
Summary
SwiftyJSON excels in JSON parsing for Swift projects, offering a type-safe and easy-to-use API. However, it's limited to JSON handling and lacks the extensive text rendering capabilities of YYText. YYText, on the other hand, provides a comprehensive solution for text-related tasks in iOS applications, including advanced layout and styling options. The choice between the two depends on the specific requirements of your project, with SwiftyJSON being ideal for JSON-centric tasks and YYText better suited for complex text manipulation and display needs.
Elegant HTTP Networking in Swift
Pros of Alamofire
- Comprehensive networking library for HTTP networking in Swift
- Extensive documentation and active community support
- Built-in features like request/response serialization and authentication
Cons of Alamofire
- Focused solely on networking, lacks text rendering capabilities
- May be overkill for simple networking tasks
- Steeper learning curve for beginners compared to YYText
Code Comparison
YYText (Text rendering):
let text = NSMutableAttributedString(string: "Hello, World!")
text.yy_setColor(.red, range: NSRange(location: 0, length: 5))
text.yy_setFont(UIFont.boldSystemFont(ofSize: 18), range: NSRange(location: 7, length: 5))
Alamofire (Networking):
AF.request("https://api.example.com/data").responseJSON { response in
    switch response.result {
    case .success(let value):
        print("JSON: \(value)")
    case .failure(let error):
        print("Error: \(error)")
    }
}
While YYText excels in text rendering and manipulation, Alamofire is a powerful networking library. YYText offers more flexibility for text-related tasks, while Alamofire provides robust networking capabilities. The choice between the two depends on the specific requirements of your project.
Convert  designs to code with AI

Introducing Visual Copilot: A new AI model to turn Figma designs to high quality code using your components.
Try Visual CopilotREADME
YYText
![]()
![]()


![]()

Powerful text framework for iOS to display and edit rich text.
(It's a component of YYKit)
Features
- UILabel and UITextView API compatible
- High performance asynchronous text layout and rendering
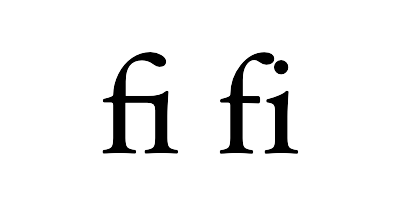
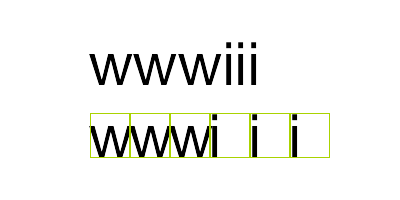
- Extended CoreText attributes with more text effects
- Text attachments with UIImage, UIView and CALayer
- Custom highlight text range to allow user interact with
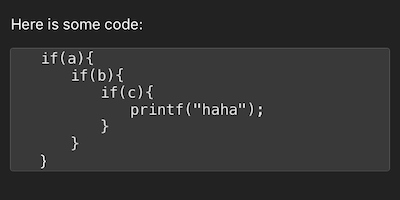
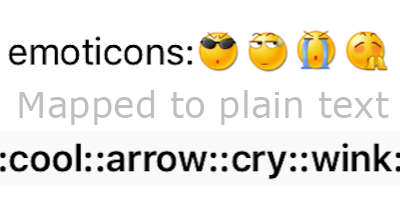
- Text parser support (built in markdown/emoticon parser)
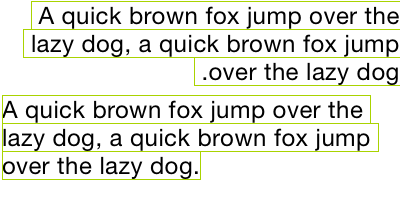
- Text container path and exclusion paths support
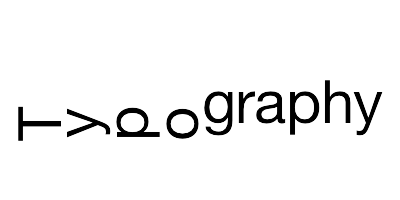
- Vertical form layout support (for CJK text)
- Image and attributed text copy/paste support
- Attributed text placeholder support
- Custom keyboard view support
- Undo and redo control
- Attributed text archiver and unarchiver support
- Multi-language and VoiceOver support
- Interface Builder support
- Fully documented
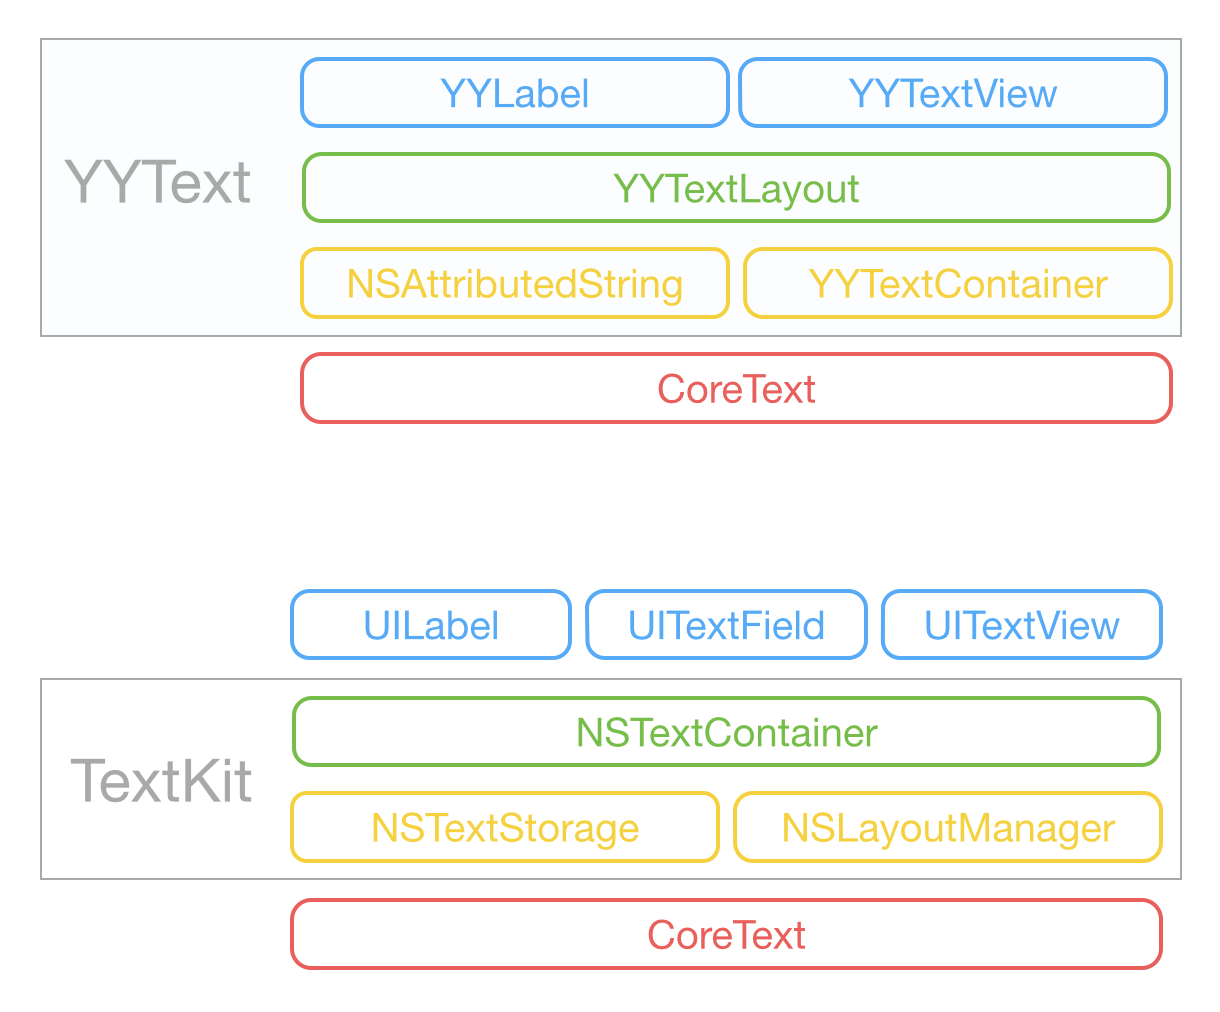
Architecture
YYText vs TextKit
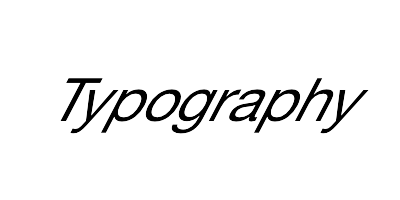
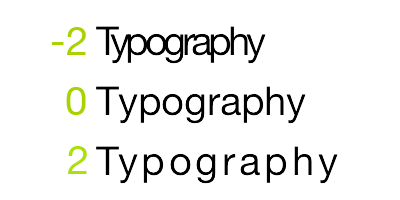
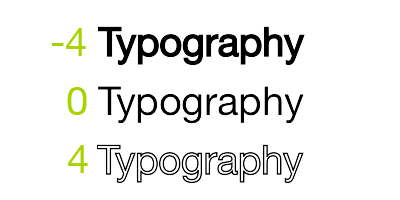
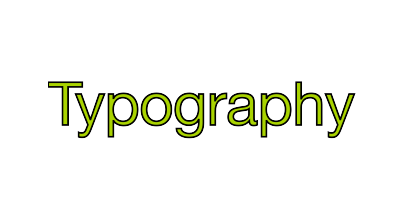
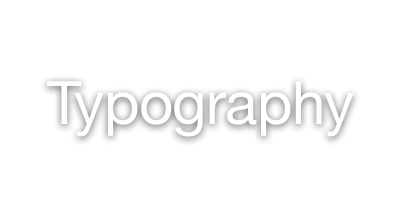
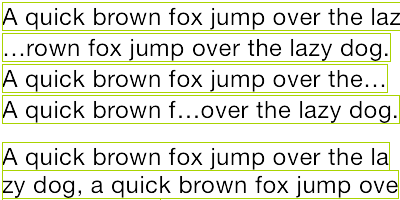
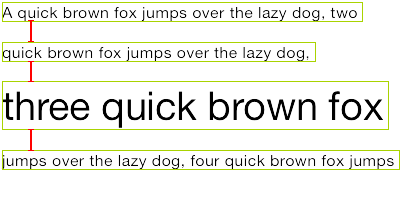
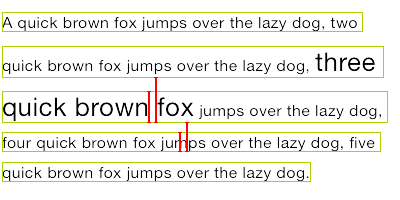
Text Attributes
YYText supported attributes
| Demo | Attribute Name | Class |
|---|---|---|
 |
TextAttachment | YYTextAttachment |
 |
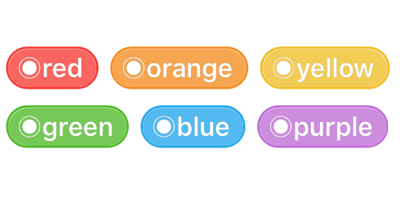
TextHighlight | YYTextHighlight |
 |
TextBinding | YYTextBinding |
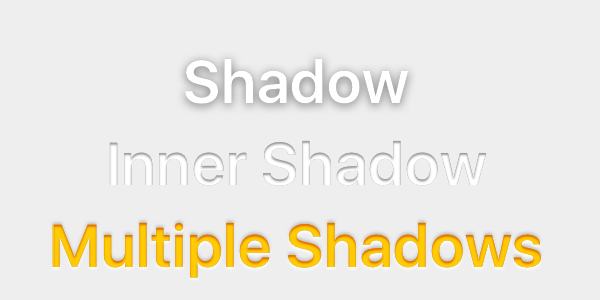 |
TextShadow TextInnerShadow |
YYTextShadow |
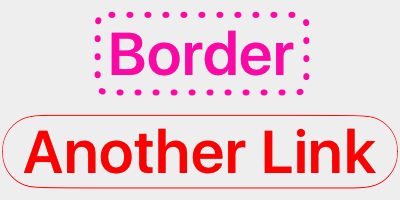 |
TextBorder | YYTextBorder |
 |
TextBackgroundBorder | YYTextBorder |
 |
TextBlockBorder | YYTextBorder |
 |
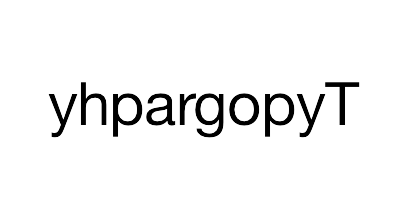
TextGlyphTransform | NSValue(CGAffineTransform) |
 |
TextUnderline | YYTextDecoration |
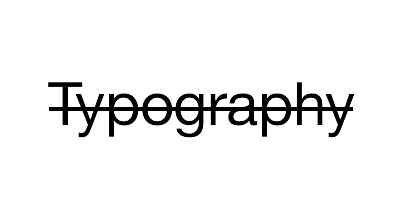 |
TextStrickthrough | YYTextDecoration |
 |
TextBackedString | YYTextBackedString |
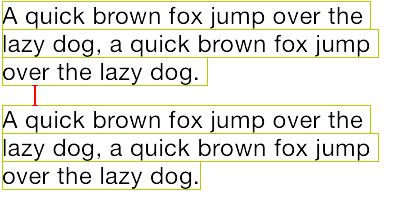
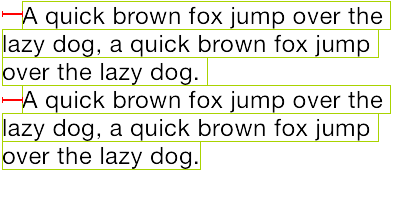
CoreText attributes which is supported by YYText
| Demo | Attribute Name | Class |
|---|---|---|
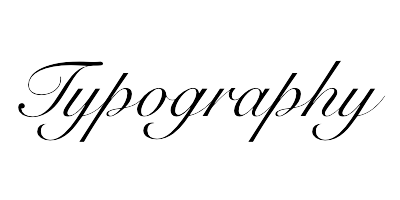 |
Font | UIFont(CTFontRef) |
 |
Kern | NSNumber |
 |
StrokeWidth | NSNumber |
 |
StrokeColor | CGColorRef |
 |
Shadow | NSShadow |
 |
Ligature | NSNumber |
 |
VerticalGlyphForm | NSNumber(BOOL) |
 |
WritingDirection | NSArray(NSNumber) |
 |
RunDelegate | CTRunDelegateRef |
 |
TextAlignment | NSParagraphStyle (NSTextAlignment) |
 |
LineBreakMode | NSParagraphStyle (NSLineBreakMode) |
 |
LineSpacing | NSParagraphStyle (CGFloat) |
 |
ParagraphSpacing ParagraphSpacingBefore |
NSParagraphStyle (CGFloat) |
 |
FirstLineHeadIndent | NSParagraphStyle (CGFloat) |
 |
HeadIndent | NSParagraphStyle (CGFloat) |
 |
TailIndent | NSParagraphStyle (CGFloat) |
 |
MinimumLineHeight | NSParagraphStyle (CGFloat) |
 |
MaximumLineHeight | NSParagraphStyle (CGFloat) |
 |
LineHeightMultiple | NSParagraphStyle (CGFloat) |
 |
BaseWritingDirection | NSParagraphStyle (NSWritingDirection) |
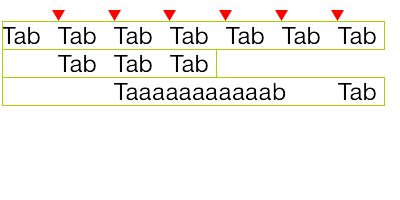 |
DefaultTabInterval TabStops |
NSParagraphStyle CGFloat/NSArray(NSTextTab) |
Usage
Basic
// YYLabel (similar to UILabel)
YYLabel *label = [YYLabel new];
label.frame = ...
label.font = ...
label.textColor = ...
label.textAlignment = ...
label.lineBreakMode = ...
label.numberOfLines = ...
label.text = ...

// YYTextView (similar to UITextView)
YYTextView *textView = [YYTextView new];
textView.frame = ...
textView.font = ...
textView.textColor = ...
textView.dataDetectorTypes = ...
textView.placeHolderText = ...
textView.placeHolderTextColor = ...
textView.delegate = ...
Attributed text
// 1. Create an attributed string.
NSMutableAttributedString *text = [[NSMutableAttributedString alloc] initWithString:@"Some Text, blabla..."];

// 2. Set attributes to text, you can use almost all CoreText attributes.
text.yy_font = [UIFont boldSystemFontOfSize:30];
text.yy_color = [UIColor blueColor];
[text yy_setColor:[UIColor redColor] range:NSMakeRange(0, 4)];
text.yy_lineSpacing = 10;

// 3. Set to YYLabel or YYTextView.
YYLabel *label = [YYLabel new];
label.frame = ...
label.attributedString = text;

YYTextView *textView = [YYTextView new];
textView.frame = ...
textView.attributedString = text;
Text highlight
You can use some convenience methods to set text highlight:
[text yy_setTextHighlightRange:range
                       color:[UIColor blueColor]
             backgroundColor:[UIColor grayColor]
                   tapAction:^(UIView *containerView, NSAttributedString *text, NSRange range, CGRect rect){
                       NSLog(@"tap text range:...");
                   }];
Or set the text highlight with your custom config:
// 1. Create a 'highlight' attribute for text.
YYTextBorder *border = [YYTextBorder borderWithFillColor:[UIColor grayColor] cornerRadius:3];

YYTextHighlight *highlight = [YYTextHighlight new];
[highlight setColor:[UIColor whiteColor]];
[highlight setBackgroundBorder:highlightBorder];
highlight.tapAction = ^(UIView *containerView, NSAttributedString *text, NSRange range, CGRect rect) {
 NSLog(@"tap text range:...");
 // you can also set the action handler to YYLabel or YYTextView.
};

// 2. Add 'highlight' attribute to a range of text.
[attributedText yy_setTextHighlight:highlight range:highlightRange];

// 3. Set text to label or text view.
YYLabel *label = ...
label.attributedText = attributedText

YYTextView *textView = ...
textView.attributedText = ...

// 4. Receive user interactive action.
label.highlightTapAction = ^(UIView *containerView, NSAttributedString *text, NSRange range, CGRect rect) {
   NSLog(@"tap text range:...");
};
label.highlightLongPressAction = ^(UIView *containerView, NSAttributedString *text, NSRange range, CGRect rect) {
   NSLog(@"long press text range:...");
};

@UITextViewDelegate
- (void)textView:(YYTextView *)textView didTapHighlight:(YYTextHighlight *)highlight inRange:(NSRange)characterRange rect:(CGRect)rect {
   NSLog(@"tap text range:...");
}
- (void)textView:(YYTextView *)textView didLongPressHighlight:(YYTextHighlight *)highlight inRange:(NSRange)characterRange rect:(CGRect)rect {
   NSLog(@"long press text range:...");
}
Text attachments
NSMutableAttributedString *text = [NSMutableAttributedString new];
UIFont *font = [UIFont systemFontOfSize:16];
NSMutableAttributedString *attachment = nil;

// UIImage attachment
UIImage *image = [UIImage imageNamed:@"dribbble64_imageio"];
attachment = [NSMutableAttributedString yy_attachmentStringWithContent:image contentMode:UIViewContentModeCenter attachmentSize:image.size alignToFont:font alignment:YYTextVerticalAlignmentCenter];
[text appendAttributedString: attachment];

// UIView attachment
UISwitch *switcher = [UISwitch new];
[switcher sizeToFit];
attachment = [NSMutableAttributedString yy_attachmentStringWithContent:switcher contentMode:UIViewContentModeBottom attachmentSize:switcher.size alignToFont:font alignment:YYTextVerticalAlignmentCenter];
[text appendAttributedString: attachment];

// CALayer attachment
CASharpLayer *layer = [CASharpLayer layer];
layer.path = ...
attachment = [NSMutableAttributedString yy_attachmentStringWithContent:layer contentMode:UIViewContentModeBottom attachmentSize:switcher.size alignToFont:font alignment:YYTextVerticalAlignmentCenter];
[text appendAttributedString: attachment];
Text layout calculation
NSAttributedString *text = ...
CGSize size = CGSizeMake(100, CGFLOAT_MAX);
YYTextLayout *layout = [YYTextLayout layoutWithContainerSize:size text:text];

// get text bounding
layout.textBoundingRect; // get bounding rect
layout.textBoundingSize; // get bounding size

 // query text layout
[layout lineIndexForPoint:CGPointMake(10,10)];
[layout closestLineIndexForPoint:CGPointMake(10,10)];
[layout closestPositionToPoint:CGPointMake(10,10)];
[layout textRangeAtPoint:CGPointMake(10,10)];
[layout rectForRange:[YYTextRange rangeWithRange:NSMakeRange(10,2)]];
[layout selectionRectsForRange:[YYTextRange rangeWithRange:NSMakeRange(10,2)]];

// text layout display
YYLabel *label = [YYLabel new];
label.size = layout.textBoundingSize;
label.textLayout = layout;
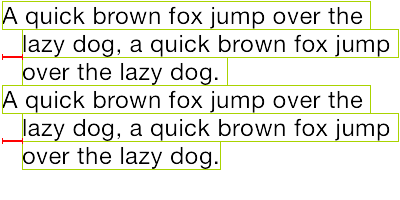
Adjust text line position
// Convenience methods:
// 1. Create a text line position modifier, implements `YYTextLinePositionModifier` protocol.
// 2. Set it to label or text view.

YYTextLinePositionSimpleModifier *modifier = [YYTextLinePositionSimpleModifier new];
modifier.fixedLineHeight = 24;

YYLabel *label = [YYLabel new];
label.linePositionModifier = modifier;

// Fully control
YYTextLinePositionSimpleModifier *modifier = [YYTextLinePositionSimpleModifier new];
modifier.fixedLineHeight = 24;

YYTextContainer *container = [YYTextContainer new];
container.size = CGSizeMake(100, CGFLOAT_MAX);
container.linePositionModifier = modifier;

YYTextLayout *layout = [YYTextLayout layoutWithContainer:container text:text];
YYLabel *label = [YYLabel new];
label.size = layout.textBoundingSize;
label.textLayout = layout;
Asynchronous layout and rendering
// If you have performance issues,
// you may enable the asynchronous display mode.
YYLabel *label = ...
label.displaysAsynchronously = YES;

// If you want to get the highest performance, you should do
// text layout with `YYTextLayout` class in background thread.
YYLabel *label = [YYLabel new];
label.displaysAsynchronously = YES;
label.ignoreCommonProperties = YES;

dispatch_async(dispatch_get_global_queue(DISPATCH_QUEUE_PRIORITY_DEFAULT, 0), ^{
   // Create attributed string.
   NSMutableAttributedString *text = [[NSMutableAttributedString alloc] initWithString:@"Some Text"];
   text.yy_font = [UIFont systemFontOfSize:16];
   text.yy_color = [UIColor grayColor];
   [text yy_setColor:[UIColor redColor] range:NSMakeRange(0, 4)];

   // Create text container
   YYTextContainer *container = [YYTextContainer new];
   container.size = CGSizeMake(100, CGFLOAT_MAX);
   container.maximumNumberOfRows = 0;

   // Generate a text layout.
   YYTextLayout *layout = [YYTextLayout layoutWithContainer:container text:text];

   dispatch_async(dispatch_get_main_queue(), ^{
       label.size = layout.textBoundingSize;
       label.textLayout = layout;
   });
});
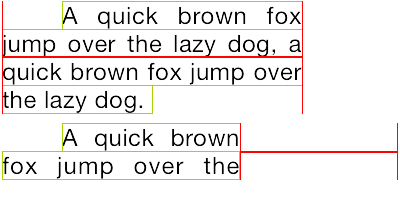
Text container control
YYLabel *label = ...
label.textContainerPath = [UIBezierPath bezierPathWith...];
label.exclusionPaths = 	@[[UIBezierPath bezierPathWith...];,...];
label.textContainerInset = UIEdgeInsetsMake(...);
label.verticalForm = YES/NO;

YYTextView *textView = ...
textView.exclusionPaths = 	@[[UIBezierPath bezierPathWith...];,...];
textView.textContainerInset = UIEdgeInsetsMake(...);
textView.verticalForm = YES/NO;
Text parser
// 1. Create a text parser

YYTextSimpleEmoticonParser *parser = [YYTextSimpleEmoticonParser new];
NSMutableDictionary *mapper = [NSMutableDictionary new];
mapper[@":smile:"] = [UIImage imageNamed:@"smile.png"];
mapper[@":cool:"] = [UIImage imageNamed:@"cool.png"];
mapper[@":cry:"] = [UIImage imageNamed:@"cry.png"];
mapper[@":wink:"] = [UIImage imageNamed:@"wink.png"];
parser.emoticonMapper = mapper;

YYTextSimpleMarkdownParser *parser = [YYTextSimpleMarkdownParser new];
[parser setColorWithDarkTheme];

MyCustomParser *parser = ... // custom parser

// 2. Attach parser to label or text view
YYLabel *label = ...
label.textParser = parser;

YYTextView *textView = ...
textView.textParser = parser;
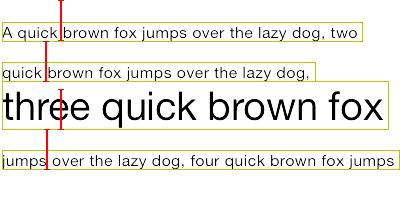
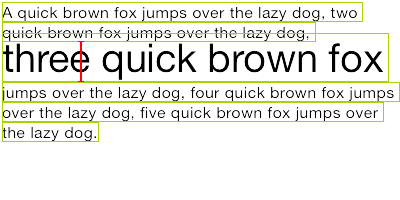
Debug
// Set a shared debug option to show text layout result.
YYTextDebugOption *debugOptions = [YYTextDebugOption new];
debugOptions.baselineColor = [UIColor redColor];
debugOptions.CTFrameBorderColor = [UIColor redColor];
debugOptions.CTLineFillColor = [UIColor colorWithRed:0.000 green:0.463 blue:1.000 alpha:0.180];
debugOptions.CGGlyphBorderColor = [UIColor colorWithRed:1.000 green:0.524 blue:0.000 alpha:0.200];
[YYTextDebugOption setSharedDebugOption:debugOptions];
More examples
See Demo/YYTextDemo.xcodeproj for more examples:

Installation
CocoaPods
- Add
pod 'YYText'to your Podfile. - Run
pod installorpod update. - Import <YYText/YYText.h>.
Carthage
- Add
github "ibireme/YYText"to your Cartfile. - Run
carthage update --platform iosand add the framework to your project. - Import <YYText/YYText.h>.
Manually
- Download all the files in the
YYTextsubdirectory. - Add the source files to your Xcode project.
- Link with required frameworks:
- UIKit
- CoreFoundation
- CoreText
- QuartzCore
- Accelerate
- MobileCoreServices
- Import
YYText.h.
Notice
You may add YYImage or YYWebImage to your project if you want to support animated image (GIF/APNG/WebP).
Documentation
Full API documentation is available on CocoaDocs.
You can also install documentation locally using appledoc.
Requirements
This library requires iOS 6.0+ and Xcode 8.0+.
License
YYText is released under the MIT license. See LICENSE file for details.
ä¸æä»ç»
åè½å¼ºå¤§ç iOS å¯ææ¬ç¼è¾ä¸æ¾ç¤ºæ¡æ¶ã
(该项ç®æ¯ YYKit ç»ä»¶ä¹ä¸)
ç¹æ§
- API å ¼å®¹ UILabel å UITextView
- æ¯æé«æ§è½çå¼æ¥æçå渲æ
- æ©å±äº CoreText çå±æ§ä»¥æ¯ææ´å¤æåææ
- æ¯æ UIImageãUIViewãCALayer ä½ä¸ºå¾ææ··æå ç´
- æ¯ææ·»å èªå®ä¹æ ·å¼çãå¯ç¹å»çææ¬é«äº®èå´
- æ¯æèªå®ä¹ææ¬è§£æ (å ç½®ç®åç Markdown/表æ 解æ)
- æ¯æææ¬å®¹å¨è·¯å¾ãå é¨ç空路å¾çæ§å¶
- æ¯ææåç«æçï¼å¯ç¨äºç¼è¾åæ¾ç¤ºä¸æ¥é©ææ¬
- æ¯æå¾çåå¯ææ¬çå¤å¶ç²è´´
- ææ¬ç¼è¾æ¶ï¼æ¯æå¯ææ¬å ä½ç¬¦
- æ¯æèªå®ä¹é®çè§å¾
- æ¤éåéå次æ°çæ§å¶
- å¯ææ¬çåºååä¸ååºååæ¯æ
- æ¯æå¤è¯è¨ï¼æ¯æ VoiceOver
- æ¯æ Interface Builder
- å ¨é¨ä»£ç é½ææ档注é
æ¶æ
YYText å TextKit æ¶æ对æ¯
ææ¬å±æ§
YYText åçæ¯æçå±æ§
| Demo | Attribute Name | Class |
|---|---|---|
|
TextAttachment | YYTextAttachment |
|
TextHighlight | YYTextHighlight |
|
TextBinding | YYTextBinding |
|
TextShadow TextInnerShadow |
YYTextShadow |
|
TextBorder | YYTextBorder |
|
TextBackgroundBorder | YYTextBorder |
|
TextBlockBorder | YYTextBorder |
|
TextGlyphTransform | NSValue(CGAffineTransform) |
|
TextUnderline | YYTextDecoration |
|
TextStrickthrough | YYTextDecoration |
|
TextBackedString | YYTextBackedString |
YYText æ¯æç CoreText å±æ§
| Demo | Attribute Name | Class |
|---|---|---|
|
Font | UIFont(CTFontRef) |
|
Kern | NSNumber |
|
StrokeWidth | NSNumber |
|
StrokeColor | CGColorRef |
|
Shadow | NSShadow |
|
Ligature | NSNumber |
|
VerticalGlyphForm | NSNumber(BOOL) |
|
WritingDirection | NSArray(NSNumber) |
|
RunDelegate | CTRunDelegateRef |
|
TextAlignment | NSParagraphStyle (NSTextAlignment) |
|
LineBreakMode | NSParagraphStyle (NSLineBreakMode) |
|
LineSpacing | NSParagraphStyle (CGFloat) |
|
ParagraphSpacing ParagraphSpacingBefore |
NSParagraphStyle (CGFloat) |
|
FirstLineHeadIndent | NSParagraphStyle (CGFloat) |
|
HeadIndent | NSParagraphStyle (CGFloat) |
|
TailIndent | NSParagraphStyle (CGFloat) |
|
MinimumLineHeight | NSParagraphStyle (CGFloat) |
|
MaximumLineHeight | NSParagraphStyle (CGFloat) |
|
LineHeightMultiple | NSParagraphStyle (CGFloat) |
|
BaseWritingDirection | NSParagraphStyle (NSWritingDirection) |
|
DefaultTabInterval TabStops |
NSParagraphStyle CGFloat/NSArray(NSTextTab) |
ç¨æ³
åºæ¬ç¨æ³
// YYLabel (å UILabel ç¨æ³ä¸è´)
YYLabel *label = [YYLabel new];
label.frame = ...
label.font = ...
label.textColor = ...
label.textAlignment = ...
label.lineBreakMode = ...
label.numberOfLines = ...
label.text = ...
// YYTextView (å UITextView ç¨æ³ä¸è´)
YYTextView *textView = [YYTextView new];
textView.frame = ...
textView.font = ...
textView.textColor = ...
textView.dataDetectorTypes = ...
textView.placeHolderText = ...
textView.placeHolderTextColor = ...
textView.delegate = ...
å±æ§ææ¬
// 1. å建ä¸ä¸ªå±æ§ææ¬
NSMutableAttributedString *text = [[NSMutableAttributedString alloc] initWithString:@"Some Text, blabla..."];
// 2. 为ææ¬è®¾ç½®å±æ§
text.yy_font = [UIFont boldSystemFontOfSize:30];
text.yy_color = [UIColor blueColor];
[text yy_setColor:[UIColor redColor] range:NSMakeRange(0, 4)];
text.yy_lineSpacing = 10;
// 3. èµå¼å° YYLabel æ YYTextView
YYLabel *label = [YYLabel new];
label.frame = ...
label.attributedString = text;
YYTextView *textView = [YYTextView new];
textView.frame = ...
textView.attributedString = text;
ææ¬é«äº®
ä½ å¯ä»¥ç¨ä¸äºå·²ç»å°è£ 好çç®ä¾¿æ¹æ³æ¥è®¾ç½®ææ¬é«äº®ï¼
[text yy_setTextHighlightRange:range
                       color:[UIColor blueColor]
             backgroundColor:[UIColor grayColor]
                   tapAction:^(UIView *containerView, NSAttributedString *text, NSRange range, CGRect rect){
                       NSLog(@"tap text range:...");
                   }];
æè ç¨æ´å¤æçåæ³æ¥è°èææ¬é«äº®çç»èï¼
// 1. å建ä¸ä¸ª"é«äº®"å±æ§ï¼å½ç¨æ·ç¹å»äºé«äº®åºåçææ¬æ¶ï¼"é«äº®"å±æ§ä¼æ¿æ¢æåæ¬çå±æ§
YYTextBorder *border = [YYTextBorder borderWithFillColor:[UIColor grayColor] cornerRadius:3];
YYTextHighlight *highlight = [YYTextHighlight new];
[highlight setColor:[UIColor whiteColor]];
[highlight setBackgroundBorder:highlightBorder];
highlight.tapAction = ^(UIView *containerView, NSAttributedString *text, NSRange range, CGRect rect) {
NSLog(@"tap text range:...");
// ä½ ä¹å¯ä»¥æäºä»¶åè°æ¾å° YYLabel å YYTextView æ¥å¤çã
};
// 2. æ"é«äº®"å±æ§è®¾ç½®å°æ个ææ¬èå´
[attributedText yy_setTextHighlight:highlight range:highlightRange];
// 3. æå±æ§ææ¬è®¾ç½®å° YYLabel æ YYTextView
YYLabel *label = ...
label.attributedText = attributedText
YYTextView *textView = ...
textView.attributedText = ...
// 4. æ¥åäºä»¶åè°
label.highlightTapAction = ^(UIView *containerView, NSAttributedString *text, NSRange range, CGRect rect) {
NSLog(@"tap text range:...");
};
label.highlightLongPressAction = ^(UIView *containerView, NSAttributedString *text, NSRange range, CGRect rect) {
NSLog(@"long press text range:...");
};
@UITextViewDelegate
- (void)textView:(YYTextView *)textView didTapHighlight:(YYTextHighlight *)highlight inRange:(NSRange)characterRange rect:(CGRect)rect {
NSLog(@"tap text range:...");
}
- (void)textView:(YYTextView *)textView didLongPressHighlight:(YYTextHighlight *)highlight inRange:(NSRange)characterRange rect:(CGRect)rect {
NSLog(@"long press text range:...");
}
å¾ææ··æ
NSMutableAttributedString *text = [NSMutableAttributedString new];
UIFont *font = [UIFont systemFontOfSize:16];
NSMutableAttributedString *attachment = nil;
// åµå
¥ UIImage
UIImage *image = [UIImage imageNamed:@"dribbble64_imageio"];
attachment = [NSMutableAttributedString yy_attachmentStringWithContent:image contentMode:UIViewContentModeCenter attachmentSize:image.size alignToFont:font alignment:YYTextVerticalAlignmentCenter];
[text appendAttributedString: attachment];
// åµå
¥ UIView
UISwitch *switcher = [UISwitch new];
[switcher sizeToFit];
attachment = [NSMutableAttributedString yy_attachmentStringWithContent:switcher contentMode:UIViewContentModeBottom attachmentSize:switcher.size alignToFont:font alignment:YYTextVerticalAlignmentCenter];
[text appendAttributedString: attachment];
// åµå
¥ CALayer
CASharpLayer *layer = [CASharpLayer layer];
layer.path = ...
attachment = [NSMutableAttributedString yy_attachmentStringWithContent:layer contentMode:UIViewContentModeBottom attachmentSize:switcher.size alignToFont:font alignment:YYTextVerticalAlignmentCenter];
[text appendAttributedString: attachment];
ææ¬å¸å±è®¡ç®
NSAttributedString *text = ...
CGSize size = CGSizeMake(100, CGFLOAT_MAX);
YYTextLayout *layout = [YYTextLayout layoutWithContainerSize:size text:text];
// è·åææ¬æ¾ç¤ºä½ç½®å大å°
layout.textBoundingRect; // get bounding rect
layout.textBoundingSize; // get bounding size
// æ¥è¯¢ææ¬æçç»æ
[layout lineIndexForPoint:CGPointMake(10,10)];
[layout closestLineIndexForPoint:CGPointMake(10,10)];
[layout closestPositionToPoint:CGPointMake(10,10)];
[layout textRangeAtPoint:CGPointMake(10,10)];
[layout rectForRange:[YYTextRange rangeWithRange:NSMakeRange(10,2)]];
[layout selectionRectsForRange:[YYTextRange rangeWithRange:NSMakeRange(10,2)]];
// æ¾ç¤ºææ¬æçç»æ
YYLabel *label = [YYLabel new];
label.size = layout.textBoundingSize;
label.textLayout = layout;
ææ¬è¡ä½ç½®è°æ´
// ç±äºä¸æãè±æãEmoji çåä½é«åº¦ä¸ä¸è´ï¼æè
å¯ææ¬ä¸åºç°äºä¸ååå·çåä½ï¼
// å¯è½ä¼é ææ¯è¡æåçé«åº¦ä¸ä¸è´ãè¿éå¯ä»¥æ·»å ä¸ä¸ªä¿®æ¹å¨æ¥å®ç°åºå®è¡é«ï¼æè
èªå®ä¹ææ¬è¡ä½ç½®ã
// ç®åçæ¹æ³:
// 1. å建ä¸ä¸ªææ¬è¡ä½ç½®ä¿®æ¹ç±»ï¼å®ç° `YYTextLinePositionModifier` åè®®ã
// 2. è®¾ç½®å° Label æ TextViewã
YYTextLinePositionSimpleModifier *modifier = [YYTextLinePositionSimpleModifier new];
modifier.fixedLineHeight = 24;
YYLabel *label = [YYLabel new];
label.linePositionModifier = modifier;
// å®å
¨æ§å¶:
YYTextLinePositionSimpleModifier *modifier = [YYTextLinePositionSimpleModifier new];
modifier.fixedLineHeight = 24;
YYTextContainer *container = [YYTextContainer new];
container.size = CGSizeMake(100, CGFLOAT_MAX);
container.linePositionModifier = modifier;
YYTextLayout *layout = [YYTextLayout layoutWithContainer:container text:text];
YYLabel *label = [YYLabel new];
label.size = layout.textBoundingSize;
label.textLayout = layout;
å¼æ¥æçå渲æ
// å¦æä½ å¨æ¾ç¤ºå符串æ¶ææ§è½é®é¢ï¼å¯ä»¥è¿æ ·å¼å¯å¼æ¥æ¨¡å¼ï¼
YYLabel *label = ...
label.displaysAsynchronously = YES;
// å¦æéè¦è·å¾æé«çæ§è½ï¼ä½ å¯ä»¥å¨åå°çº¿ç¨ç¨ `YYTextLayout` è¿è¡é¢æçï¼
YYLabel *label = [YYLabel new];
label.displaysAsynchronously = YES; //å¼å¯å¼æ¥ç»å¶
label.ignoreCommonProperties = YES; //忽ç¥é¤äº textLayout ä¹å¤çå
¶ä»å±æ§
dispatch_async(dispatch_get_global_queue(DISPATCH_QUEUE_PRIORITY_DEFAULT, 0), ^{
// å建å±æ§å符串
NSMutableAttributedString *text = [[NSMutableAttributedString alloc] initWithString:@"Some Text"];
text.yy_font = [UIFont systemFontOfSize:16];
text.yy_color = [UIColor grayColor];
[text yy_setColor:[UIColor redColor] range:NSMakeRange(0, 4)];
// å建ææ¬å®¹å¨
YYTextContainer *container = [YYTextContainer new];
container.size = CGSizeMake(100, CGFLOAT_MAX);
container.maximumNumberOfRows = 0;
// çææçç»æ
YYTextLayout *layout = [YYTextLayout layoutWithContainer:container text:text];
dispatch_async(dispatch_get_main_queue(), ^{
label.size = layout.textBoundingSize;
label.textLayout = layout;
});
});
ææ¬å®¹å¨æ§å¶
YYLabel *label = ...
label.textContainerPath = [UIBezierPath bezierPathWith...];
label.exclusionPaths = 	@[[UIBezierPath bezierPathWith...];,...];
label.textContainerInset = UIEdgeInsetsMake(...);
label.verticalForm = YES/NO;

YYTextView *textView = ...
textView.exclusionPaths = 	@[[UIBezierPath bezierPathWith...];,...];
textView.textContainerInset = UIEdgeInsetsMake(...);
textView.verticalForm = YES/NO;
ææ¬è§£æ
// 1. å建ä¸ä¸ªè§£æå¨
// å
ç½®ç®åç表æ
解æ
YYTextSimpleEmoticonParser *parser = [YYTextSimpleEmoticonParser new];
NSMutableDictionary *mapper = [NSMutableDictionary new];
mapper[@":smile:"] = [UIImage imageNamed:@"smile.png"];
mapper[@":cool:"] = [UIImage imageNamed:@"cool.png"];
mapper[@":cry:"] = [UIImage imageNamed:@"cry.png"];
mapper[@":wink:"] = [UIImage imageNamed:@"wink.png"];
parser.emoticonMapper = mapper;
// å
ç½®ç®åç markdown 解æ
YYTextSimpleMarkdownParser *parser = [YYTextSimpleMarkdownParser new];
[parser setColorWithDarkTheme];
// å®ç° `YYTextParser` åè®®çèªå®ä¹è§£æå¨
MyCustomParser *parser = ...
// 2. æ解æå¨æ·»å å° YYLabel æ YYTextView
YYLabel *label = ...
label.textParser = parser;
YYTextView *textView = ...
textView.textParser = parser;
Debug
// 设置ä¸ä¸ªå
¨å±ç debug option æ¥æ¾ç¤ºæçç»æã
YYTextDebugOption *debugOptions = [YYTextDebugOption new];
debugOptions.baselineColor = [UIColor redColor];
debugOptions.CTFrameBorderColor = [UIColor redColor];
debugOptions.CTLineFillColor = [UIColor colorWithRed:0.000 green:0.463 blue:1.000 alpha:0.180];
debugOptions.CGGlyphBorderColor = [UIColor colorWithRed:1.000 green:0.524 blue:0.000 alpha:0.200];
[YYTextDebugOption setSharedDebugOption:debugOptions];
æ´å¤ç¤ºä¾
æ¥çæ¼ç¤ºå·¥ç¨ Demo/YYTextDemo.xcodeproj:
å®è£
CocoaPods
- å¨ Podfile ä¸æ·»å
pod 'YYText'ã - æ§è¡
pod installæpod updateã - å¯¼å ¥ <YYText/YYText.h>ã
Carthage
- å¨ Cartfile ä¸æ·»å
github "ibireme/YYText"ã - æ§è¡
carthage update --platform ios并å°çæç framework æ·»å å°ä½ çå·¥ç¨ã - å¯¼å ¥ <YYText/YYText.h>ã
æå¨å®è£
- ä¸è½½ YYText æ件夹å çææå 容ã
- å° YYText å çæºæ件添å (ææ¾)å°ä½ çå·¥ç¨ã
- é¾æ¥ä»¥ä¸ frameworks:
- UIKit
- CoreFoundation
- CoreText
- QuartzCore
- Accelerate
- MobileCoreServices
- 导å
¥
YYText.hã
注æ
ä½ å¯ä»¥æ·»å YYImage æ YYWebImage å°ä½ çå·¥ç¨ï¼ä»¥æ¯æå¨ç»æ ¼å¼(GIF/APNG/WebP)çå¾çã
ææ¡£
ä½ å¯ä»¥å¨ CocoaDocs æ¥çå¨çº¿ API ææ¡£ï¼ä¹å¯ä»¥ç¨ appledoc æ¬å°çæææ¡£ã
ç³»ç»è¦æ±
该项ç®æä½æ¯æ iOS 6.0 å Xcode 8.0ã
å·²ç¥é®é¢
- YYText 并ä¸è½æ¯æææ CoreText/TextKit çå±æ§ï¼æ¯å¦ NSBackgroundColorãNSStrikethroughãNSUnderlineãNSAttachmentãNSLink çï¼ä½ YYText ä¸åºæ¬é½æ对åºå±æ§ä½ä¸ºæ¿ä»£ã详æ è§ä¸æ¹è¡¨æ ¼ã
- YYTextView æªå®ç°å±é¨å·æ°ï¼æ以å¨è¾å ¥åç¼è¾å¤§éçææ¬ï¼æ¯å¦è¶ è¿å¤§æ¦äºå个æ±åãæ大æ¦ä¸ä¸ä¸ªè±æå符ï¼æ¶ä¼åºç°è¾ææ¾çå¡é¡¿ç°è±¡ã
- ç«æçæ¶ï¼æ·»å exclusionPaths å¨å°æ°æ åµä¸å¯è½ä¼å¯¼è´ææ¬æ¾ç¤ºç©ºç½ã
- å½æ·»å äºéç©å½¢ç textContainerPathï¼å¹¶ä¸æåµå ¥å¤§äºææ¬æçæ¹å宽度ç RunDelegate æ¶ï¼RunDelegate ä¹åçæåä¼æ æ³æ¾ç¤ºãè¿æ¯ CoreText ç Bugï¼æè è¯´æ¯ Featureï¼ã
许å¯è¯
YYText ä½¿ç¨ MIT 许å¯è¯ï¼è¯¦æ è§ LICENSE æ件ã
Top Related Projects
[EXPERIMENTAL] Graceful morphing effects for UILabel written in Swift.
A drop-in replacement for UILabel that supports attributes, data detectors, links, and more
A Swift Autolayout DSL for iOS & OS X
The better way to deal with JSON data in Swift.
Elegant HTTP Networking in Swift
Convert designs to code with AI
Introducing Visual Copilot: A new AI model to turn Figma designs to high quality code using your components.
Try Visual Copilot