Top Related Projects
Animate elements as they scroll into view.
A collection of loading indicators animated with CSS
Automatically add a progress bar to your site.
A spinning activity indicator
Buttons with built-in loading indicators.
Simple javascript toast notifications
Quick Overview
MBProgressHUD is a popular iOS library for displaying loading indicators and progress HUDs (Heads-Up Displays) in iOS applications. It provides an easy-to-use, customizable, and lightweight solution for showing loading states and progress information to users.
Pros
- Simple and intuitive API for quick implementation
- Highly customizable appearance and behavior
- Supports both UIKit and SwiftUI
- Well-maintained and actively updated
Cons
- Limited to iOS platform only
- May require additional customization for complex use cases
- Some users report occasional issues with memory management
- Learning curve for advanced customizations
Code Examples
- Show a simple loading HUD:
let hud = MBProgressHUD.showAdded(to: view, animated: true)
hud.label.text = "Loading..."
- Show a progress HUD with a custom image:
let hud = MBProgressHUD.showAdded(to: view, animated: true)
hud.mode = .customView
hud.customView = UIImageView(image: UIImage(named: "custom-loader"))
hud.label.text = "Processing..."
- Show a HUD with progress bar:
let hud = MBProgressHUD.showAdded(to: view, animated: true)
hud.mode = .determinateHorizontalBar
hud.label.text = "Uploading..."

// Update progress
hud.progress = 0.5 // 50% complete
- Hide the HUD:
MBProgressHUD.hide(for: view, animated: true)
Getting Started
- Install MBProgressHUD using CocoaPods by adding the following to your Podfile:
pod 'MBProgressHUD', '~> 1.2.0'
-
Run
pod installin your terminal. -
Import MBProgressHUD in your Swift file:
import MBProgressHUD
- Use MBProgressHUD in your view controller:
class ViewController: UIViewController {
    override func viewDidLoad() {
        super.viewDidLoad()

        let hud = MBProgressHUD.showAdded(to: view, animated: true)
        hud.label.text = "Loading..."

        // Simulate a task
        DispatchQueue.main.asyncAfter(deadline: .now() + 3.0) {
            MBProgressHUD.hide(for: self.view, animated: true)
        }
    }
}
This setup will display a loading HUD when the view loads and hide it after 3 seconds.
Competitor Comparisons
Animate elements as they scroll into view.
Pros of ScrollReveal
- Focuses on scroll-based animations, providing a specialized solution for revealing elements as users scroll
- Offers a wide range of customization options for animations, including duration, delay, and easing functions
- Lightweight and easy to integrate into web projects without additional dependencies
Cons of ScrollReveal
- Limited to scroll-based animations, lacking the versatility of a general-purpose progress indicator
- May not be suitable for mobile applications or scenarios where scroll-based interactions are not applicable
- Requires JavaScript to function, potentially impacting performance on slower devices or connections
Code Comparison
ScrollReveal:
ScrollReveal().reveal('.element', {
    delay: 200,
    distance: '50px',
    origin: 'bottom',
    duration: 1000
});
MBProgressHUD:
MBProgressHUD *hud = [MBProgressHUD showHUDAddedTo:self.view animated:YES];
hud.mode = MBProgressHUDModeIndeterminate;
hud.label.text = @"Loading...";
[hud showAnimated:YES];
While ScrollReveal specializes in scroll-based animations for web projects, MBProgressHUD focuses on providing progress indicators and HUDs for iOS applications. ScrollReveal offers more customization for reveal animations, while MBProgressHUD provides a wider range of progress indicator types for mobile apps.
A collection of loading indicators animated with CSS
Pros of SpinKit
- Pure CSS animations, reducing dependency on JavaScript
- Wide variety of pre-built, customizable loading indicators
- Lightweight and easy to implement across different web platforms
Cons of SpinKit
- Limited to web-based applications, not suitable for native mobile apps
- Lacks advanced features like background dimming or text labels
- May require additional work to integrate with complex UI frameworks
Code Comparison
MBProgressHUD (Objective-C):
MBProgressHUD *hud = [MBProgressHUD showHUDAddedTo:self.view animated:YES];
hud.label.text = @"Loading...";
[hud showAnimated:YES];
SpinKit (HTML/CSS):
<div class="sk-spinner sk-spinner-pulse"></div>
.sk-spinner-pulse {
  width: 40px;
  height: 40px;
  background-color: #333;
  border-radius: 100%;
  animation: sk-pulseScaleOut 1s infinite ease-in-out;
}
Summary
MBProgressHUD is an Objective-C library for iOS applications, offering a robust set of features for displaying loading indicators and progress HUDs. SpinKit, on the other hand, is a collection of CSS spinners for web applications, providing a lightweight and easily customizable solution for loading animations. While MBProgressHUD is more suitable for native iOS development, SpinKit excels in web-based projects with its pure CSS approach and variety of spinner styles.
Automatically add a progress bar to your site.
Pros of pace
- Language-agnostic: Works with any JavaScript framework or vanilla JS
- Customizable: Offers more styling options and themes
- Lightweight: Smaller file size and fewer dependencies
Cons of pace
- Limited functionality: Focuses primarily on page load progress
- Less native feel: May not blend as seamlessly with iOS UI
- Fewer built-in options: Requires more custom configuration for advanced features
Code comparison
MBProgressHUD:
MBProgressHUD *hud = [MBProgressHUD showHUDAddedTo:self.view animated:YES];
hud.mode = MBProgressHUDModeIndeterminate;
hud.label.text = @"Loading...";
[hud showAnimated:YES];
pace:
Pace.start({
  document: false,
  ajax: true,
  eventLag: false
});

Pace.on('done', function() {
  console.log('Loading complete');
});
Summary
MBProgressHUD is an Objective-C library specifically designed for iOS applications, providing a native look and feel with a wide range of progress indicator types. It's well-suited for iOS developers who want a comprehensive, iOS-specific solution.
pace is a JavaScript library that focuses on page load progress indicators for web applications. It's more versatile in terms of platform support and easier to implement in web projects, but it may require more customization for complex use cases.
A spinning activity indicator
Pros of spin.js
- Platform-independent: Works in any JavaScript environment, including browsers and Node.js
- Highly customizable: Offers numerous options for size, color, speed, and more
- Lightweight: Minimal file size and no external dependencies
Cons of spin.js
- Requires more setup: Developers need to configure options and manually insert the spinner
- Limited to spinning animations: Doesn't offer as many progress indicator styles as MBProgressHUD
Code Comparison
MBProgressHUD (Objective-C):
MBProgressHUD *hud = [MBProgressHUD showHUDAddedTo:self.view animated:YES];
hud.label.text = @"Loading...";
[hud showAnimated:YES];
spin.js (JavaScript):
var opts = {
  lines: 13,
  length: 28,
  width: 14,
  radius: 42,
  scale: 1.00,
  corners: 1,
  color: '#000',
  fadeColor: 'transparent',
  speed: 1,
  rotate: 0,
  animation: 'spinner-line-fade-quick',
  direction: 1,
  zIndex: 2e9,
  className: 'spinner',
  top: '50%',
  left: '50%',
  shadow: '0 0 1px transparent',
  position: 'absolute'
};
var target = document.getElementById('foo');
var spinner = new Spinner(opts).spin(target);
The code comparison shows that MBProgressHUD requires less setup and is more concise, while spin.js offers more granular control over the spinner's appearance and behavior.
Buttons with built-in loading indicators.
Pros of Ladda
- Provides a more interactive and visually appealing loading indicator directly on buttons
- Supports multiple loading styles and animations
- Lightweight and easy to implement with minimal dependencies
Cons of Ladda
- Limited to button-based loading indicators, less versatile for general-purpose loading screens
- Requires more specific HTML structure and JavaScript initialization
- May not be as suitable for iOS-style native app interfaces
Code Comparison
MBProgressHUD:
MBProgressHUD *hud = [MBProgressHUD showHUDAddedTo:self.view animated:YES];
hud.label.text = @"Loading...";
[self doSomeLongTask];
[hud hideAnimated:YES];
Ladda:
var l = Ladda.create(document.querySelector('.ladda-button'));
l.start();
doSomeLongTask().then(function() {
    l.stop();
});
MBProgressHUD is designed for iOS applications and provides a centralized loading indicator, while Ladda focuses on enhancing button interactions with built-in loading animations. MBProgressHUD offers more flexibility for different types of loading scenarios in iOS apps, whereas Ladda excels in creating engaging button-specific loading experiences for web applications.
Simple javascript toast notifications
Pros of toastr
- Cross-browser compatibility and support for modern web technologies
- Highly customizable with various options for appearance and behavior
- Lightweight and easy to integrate into web applications
Cons of toastr
- Limited to web-based applications, not suitable for native mobile apps
- Requires additional setup for responsive design on different screen sizes
Code Comparison
MBProgressHUD (Objective-C):
MBProgressHUD *hud = [MBProgressHUD showHUDAddedTo:self.view animated:YES];
hud.mode = MBProgressHUDModeText;
hud.label.text = @"Loading...";
[hud hideAnimated:YES afterDelay:3.0f];
toastr (JavaScript):
toastr.options = {
  closeButton: true,
  progressBar: true
};
toastr.info('Loading...', 'Status', {timeOut: 3000});
Summary
MBProgressHUD is an Objective-C library for iOS applications, providing a native HUD (Heads-Up Display) for showing loading indicators and messages. toastr, on the other hand, is a JavaScript library for displaying non-blocking notifications in web applications.
While MBProgressHUD is specifically designed for iOS development, toastr offers cross-browser compatibility for web applications. toastr provides more customization options out of the box, but may require additional work for responsive design. MBProgressHUD integrates seamlessly with native iOS apps, offering a more platform-specific solution.
Choose MBProgressHUD for native iOS development and toastr for web-based applications requiring customizable notifications.
Convert  designs to code with AI

Introducing Visual Copilot: A new AI model to turn Figma designs to high quality code using your components.
Try Visual CopilotREADME
MBProgressHUD
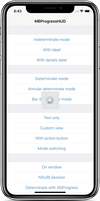
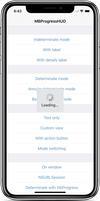
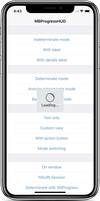
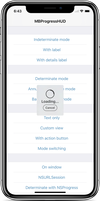
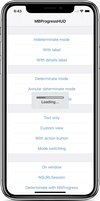
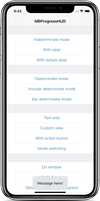
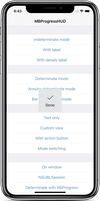
MBProgressHUD is an iOS drop-in class that displays a translucent HUD with an indicator and/or labels while work is being done in a background thread. The HUD is meant as a replacement for the undocumented, private UIKit UIProgressHUD with some additional features.
Requirements
MBProgressHUD works on iOS 9.0+. It depends on the following Apple frameworks, which should already be included with most Xcode templates:
- Foundation.framework
- UIKit.framework
- CoreGraphics.framework
You will need the latest developer tools in order to build MBProgressHUD. Old Xcode versions might work, but compatibility will not be explicitly maintained.
Adding MBProgressHUD to your project
CocoaPods
CocoaPods is the recommended way to add MBProgressHUD to your project.
- Add a pod entry for MBProgressHUD to your Podfile
pod 'MBProgressHUD', '~> 1.2.0' - Install the pod(s) by running
pod install. - Include MBProgressHUD wherever you need it with
#import "MBProgressHUD.h".
Carthage
- Add MBProgressHUD to your Cartfile. e.g.,
github "jdg/MBProgressHUD" ~> 1.2.0 - Run
carthage update - Follow the rest of the standard Carthage installation instructions to add MBProgressHUD to your project.
SwiftPM / Accio
- Add the following to your
Package.swift:.package(url: "https://github.com/jdg/MBProgressHUD.git", .upToNextMajor(from: "1.2.0")), - Next, add
MBProgressHUDto your App targets dependencies like so:.target(name: "App", dependencies: ["MBProgressHUD"]), - Then open your project in Xcode 11+ (SwiftPM) or run
accio update(Accio).
Source files
Alternatively you can directly add the MBProgressHUD.h and MBProgressHUD.m source files to your project.
- Download the latest code version or add the repository as a git submodule to your git-tracked project.
- Open your project in Xcode, then drag and drop
MBProgressHUD.handMBProgressHUD.monto your project (use the "Product Navigator view"). Make sure to select Copy items when asked if you extracted the code archive outside of your project. - Include MBProgressHUD wherever you need it with
#import "MBProgressHUD.h".
Static library
You can also add MBProgressHUD as a static library to your project or workspace.
- Download the latest code version or add the repository as a git submodule to your git-tracked project.
- Open your project in Xcode, then drag and drop
MBProgressHUD.xcodeprojonto your project or workspace (use the "Product Navigator view"). - Select your target and go to the Build phases tab. In the Link Binary With Libraries section select the add button. On the sheet find and add
libMBProgressHUD.a. You might also need to addMBProgressHUDto the Target Dependencies list. - Include MBProgressHUD wherever you need it with
#import <MBProgressHUD/MBProgressHUD.h>.
Usage
The main guideline you need to follow when dealing with MBProgressHUD while running long-running tasks is keeping the main thread work-free, so the UI can be updated promptly. The recommended way of using MBProgressHUD is therefore to set it up on the main thread and then spinning the task, that you want to perform, off onto a new thread.
[MBProgressHUD showHUDAddedTo:self.view animated:YES];
dispatch_async(dispatch_get_global_queue( DISPATCH_QUEUE_PRIORITY_LOW, 0), ^{
	// Do something...
	dispatch_async(dispatch_get_main_queue(), ^{
		[MBProgressHUD hideHUDForView:self.view animated:YES];
	});
});
You can add the HUD on any view or window. It is however a good idea to avoid adding the HUD to certain UIKit views with complex view hierarchies - like UITableView or UICollectionView. Those can mutate their subviews in unexpected ways and thereby break HUD display.
If you need to configure the HUD you can do this by using the MBProgressHUD reference that showHUDAddedTo:animated: returns.
MBProgressHUD *hud = [MBProgressHUD showHUDAddedTo:self.view animated:YES];
hud.mode = MBProgressHUDModeAnnularDeterminate;
hud.label.text = @"Loading";
[self doSomethingInBackgroundWithProgressCallback:^(float progress) {
	hud.progress = progress;
} completionCallback:^{
	[hud hideAnimated:YES];
}];
You can also use a NSProgress object and MBProgressHUD will update itself when there is progress reported through that object.
MBProgressHUD *hud = [MBProgressHUD showHUDAddedTo:self.view animated:YES];
hud.mode = MBProgressHUDModeAnnularDeterminate;
hud.label.text = @"Loading";
NSProgress *progress = [self doSomethingInBackgroundCompletion:^{
	[hud hideAnimated:YES];
}];
hud.progressObject = progress;
Keep in mind that UI updates, including calls to MBProgressHUD should always be done on the main thread.
If you need to run your long-running task in the main thread, you should perform it with a slight delay, so UIKit will have enough time to update the UI (i.e., draw the HUD) before you block the main thread with your task.
[MBProgressHUD showHUDAddedTo:self.view animated:YES];
dispatch_time_t popTime = dispatch_time(DISPATCH_TIME_NOW, 0.01 * NSEC_PER_SEC);
dispatch_after(popTime, dispatch_get_main_queue(), ^(void){
	// Do something...
	[MBProgressHUD hideHUDForView:self.view animated:YES];
});
You should be aware that any HUD updates issued inside the above block won't be displayed until the block completes.
For more examples, including how to use MBProgressHUD with asynchronous operations such as NSURLConnection, take a look at the bundled demo project. Extensive API documentation is provided in the header file (MBProgressHUD.h).
License
This code is distributed under the terms and conditions of the MIT license.
Change-log
A brief summary of each MBProgressHUD release can be found in the CHANGELOG.
Privacy
MBProgressHUD does not collect any data. See SDK Privacy Practices for more information.
Top Related Projects
Animate elements as they scroll into view.
A collection of loading indicators animated with CSS
Automatically add a progress bar to your site.
A spinning activity indicator
Buttons with built-in loading indicators.
Simple javascript toast notifications
Convert  designs to code with AI

Introducing Visual Copilot: A new AI model to turn Figma designs to high quality code using your components.
Try Visual Copilot


