
Top Related Projects

Official PyTorch implementation of StyleGAN3

A latent text-to-image diffusion model

PyTorch package for the discrete VAE used for DALL·E.

Implementation of DALL-E 2, OpenAI's updated text-to-image synthesis neural network, in Pytorch
High-Resolution Image Synthesis with Latent Diffusion Models
Quick Overview
The junyanz/iGAN repository is a PyTorch implementation of the Generative Adversarial Network (GAN) framework for interactive image generation. It allows users to interactively manipulate and generate images using a trained GAN model.
Pros
- Interactive Image Generation: The project provides a user-friendly interface for interactively generating and manipulating images using a trained GAN model.
- Flexible Architecture: The codebase is designed to be modular and extensible, allowing users to easily experiment with different GAN architectures and training techniques.
- Comprehensive Documentation: The repository includes detailed documentation, including instructions for training and using the GAN models, as well as examples and tutorials.
- Active Development: The project is actively maintained, with regular updates and bug fixes.
Cons
- Computational Complexity: Training and using GAN models can be computationally intensive, especially for high-resolution images.
- Limited Pre-trained Models: The repository only provides a few pre-trained GAN models, which may not be suitable for all use cases.
- Steep Learning Curve: Effectively using and customizing the GAN models in this repository may require a good understanding of deep learning and GAN architectures.
- Potential Bias in Generated Images: Like other GAN-based models, the generated images may reflect biases present in the training data.
Code Examples
# Load a pre-trained GAN model
from iGAN.models.dcgan import DCGAN
model = DCGAN(image_size=64, z_dim=100, num_channels=3)
model.load_state_dict(torch.load('path/to/pretrained/model.pth'))

# Generate a random image
z = torch.randn(1, 100)
image = model.generate(z)
This code loads a pre-trained DCGAN model and generates a random image using the model.
# Interactively manipulate an image
from iGAN.interactive import InteractiveGAN
interactive_gan = InteractiveGAN(model)
interactive_gan.interactive_edit()
This code creates an InteractiveGAN object and launches an interactive image manipulation interface, allowing the user to explore the latent space of the GAN model.
# Train a new GAN model
from iGAN.train import train_gan
train_gan(
    dataset_path='path/to/dataset',
    model_type='dcgan',
    image_size=64,
    z_dim=100,
    num_epochs=100,
    batch_size=64,
    learning_rate=0.0002,
    beta1=0.5,
    beta2=0.999,
    save_path='path/to/save/model.pth'
)
This code trains a new DCGAN model on the dataset located at 'path/to/dataset', and saves the trained model to 'path/to/save/model.pth'.
Getting Started
To get started with the junyanz/iGAN repository, follow these steps:
- Clone the repository:
git clone https://github.com/junyanz/iGAN.git
- Install the required dependencies:
cd iGAN
pip install -r requirements.txt
- Download a pre-trained GAN model:
wget https://drive.google.com/uc?export=download&id=1O7m1010EJjLE5QxLZiM9Fpjs7yxvCvQj -O pretrained_model.pth
- Run the interactive image generation demo:
python iGAN/interactive.py --model_path pretrained_model.pth
This will launch the interactive image manipulation interface, allowing you to explore the latent space of the pre-trained GAN model.
For more advanced usage, such as training your own GAN models or customizing the existing models, please refer to the project's documentation.
Competitor Comparisons
Official PyTorch implementation of StyleGAN3
Pros of StyleGAN3
- Higher image quality and resolution (up to 1024x1024)
- More advanced architecture with improved training stability
- Better control over generated image attributes
Cons of StyleGAN3
- Requires more computational resources for training
- More complex implementation, potentially harder to understand and modify
Code Comparison
iGAN:
def train_step(self, real_images):
    noise = torch.randn(batch_size, latent_dim)
    fake_images = self.generator(noise)
    d_loss = self.discriminator_loss(real_images, fake_images)
    g_loss = self.generator_loss(fake_images)
    return d_loss, g_loss
StyleGAN3:
def train_step(self, real_img, real_c, gen_z, gen_c, sync):
    with misc.ddp_sync(self.G, sync):
        gen_img = self.G(gen_z, gen_c)
    with misc.ddp_sync(self.D, sync):
        real_logits = self.D(real_img, real_c)
        fake_logits = self.D(gen_img, gen_c)
    d_loss = self.D_loss(real_logits, fake_logits)
    g_loss = self.G_loss(fake_logits)
    return d_loss, g_loss
The code comparison shows that StyleGAN3 has a more sophisticated training process, incorporating additional parameters and synchronization mechanisms for distributed training. iGAN's implementation is simpler but less flexible in terms of controlling the generation process.
A latent text-to-image diffusion model
Pros of stable-diffusion
- More advanced and capable of generating higher-quality images
- Supports text-to-image generation, offering greater flexibility
- Actively maintained with regular updates and improvements
Cons of stable-diffusion
- Requires more computational resources and longer processing times
- More complex to set up and use, with a steeper learning curve
- May have limitations on commercial use due to licensing restrictions
Code comparison
iGAN
from igan import iGAN

model = iGAN()
generated_image = model.generate(input_image)
stable-diffusion
from diffusers import StableDiffusionPipeline

pipe = StableDiffusionPipeline.from_pretrained("CompVis/stable-diffusion-v1-4")
image = pipe(prompt="a photo of an astronaut riding a horse on mars").images[0]
Summary
While iGAN focuses on interactive image generation and manipulation, stable-diffusion offers more advanced capabilities, including text-to-image generation. stable-diffusion produces higher-quality results but requires more resources and expertise to use effectively. iGAN may be more suitable for simpler tasks or users with limited computational power, while stable-diffusion is better suited for more complex image generation needs and those with access to powerful hardware.
PyTorch package for the discrete VAE used for DALL·E.
Pros of DALL-E
- More advanced text-to-image generation capabilities
- Produces higher quality and more diverse images
- Handles complex prompts and concepts better
Cons of DALL-E
- Closed-source, limiting accessibility and customization
- Requires significant computational resources
- May have ethical concerns regarding content generation
Code Comparison
While a direct code comparison is not possible due to DALL-E being closed-source, we can look at a snippet from iGAN for context:
# iGAN code snippet
def generate_image(self, z, G):
    return G.forward(z)
DALL-E's implementation would likely involve more complex natural language processing and image generation techniques, but the exact code is not publicly available.
Key Differences
- iGAN focuses on interactive image generation and editing, while DALL-E specializes in text-to-image generation
- iGAN is open-source and more accessible for researchers and developers
- DALL-E produces more photorealistic and diverse images across a wider range of concepts
Use Cases
- iGAN: Interactive image editing, style transfer, and simple image generation
- DALL-E: Complex text-to-image generation, creative content creation, and conceptual visualization
Both projects contribute significantly to the field of AI-generated imagery, with iGAN offering more flexibility for developers and DALL-E pushing the boundaries of what's possible in text-to-image generation.
Implementation of DALL-E 2, OpenAI's updated text-to-image synthesis neural network, in Pytorch
Pros of DALLE2-pytorch
- Implements the more advanced DALL-E 2 model, offering higher-quality image generation
- Provides a PyTorch implementation, which is more widely used in the research community
- Offers more flexibility and customization options for advanced users
Cons of DALLE2-pytorch
- More complex and resource-intensive, requiring more computational power
- May be more challenging for beginners to understand and use effectively
- Less focused on interactive image manipulation compared to iGAN
Code Comparison
DALLE2-pytorch:
dalle2 = DALLE2(
    dim = 512,
    image_size = 256,
    text_encoder_depth = 6,
    text_encoder_heads = 8,
    text_encoder_dim_head = 64,
    num_tokenizer_tokens = 49408,
    tokenizer_name = "gpt2"
)
iGAN:
model = iGAN(
    G_file='models/outdoor_64.dcgan_theano',
    nz=100,
    n_iterations=1000,
    use_cuda=True
)
The code snippets show the initialization of the main models in both repositories. DALLE2-pytorch offers more configuration options, while iGAN focuses on simplicity and ease of use.
High-Resolution Image Synthesis with Latent Diffusion Models
Pros of latent-diffusion
- Improved image quality and diversity compared to iGAN
- More efficient training and inference due to the latent space compression
- Better scalability to higher resolutions and complex datasets
Cons of latent-diffusion
- Potentially more complex architecture and training process
- May require more computational resources for training
- Less interpretable latent space compared to iGAN's direct pixel manipulation
Code comparison
latent-diffusion:
model = LatentDiffusion(
    linear_start=0.0015,
    linear_end=0.0195,
    num_timesteps=1000,
    latent_channels=4,
    scaling_factor=0.18215
)
iGAN:
model = iGAN(
    nz=100,
    ngf=64,
    ndf=64,
    nc=3,
    use_gpu=True
)
The code snippets show the initialization of the main models for each project. latent-diffusion uses a more complex setup with additional parameters for the diffusion process, while iGAN has a simpler initialization focused on GAN-specific parameters.
Convert  designs to code with AI

Introducing Visual Copilot: A new AI model to turn Figma designs to high quality code using your components.
Try Visual CopilotREADME
iGAN: Interactive Image Generation via Generative Adversarial Networks
Recent projects:
[pix2pix]: Torch implementation for learning a mapping from input images to output images.
[CycleGAN]: Torch implementation for learning an image-to-image translation (i.e., pix2pix) without input-output pairs.
[pytorch-CycleGAN-and-pix2pix]: PyTorch implementation for both unpaired and paired image-to-image translation.

Overview
iGAN (aka. interactive GAN) is the author's implementation of interactive image generation interface described in:
"Generative Visual Manipulation on the Natural Image Manifold"
Jun-Yan Zhu, Philipp Krähenbühl, Eli Shechtman, Alexei A. Efros
In European Conference on Computer Vision (ECCV) 2016

Given a few user strokes, our system could produce photo-realistic samples that best satisfy the user edits in real-time. Our system is based on deep generative models such as Generative Adversarial Networks (GAN) and DCGAN. The system serves the following two purposes:
- An intelligent drawing interface for automatically generating images inspired by the color and shape of the brush strokes.
- An interactive visual debugging tool for understanding and visualizing deep generative models. By interacting with the generative model, a developer can understand what visual content the model can produce, as well as the limitation of the model.
Please cite our paper if you find this code useful in your research. (Contact: Jun-Yan Zhu, junyanz at mit dot edu)
Getting started
- Install the python libraries. (See Requirements).
- Download the code from GitHub:
git clone https://github.com/junyanz/iGAN
cd iGAN
- Download the model. (See
Model Zoofor details):
bash ./models/scripts/download_dcgan_model.sh outdoor_64
- Run the python script:
THEANO_FLAGS='device=gpu0, floatX=float32, nvcc.fastmath=True' python iGAN_main.py --model_name outdoor_64
Requirements
The code is written in Python2 and requires the following 3rd party libraries:
- numpy
- OpenCV
sudo apt-get install python-opencv
sudo pip install --upgrade --no-deps git+git://github.com/Theano/Theano.git
sudo apt-get install python-qt4
sudo pip install qdarkstyle
sudo pip install dominate
- GPU + CUDA + cuDNN: The code is tested on GTX Titan X + CUDA 7.5 + cuDNN 5. Here are the tutorials on how to install CUDA and cuDNN. A decent GPU is required to run the system in real-time. [Warning] If you run the program on a GPU server, you need to use remote desktop software (e.g., VNC), which may introduce display artifacts and latency problem.
Python3
For Python3 users, you need to replace pip with pip3:
- PyQt4 with Python3:
sudo apt-get install python3-pyqt4
- OpenCV3 with Python3: see the installation instruction.
Interface:
See [Youtube] at 2:18s for the interactive image generation demos.

Layout
- Drawing Pad: This is the main window of our interface. A user can apply different edits via our brush tools, and the system will display the generated image. Check/Uncheck
Editsbutton to display/hide user edits. - Candidate Results: a display showing thumbnails of all the candidate results (e.g., different modes) that fits the user edits. A user can click a mode (highlighted by a green rectangle), and the drawing pad will show this result.
- Brush Tools:
Coloring Brushfor changing the color of a specific region;Sketching brushfor outlining the shape.Warping brushfor modifying the shape more explicitly. - Slider Bar: drag the slider bar to explore the interpolation sequence between the initial result (i.e., randomly generated image) and the current result (e.g., image that satisfies the user edits).
- Control Panel:
Play: play the interpolation sequence;Fix: use the current result as additional constraints for further editingRestart: restart the system;Save: save the result to a webpage.Edits: Check the box if you would like to show the edits on top of the generated image.
User interaction
Coloring Brush: right-click to select a color; hold left click to paint; scroll the mouse wheel to adjust the width of the brush.Sketching Brush: hold left-click to sketch the shape.Warping Brush: We recommend you first use coloring and sketching before the warping brush. Right-click to select a square region; hold left click to drag the region; scroll the mouse wheel to adjust the size of the square region.- Shortcuts: P for
Play, F forFix, R forRestart; S forSave; E forEdits; Q for quitting the program. - Tooltips: when you move the cursor over a button, the system will display the tooltip of the button.
Model Zoo:
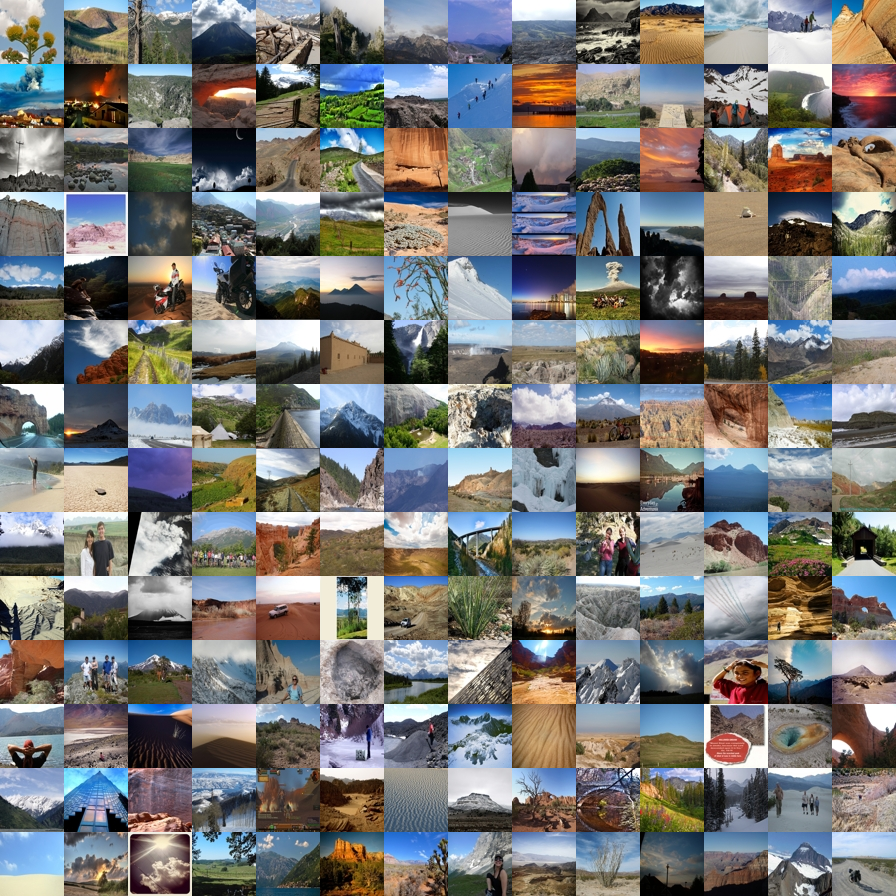
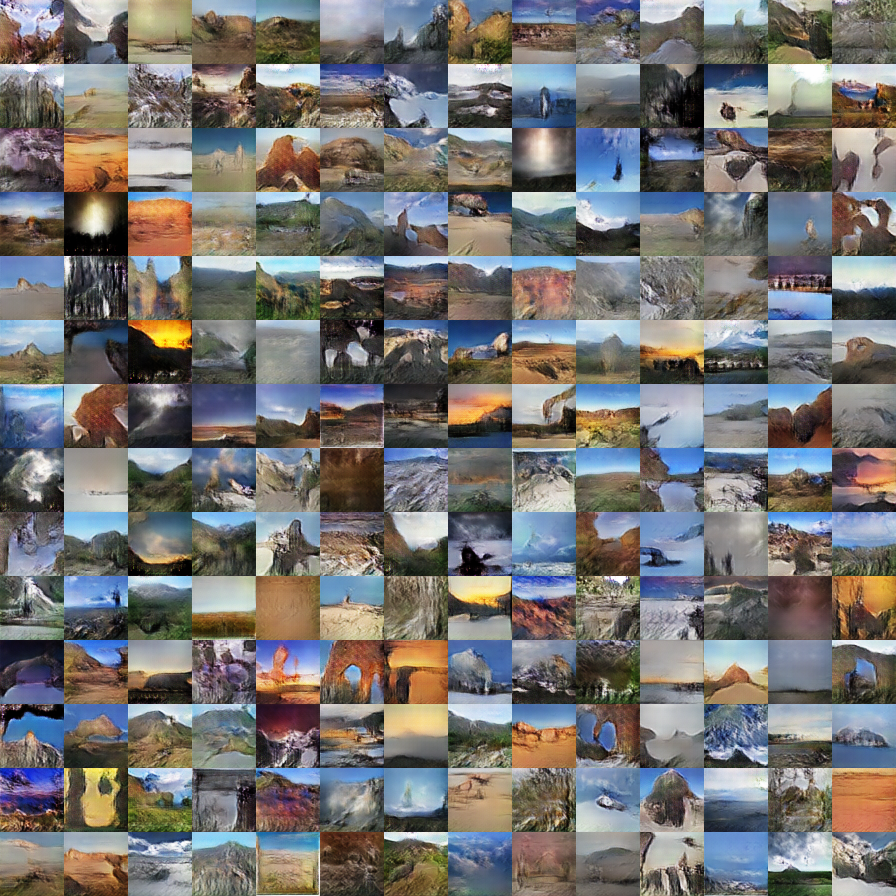
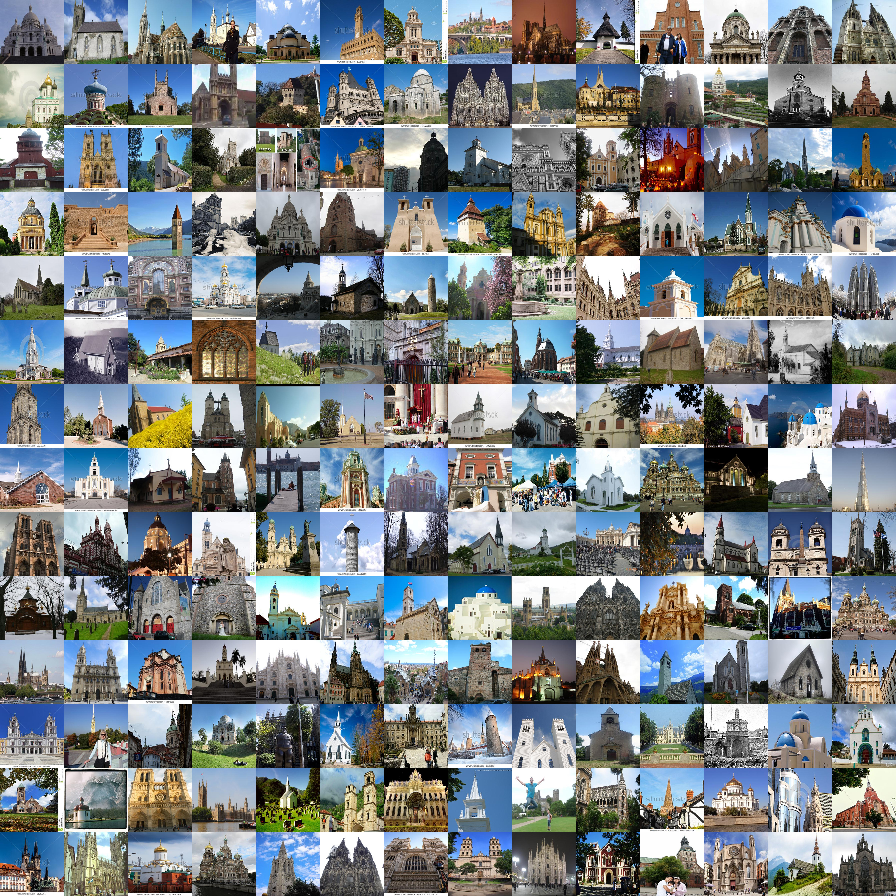
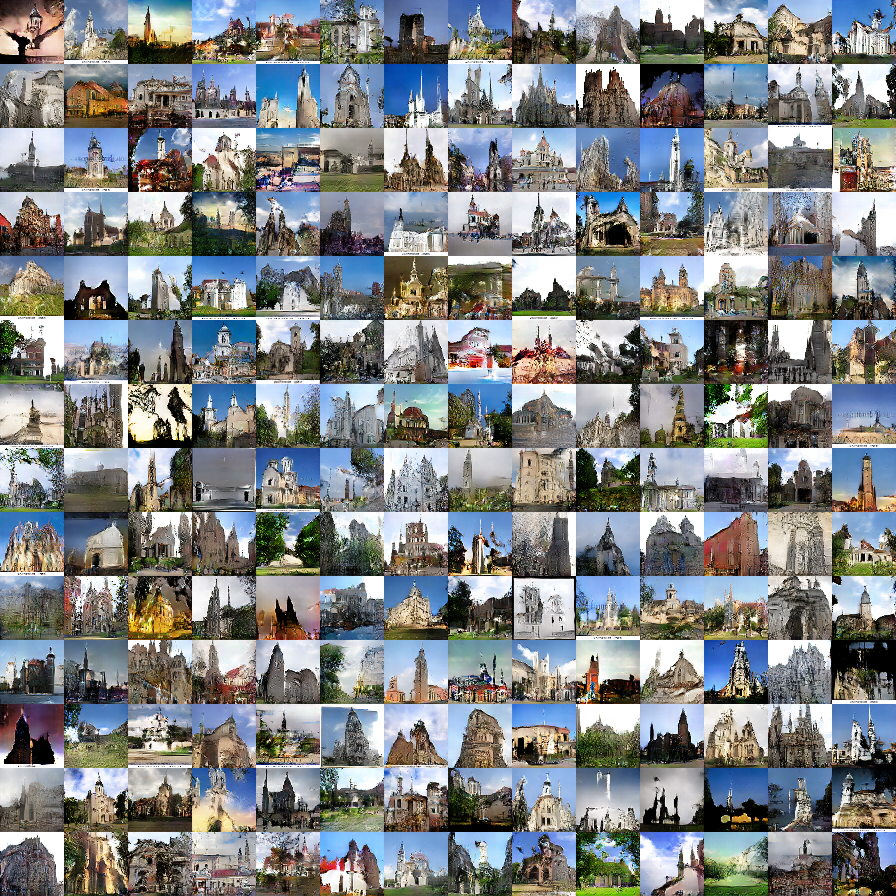
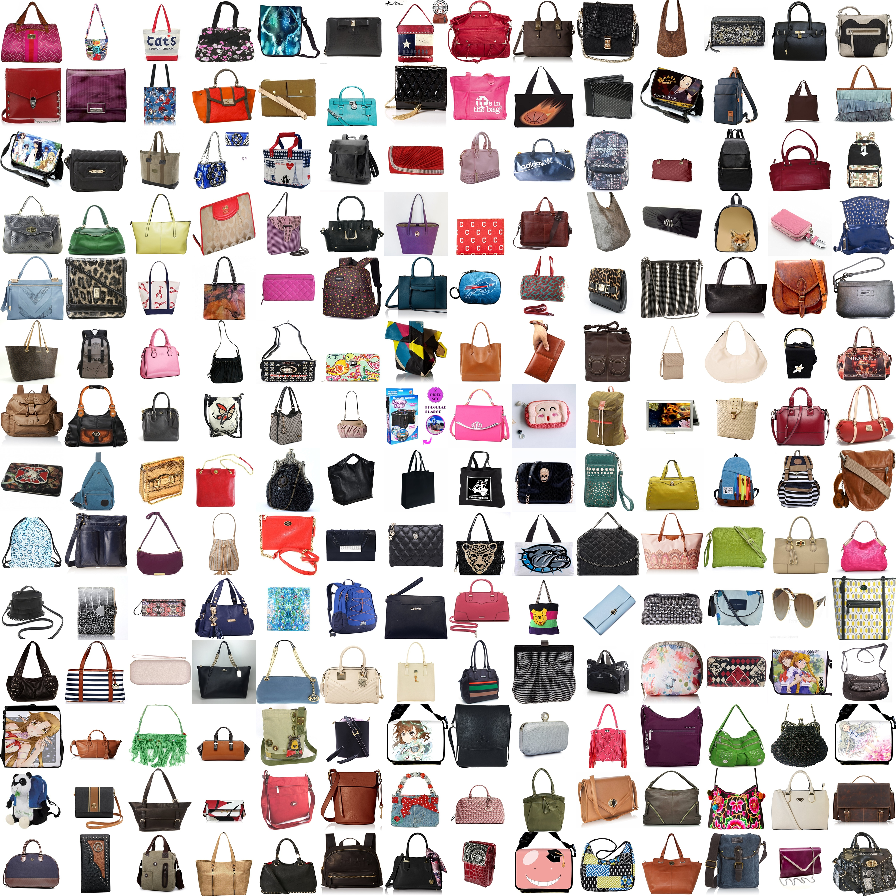
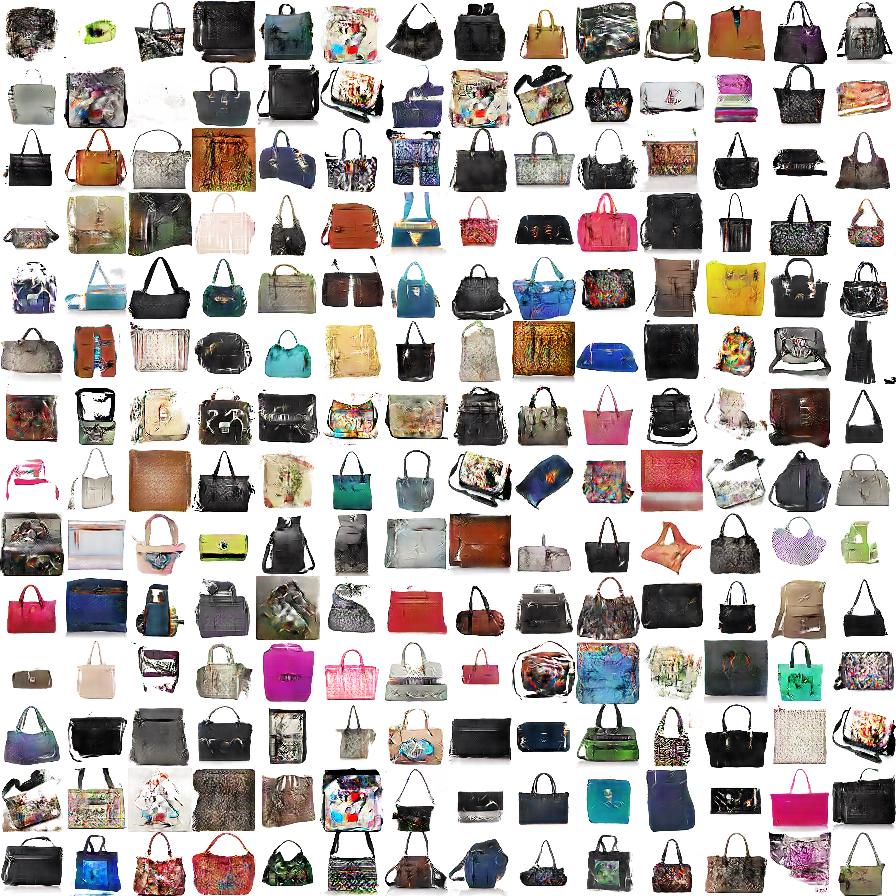
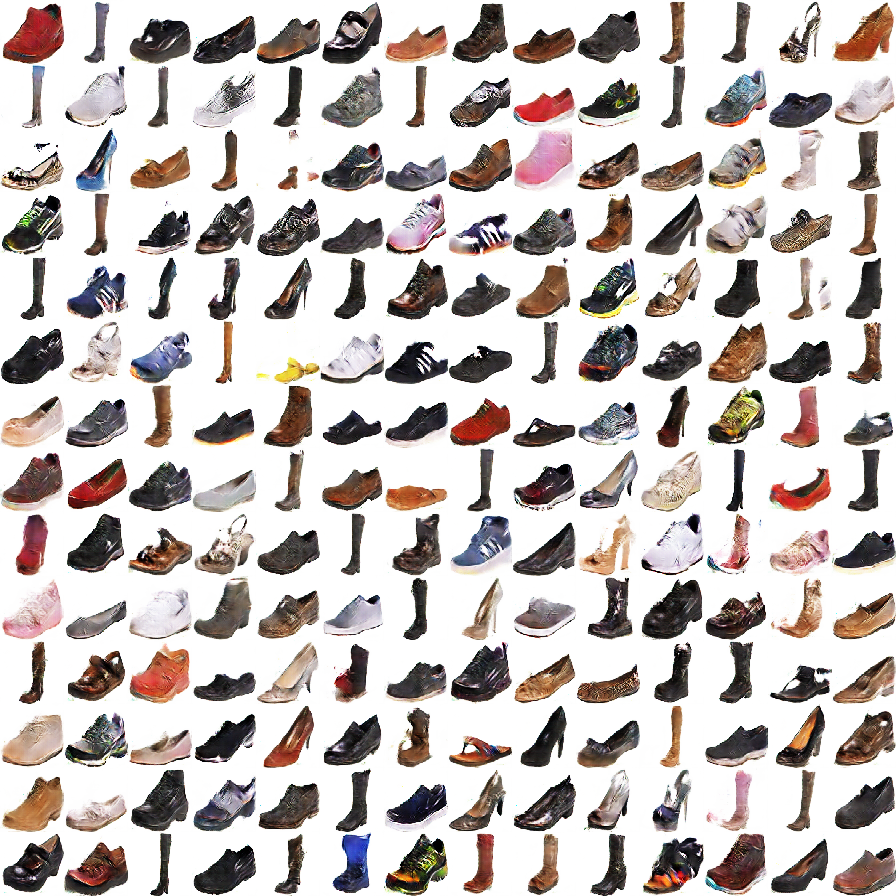
Download the Theano DCGAN model (e.g., outdoor_64). Before using our system, please check out the random real images vs. DCGAN generated samples to see which kind of images that a model can produce.
bash ./models/scripts/download_dcgan_model.sh outdoor_64
- ourdoor_64.dcgan_theano (64x64): trained on 150K landscape images from MIT Places dataset [Real vs. DCGAN].
- church_64.dcgan_theano (64x64): trained on 126k church images from the LSUN challenge [Real vs. DCGAN].
- handbag_64.dcgan_theano (64x64): trained on 137K handbag images downloaded from Amazon [Real vs. DCGAN].
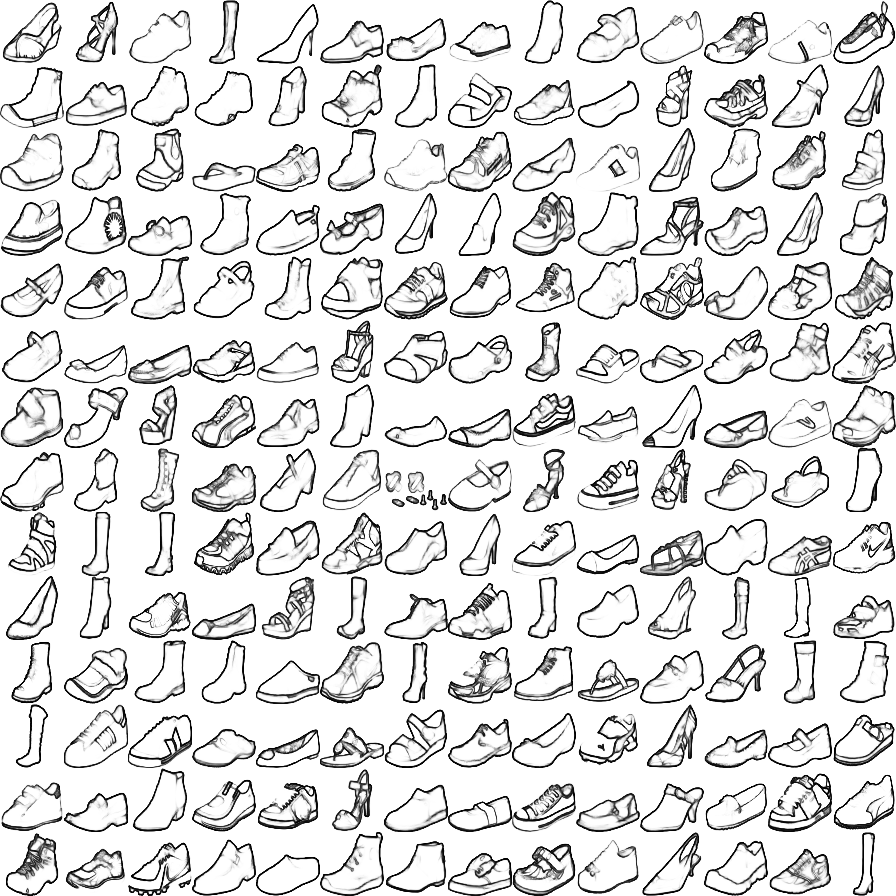
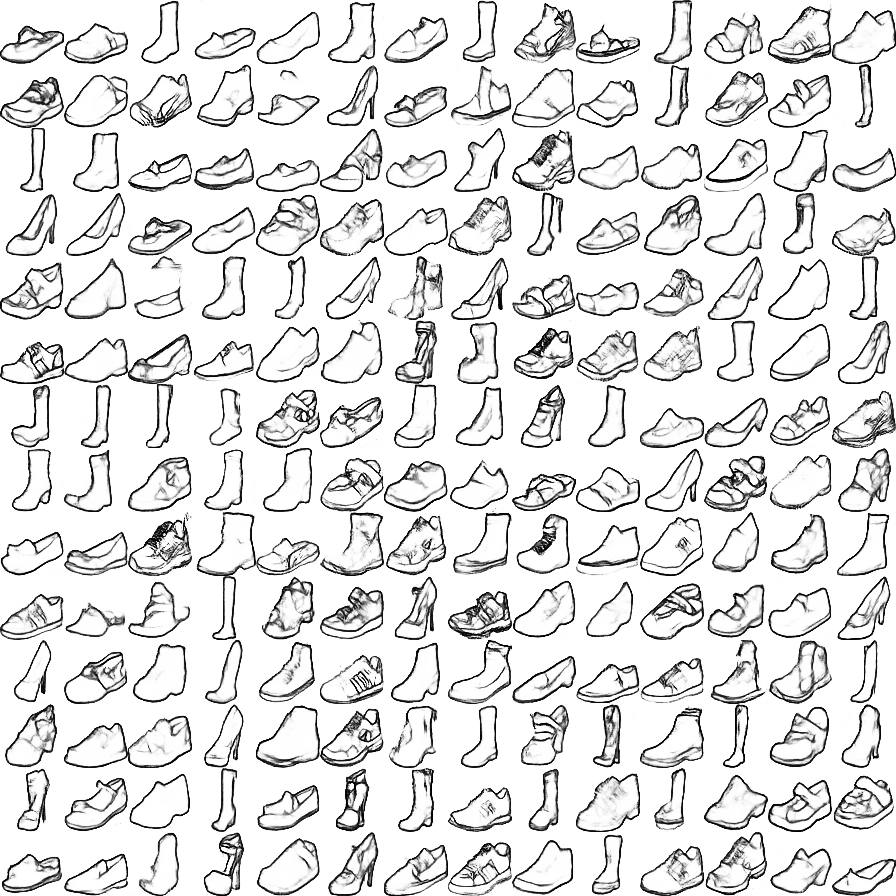
- shoes_64.dcgan_theano (64x64): trained on 50K shoes images collected by Yu and Grauman [Real vs. DCGAN].
- hed_shoes_64.dcgan_theano (64x64): trained on 50K shoes sketches (computed by HED) [Real vs. DCGAN]. (Use this model with
--shadowflag)
We provide a simple script to generate samples from a pre-trained DCGAN model. You can run this script to test if Theano, CUDA, cuDNN are configured properly before running our interface.
THEANO_FLAGS='device=gpu0, floatX=float32, nvcc.fastmath=True' python generate_samples.py --model_name outdoor_64 --output_image outdoor_64_dcgan.png
Command line arguments:
Type python iGAN_main.py --help for a complete list of the arguments. Here we discuss some important arguments:
--model_name: the name of the model (e.g., outdoor_64, shoes_64, etc.)--model_type: currently only supports dcgan_theano.--model_file: the file that stores the generative model; If not specified,model_file='./models/%s.%s' % (model_name, model_type)--top_k: the number of the candidate results being displayed--average: show an average image in the main window. Inspired by AverageExplorer, average image is a weighted average of multiple generated results, with the weights reflecting user-indicated importance. You can switch between average mode and normal mode by pressA.--shadow: We build a sketching assistance system for guiding the freeform drawing of objects inspired by ShadowDraw To use the interface, download the modelhed_shoes_64and run the following script
THEANO_FLAGS='device=gpu0, floatX=float32, nvcc.fastmath=True' python iGAN_main.py --model_name hed_shoes_64 --shadow --average
Dataset and Training
See more details here
Projecting an Image onto Latent Space

We provide a script to project an image into latent space (i.e., x->z):
- Download the pre-trained AlexNet model (
conv4):
bash models/scripts/download_alexnet.sh conv4
- Run the following script with a model and an input image. (e.g., model:
shoes_64.dcgan_theano, and input image./pics/shoes_test.png)
THEANO_FLAGS='device=gpu0, floatX=float32, nvcc.fastmath=True' python iGAN_predict.py --model_name shoes_64 --input_image ./pics/shoes_test.png --solver cnn_opt
- Check the result saved in
./pics/shoes_test_cnn_opt.png - We provide three methods:
optfor optimization method;cnnfor feed-forward network method (fastest);cnn_opthybrid of the previous methods (default and best). Typepython iGAN_predict.py --helpfor a complete list of the arguments.
Script without UI

We also provide a standalone script that should work without UI. Given user constraints (i.e., a color map, a color mask, and an edge map), the script generates multiple images that mostly satisfy the user constraints. See python iGAN_script.py --help for more details.
THEANO_FLAGS='device=gpu0, floatX=float32, nvcc.fastmath=True' python iGAN_script.py --model_name outdoor_64
Citation
@inproceedings{zhu2016generative,
  title={Generative Visual Manipulation on the Natural Image Manifold},
  author={Zhu, Jun-Yan and Kr{\"a}henb{\"u}hl, Philipp and Shechtman, Eli and Efros, Alexei A.},
  booktitle={Proceedings of European Conference on Computer Vision (ECCV)},
  year={2016}
}
Cat Paper Collection
If you love cats, and love reading cool graphics, vision, and learning papers, please check out our Cat Paper Collection:
[Github] [Webpage]
Acknowledgement
Top Related Projects
Official PyTorch implementation of StyleGAN3
A latent text-to-image diffusion model
PyTorch package for the discrete VAE used for DALL·E.
Implementation of DALL-E 2, OpenAI's updated text-to-image synthesis neural network, in Pytorch
High-Resolution Image Synthesis with Latent Diffusion Models
Convert designs to code with AI
Introducing Visual Copilot: A new AI model to turn Figma designs to high quality code using your components.
Try Visual Copilot