
Top Related Projects

The HTML5 Creation Engine: Create beautiful digital content with the fastest, most flexible 2D WebGL renderer.

Phaser is a fun, free and fast 2D game framework for making HTML5 games for desktop and mobile web browsers, supporting Canvas and WebGL rendering.

Cocos2d for Web Browsers. Built using JavaScript.

JavaScript Game Engine

Kiwi.js is a blazingly fast mobile & desktop browser based HTML5 game framework. It uses CocoonJS for publishing to the AppStore.
Quick Overview
melonJS is a lightweight, open-source game engine for HTML5 games. It provides a comprehensive set of tools and features for developing 2D games that run in web browsers, using JavaScript and HTML5 technologies.
Pros
- Easy to learn and use, especially for developers familiar with JavaScript
- Supports both desktop and mobile platforms
- Includes a built-in physics engine and collision detection system
- Active community and regular updates
Cons
- Limited 3D capabilities compared to some other game engines
- Documentation could be more comprehensive for advanced features
- Smaller ecosystem of plugins and extensions compared to larger game engines
- Performance may not be as optimized as some native game engines
Code Examples
- Creating a basic game entity:
game.Entity = me.Entity.extend({
    init: function(x, y, settings) {
        this._super(me.Entity, 'init', [x, y, settings]);
        this.body.setVelocity(3, 15);
        this.body.setFriction(0.4, 0);
    },
    update: function(dt) {
        this.body.update(dt);
        return true;
    }
});
- Adding a simple collision detection:
update: function(dt) {
    if (me.collision.check(this)) {
        me.collision.response.clear();
    }
    return true;
}
- Loading and playing audio:
me.audio.load([{
    name: "background_music",
    type: "audio/mpeg",
    src: "data/audio/background_music.mp3"
}]);

me.audio.play("background_music", true);
Getting Started
-
Install melonJS using npm:
npm install melonjs -
Create a basic HTML file:
<!DOCTYPE html> <html> <head> <title>My melonJS Game</title> </head> <body> <div id="screen"></div> <script src="node_modules/melonjs/dist/melonjs.js"></script> <script src="js/game.js"></script> </body> </html> -
Create a
game.jsfile with basic game setup:me.device.onReady(function() { me.video.init(800, 600, {parent: "screen", scale: "auto"}); me.loader.preload([], function() { me.state.set(me.state.PLAY, new PlayScreen()); me.state.change(me.state.PLAY); }); }); -
Run a local server to test your game.
Competitor Comparisons
The HTML5 Creation Engine: Create beautiful digital content with the fastest, most flexible 2D WebGL renderer.
Pros of PixiJS
- Larger community and more frequent updates
- Better performance for complex graphics and animations
- More comprehensive documentation and examples
Cons of PixiJS
- Steeper learning curve for beginners
- Larger file size, which may impact load times
- Less focus on game-specific features out of the box
Code Comparison
MelonJS:
me.game.world.addChild(me.pool.pull("player", 100, 100));
PixiJS:
const player = new PIXI.Sprite(PIXI.Texture.from('player.png'));
app.stage.addChild(player);
Key Differences
- MelonJS is more focused on game development, while PixiJS is a general-purpose rendering engine
- PixiJS offers more flexibility for custom rendering and effects
- MelonJS provides built-in physics and collision detection, which PixiJS lacks by default
Community and Support
- PixiJS has a larger user base and more third-party plugins
- MelonJS has a smaller but dedicated community focused on game development
Performance
- PixiJS generally offers better performance for complex scenes and particle systems
- MelonJS is optimized for 2D game development and may perform better for simpler games
Learning Resources
- PixiJS has more extensive documentation and tutorials available
- MelonJS provides game-specific examples and guides
Phaser is a fun, free and fast 2D game framework for making HTML5 games for desktop and mobile web browsers, supporting Canvas and WebGL rendering.
Pros of Phaser
- Larger community and ecosystem, with more resources and plugins available
- More comprehensive documentation and tutorials
- Better performance for complex games and large-scale projects
Cons of Phaser
- Steeper learning curve, especially for beginners
- Larger file size, which may impact load times for web games
- More complex setup process compared to MelonJS
Code Comparison
MelonJS:
me.game.onload = function() {
    me.state.set(me.state.PLAY, new PlayScreen());
    me.state.change(me.state.PLAY);
};
Phaser:
const config = {
    type: Phaser.AUTO,
    scene: PlayScene
};
const game = new Phaser.Game(config);
Both frameworks use a scene-based approach, but Phaser's configuration is more concise. MelonJS uses a state system, while Phaser uses a scene system. Phaser's setup is more straightforward, but MelonJS offers more flexibility in state management.
Overall, Phaser is better suited for larger, more complex projects with a need for extensive community support and resources. MelonJS is a good choice for simpler games or developers who prefer a more lightweight framework with a gentler learning curve.
Cocos2d for Web Browsers. Built using JavaScript.
Pros of cocos2d-html5
- More comprehensive framework with a wider range of features and tools
- Larger community and ecosystem, providing better support and resources
- Cross-platform compatibility, allowing development for multiple platforms
Cons of cocos2d-html5
- Steeper learning curve due to its complexity and extensive feature set
- Heavier framework, potentially impacting performance on lower-end devices
- Less frequent updates and maintenance compared to melonJS
Code Comparison
melonJS:
me.game.onload = function() {
    me.state.set(me.state.PLAY, new PlayScreen());
    me.state.change(me.state.PLAY);
};
cocos2d-html5:
var MyScene = cc.Scene.extend({
    onEnter: function () {
        this._super();
        var layer = new MyLayer();
        this.addChild(layer);
    }
});
Both frameworks use similar concepts for scene management, but cocos2d-html5 employs a more object-oriented approach with class extension. melonJS uses a simpler state-based system, which may be easier for beginners to grasp. However, cocos2d-html5's approach offers more flexibility and power for complex game structures.
JavaScript Game Engine
Pros of Crafty
- More flexible entity-component system, allowing for easier composition of game objects
- Larger and more active community, resulting in more resources and third-party plugins
- Better suited for complex, multi-scene games with its scene management system
Cons of Crafty
- Steeper learning curve due to its unique entity-component architecture
- Less optimized for mobile devices compared to MelonJS
- Documentation can be outdated or incomplete in some areas
Code Comparison
MelonJS:
me.game.world.addChild(me.pool.pull("player", 100, 100));
Crafty:
Crafty.e("2D, Canvas, Color").attr({x: 100, y: 100, w: 50, h: 50}).color("red");
Both frameworks offer different approaches to creating game entities. MelonJS uses a pooling system for object creation, while Crafty employs a more flexible entity creation method with component-based attributes.
MelonJS focuses on simplicity and ease of use, making it ideal for beginners and mobile game development. Crafty, on the other hand, provides more flexibility and power for complex game structures, but may require more time to master.
Ultimately, the choice between these frameworks depends on the specific requirements of your game project and your familiarity with different programming paradigms.
Kiwi.js is a blazingly fast mobile & desktop browser based HTML5 game framework. It uses CocoonJS for publishing to the AppStore.
Pros of Kiwi.js
- More modern architecture with better support for ES6+ features
- Extensive plugin system for easy extensibility
- Better documentation and learning resources
Cons of Kiwi.js
- Smaller community and fewer updates compared to MelonJS
- Less optimized for mobile devices
- Steeper learning curve for beginners
Code Comparison
MelonJS example:
me.game.onload = function() {
    me.state.set(me.state.PLAY, new PlayScreen());
    me.state.change(me.state.PLAY);
};
Kiwi.js example:
var game = new Kiwi.Game('content', 'MyGame', state, { renderer: Kiwi.RENDERER_WEBGL });
game.states.addState(PlayState);
game.states.switchState("PlayState");
Both frameworks use a state-based approach for game management, but Kiwi.js has a more object-oriented structure. MelonJS uses a global me object, while Kiwi.js creates a game instance. Kiwi.js also explicitly specifies the renderer, offering more flexibility.
MelonJS is generally easier for beginners to pick up, while Kiwi.js provides more advanced features and customization options. The choice between the two depends on the specific needs of your project and your familiarity with JavaScript game development.
Convert  designs to code with AI

Introducing Visual Copilot: A new AI model to turn Figma designs to high quality code using your components.
Try Visual CopilotREADME
melonJS 2


![]()
![]()
A fresh, modern & lightweight HTML5 game engine
melonJS 2 is a modern version of the melonJS game engine that was first released in 2011. It has been rebuilt entirely using ES6 class, inheritance and semantic, and bundled using esbuild for blazing fast build performance and provide modern features such as tree-shaking.
Note: migrating an existing project to melonJS 2 (version 10.0 and higher) will definitely break your game (ES6 semantic and inheritance, nodeJS event emitter, and no backward compatibility with deprecated legacy APIs), and you might want to read first this small step by step guide on upgrading to melonJS 2. If you are looking at the legacy version (9.x and lower) of melonJS, you can find it here under the legacy branch.
melonJS is open-source, licensed under the MIT License, and actively developed and maintained with the help of a small team of enthusiasts at AltByte in Singapore.
About melonJS
melonJS is a fully featured game engine :
Compatibility
- Standalone library (does not rely on anything else, except a HTML5 capable browser)
- Compatible with all major browsers (Chrome, Safari, Firefox, Opera, Edge) and mobile devices
Graphics
- 2D sprite-based graphic engine
- Blazing Fast WebGL renderer for desktop and mobile devices with fallback to Canvas rendering
- High DPI resolution & Canvas advanced auto scaling
- Sprite with 9-slice scaling option, and animation management
- built-in effects such as tinting and masking
- Standard spritesheet, single and multiple Packed Textures support
- System & Bitmap Text
Sound
- Web Audio support with 3D spatial audio or stereo panning based on Howler
- fallback to Multi-channel HTML5 audio for legacy browsers
Physic
- Polygon (SAT) based collision algorithm for accurate detection and response
- Fast Broad-phase collision detection using spatial partitioning
- Collision filtering for optimized automatic collision detection
Input
- Mouse and Touch device support (with mouse emulation)
- Device motion & accelerometer support
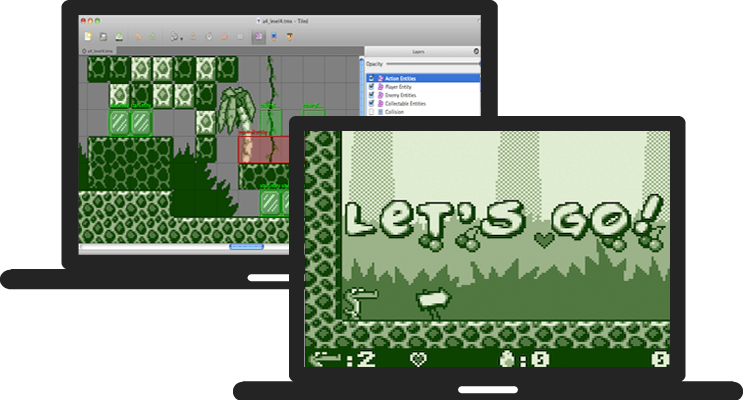
Level Editor
- Tiled map format version +1.0 built-in support for easy level design
- Uncompressed and compressed Plain, Base64, CSV and JSON encoded XML tilemap loading
- Orthogonal, Isometric and Hexagonal maps (both normal and staggered)
- Multiple layers (multiple background/foreground, collision and Image layers)
- Animated and multiple Tileset support
- Tileset transparency settings
- Layers alpha and tinting settings
- Rectangle, Ellipse, Polygon and Polyline objects support
- Tiled Objects
- Flipped & rotated Tiles
- Dynamic Layer and Object/Group ordering
- Dynamic Entity loading
- Shape based Tile collision support
Assets
- Asynchronous asset loading
- A fully customizable preloader
And Also
- A state manager (to easily manage loading, menu, options, in-game state)
- Tween Effects, Transition effects
- Pooling support for object recycling
- Basic Particle System
- nodeJS EventEmitter based event system
Tools integration
melonJS is supporting the below tools and frameworks natively or through our official plugin(s) :


Tools integration and usage with melonJS is documented in our Wiki.
Using melonJS
For your first time using melonJS, this is where you start
You may find it useful to skim the overview found at the wiki Details & Usage
When starting your own projects, checkout our ES6 x Vite boilerplate or the TypeScript x Vite boilerplate
Demos
A few demos of melonJS capabilities :
- Platformer Demo (source)
- Isometric Demo (source)
- Sprite Demo (source)
- Masking Demo (source) (WARNING: may potentially trigger seizures for people with photosensitive epilepsy)
- Primitive Drawing Demo (source)
- UI Demo (source)
- Tiled Map Loader Demo (source)
- Video Demo (source)
More examples are available here
Basic Hello World Example
import * as me from "https://esm.run/melonjs";

me.device.onReady(function () {
    // initialize the display canvas once the device/browser is ready
    if (!me.video.init(1218, 562, {parent : "screen", scale : "auto"})) {
        alert("Your browser does not support HTML5 canvas.");
        return;
    }

    // set a gray background color
    me.game.world.backgroundColor.parseCSS("#202020");

    // add a font text display object
    me.game.world.addChild(new me.Text(609, 281, {
        font: "Arial",
        size: 160,
        fillStyle: "#FFFFFF",
        textBaseline : "middle",
        textAlign : "center",
        text : "Hello World !"
    }));
});
Simple hello world using melonJS 2 (version 10.x or higher)
Documentation
Plugins
melonJS provide a plugin system allowing to extend the engine capabilities.
Here is the list of official plugins maintained by the melonJS team:
- debug-plugin - a debug panel for inspecting game objects
- tiled-inflate-plugin - enable loading and parsing of zlib and gzip compressed Tiled maps
- spine-plugin - Spine runtime integration to render Spine skeletal animations
If you wish to develop your own plugin, we also provide a plugin template to help you get started.
Download melonJS
The latest builds with corresponding release note are available for direct download here.
melonJS 2 now only provides an ES6 Bundle :
| build | description |
|---|---|
index.js | a tree-shakeable ES6 Module Directory |
index.d.ts | typescript declaration files |
Note: if you need your application to be compatible with ES5, refer to our boilerplate that provides automatic transpiling to ES5.
The latest version of melonJS can be installed through NPM :
$ npm install melonjs
And then import melonjs in your project using :
$ import * as me from 'melonjs';
Or it can simply be added to your html, using jsDeliver content delivery network (CDN) :
<!-- load the ES6 module bundle of melonJS v10.0 -->
<script type="module" src="https://esm.run/melonjs@10.0"></script>
<!-- omit the version completely to get the latest one -->
<!-- you should NOT use this in production -->
<script type="module" src="https://esm.run/melonjs"></script>
Note: starting from the 10.0.0 version, the debug plugin is no longer provided as part of the melonJS library release, and has been moved to the official boilerplate
Contributing
For most users, all you probably want is to use melonJS, and all you need then is just to download the latest built release to get started.
If you want to start to be part and contribute to the project, make sure to read our Contributing Guide before starting submitting changes or new features.
Contributors
Sponsors
Support the development of melonJS by becoming a sponsor. Get your logo in our README with a link to your site or become a backer and get your name in the BACKERS list. Any level of support is really appreciated and goes a long way !


Top Related Projects
The HTML5 Creation Engine: Create beautiful digital content with the fastest, most flexible 2D WebGL renderer.
Phaser is a fun, free and fast 2D game framework for making HTML5 games for desktop and mobile web browsers, supporting Canvas and WebGL rendering.
Cocos2d for Web Browsers. Built using JavaScript.
JavaScript Game Engine
Kiwi.js is a blazingly fast mobile & desktop browser based HTML5 game framework. It uses CocoonJS for publishing to the AppStore.
Convert designs to code with AI
Introducing Visual Copilot: A new AI model to turn Figma designs to high quality code using your components.
Try Visual Copilot