
Top Related Projects

An Android library that allows you to easily create applications with slide-in menus. You may use it in your Android apps provided that you cite this project and include the license in your app. Thanks!

Facebook-like side menu for iOS

iOS 7/8 style side menu with parallax effect.

iOS Slide Menu View based on Google+, iQON, Feedly, Ameba iOS app. It is written in pure swift.

A UIViewController subclass for presenting side view controllers inspired on the FaceBook and Wunderlist apps, done right !

Customizable sliding view controller container.
Quick Overview
MMDrawerController is an iOS library that provides a lightweight, easy-to-use side drawer navigation controller. It allows developers to create sliding drawer menus similar to those found in popular apps like Facebook and Path, with support for both left and right side drawers.
Pros
- Easy to integrate and customize
- Supports both left and right side drawers
- Smooth animations and gestures for opening/closing drawers
- Extensive documentation and example project provided
Cons
- Not actively maintained (last update was in 2017)
- Limited to iOS platform only
- May require additional work to adapt to modern iOS design guidelines
- Some reported issues with iOS 11+ compatibility
Code Examples
- Initialize the drawer controller:
UIViewController *centerViewController = [[UIViewController alloc] init];
UIViewController *leftDrawerViewController = [[UIViewController alloc] init];
UIViewController *rightDrawerViewController = [[UIViewController alloc] init];

MMDrawerController *drawerController = [[MMDrawerController alloc]
                                        initWithCenterViewController:centerViewController
                                        leftDrawerViewController:leftDrawerViewController
                                        rightDrawerViewController:rightDrawerViewController];
- Open the left drawer:
[self.mm_drawerController openDrawerSide:MMDrawerSideLeft animated:YES completion:nil];
- Set gesture completion block:
[self.mm_drawerController
    setGestureCompletionBlock:^(MMDrawerController *drawerController, UIGestureRecognizer *gesture) {
        NSLog(@"Gesture completed");
    }
];
Getting Started
-
Install via CocoaPods by adding to your Podfile:
pod 'MMDrawerController', '~> 0.6.0' -
Import the header in your view controller:
#import <MMDrawerController/MMDrawerController.h> -
Initialize and present the drawer controller:
UIViewController *center = [[UIViewController alloc] init];
UIViewController *left = [[UIViewController alloc] init];
UIViewController *right = [[UIViewController alloc] init];

MMDrawerController *drawerController = [[MMDrawerController alloc]
                                        initWithCenterViewController:center
                                        leftDrawerViewController:left
                                        rightDrawerViewController:right];

[self presentViewController:drawerController animated:YES completion:nil];
Competitor Comparisons
An Android library that allows you to easily create applications with slide-in menus. You may use it in your Android apps provided that you cite this project and include the license in your app. Thanks!
Pros of SlidingMenu
- More customizable appearance with various animation styles
- Supports both left and right sliding menus
- Includes a built-in shadow effect for depth
Cons of SlidingMenu
- Less actively maintained (last update in 2016)
- Limited to sliding menu functionality only
- Potentially more complex to implement for basic use cases
Code Comparison
MMDrawerController:
MMDrawerController *drawerController = [[MMDrawerController alloc]
    initWithCenterViewController:centerViewController
    leftDrawerViewController:leftDrawerViewController
    rightDrawerViewController:rightDrawerViewController];
[drawerController setOpenDrawerGestureModeMask:MMOpenDrawerGestureModeAll];
[drawerController setCloseDrawerGestureModeMask:MMCloseDrawerGestureModeAll];
SlidingMenu:
SlidingMenu menu = new SlidingMenu(this);
menu.setMode(SlidingMenu.LEFT);
menu.setTouchModeAbove(SlidingMenu.TOUCHMODE_FULLSCREEN);
menu.setShadowWidthRes(R.dimen.shadow_width);
menu.setBehindOffsetRes(R.dimen.slidingmenu_offset);
menu.setFadeDegree(0.35f);
menu.attachToActivity(this, SlidingMenu.SLIDING_CONTENT);
menu.setMenu(R.layout.menu);
Both libraries offer easy-to-use APIs for implementing drawer/sliding menu functionality. MMDrawerController focuses on a clean, gesture-based approach, while SlidingMenu provides more customization options for appearance and behavior. The choice between them depends on specific project requirements and desired user experience.
Facebook-like side menu for iOS
Pros of MFSideMenu
- Simpler implementation with fewer configuration options, making it easier to set up quickly
- Supports both left and right side menus out of the box
- Lightweight and has fewer dependencies
Cons of MFSideMenu
- Less customizable compared to MMDrawerController
- Fewer animation options for menu transitions
- Not as actively maintained, with fewer recent updates
Code Comparison
MFSideMenu:
MFSideMenuContainerViewController *container = [MFSideMenuContainerViewController
                                                containerWithCenterViewController:centerViewController
                                                leftMenuViewController:leftMenuViewController
                                                rightMenuViewController:rightMenuViewController];
MMDrawerController:
MMDrawerController *drawerController = [[MMDrawerController alloc]
                                        initWithCenterViewController:centerViewController
                                        leftDrawerViewController:leftDrawerViewController
                                        rightDrawerViewController:rightDrawerViewController];
drawerController.openDrawerGestureModeMask = MMOpenDrawerGestureModeAll;
drawerController.closeDrawerGestureModeMask = MMCloseDrawerGestureModeAll;
Both libraries provide similar functionality for implementing side menus in iOS applications. MMDrawerController offers more customization options and is more actively maintained, while MFSideMenu provides a simpler implementation with fewer configuration options. The choice between the two depends on the specific requirements of your project and the level of customization needed.
iOS 7/8 style side menu with parallax effect.
Pros of RESideMenu
- Supports both left and right side menus simultaneously
- Includes built-in animations and customizable transitions
- Easier to implement with less setup code required
Cons of RESideMenu
- Less flexible for custom implementations
- May have performance issues with complex view hierarchies
- Limited options for gesture customization
Code Comparison
MMDrawerController:
MMDrawerController *drawerController = [[MMDrawerController alloc]
    initWithCenterViewController:centerViewController
    leftDrawerViewController:leftDrawerViewController
    rightDrawerViewController:rightDrawerViewController];
[drawerController setMaximumLeftDrawerWidth:280.0];
[drawerController setOpenDrawerGestureModeMask:MMOpenDrawerGestureModeAll];
RESideMenu:
RESideMenu *sideMenu = [[RESideMenu alloc]
    initWithContentViewController:contentViewController
    leftMenuViewController:leftMenuViewController
    rightMenuViewController:rightMenuViewController];
sideMenu.backgroundImage = [UIImage imageNamed:@"background"];
sideMenu.menuPreferredStatusBarStyle = UIStatusBarStyleLightContent;
Both libraries offer similar functionality for implementing side menus in iOS applications. MMDrawerController provides more granular control and customization options, making it suitable for complex implementations. RESideMenu, on the other hand, offers a simpler setup process and built-in animations, making it ideal for quick implementations with standard designs. The choice between the two depends on the specific requirements of your project and the level of customization needed.
iOS Slide Menu View based on Google+, iQON, Feedly, Ameba iOS app. It is written in pure swift.
Pros of SlideMenuControllerSwift
- Written in Swift, making it more modern and compatible with newer iOS projects
- Supports both left and right side menus out of the box
- Customizable animation and gesture options
Cons of SlideMenuControllerSwift
- Less mature and potentially less stable than MMDrawerController
- Fewer configuration options for fine-tuning drawer behavior
- Limited documentation compared to MMDrawerController
Code Comparison
SlideMenuControllerSwift:
let slideMenuController = SlideMenuController(mainViewController: mainViewController, leftMenuViewController: leftViewController, rightMenuViewController: rightViewController)
self.window?.rootViewController = slideMenuController
self.window?.makeKeyAndVisible()
MMDrawerController:
MMDrawerController *drawerController = [[MMDrawerController alloc] initWithCenterViewController:centerViewController leftDrawerViewController:leftViewController rightDrawerViewController:rightViewController];
[drawerController setMaximumLeftDrawerWidth:280.0];
[drawerController setOpenDrawerGestureModeMask:MMOpenDrawerGestureModeAll];
[drawerController setCloseDrawerGestureModeMask:MMCloseDrawerGestureModeAll];
self.window.rootViewController = drawerController;
Both libraries offer similar functionality for implementing sliding menus in iOS applications. SlideMenuControllerSwift is more suitable for modern Swift projects, while MMDrawerController provides more configuration options and has a longer track record in Objective-C projects.
A UIViewController subclass for presenting side view controllers inspired on the FaceBook and Wunderlist apps, done right !
Pros of SWRevealViewController
- Simpler implementation with fewer classes and methods
- Built-in support for both left and right side menus
- Easier to customize gesture recognizers
Cons of SWRevealViewController
- Less flexible for complex drawer configurations
- Limited animation options compared to MMDrawerController
- Fewer customization options for drawer appearance
Code Comparison
SWRevealViewController:
SWRevealViewController *revealViewController = self.revealViewController;
self.view.addGestureRecognizer(revealViewController.panGestureRecognizer);
revealViewController.rearViewRevealWidth = 260;
MMDrawerController:
MMDrawerController *drawerController = [[MMDrawerController alloc]
    initWithCenterViewController:centerViewController
    leftDrawerViewController:leftDrawerViewController
    rightDrawerViewController:rightDrawerViewController];
[drawerController setMaximumLeftDrawerWidth:260];
[drawerController setOpenDrawerGestureModeMask:MMOpenDrawerGestureModeAll];
Both SWRevealViewController and MMDrawerController are popular iOS libraries for implementing side drawer navigation. SWRevealViewController offers a simpler approach with built-in support for both left and right menus, making it easier to set up basic drawer functionality. However, MMDrawerController provides more flexibility and customization options, allowing for more complex drawer configurations and animations.
The code comparison shows that SWRevealViewController requires less setup code, while MMDrawerController offers more granular control over drawer behavior and appearance. Developers should choose based on their specific project requirements and desired level of customization.
Customizable sliding view controller container.
Pros of ECSlidingViewController
- Simpler implementation with fewer components, making it easier to integrate and customize
- Supports both left and right sliding menus out of the box
- Lightweight and has fewer dependencies
Cons of ECSlidingViewController
- Less actively maintained, with fewer recent updates
- Limited built-in customization options compared to MMDrawerController
- Lacks some advanced features like gesture customization and multiple drawer support
Code Comparison
ECSlidingViewController:
self.slidingViewController.topViewController = mainViewController;
self.slidingViewController.underLeftViewController = menuViewController;
[self.slidingViewController anchorTopViewToRightAnimated:YES];
MMDrawerController:
MMDrawerController *drawerController = [[MMDrawerController alloc]
    initWithCenterViewController:centerViewController
    leftDrawerViewController:leftDrawerViewController
    rightDrawerViewController:rightDrawerViewController];
[drawerController setMaximumLeftDrawerWidth:240.0];
[drawerController setOpenDrawerGestureModeMask:MMOpenDrawerGestureModeAll];
Both libraries provide similar functionality for implementing sliding drawer menus in iOS applications. ECSlidingViewController offers a simpler approach with fewer components, making it easier to implement basic sliding menus. However, MMDrawerController provides more advanced features and customization options, making it suitable for more complex implementations. The choice between the two depends on the specific requirements of your project and the level of customization needed.
Convert  designs to code with AI

Introducing Visual Copilot: A new AI model to turn Figma designs to high quality code using your components.
Try Visual CopilotREADME
#Mutual Mobile Drawer Controller
MMDrawerController is a side drawer navigation container view controller designed to support the growing number of applications that leverage the side drawer paradigm. This library is designed to exclusively support side drawer navigation in a light-weight, focused approach while exposing the ability to provide custom animations for presenting and dismissing the drawer.

##Documentation Official appledoc documentation can be found at CocoaDocs.
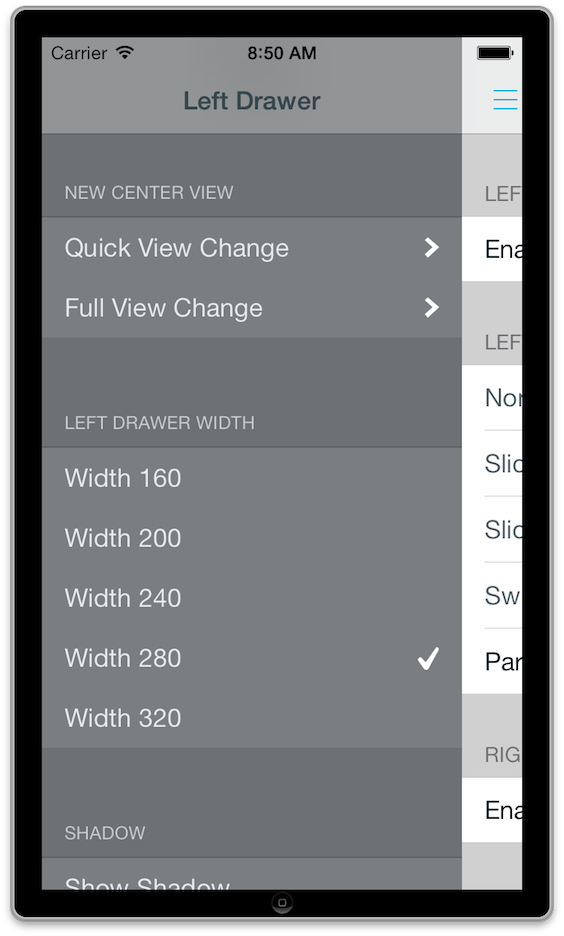
##Installing MMDrawerController
![]()
You can install MMDrawerController in your project by using CocoaPods:
pod 'MMDrawerController', '~> 0.5.7'
##Creating a Drawer Controller
Creating a MMDrawerController is as easy as creating a center view controller and the drawer view controllers, and init'ing the drawer.
UIViewController * leftDrawer = [[UIViewController alloc] init];
UIViewController * center = [[UIViewController alloc] init];
UIViewController * rightDrawer = [[UIViewController alloc] init];

MMDrawerController * drawerController = [[MMDrawerController alloc]
                                  	   initWithCenterViewController:center
										   leftDrawerViewController:leftDrawer
										   rightDrawerViewController:rightDrawer];
##Features
###UINavigationController Support
MMDrawerController seamlessly accepts a UINavigationController as the centerViewController, and will update all of the gesture support automatically. In addition, any child view controller contained within the UINavigationController will have access to the parent drawer controller using the category explained below.
###UIGestureRecognizer Support
MMDrawerController exposes gesture support for opening and closing the drawer through two masks, one for opening and one for closing. The options are as follows:
-
MMOpenDrawerGestureMode
-
MMOpenDrawerGestureModePanningNavigationBar: The user can open the drawer by panning anywhere on the navigation bar.
-
MMOpenDrawerGestureModePanningCenterView: The user can open the drawer by panning anywhere on the center view.
-
MMOpenDrawerGestureModeBezelPanningCenterView: The user can open the drawer by starting a pan anywhere within 20 points of the bezel.
-
MMOpenDrawerGestureModeCustom: The developer can provide a callback block to determine if the gesture should be recognized. More information below.
-
MMCloseDrawerGestureMode
-
MMCloseDrawerGestureModePanningNavigationBar: The user can close the drawer by panning anywhere on the navigation bar.
-
MMCloseDrawerGestureModePanningCenterView: The user can close the drawer by panning anywhere on the center view.
-
MMCloseDrawerGestureModeBezelPanningCenterView: The user can close the drawer by starting a pan anywhere within the bezel of the center view.
-
MMCloseDrawerGestureModeTapNavigationBar: The user can close the drawer by tapping the navigation bar.
-
MMCloseDrawerGestureModeTapCenterView: The user can close the drawer by tapping the center view.
-
MMCloseDrawerGestureModePanningDrawerView: The user can close the drawer by panning anywhere on the drawer view.
-
MMCloseDrawerGestureModeCustom: The developer can provide a callback block to determine if the gesture should be recognized. More information below.
You are free to set whatever combination you want for opening and closing. Note that these gestures may impact touches sent to the child view controllers, so be sure to use these appropriately for your application. For example, you wouldn't want MMOpenDrawerGestureModePanningCenterView set if a MKMapView is your center view controller, since it would intercept the pan meant for moving around the map.
####Custom Gesture Recognizer Support
Starting with version 0.3.0, you can now provide a callback block to determine if a gesture should be recognized using the setGestureShouldRecognizeTouchBlock: method. This method provides three parameters - the drawer controller, the gesture, and the touch. As a developer, you are responsible for inspecting those elements and determining if the gesture should be recognized or not. Note the block is only consulted if you have set MMOpenDrawerGestureModeCustom/MMCloseDrawerGestureModeCustom on the appropriate mask.
For example, lets say you have a center view controller that contains a few elements, and you only want the pan gesture to be recognized to open the drawer when the touch begins within a certain subview. You would make sure that the openDrawerGestureModeMask contains MMOpenDrawerGestureModeCustom, and you could set a block below as so:
[myDrawerController
 setGestureShouldRecognizeTouchBlock:^BOOL(MMDrawerController *drawerController, UIGestureRecognizer *gesture, UITouch *touch) {
     BOOL shouldRecognizeTouch = NO;
     if(drawerController.openSide == MMDrawerSideNone &&
        [gesture isKindOfClass:[UIPanGestureRecognizer class]]){
         UIView * customView = [drawerController.centerViewController myCustomSubview];
         CGPoint location = [touch locationInView:customView];
         shouldRecognizeTouch = (CGRectContainsPoint(customView.bounds, location));
     }
     return shouldRecognizeTouch;
 }];
Note that you would not want the openDrawerGestureModeMask to contain MMOpenDrawerGestureModePanningCenterView, since that would take over and be applied automatically regardless of where the touch begins within the center view.
###Custom Drawer Open/Close Animations
MMDrawerController provides a callback block that allows you to implement your own custom state for the drawer controller when an open/close or pan gesture event happens. Within the block, you are responsible for updating the visual state of the drawer controller, and the drawer controller will handle animating to that state.
For example, to set the alpha of the side drawer controller from 0 to 1 during an animation, you would do the following:
[drawerController
     setDrawerVisualStateBlock:^(MMDrawerController *drawerController, MMDrawerSide drawerSide, CGFloat percentVisible) {
         UIViewController * sideDrawerViewController;
		 if(drawerSide == MMDrawerSideLeft){
			 sideDrawerViewController = drawerController.leftDrawerViewController;
		 }
		 else if(drawerSide == MMDrawerSideRight){
			 sideDrawerViewController = drawerController.rightDrawerViewController;
		 }
		 [sideDrawerViewController.view setAlpha:percentVisible];
     }];
In addition, MMDrawerController ships with several prebuilt animations to let you go crazy right out of the box. These are included as a subspec for the project, and more information can be found below.
###Center View Controller Interaction Mode When a drawer is open, you can control how a user can interact with the center view controller.
- MMDrawerOpenCenterInteractionModeNone: The user can not interact with any content in the center view.
- MMDrawerOpenCenterInteractionModeFull: The user can interact with all content in the center view.
- MMDrawerOpenCenterInteractionModeNavigationBarOnly: The user can interact with only content on the navigation bar. The setting allows the menu button to still respond, allowing you to toggle the drawer closed when it is open. This is the default setting.
###Accessing the Drawer Controller from a Child View Controller
You can use the UIViewController+MMDrawerController category in order to query the drawerController directly from child view controllers.
###State Restoration
Beginning with 0.4.0, MMDrawerController supports iOS state restoration. In order to opt in to state restoration for MMDrawerController, you must set the restorationIdentifier of your drawer controller. Instances of your centerViewController, leftDrawerViewController and rightDrawerViewController must also be configured with their own restorationIdentifier (and optionally a restorationClass) if you intend for those to be restored as well. If your MMDrawerController had an open drawer when your app was sent to the background, that state will also be restored.
##iOS 7 Status Bar Support ###Child View Controller Support Beginning with iOS 7, the child view controllers will by default determine the state of the status bar, including its' style and whether or not it is hidden. This value will also be updated anytime the open side changes state, meaning that a side drawer can provide a different value than the center view controller.
If you do not want the drawer controller to consult the child view controllers for this state, you should subclass MMDrawerController, override childViewControllerForStatusBarStyle and childViewControllerForStatusBarHidden, and return nil for both.
###Custom Status Bar Background View
If you have a contrasting colors between your center view controller and your drawer controllers, the new iOS 7 status bar handling could cause your application to look less than ideal. Starting with iOS 7, MMDrawerController supports drawing a custom status bar area at the top of the screen, to give you an area to display the status bar with a constant color, while allowing you to draw custom content below the status bar without worrying about the color of your navigation bars or the top of your content running up underneath the status bar. Using the feature essentially mimics <= iOS 6.X behavior.
To enable a custom status bar, simple set showsStatusBarBackgroundView to YES. By default, this will draw a black a view underneath the status bar, and adjust your to content to be laid out lower than the status bar. If you would like a custom status background color, you can set statusBarViewBackgroundColor to whatever color you desire.
##Subclassing
If you plan to subclass MMDrawerController, import MMDrawerController+Subclass.h into your subclass to access protected methods for MMDrawerController. Note that several methods assume and require you to call super, so be sure to follow that convention.
If there is specific functionality you need that is not supported by these methods, please open a Github issue explaining your needs and we can try and find a way to open up methods that can help you out.
##Bells and Whistles A few extras to make your life easier...
###MMDrawerBarButtonItem
Using Paint Code, we created a standard Menu Button that you can use in any UINavigationBar, and make it whatever color you want. It's included as a subspec to this library. Enjoy.
Starting with iOS 7, the drawer button is now drawn in a much thinner stroke. In addition, the color methods have been deprecated, and the color will now be determined by the tintColor. Also note that the shadow has been deprecated to be more in line with the design themes of the OS.
###Prebuilt Example Animations
In order to make it as easy as possible for you to use this library, we built some of the common animations we see out there today. Simply include the MMDrawerVisualStates subspec, and use any of the prebuilt visual states.
For example, if you wanted to use a slide and scale animation, you would do the following:
[drawerController setDrawerVisualStateBlock:[MMDrawerVisualState slideAndScaleVisualStateBlock]];
And that's it...
Here's a quick list of the built in animations:
- Slide: The drawer slides at the same rate as the center view controller.
- Slide and Scale: The drawer slides and scales up at the same time, while also alpha'ing from 0.0 to 1.0.
- Swinging Door: The drawer swings in along a hinge on the center view controller.
- Parallax: The drawer slides in at a slower rate than the center view controller, giving a parallax effect.
###Stretchy Drawer
By default, the side drawer will stretch if the user pans past the maximum drawer width. This gives a playful stretch effect. You can disable this by setting shouldStretchDrawer to NO, or you can make your own overshoot animation by creating a custom visual state block and setting up custom transforms for when percentVisible is greater than 1.0
###Bounce Preview
To make your side drawer more discoverable, it may be helpful to bounce the drawer the first time your user launches the app. You can use the bouncePreviewForDrawerSide:completion: method to easily do this.
If you would like to bounce a custom distance, you can use bouncePreviewForDrawerSide:distance:completion:.
###Nifty Example We decided to spruce up the example a bit using graphics generated from PaintCode. Hope you like it.
The example shows off all the features of the library. Give it a whirl.
##What this Library Doesn't Do In order to keep this library light-weight, we had to make some design trade off decisions. Specifically, we decided this library would NOT DO the following:
- Top or bottom drawer views
- Displaying both drawers at one time
- Displaying a minimum drawer width
- Support container view controllers other than
UINavigationController(such asUITabBarControllerorUISplitViewController) as the center view controller. - Support presenting the drawer above the center view controller (like the Google+ app).
We're sure this list will grow over time. But that's the cost of keeping something maintainable :)
##Workarounds/FAQs
####How do I support editing/dragging cells in a tableview in the center view controller?
The best way to support this is to set the open/close mask to MMOpenDrawerGestureModeNone / MMCloseDrawerGestureModeNone while editing is enabled, and restore the mask when editing is finished. This will allow the proper gestures/touches to be passed all the way to the table view. (#184)
##Credit Designed and Developed by these fine folks at Mutual Mobile:
###Development
###Design
##Feedback We'd love to hear feedback on the library. Create Github issues, or hit us up on Twitter.
##License
MMDrawerController is available under the MIT license. See the LICENSE file for more info.
Top Related Projects
An Android library that allows you to easily create applications with slide-in menus. You may use it in your Android apps provided that you cite this project and include the license in your app. Thanks!
Facebook-like side menu for iOS
iOS 7/8 style side menu with parallax effect.
iOS Slide Menu View based on Google+, iQON, Feedly, Ameba iOS app. It is written in pure swift.
A UIViewController subclass for presenting side view controllers inspired on the FaceBook and Wunderlist apps, done right !
Customizable sliding view controller container.
Convert designs to code with AI
Introducing Visual Copilot: A new AI model to turn Figma designs to high quality code using your components.
Try Visual Copilot