 machinery
Machinery is an asynchronous task queue/job queue based on distributed message passing.
Top Related Projects


Quick Overview
Machinery is a distributed task queue system, inspired by Celery, but written in Go. It supports a variety of brokers, including RabbitMQ, Redis, and Amazon SQS, and provides a simple, yet powerful API for defining, enqueuing, and processing tasks.
Pros
- Flexibility: Machinery supports a wide range of message brokers, allowing you to choose the one that best fits your infrastructure.
- Scalability: Machinery is designed to be highly scalable, with the ability to handle large numbers of tasks and workers.
- Reliability: Machinery provides robust error handling and retry mechanisms, ensuring that tasks are processed reliably.
- Simplicity: Machinery's API is straightforward and easy to use, making it accessible to developers of all skill levels.
Cons
- Limited Documentation: While the project has a decent amount of documentation, some areas could be more comprehensive, especially for newer users.
- Lack of Official Support: Machinery is an open-source project, and while it has a active community, it does not have the same level of official support as some commercial task queue systems.
- Dependency on Message Broker: Machinery is dependent on a message broker, which adds an additional layer of complexity to the setup and configuration.
- Performance Concerns: Depending on the message broker and the complexity of your tasks, Machinery's performance may not be as high as some other task queue systems.
Code Examples
Here are a few examples of how to use Machinery:
- Defining a Task:
package main

import (
    "github.com/RichardKnop/machinery/v2"
    "github.com/RichardKnop/machinery/v2/tasks"
)

func Add(args ...int64) (int64, error) {
    sum := int64(0)
    for _, arg := range args {
        sum += arg
    }
    return sum, nil
}

func main() {
    server, err := machinery.NewServer(config)
    if err != nil {
        // Handle error
    }

    server.RegisterTask("add", Add)
}
- Sending a Task:
package main

import (
    "github.com/RichardKnop/machinery/v2"
    "github.com/RichardKnop/machinery/v2/tasks"
)

func main() {
    server, err := machinery.NewServer(config)
    if err != nil {
        // Handle error
    }

    signature := &tasks.Signature{
        Name: "add",
        Args: []tasks.Arg{
            {
                Type:  "int64",
                Value: 1,
            },
            {
                Type:  "int64",
                Value: 2,
            },
        },
    }

    _, err = server.SendTask(signature)
    if err != nil {
        // Handle error
    }
}
- Consuming Tasks:
package main

import (
    "github.com/RichardKnop/machinery/v2"
    "github.com/RichardKnop/machinery/v2/backends"
    "github.com/RichardKnop/machinery/v2/config"
    "github.com/RichardKnop/machinery/v2/log"
    "github.com/RichardKnop/machinery/v2/tasks"
)

func main() {
    cnf := &config.Config{
        Broker:        "amqp://guest:guest@localhost:5672/",
        ResultBackend: "amqp://guest:guest@localhost:5672/",
    }

    server, err := machinery.NewServer(cnf)
    if err != nil {
        // Handle error
    }

    worker := server.NewWorker("worker_name", 0)
    err = worker.Launch()
    if err != nil {
        // Handle error
    }
}
Getting Started
To get started with Machinery, follow these steps:
- Install the Machinery library:
go get github.com/RichardKnop/
Competitor Comparisons
Distributed Task Queue (development branch)
Pros of Celery
- More mature and widely adopted project with extensive documentation
- Supports a broader range of message brokers (RabbitMQ, Redis, Amazon SQS, etc.)
- Offers more advanced features like task scheduling, retries, and result backends
Cons of Celery
- Can be complex to set up and configure, especially for simpler use cases
- Python-specific, limiting language interoperability
- Heavier resource footprint compared to lighter alternatives
Code Comparison
Celery task definition:
from celery import Celery

app = Celery('tasks', broker='redis://localhost:6379')

@app.task
def add(x, y):
    return x + y
Machinery task definition:
import "github.com/RichardKnop/machinery/v1/tasks"

var AddTask = tasks.Signature{
    Name: "add",
    Args: []tasks.Arg{
        {Type: "int64", Value: 1},
        {Type: "int64", Value: 1},
    },
}
Summary
Celery is a more feature-rich and mature task queue system primarily for Python, while Machinery is a lighter, Go-based alternative. Celery offers more advanced features and broader broker support but can be more complex to set up. Machinery provides a simpler solution for Go projects but with fewer features and less community support.
Simple, reliable, and efficient distributed task queue in Go
Pros of Asynq
- Built specifically for Go, leveraging Go's concurrency model
- Simpler API and easier setup for basic use cases
- Better performance and lower memory footprint
Cons of Asynq
- Less feature-rich compared to Machinery (e.g., no built-in workflow support)
- Limited to Redis as the only supported backend
- Younger project with potentially less community support
Code Comparison
Asynq:
client := asynq.NewClient(asynq.RedisClientOpt{Addr: "localhost:6379"})
task := asynq.NewTask("email:send", []byte(`{"to":"user@example.com"}`))
_, err := client.Enqueue(task)
Machinery:
server := machinery.NewServer(cnf)
task := tasks.NewSignature("send_email", []tasks.Arg{
    {Name: "to", Type: "string", Value: "user@example.com"},
})
_, err := server.SendTask(task)
Both libraries offer straightforward task creation and enqueuing, but Asynq's API is slightly more concise. Machinery provides more flexibility in task signature definition, while Asynq uses a simpler byte payload approach.
Process background jobs in Go
Pros of work
- Simpler API and easier to get started with
- Built-in web UI for monitoring jobs and workers
- Better support for job priorities and rate limiting
Cons of work
- Less flexible configuration options
- Fewer built-in result backends (only Redis)
- Limited support for distributed task execution
Code Comparison
work:
c := work.NewClient("my_app", redisPool)
job := work.NewJob("send_email", map[string]interface{}{
    "to":   "user@example.com",
    "body": "Hello, World!",
})
c.Enqueue(job)
machinery:
server.RegisterTask("send_email", sendEmail)
signature := &tasks.Signature{
    Name: "send_email",
    Args: []tasks.Arg{
        {Name: "to", Type: "string", Value: "user@example.com"},
        {Name: "body", Type: "string", Value: "Hello, World!"},
    },
}
server.SendTask(signature)
Both work and machinery are Go libraries for background job processing. work offers a simpler API and built-in monitoring, making it easier for beginners. However, machinery provides more advanced features and flexibility, especially for distributed task execution and result backend options. The choice between the two depends on the specific requirements of your project and the level of complexity you need in your background job processing system.
Message queue system written in Go and backed by Redis
Pros of rmq
- Lightweight and focused specifically on RabbitMQ integration
- Simpler setup and configuration for RabbitMQ-based tasks
- Provides more fine-grained control over RabbitMQ-specific features
Cons of rmq
- Limited to RabbitMQ as the message broker
- Fewer built-in features compared to Machinery's broader task processing capabilities
- Less active development and smaller community support
Code Comparison
rmq:
conn := rmq.OpenConnection("my service", "tcp://localhost:5672", 0)
queue := conn.OpenQueue("tasks")
queue.Publish("task payload")
Machinery:
server, _ := machinery.NewServer(cnf)
task := tasks.NewSignature("add", []tasks.Arg{{Type: "int64", Value: 1}, {Type: "int64", Value: 1}})
server.SendTask(task)
Both libraries provide ways to enqueue tasks, but rmq focuses on RabbitMQ-specific operations, while Machinery offers a more abstracted approach for various backends.
Convert  designs to code with AI

Introducing Visual Copilot: A new AI model to turn Figma designs to high quality code using your components.
Try Visual CopilotREADME
Machinery
Machinery is an asynchronous task queue/job queue based on distributed message passing.

![]()
![]()
![]()
![]()
- V2 Experiment
- First Steps
- Configuration
- Custom Logger
- Server
- Workers
- Tasks
- Workflows
- Periodic Tasks & Workflows
- Development
V2
I recommend using V2 in order to avoid having to import all dependencies for brokers and backends you are not using.
Instead of factory, you will need to inject broker and backend objects to the server constructor:
import (
  "github.com/RichardKnop/machinery/v2"
  backendsiface "github.com/RichardKnop/machinery/v2/backends/iface"
  brokersiface "github.com/RichardKnop/machinery/v2/brokers/iface"
  locksiface "github.com/RichardKnop/machinery/v2/locks/iface"
)

var broker brokersiface.Broker
var backend backendsiface.Backend
var lock locksiface.Lock
server := machinery.NewServer(cnf, broker, backend, lock)
// server.NewWorker("machinery", 10)
First Steps
To install recommended v2 release:
go get github.com/RichardKnop/machinery/v2
If you want to use legacy v1 version, you still can:
go get github.com/RichardKnop/machinery
First, you will need to define some tasks. Look at sample tasks in v2/example/tasks/tasks.go to see a few examples.
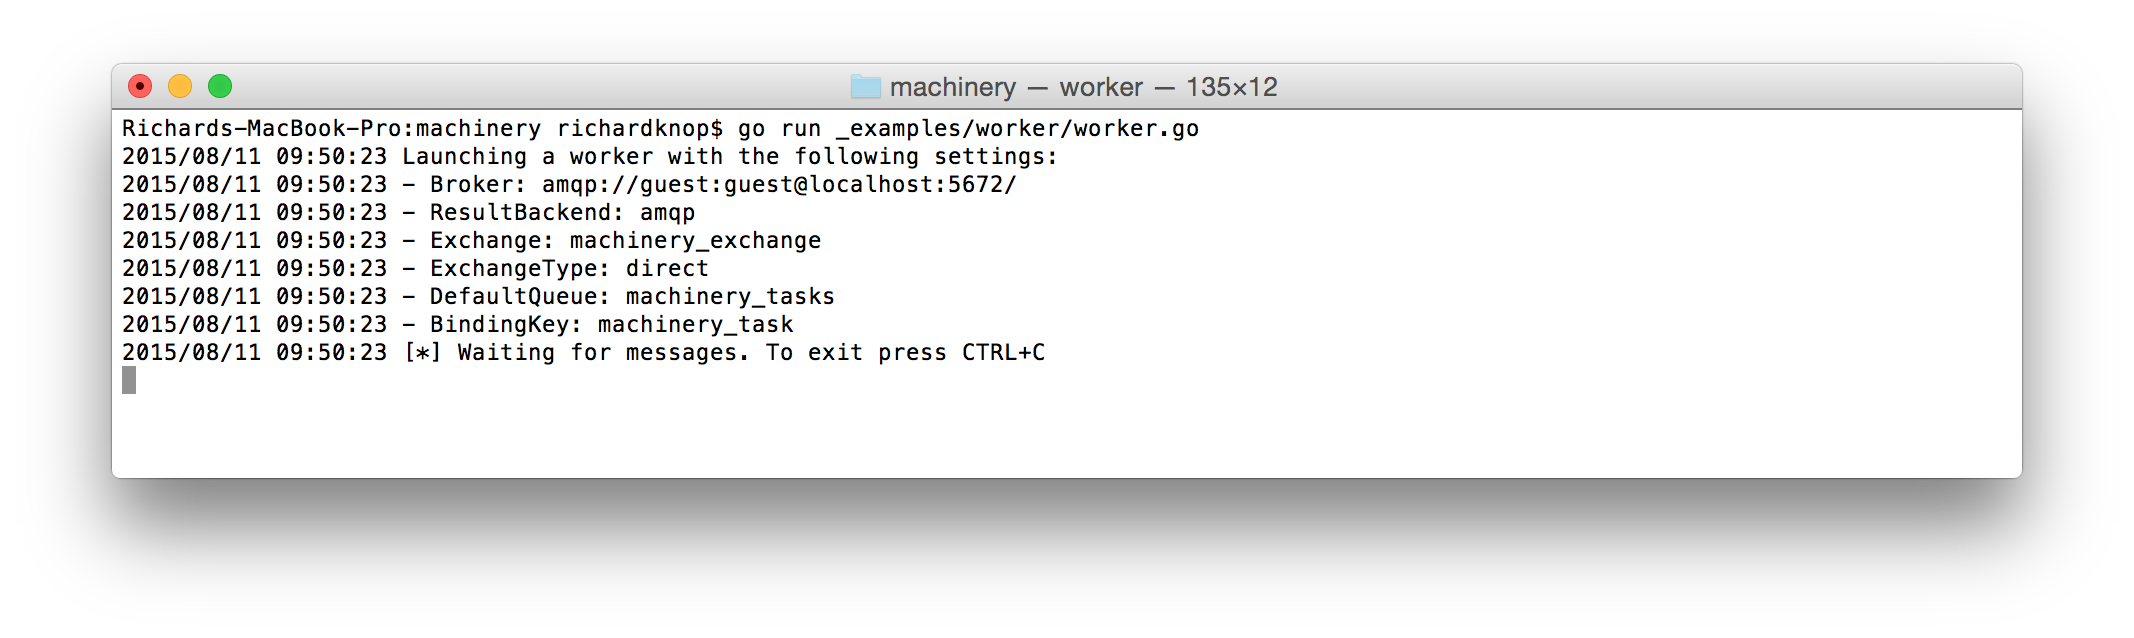
Second, you will need to launch a worker process with one of these commands (v2 is recommended since it doesn't import dependencies for all brokers / backends, only those you actually need):
cd v2/
go run example/amqp/main.go worker
go run example/redigo/main.go worker // Redis with redigo driver
go run example/go-redis/main.go worker // Redis with Go Redis driver

go run example/amqp/main.go worker
go run example/redis/main.go worker
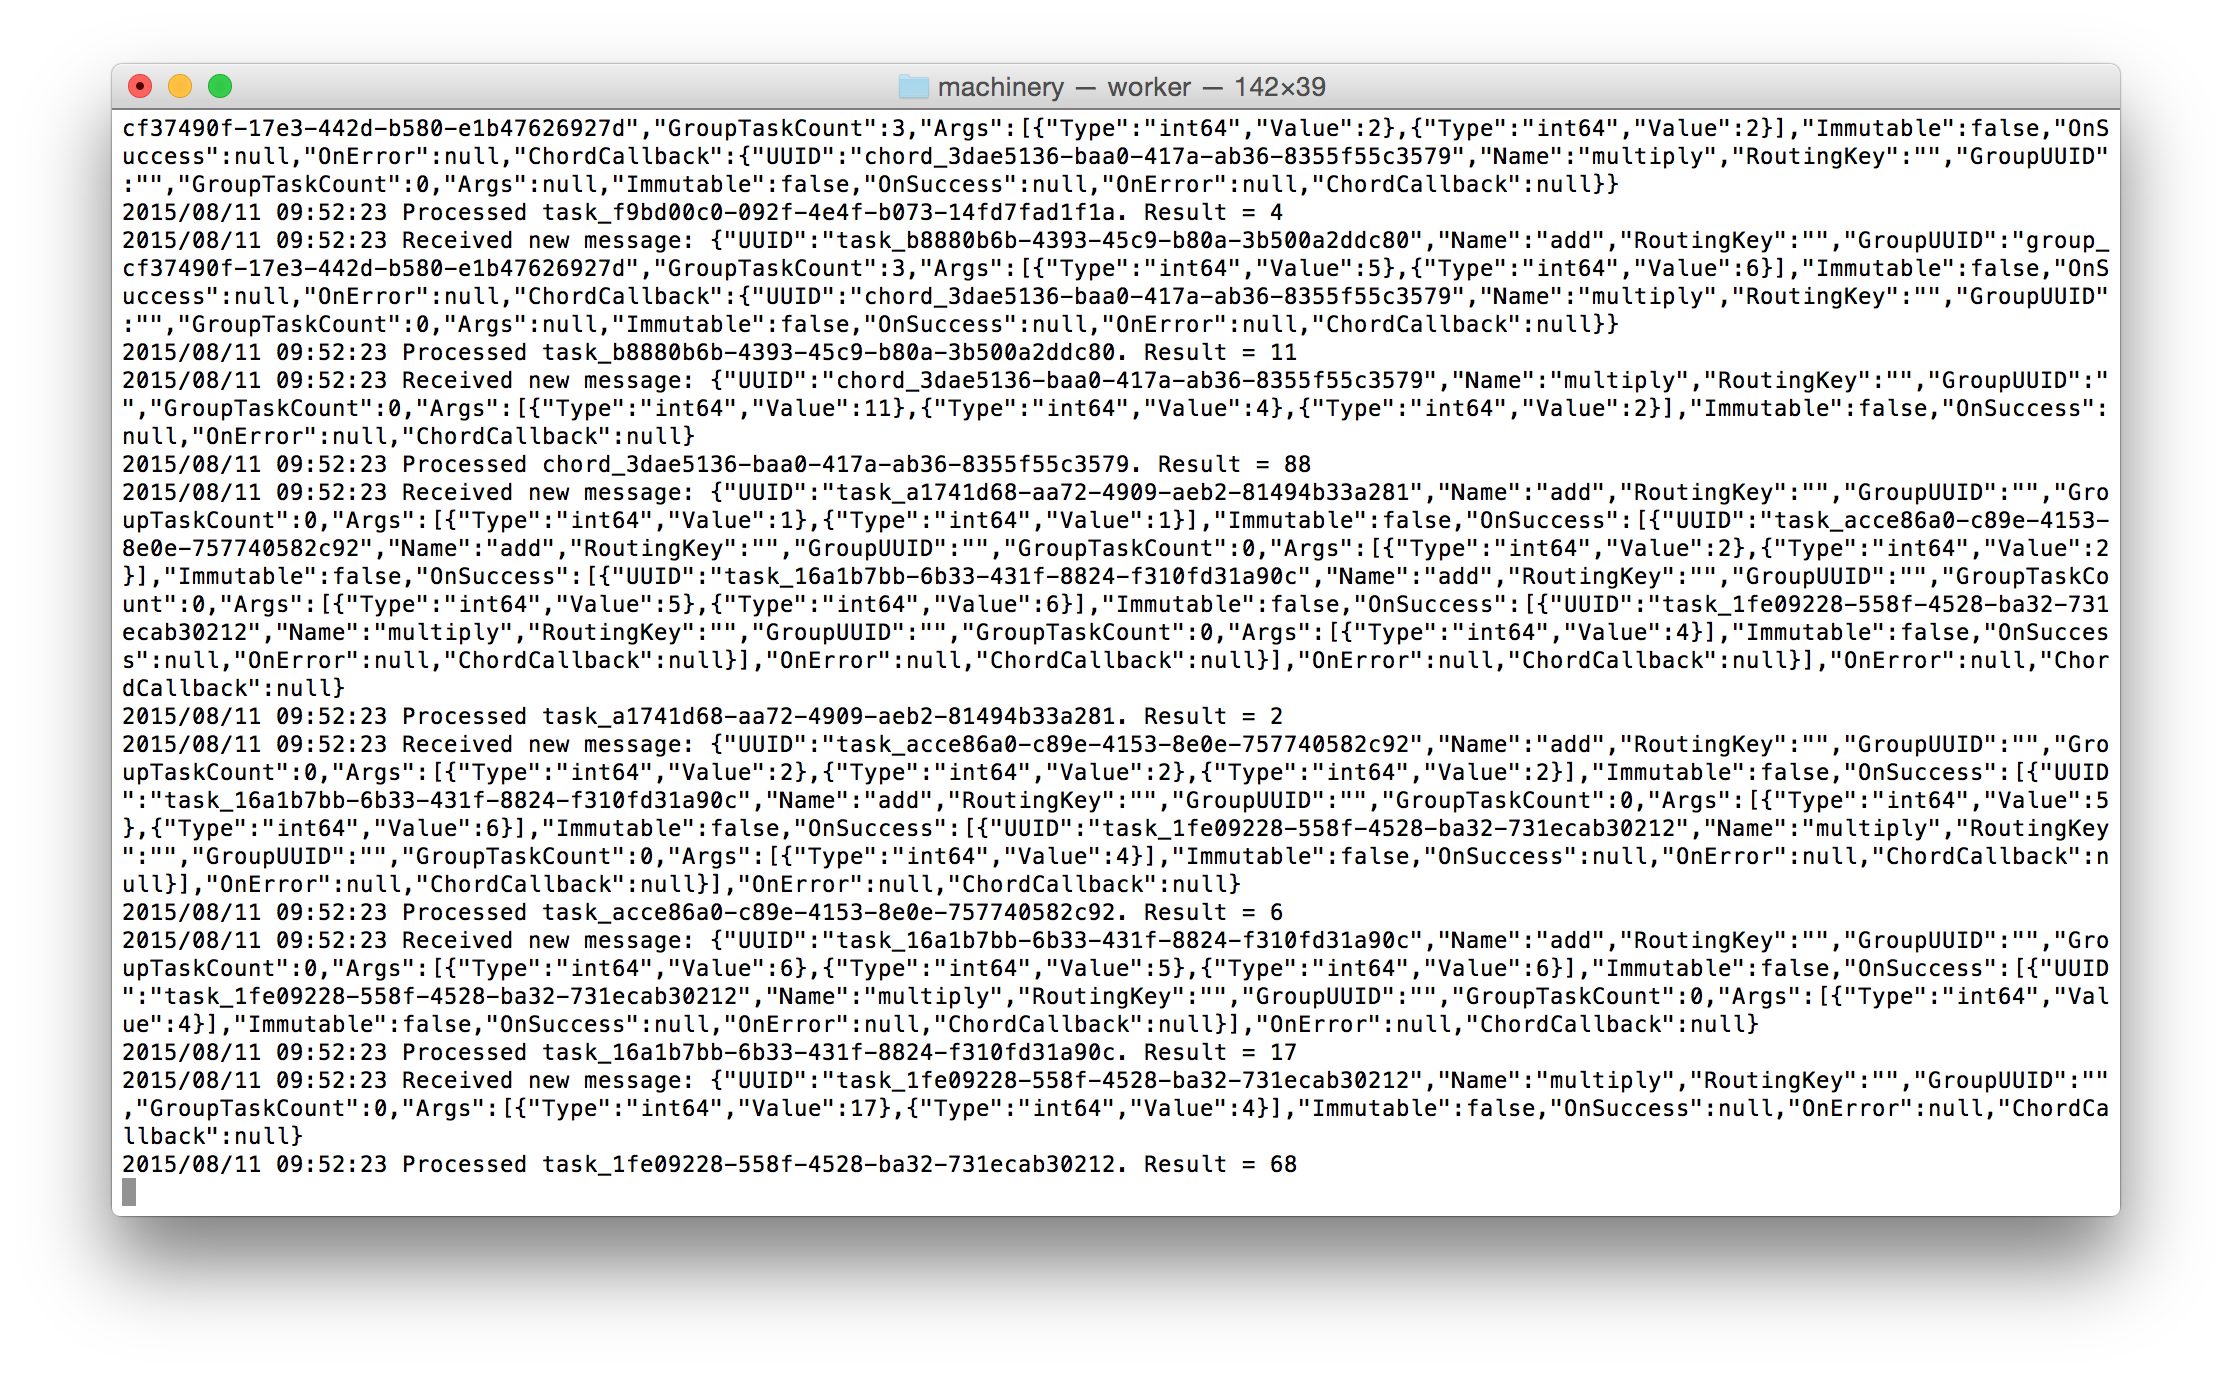
Finally, once you have a worker running and waiting for tasks to consume, send some tasks with one of these commands (v2 is recommended since it doesn't import dependencies for all brokers / backends, only those you actually need):
cd v2
go run v2/example/amqp/main.go send
go run v2/example/redigo/main.go send // Redis with redigo driver
go run v2/example/go-redis/main.go send // Redis with Go Redis driver
You will be able to see the tasks being processed asynchronously by the worker:
Configuration
The config package has convenience methods for loading configuration from environment variables or a YAML file. For example, load configuration from environment variables:
cnf, err := config.NewFromEnvironment()
Or load from YAML file:
cnf, err := config.NewFromYaml("config.yml", true)
Second boolean flag enables live reloading of configuration every 10 seconds. Use false to disable live reloading.
Machinery configuration is encapsulated by a Config struct and injected as a dependency to objects that need it.
Lock
Redis
Use Redis URL in one of these formats:
redis://[password@]host[port][/db_num]
For example:
redis://localhost:6379, or with passwordredis://password@localhost:6379
Broker
A message broker. Currently supported brokers are:
AMQP
Use AMQP URL in the format:
amqp://[username:password@]@host[:port]
For example:
amqp://guest:guest@localhost:5672
AMQP also supports multiples brokers urls. You need to specify the URL separator in the MultipleBrokerSeparator field.
Redis
Use Redis URL in one of these formats:
redis://[password@]host[port][/db_num]
redis+socket://[password@]/path/to/file.sock[:/db_num]
For example:
redis://localhost:6379, or with passwordredis://password@localhost:6379redis+socket://password@/path/to/file.sock:/0
AWS SQS
Use AWS SQS URL in the format:
https://sqs.us-east-2.amazonaws.com/123456789012
See AWS SQS docs for more information.
Also, configuring AWS_REGION is required, or an error would be thrown.
To use a manually configured SQS Client:
var sqsClient = sqs.New(session.Must(session.NewSession(&aws.Config{
  Region:         aws.String("YOUR_AWS_REGION"),
  Credentials:    credentials.NewStaticCredentials("YOUR_AWS_ACCESS_KEY", "YOUR_AWS_ACCESS_SECRET", ""),
  HTTPClient:     &http.Client{
    Timeout: time.Second * 120,
  },
})))
var visibilityTimeout = 20
var cnf = &config.Config{
  Broker:          "YOUR_SQS_URL"
  DefaultQueue:    "machinery_tasks",
  ResultBackend:   "YOUR_BACKEND_URL",
  SQS: &config.SQSConfig{
    Client: sqsClient,
    // if VisibilityTimeout is nil default to the overall visibility timeout setting for the queue
    // https://docs.aws.amazon.com/AWSSimpleQueueService/latest/SQSDeveloperGuide/sqs-visibility-timeout.html
    VisibilityTimeout: &visibilityTimeout,
    WaitTimeSeconds: 30,
  },
}
GCP Pub/Sub
Use GCP Pub/Sub URL in the format:
gcppubsub://YOUR_GCP_PROJECT_ID/YOUR_PUBSUB_SUBSCRIPTION_NAME
To use a manually configured Pub/Sub Client:
pubsubClient, err := pubsub.NewClient(
    context.Background(),
    "YOUR_GCP_PROJECT_ID",
    option.WithServiceAccountFile("YOUR_GCP_SERVICE_ACCOUNT_FILE"),
)

cnf := &config.Config{
  Broker:          "gcppubsub://YOUR_GCP_PROJECT_ID/YOUR_PUBSUB_SUBSCRIPTION_NAME"
  DefaultQueue:    "YOUR_PUBSUB_TOPIC_NAME",
  ResultBackend:   "YOUR_BACKEND_URL",
  GCPPubSub: config.GCPPubSubConfig{
    Client: pubsubClient,
  },
}
DefaultQueue
Default queue name, e.g. machinery_tasks.
ResultBackend
Result backend to use for keeping task states and results.
Currently supported backends are:
Redis
Use Redis URL in one of these formats:
redis://[password@]host[port][/db_num]
redis+socket://[password@]/path/to/file.sock[:/db_num]
For example:
redis://localhost:6379, or with passwordredis://password@localhost:6379redis+socket://password@/path/to/file.sock:/0- cluster/sentinel
redis://host1:port1,host2:port2,host3:port3 - cluster/sentinel with password
redis://pass@host1:port1,host2:port2,host3:port3
Memcache
Use Memcache URL in the format:
memcache://host1[:port1][,host2[:port2],...[,hostN[:portN]]]
For example:
memcache://localhost:11211for a single instance, ormemcache://10.0.0.1:11211,10.0.0.2:11211for a cluster
AMQP
Use AMQP URL in the format:
amqp://[username:password@]@host[:port]
For example:
amqp://guest:guest@localhost:5672
Keep in mind AMQP is not recommended as a result backend. See Keeping Results
MongoDB
Use Mongodb URL in the format:
mongodb://[username:password@]host1[:port1][,host2[:port2],...[,hostN[:portN]]][/[database][?options]]
For example:
mongodb://localhost:27017/taskresults
See MongoDB docs for more information.
ResultsExpireIn
How long to store task results for in seconds. Defaults to 3600 (1 hour).
AMQP
RabbitMQ related configuration. Not necessary if you are using other broker/backend.
Exchange: exchange name, e.g.machinery_exchangeExchangeType: exchange type, e.g.directQueueBindingArguments: an optional map of additional arguments used when binding to an AMQP queueBindingKey: The queue is bind to the exchange with this key, e.g.machinery_taskPrefetchCount: How many tasks to prefetch (set to1if you have long running tasks)DelayedQueue: delayed queue name to be used for task retry or delayed task (if empty it will follow auto create and delate delayed queues)
DynamoDB
DynamoDB related configuration. Not necessary if you are using other backend.
TaskStatesTable: Custom table name for saving task states. Default one istask_states, and make sure to create this table in your AWS admin first, usingTaskUUIDas table's primary key.GroupMetasTable: Custom table name for saving group metas. Default one isgroup_metas, and make sure to create this table in your AWS admin first, usingGroupUUIDas table's primary key. For example:
dynamodb:
  task_states_table: 'task_states'
  group_metas_table: 'group_metas'
If these tables are not found, an fatal error would be thrown.
If you wish to expire the records, you can configure the TTL field in AWS admin for these tables. The TTL field is set based on the ResultsExpireIn value in the Server's config. See https://docs.aws.amazon.com/amazondynamodb/latest/developerguide/howitworks-ttl.html for more information.
Redis
Redis related configuration. Not necessary if you are using other backend.
See: config (TODO)
GCPPubSub
GCPPubSub related configuration. Not necessary if you are using other backend.
See: config (TODO)
Custom Logger
You can define a custom logger by implementing the following interface:
type Interface interface {
  Print(...interface{})
  Printf(string, ...interface{})
  Println(...interface{})

  Fatal(...interface{})
  Fatalf(string, ...interface{})
  Fatalln(...interface{})

  Panic(...interface{})
  Panicf(string, ...interface{})
  Panicln(...interface{})
}
Then just set the logger in your setup code by calling Set function exported by github.com/RichardKnop/machinery/v1/log package:
log.Set(myCustomLogger)
Server
A Machinery library must be instantiated before use. The way this is done is by creating a Server instance. Server is a base object which stores Machinery configuration and registered tasks. E.g.:
import (
  "github.com/RichardKnop/machinery/v1/config"
  "github.com/RichardKnop/machinery/v1"
)

var cnf = &config.Config{
  Broker:        "amqp://guest:guest@localhost:5672/",
  DefaultQueue:  "machinery_tasks",
  ResultBackend: "amqp://guest:guest@localhost:5672/",
  AMQP: &config.AMQPConfig{
    Exchange:     "machinery_exchange",
    ExchangeType: "direct",
    BindingKey:   "machinery_task",
  },
}

server, err := machinery.NewServer(cnf)
if err != nil {
  // do something with the error
}
Workers
In order to consume tasks, you need to have one or more workers running. All you need to run a worker is a Server instance with registered tasks. E.g.:
worker := server.NewWorker("worker_name", 10)
err := worker.Launch()
if err != nil {
  // do something with the error
}
Each worker will only consume registered tasks. For each task on the queue the Worker.Process() method will be run
in a goroutine. Use the second parameter of server.NewWorker to limit the number of concurrently running Worker.Process()
calls (per worker). Example: 1 will serialize task execution while 0 makes the number of concurrently executed tasks unlimited (default).
Tasks
Tasks are a building block of Machinery applications. A task is a function which defines what happens when a worker receives a message.
Each task needs to return an error as a last return value. In addition to error tasks can now return any number of arguments.
Examples of valid tasks:
func Add(args ...int64) (int64, error) {
  sum := int64(0)
  for _, arg := range args {
    sum += arg
  }
  return sum, nil
}

func Multiply(args ...int64) (int64, error) {
  sum := int64(1)
  for _, arg := range args {
    sum *= arg
  }
  return sum, nil
}

// You can use context.Context as first argument to tasks, useful for open tracing
func TaskWithContext(ctx context.Context, arg Arg) error {
  // ... use ctx ...
  return nil
}

// Tasks need to return at least error as a minimal requirement
func DummyTask(arg string) error {
  return errors.New(arg)
}

// You can also return multiple results from the task
func DummyTask2(arg1, arg2 string) (string, string, error) {
  return arg1, arg2, nil
}
Registering Tasks
Before your workers can consume a task, you need to register it with the server. This is done by assigning a task a unique name:
server.RegisterTasks(map[string]interface{}{
  "add":      Add,
  "multiply": Multiply,
})
Tasks can also be registered one by one:
server.RegisterTask("add", Add)
server.RegisterTask("multiply", Multiply)
Simply put, when a worker receives a message like this:
{
  "UUID": "48760a1a-8576-4536-973b-da09048c2ac5",
  "Name": "add",
  "RoutingKey": "",
  "ETA": null,
  "GroupUUID": "",
  "GroupTaskCount": 0,
  "Args": [
    {
      "Type": "int64",
      "Value": 1,
    },
    {
      "Type": "int64",
      "Value": 1,
    }
  ],
  "Immutable": false,
  "RetryCount": 0,
  "RetryTimeout": 0,
  "OnSuccess": null,
  "OnError": null,
  "ChordCallback": null
}
It will call Add(1, 1). Each task should return an error as well so we can handle failures.
Ideally, tasks should be idempotent which means there will be no unintended consequences when a task is called multiple times with the same arguments.
Signatures
A signature wraps calling arguments, execution options (such as immutability) and success/error callbacks of a task so it can be sent across the wire to workers. Task signatures implement a simple interface:
// Arg represents a single argument passed to invocation fo a task
type Arg struct {
  Type  string
  Value interface{}
}

// Headers represents the headers which should be used to direct the task
type Headers map[string]interface{}

// Signature represents a single task invocation
type Signature struct {
  UUID           string
  Name           string
  RoutingKey     string
  ETA            *time.Time
  GroupUUID      string
  GroupTaskCount int
  Args           []Arg
  Headers        Headers
  Immutable      bool
  RetryCount     int
  RetryTimeout   int
  OnSuccess      []*Signature
  OnError        []*Signature
  ChordCallback  *Signature
}
UUID is a unique ID of a task. You can either set it yourself or it will be automatically generated.
Name is the unique task name by which it is registered against a Server instance.
RoutingKey is used for routing a task to correct queue. If you leave it empty, the default behaviour will be to set it to the default queue's binding key for direct exchange type and to the default queue name for other exchange types.
ETA is a timestamp used for delaying a task. if it's nil, the task will be published for workers to consume immediately. If it is set, the task will be delayed until the ETA timestamp.
GroupUUID, GroupTaskCount are useful for creating groups of tasks.
Args is a list of arguments that will be passed to the task when it is executed by a worker.
Headers is a list of headers that will be used when publishing the task to AMQP queue.
Immutable is a flag which defines whether a result of the executed task can be modified or not. This is important with OnSuccess callbacks. Immutable task will not pass its result to its success callbacks while a mutable task will prepend its result to args sent to callback tasks. Long story short, set Immutable to false if you want to pass result of the first task in a chain to the second task.
RetryCount specifies how many times a failed task should be retried (defaults to 0). Retry attempts will be spaced out in time, after each failure another attempt will be scheduled further to the future.
RetryTimeout specifies how long to wait before resending task to the queue for retry attempt. Default behaviour is to use fibonacci sequence to increase the timeout after each failed retry attempt.
OnSuccess defines tasks which will be called after the task has executed successfully. It is a slice of task signature structs.
OnError defines tasks which will be called after the task execution fails. The first argument passed to error callbacks will be the error string returned from the failed task.
ChordCallback is used to create a callback to a group of tasks.
Supported Types
Machinery encodes tasks to JSON before sending them to the broker. Task results are also stored in the backend as JSON encoded strings. Therefor only types with native JSON representation can be supported. Currently supported types are:
boolintint8int16int32int64uintuint8uint16uint32uint64float32float64string[]bool[]int[]int8[]int16[]int32[]int64[]uint[]uint8[]uint16[]uint32[]uint64[]float32[]float64[]string
Sending Tasks
Tasks can be called by passing an instance of Signature to an Server instance. E.g:
import (
  "github.com/RichardKnop/machinery/v1/tasks"
)

signature := &tasks.Signature{
  Name: "add",
  Args: []tasks.Arg{
    {
      Type:  "int64",
      Value: 1,
    },
    {
      Type:  "int64",
      Value: 1,
    },
  },
}

asyncResult, err := server.SendTask(signature)
if err != nil {
  // failed to send the task
  // do something with the error
}
Delayed Tasks
You can delay a task by setting the ETA timestamp field on the task signature.
// Delay the task by 5 seconds
eta := time.Now().UTC().Add(time.Second * 5)
signature.ETA = &eta
Retry Tasks
You can set a number of retry attempts before declaring task as failed. Fibonacci sequence will be used to space out retry requests over time. (See RetryTimeout for details.)
// If the task fails, retry it up to 3 times
signature.RetryCount = 3
Alternatively, you can return tasks.ErrRetryTaskLater from your task and specify duration after which the task should be retried, e.g.:
return tasks.NewErrRetryTaskLater("some error", 4 * time.Hour)
Get Pending Tasks
Tasks currently waiting in the queue to be consumed by workers can be inspected, e.g.:
server.GetBroker().GetPendingTasks("some_queue")
Currently only supported by Redis broker.
Keeping Results
If you configure a result backend, the task states and results will be persisted. Possible states:
const (
	// StatePending - initial state of a task
	StatePending = "PENDING"
	// StateReceived - when task is received by a worker
	StateReceived = "RECEIVED"
	// StateStarted - when the worker starts processing the task
	StateStarted = "STARTED"
	// StateRetry - when failed task has been scheduled for retry
	StateRetry = "RETRY"
	// StateSuccess - when the task is processed successfully
	StateSuccess = "SUCCESS"
	// StateFailure - when processing of the task fails
	StateFailure = "FAILURE"
)
When using AMQP as a result backend, task states will be persisted in separate queues for each task. Although RabbitMQ can scale up to thousands of queues, it is strongly advised to use a better suited result backend (e.g. Memcache) when you are expecting to run a large number of parallel tasks.
// TaskResult represents an actual return value of a processed task
type TaskResult struct {
  Type  string      `bson:"type"`
  Value interface{} `bson:"value"`
}

// TaskState represents a state of a task
type TaskState struct {
  TaskUUID  string        `bson:"_id"`
  State     string        `bson:"state"`
  Results   []*TaskResult `bson:"results"`
  Error     string        `bson:"error"`
}

// GroupMeta stores useful metadata about tasks within the same group
// E.g. UUIDs of all tasks which are used in order to check if all tasks
// completed successfully or not and thus whether to trigger chord callback
type GroupMeta struct {
  GroupUUID      string   `bson:"_id"`
  TaskUUIDs      []string `bson:"task_uuids"`
  ChordTriggered bool     `bson:"chord_triggered"`
  Lock           bool     `bson:"lock"`
}
TaskResult represents a slice of return values of a processed task.
TaskState struct will be serialized and stored every time a task state changes.
GroupMeta stores useful metadata about tasks within the same group. E.g. UUIDs of all tasks which are used in order to check if all tasks completed successfully or not and thus whether to trigger chord callback.
AsyncResult object allows you to check for the state of a task:
taskState := asyncResult.GetState()
fmt.Printf("Current state of %v task is:\n", taskState.TaskUUID)
fmt.Println(taskState.State)
There are couple of convenient methods to inspect the task status:
asyncResult.GetState().IsCompleted()
asyncResult.GetState().IsSuccess()
asyncResult.GetState().IsFailure()
You can also do a synchronous blocking call to wait for a task result:
results, err := asyncResult.Get(time.Duration(time.Millisecond * 5))
if err != nil {
  // getting result of a task failed
  // do something with the error
}
for _, result := range results {
  fmt.Println(result.Interface())
}
Error Handling
When a task returns with an error, the default behavior is to first attempty to retry the task if it's retriable, otherwise log the error and then eventually call any error callbacks.
To customize this, you can set a custom error handler on the worker which can do more than just logging after retries fail and error callbacks are trigerred:
worker.SetErrorHandler(func (err error) {
  customHandler(err)
})
Workflows
Running a single asynchronous task is fine but often you will want to design a workflow of tasks to be executed in an orchestrated way. There are couple of useful functions to help you design workflows.
Groups
Group is a set of tasks which will be executed in parallel, independent of each other. E.g.:
import (
  "github.com/RichardKnop/machinery/v1/tasks"
  "github.com/RichardKnop/machinery/v1"
)

signature1 := tasks.Signature{
  Name: "add",
  Args: []tasks.Arg{
    {
      Type:  "int64",
      Value: 1,
    },
    {
      Type:  "int64",
      Value: 1,
    },
  },
}

signature2 := tasks.Signature{
  Name: "add",
  Args: []tasks.Arg{
    {
      Type:  "int64",
      Value: 5,
    },
    {
      Type:  "int64",
      Value: 5,
    },
  },
}

group, _ := tasks.NewGroup(&signature1, &signature2)
asyncResults, err := server.SendGroup(group, 0) //The second parameter specifies the number of concurrent sending tasks. 0 means unlimited.
if err != nil {
  // failed to send the group
  // do something with the error
}
SendGroup returns a slice of AsyncResult objects. So you can do a blocking call and wait for the result of groups tasks:
for _, asyncResult := range asyncResults {
  results, err := asyncResult.Get(time.Duration(time.Millisecond * 5))
  if err != nil {
    // getting result of a task failed
    // do something with the error
  }
  for _, result := range results {
    fmt.Println(result.Interface())
  }
}
Chords
Chord allows you to define a callback to be executed after all tasks in a group finished processing, e.g.:
import (
  "github.com/RichardKnop/machinery/v1/tasks"
  "github.com/RichardKnop/machinery/v1"
)

signature1 := tasks.Signature{
  Name: "add",
  Args: []tasks.Arg{
    {
      Type:  "int64",
      Value: 1,
    },
    {
      Type:  "int64",
      Value: 1,
    },
  },
}

signature2 := tasks.Signature{
  Name: "add",
  Args: []tasks.Arg{
    {
      Type:  "int64",
      Value: 5,
    },
    {
      Type:  "int64",
      Value: 5,
    },
  },
}

signature3 := tasks.Signature{
  Name: "multiply",
}

group := tasks.NewGroup(&signature1, &signature2)
chord, _ := tasks.NewChord(group, &signature3)
chordAsyncResult, err := server.SendChord(chord, 0) //The second parameter specifies the number of concurrent sending tasks. 0 means unlimited.
if err != nil {
  // failed to send the chord
  // do something with the error
}
The above example executes task1 and task2 in parallel, aggregates their results and passes them to task3. Therefore what would end up happening is:
multiply(add(1, 1), add(5, 5))
More explicitly:
(1 + 1) * (5 + 5) = 2 * 10 = 20
SendChord returns ChordAsyncResult which follows AsyncResult's interface. So you can do a blocking call and wait for the result of the callback:
results, err := chordAsyncResult.Get(time.Duration(time.Millisecond * 5))
if err != nil {
  // getting result of a chord failed
  // do something with the error
}
for _, result := range results {
  fmt.Println(result.Interface())
}
Chains
Chain is simply a set of tasks which will be executed one by one, each successful task triggering the next task in the chain. E.g.:
import (
  "github.com/RichardKnop/machinery/v1/tasks"
  "github.com/RichardKnop/machinery/v1"
)

signature1 := tasks.Signature{
  Name: "add",
  Args: []tasks.Arg{
    {
      Type:  "int64",
      Value: 1,
    },
    {
      Type:  "int64",
      Value: 1,
    },
  },
}

signature2 := tasks.Signature{
  Name: "add",
  Args: []tasks.Arg{
    {
      Type:  "int64",
      Value: 5,
    },
    {
      Type:  "int64",
      Value: 5,
    },
  },
}

signature3 := tasks.Signature{
  Name: "multiply",
  Args: []tasks.Arg{
    {
      Type:  "int64",
      Value: 4,
    },
  },
}

chain, _ := tasks.NewChain(&signature1, &signature2, &signature3)
chainAsyncResult, err := server.SendChain(chain)
if err != nil {
  // failed to send the chain
  // do something with the error
}
The above example executes task1, then task2 and then task3. When a task is completed successfully, the result is appended to the end of list of arguments for the next task in the chain. Therefore what would end up happening is:
multiply(4, add(5, 5, add(1, 1)))
More explicitly:
  4 * (5 + 5 + (1 + 1))   # task1: add(1, 1)        returns 2
= 4 * (5 + 5 + 2)         # task2: add(5, 5, 2)     returns 12
= 4 * (12)                # task3: multiply(4, 12)  returns 48
= 48
SendChain returns ChainAsyncResult which follows AsyncResult's interface. So you can do a blocking call and wait for the result of the whole chain:
results, err := chainAsyncResult.Get(time.Duration(time.Millisecond * 5))
if err != nil {
  // getting result of a chain failed
  // do something with the error
}
for _, result := range results {
  fmt.Println(result.Interface())
}
Periodic Tasks & Workflows
Machinery now supports scheduling periodic tasks and workflows. See examples bellow.
Periodic Tasks
import (
  "github.com/RichardKnop/machinery/v1/tasks"
)

signature := &tasks.Signature{
  Name: "add",
  Args: []tasks.Arg{
    {
      Type:  "int64",
      Value: 1,
    },
    {
      Type:  "int64",
      Value: 1,
    },
  },
}
err := server.RegisterPeriodicTask("0 6 * * ?", "periodic-task", signature)
if err != nil {
  // failed to register periodic task
}
Periodic Groups
import (
  "github.com/RichardKnop/machinery/v1/tasks"
  "github.com/RichardKnop/machinery/v1"
)

signature1 := tasks.Signature{
  Name: "add",
  Args: []tasks.Arg{
    {
      Type:  "int64",
      Value: 1,
    },
    {
      Type:  "int64",
      Value: 1,
    },
  },
}

signature2 := tasks.Signature{
  Name: "add",
  Args: []tasks.Arg{
    {
      Type:  "int64",
      Value: 5,
    },
    {
      Type:  "int64",
      Value: 5,
    },
  },
}

group, _ := tasks.NewGroup(&signature1, &signature2)
err := server.RegisterPeriodicGroup("0 6 * * ?", "periodic-group", group)
if err != nil {
  // failed to register periodic group
}
Periodic Chains
import (
  "github.com/RichardKnop/machinery/v1/tasks"
  "github.com/RichardKnop/machinery/v1"
)

signature1 := tasks.Signature{
  Name: "add",
  Args: []tasks.Arg{
    {
      Type:  "int64",
      Value: 1,
    },
    {
      Type:  "int64",
      Value: 1,
    },
  },
}

signature2 := tasks.Signature{
  Name: "add",
  Args: []tasks.Arg{
    {
      Type:  "int64",
      Value: 5,
    },
    {
      Type:  "int64",
      Value: 5,
    },
  },
}

signature3 := tasks.Signature{
  Name: "multiply",
  Args: []tasks.Arg{
    {
      Type:  "int64",
      Value: 4,
    },
  },
}

chain, _ := tasks.NewChain(&signature1, &signature2, &signature3)
err := server.RegisterPeriodicChain("0 6 * * ?", "periodic-chain", chain)
if err != nil {
  // failed to register periodic chain
}
Chord
import (
  "github.com/RichardKnop/machinery/v1/tasks"
  "github.com/RichardKnop/machinery/v1"
)

signature1 := tasks.Signature{
  Name: "add",
  Args: []tasks.Arg{
    {
      Type:  "int64",
      Value: 1,
    },
    {
      Type:  "int64",
      Value: 1,
    },
  },
}

signature2 := tasks.Signature{
  Name: "add",
  Args: []tasks.Arg{
    {
      Type:  "int64",
      Value: 5,
    },
    {
      Type:  "int64",
      Value: 5,
    },
  },
}

signature3 := tasks.Signature{
  Name: "multiply",
}

group := tasks.NewGroup(&signature1, &signature2)
chord, _ := tasks.NewChord(group, &signature3)
err := server.RegisterPeriodicChord("0 6 * * ?", "periodic-chord", chord)
if err != nil {
  // failed to register periodic chord
}
Development
Requirements
- Go
- RabbitMQ (optional)
- Redis
- Memcached (optional)
- MongoDB (optional)
On OS X systems, you can install requirements using Homebrew:
brew install go
brew install rabbitmq
brew install redis
brew install memcached
brew install mongodb
Or optionally use the corresponding Docker containers:
docker run -d -p 5672:5672 rabbitmq
docker run -d -p 6379:6379 redis
docker run -d -p 11211:11211 memcached
docker run -d -p 27017:27017 mongo
docker run -d -p 6831:6831/udp -p 16686:16686 jaegertracing/all-in-one:latest
Dependencies
Since Go 1.11, a new recommended dependency management system is via modules.
This is one of slight weaknesses of Go as dependency management is not a solved problem. Previously Go was officially recommending to use the dep tool but that has been abandoned now in favor of modules.
Testing
Easiest (and platform agnostic) way to run tests is via docker-compose:
make ci
This will basically run docker-compose command:
(docker-compose -f docker-compose.test.yml -p machinery_ci up --build -d) && (docker logs -f machinery_sut &) && (docker wait machinery_sut)
Alternative approach is to setup a development environment on your machine.
In order to enable integration tests, you will need to install all required services (RabbitMQ, Redis, Memcache, MongoDB) and export these environment variables:
export AMQP_URL=amqp://guest:guest@localhost:5672/
export REDIS_URL=localhost:6379
export MEMCACHE_URL=localhost:11211
export MONGODB_URL=localhost:27017
To run integration tests against an SQS instance, you will need to create a "test_queue" in SQS and export these environment variables:
export SQS_URL=https://YOUR_SQS_URL
export AWS_ACCESS_KEY_ID=YOUR_AWS_ACCESS_KEY_ID
export AWS_SECRET_ACCESS_KEY=YOUR_AWS_SECRET_ACCESS_KEY
export AWS_DEFAULT_REGION=YOUR_AWS_DEFAULT_REGION
Then just run:
make test
If the environment variables are not exported, make test will only run unit tests.
Top Related Projects
Convert designs to code with AI
Introducing Visual Copilot: A new AI model to turn Figma designs to high quality code using your components.
Try Visual Copilot