 keychain-swift
Helper functions for saving text in Keychain securely for iOS, OS X, tvOS and watchOS.
Top Related Projects

Valet lets you securely store data in the iOS, tvOS, watchOS, or macOS Keychain without knowing a thing about how the Keychain works. It’s easy. We promise.

Simple Swift wrapper for Keychain that works on iOS, watchOS, tvOS and macOS.

A powerful, protocol-oriented library for working with the keychain in Swift.

Simple Objective-C wrapper for the keychain that works on Mac and iOS

Convenient & secure logging during development & release in Swift 4 & 5
Quick Overview
Keychain-swift is a lightweight Swift library that provides a simple and convenient way to interact with the iOS Keychain. It offers a high-level API for storing and retrieving sensitive data securely, making it easier for developers to implement secure storage in their iOS applications.
Pros
- Easy to use with a simple, intuitive API
- Supports both synchronous and asynchronous operations
- Provides type-safe methods for storing various data types
- Well-documented and actively maintained
Cons
- Limited to iOS and macOS platforms
- Doesn't provide advanced keychain features like access control or sharing between apps
- May require additional setup for certain use cases (e.g., iCloud syncing)
Code Examples
- Storing a string value in the keychain:
let keychain = KeychainSwift()
keychain.set("secret_value", forKey: "my_key")
- Retrieving a string value from the keychain:
let keychain = KeychainSwift()
if let value = keychain.get("my_key") {
    print("Retrieved value: \(value)")
}
- Storing and retrieving data:
let keychain = KeychainSwift()
let data = "Hello, World!".data(using: .utf8)!
keychain.set(data, forKey: "my_data_key")

if let retrievedData = keychain.getData("my_data_key") {
    let string = String(data: retrievedData, encoding: .utf8)
    print("Retrieved string: \(string ?? "")")
}
Getting Started
- Install the library using Swift Package Manager by adding the following to your
Package.swiftfile:
dependencies: [
    .package(url: "https://github.com/evgenyneu/keychain-swift.git", from: "20.0.0")
]
- Import the library in your Swift file:
import KeychainSwift
- Create an instance of
KeychainSwiftand start using it:
let keychain = KeychainSwift()
keychain.set("secret_value", forKey: "my_key")
let value = keychain.get("my_key")
Competitor Comparisons
Valet lets you securely store data in the iOS, tvOS, watchOS, or macOS Keychain without knowing a thing about how the Keychain works. It’s easy. We promise.
Pros of Valet
- More comprehensive and feature-rich, offering advanced functionality like data synchronization across devices
- Better documentation and examples, making it easier for developers to integrate and use
- Actively maintained by Square, a reputable company in the fintech industry
Cons of Valet
- Larger codebase and more dependencies, potentially increasing app size
- Steeper learning curve due to more complex API and additional features
- Written in Objective-C, which may be less preferred by developers working primarily with Swift
Code Comparison
Keychain-swift:
let keychain = KeychainSwift()
keychain.set("hello world", forKey: "my key")
let value = keychain.get("my key")
Valet:
let myValet = Valet.valet(with: Identifier(nonEmpty: "Druidia")!, accessibility: .whenUnlocked)
try? myValet.setString("12345", forKey: "combination")
let combination = try? myValet.string(forKey: "combination")
Both libraries provide simple APIs for storing and retrieving data from the keychain, but Valet offers more configuration options and error handling capabilities. Keychain-swift focuses on simplicity and ease of use, while Valet provides more advanced features and flexibility at the cost of increased complexity.
Simple Swift wrapper for Keychain that works on iOS, watchOS, tvOS and macOS.
Pros of KeychainAccess
- More comprehensive API with support for advanced Keychain features
- Better documentation and examples
- Active development and maintenance
Cons of KeychainAccess
- Larger codebase, potentially increasing app size
- Steeper learning curve due to more complex API
Code Comparison
KeychainAccess:
let keychain = Keychain(service: "com.example.app")
keychain["username"] = "john_doe"
let username = keychain["username"]
keychain-swift:
let keychain = KeychainSwift()
keychain.set("john_doe", forKey: "username")
let username = keychain.get("username")
Both libraries provide simple ways to interact with the Keychain, but KeychainAccess offers more advanced features and configuration options. keychain-swift focuses on simplicity and ease of use, making it a good choice for basic Keychain operations. KeychainAccess is better suited for projects requiring more complex Keychain interactions or advanced security features.
KeychainAccess has a larger community and more frequent updates, which can be beneficial for long-term support and bug fixes. However, keychain-swift's simplicity may be preferable for smaller projects or developers new to working with the Keychain.
A powerful, protocol-oriented library for working with the keychain in Swift.
Pros of Locksmith
- More comprehensive API with support for advanced features like accessibility options and synchronization
- Better documentation and examples in the README
- Supports both Swift and Objective-C
Cons of Locksmith
- Larger codebase, which may increase app size
- More complex to use for simple keychain operations
- Less frequently updated compared to keychain-swift
Code Comparison
keychain-swift:
let keychain = KeychainSwift()
keychain.set("hello world", forKey: "my key")
let value = keychain.get("my key")
Locksmith:
try Locksmith.saveData(["some key": "some value"], forUserAccount: "myUserAccount")
let dictionary = Locksmith.loadDataForUserAccount("myUserAccount")
Both libraries provide simple ways to interact with the iOS Keychain, but Locksmith offers a more feature-rich API at the cost of increased complexity. keychain-swift focuses on simplicity and ease of use, making it a good choice for basic keychain operations. Locksmith is better suited for projects requiring advanced keychain functionality or cross-language support.
Simple Objective-C wrapper for the keychain that works on Mac and iOS
Pros of SAMKeychain
- Objective-C implementation, which can be beneficial for projects using both Swift and Objective-C
- More comprehensive API with additional features like setting accessibility and synchronization options
- Longer development history and wider adoption in the community
Cons of SAMKeychain
- Less Swift-friendly syntax compared to keychain-swift
- Requires bridging header for Swift projects, adding complexity to integration
- Larger codebase, which may increase app size slightly
Code Comparison
SAMKeychain:
[SAMKeychain setPassword:@"secret" forService:@"MyService" account:@"user@example.com"];
NSString *password = [SAMKeychain passwordForService:@"MyService" account:@"user@example.com"];
keychain-swift:
let keychain = KeychainSwift()
keychain.set("secret", forKey: "MyService_user@example.com")
let password = keychain.get("MyService_user@example.com")
Both libraries provide similar functionality for storing and retrieving data from the iOS Keychain. SAMKeychain offers a more traditional Objective-C API, while keychain-swift provides a more Swift-idiomatic approach. The choice between the two depends on the project's requirements, existing codebase, and developer preferences.
Convenient & secure logging during development & release in Swift 4 & 5
Pros of SwiftyBeaver
- Comprehensive logging system with multiple destinations (console, file, cloud)
- Advanced filtering and formatting options for log messages
- Supports multiple log levels (verbose, debug, info, warning, error)
Cons of SwiftyBeaver
- Larger and more complex library, potentially overkill for simple logging needs
- Requires more setup and configuration compared to simpler alternatives
- Not specifically designed for keychain operations
Code Comparison
SwiftyBeaver:
import SwiftyBeaver
let log = SwiftyBeaver.self
log.addDestination(ConsoleDestination())
log.info("Hello World")
keychain-swift:
import KeychainSwift
let keychain = KeychainSwift()
keychain.set("hello world", forKey: "my key")
Summary
SwiftyBeaver is a powerful logging framework with extensive features, while keychain-swift is a lightweight wrapper for Keychain Services. SwiftyBeaver offers more comprehensive logging capabilities but may be excessive for simple projects. keychain-swift is focused solely on keychain operations, making it more suitable for projects that primarily need secure data storage. The choice between the two depends on the specific requirements of your project, with SwiftyBeaver being better for advanced logging needs and keychain-swift for straightforward keychain interactions.
Convert  designs to code with AI

Introducing Visual Copilot: A new AI model to turn Figma designs to high quality code using your components.
Try Visual CopilotREADME
Helper functions for storing text in Keychain for iOS, macOS, tvOS and WatchOS
![]()

![]()


This is a collection of helper functions for saving text and data in the Keychain. As you probably noticed Apple's keychain API is a bit verbose. This library was designed to provide shorter syntax for accomplishing a simple task: reading/writing text values for specified keys:
let keychain = KeychainSwift()
keychain.set("hello world", forKey: "my key")
keychain.get("my key")
The Keychain library includes the following features:
- Get, set and delete string, boolean and Data Keychain items
- Specify item access security level
- Synchronize items through iCloud
- Share Keychain items with other apps
What's Keychain?
Keychain is a secure storage. You can store all kind of sensitive data in it: user passwords, credit card numbers, secret tokens etc. Once stored in Keychain this information is only available to your app, other apps can't see it. Besides that, operating system makes sure this information is kept and processed securely. For example, text stored in Keychain can not be extracted from iPhone backup or from its file system. Apple recommends storing only small amount of data in the Keychain. If you need to secure something big you can encrypt it manually, save to a file and store the key in the Keychain.
Setup
There are four ways you can add KeychainSwift to your project.
Add source (iOS 7+)
Simply add KeychainSwiftDistrib.swift file into your Xcode project.
Setup with Carthage (iOS 8+)
Alternatively, add github "evgenyneu/keychain-swift" ~> 24.0 to your Cartfile and run carthage update.
Setup with CocoaPods (iOS 8+)
If you are using CocoaPods add this text to your Podfile and run pod install.
use_frameworks!
target 'Your target name'
pod 'KeychainSwift', '~> 24.0'
Setup with Swift Package Manager (in project)
- In Xcode select File > Add Packages.
- Enter this project's URL: https://github.com/evgenyneu/keychain-swift.git
Setup with Swift Package Manager (in Swift Package)
If you're using KeychainSwift in a Swift package, make sure to specify a name. This is because SPM cannot automatically resolve a name for a package that has a different Target name in its Package.swift (namely KeychainSwift) that differs from the repo link (keychain-swift).
.package(name: "KeychainSwift", url: "https://github.com/evgenyneu/keychain-swift.git", from: "24.0.0")
Legacy Swift versions
Setup a previous version of the library if you use an older version of Swift.
Usage
Add import KeychainSwift to your source code unless you used the file setup method.
String values
let keychain = KeychainSwift()
keychain.set("hello world", forKey: "my key")
keychain.get("my key")
Boolean values
let keychain = KeychainSwift()
keychain.set(true, forKey: "my key")
keychain.getBool("my key")
Data values
let keychain = KeychainSwift()
keychain.set(dataObject, forKey: "my key")
keychain.getData("my key")
Removing keys from Keychain
keychain.delete("my key") // Remove single key
keychain.clear() // Delete everything from app's Keychain. Does not work on macOS.
Return all keys
let keychain = KeychainSwift()
keychain.allKeys // Returns the names of all keys
Advanced options
Keychain item access
Use withAccess parameter to specify the security level of the keychain storage.
By default the .accessibleWhenUnlocked option is used. It is one of the most restrictive options and provides good data protection.
let keychain = KeychainSwift()
keychain.set("Hello world", forKey: "key 1", withAccess: .accessibleWhenUnlocked)
You can use .accessibleAfterFirstUnlock if you need your app to access the keychain item while in the background. Note that it is less secure than the .accessibleWhenUnlocked option.
See the list of all available access options.
Synchronizing keychain items with other devices
Set synchronizable property to true to enable keychain items synchronization across user's multiple devices. The synchronization will work for users who have the "Keychain" enabled in the iCloud settings on their devices.
Setting synchronizable property to true will add the item to other devices with the set method and obtain synchronizable items with the get command. Deleting a synchronizable item will remove it from all devices.
Note that you do NOT need to enable iCloud or Keychain Sharing capabilities in your app's target for this feature to work.
// First device
let keychain = KeychainSwift()
keychain.synchronizable = true
keychain.set("hello world", forKey: "my key")

// Second device
let keychain = KeychainSwift()
keychain.synchronizable = true
keychain.get("my key") // Returns "hello world"
We could not get the Keychain synchronization work on macOS.
Sharing keychain items with other apps
In order to share keychain items between apps on the same device they need to have common Keychain Groups registered in Capabilities > Keychain Sharing settings. This tutorial shows how to set it up.
Use accessGroup property to access shared keychain items. In the following example we specify an access group "CS671JRA62.com.myapp.KeychainGroup" that will be used to set, get and delete an item "my key".
let keychain = KeychainSwift()
keychain.accessGroup = "CS671JRA62.com.myapp.KeychainGroup" // Use your own access goup

keychain.set("hello world", forKey: "my key")
keychain.get("my key")
keychain.delete("my key")
keychain.clear()
Note: there is no way of sharing a keychain item between the watchOS 2.0 and its paired device: https://forums.developer.apple.com/thread/5938
Setting key prefix
One can pass a keyPrefix argument when initializing a KeychainSwift object. The string passed in keyPrefix argument will be used as a prefix to all the keys used in set, get, getData and delete methods. Adding a prefix to the keychain keys can be useful in unit tests. This prevents the tests from changing the Keychain keys that are used when the app is launched manually.
Note that clear method still clears everything from the Keychain regardless of the prefix used.
let keychain = KeychainSwift(keyPrefix: "myTestKey_")
keychain.set("hello world", forKey: "hello")
// Value will be stored under "myTestKey_hello" key
Check if operation was successful
One can verify if set, delete and clear methods finished successfully by checking their return values. Those methods return true on success and false on error.
if keychain.set("hello world", forKey: "my key") {
  // Keychain item is saved successfully
} else {
  // Report error
}
To get a specific failure reason use the lastResultCode property containing result code for the last operation. See Keychain Result Codes.
keychain.set("hello world", forKey: "my key")
if keychain.lastResultCode != noErr { /* Report error */ }
Returning data as reference
Use the asReference: true parameter to return the data as reference, which is needed for NEVPNProtocol.
let keychain = KeychainSwift()
keychain.set(dataObject, forKey: "my key")
keychain.getData("my key", asReference: true)
Using KeychainSwift from Objective-C
This manual describes how to use KeychainSwift in Objective-C apps.
âï¸Known critical issue - call to actionâï¸
It has been reported that the library sometimes returns nil instead of the stored Keychain value. It may be connected with the Keychain issue reported on Apple developer forums. The issue is random and hard to reproduce. If you experienced this problem feel free to create an issue and share your story, so we can find solutions.
Video tutorial
Thanks to Alex Nagy from rebeloper.com for creating this two-part video tutorial.

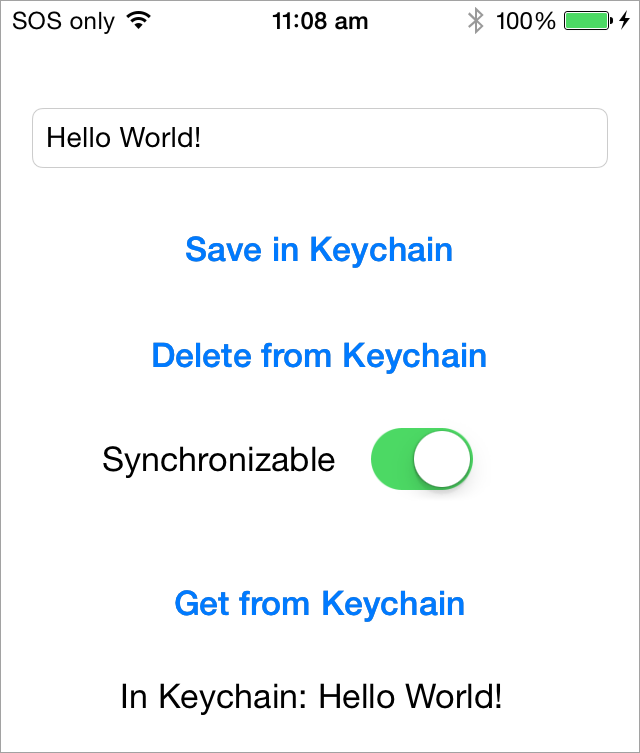
Demo app
Alternative solutions
Here are some other Keychain libraries.
- DanielTomlinson/Latch
- jrendel/SwiftKeychainWrapper
- kishikawakatsumi/KeychainAccess
- matthewpalmer/Locksmith
- s-aska/KeyClip
- yankodimitrov/SwiftKeychain
Thanks ð
- The code is based on this example: https://gist.github.com/s-aska/e7ad24175fb7b04f78e7
- Thanks to diogoguimaraes for adding Swift Package Manager setup option.
- Thanks to glyuck for taming booleans.
- Thanks to pepibumur for adding macOS, watchOS and tvOS support.
- Thanks to ezura for iOS 7 support.
- Thanks to mikaoj for adding keychain synchronization.
- Thanks to tcirwin for adding Swift 3.0 support.
- Thanks to Tulleb for adding Xcode 8 beta 6 support.
- Thanks to CraigSiemens for adding Swift 3.1 support.
- Thanks to maxkramerbcgdv for fixing Package Manager setup in Xcode 8.2.
- Thanks to elikohen for fixing concurrency issues.
- Thanks to beny for adding Swift 4.2 support.
- Thanks to xuaninbox for fixing watchOS deployment target for Xcode 10.
- Thanks to schayes04 for adding Swift 5.0 support.
- Thanks to mediym41 for adding ability to return data as reference.
- Thanks to AnthonyOliveri for adding ability to run unit tests from Swift Package Manager.
- Thanks to philippec for removing deprecated access options.
- Thanks to lucasmpaim for adding ability to return the names of all keys.
Feedback is welcome
If you notice any issue, got stuck or just want to chat feel free to create an issue. We will be happy to help you.
License
Keychain Swift is released under the MIT License.
Top Related Projects
Valet lets you securely store data in the iOS, tvOS, watchOS, or macOS Keychain without knowing a thing about how the Keychain works. It’s easy. We promise.
Simple Swift wrapper for Keychain that works on iOS, watchOS, tvOS and macOS.
A powerful, protocol-oriented library for working with the keychain in Swift.
Simple Objective-C wrapper for the keychain that works on Mac and iOS
Convenient & secure logging during development & release in Swift 4 & 5
Convert designs to code with AI
Introducing Visual Copilot: A new AI model to turn Figma designs to high quality code using your components.
Try Visual Copilot