
Top Related Projects

Neural style in TensorFlow! 🎨

TensorFlow CNN for fast style transfer ⚡🖥🎨🖼

Code and data for paper "Deep Photo Style Transfer": https://arxiv.org/abs/1703.07511

Style transfer, deep learning, feature transform

TensorFlow (Python API) implementation of Neural Style
Quick Overview
Neural-style is a Torch implementation of the neural style algorithm, which combines the content of one image with the style of another image using convolutional neural networks. This project allows users to create artistic images by transferring the style of famous paintings onto their own photographs.
Pros
- High-quality style transfer results
- Flexible control over style and content balance
- Supports multiple style images and layer selections
- Well-documented with clear instructions and examples
Cons
- Requires a powerful GPU for reasonable processing times
- Limited to static image processing (no video support)
- Dependency on Torch, which is less popular than other deep learning frameworks
- May require some trial and error to achieve desired results
Code Examples
- Basic style transfer:
th neural_style.lua -style_image examples/inputs/starry_night.jpg -content_image examples/inputs/tubingen.jpg
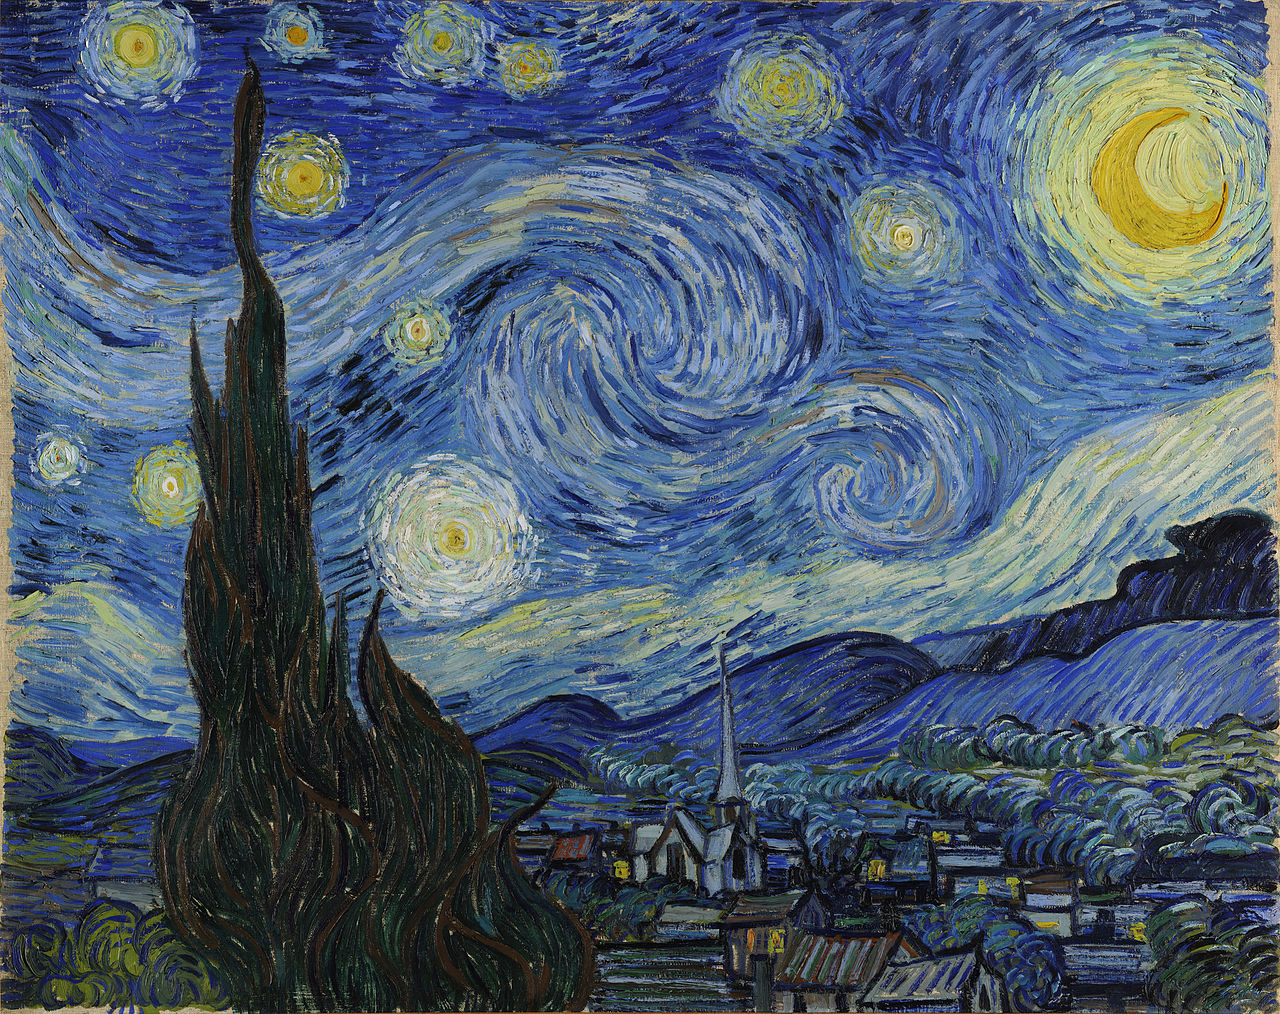
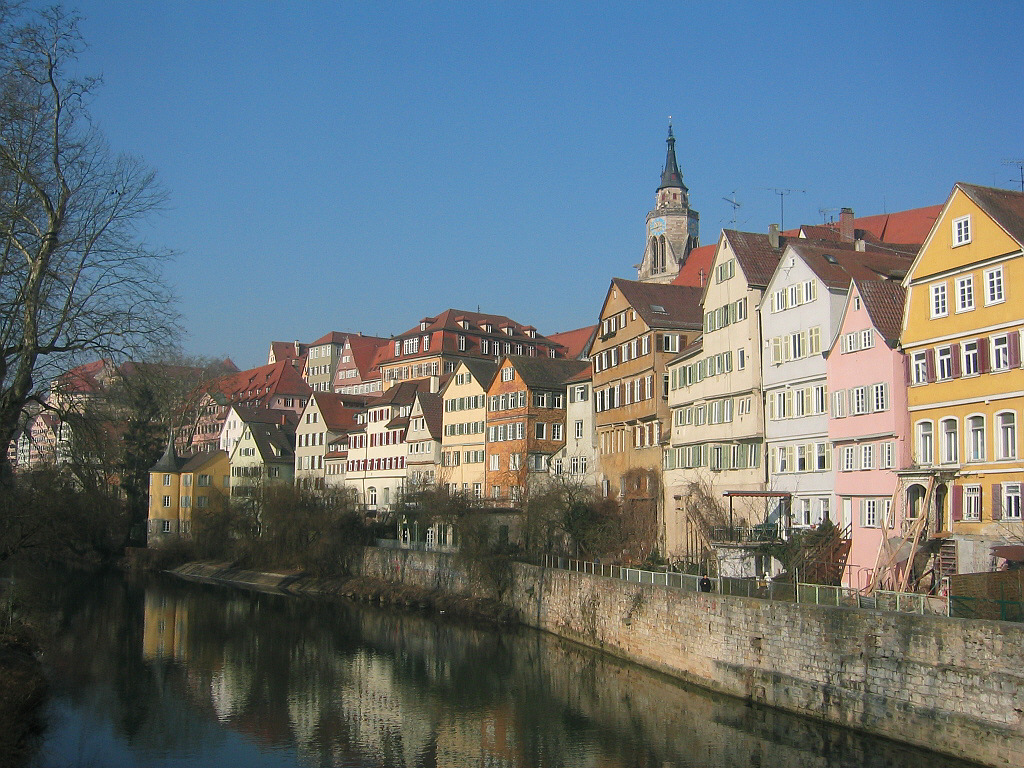
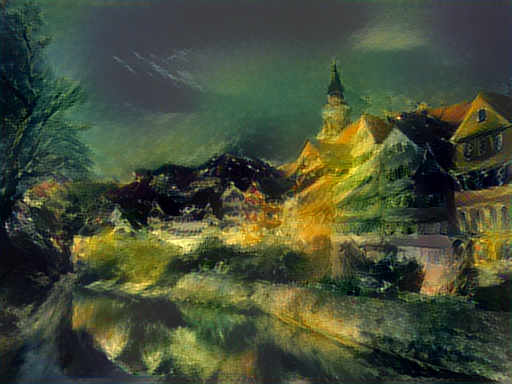
This command applies the style of Van Gogh's "Starry Night" to a photograph of Tübingen.
- Multiple style images:
th neural_style.lua -style_image examples/inputs/starry_night.jpg -style_image examples/inputs/the_scream.jpg -content_image examples/inputs/tubingen.jpg -style_blend_weights 0.5 0.5
This example combines two style images (Starry Night and The Scream) with equal weights.
- Adjusting style scale:
th neural_style.lua -style_image examples/inputs/starry_night.jpg -content_image examples/inputs/tubingen.jpg -style_scale 0.5
This command reduces the style scale to 0.5, resulting in a more subtle style transfer.
Getting Started
-
Install Torch and required dependencies:
git clone https://github.com/torch/distro.git ~/torch --recursive cd ~/torch && bash install-deps && ./install.sh -
Clone the repository:
git clone https://github.com/jcjohnson/neural-style.git cd neural-style -
Download pre-trained VGG model:
sh models/download_models.sh -
Run the script with your chosen style and content images:
th neural_style.lua -style_image <path_to_style_image> -content_image <path_to_content_image>
Competitor Comparisons
Neural style in TensorFlow! 🎨
Pros of neural-style (anishathalye)
- Supports multiple GPU usage for faster processing
- Includes a user-friendly command-line interface
- Offers additional features like content-aware image resizing
Cons of neural-style (anishathalye)
- May require more setup and dependencies
- Potentially slower on CPU-only systems
- Less extensive documentation compared to the jcjohnson version
Code Comparison
neural-style (jcjohnson):
local cmd = torch.CmdLine()
cmd:option('-style_image', 'examples/inputs/seated-nude.jpg', 'Style target image')
cmd:option('-content_image', 'examples/inputs/tubingen.jpg', 'Content target image')
cmd:option('-output_image', 'out.png', 'Output image')
neural-style (anishathalye):
parser.add_argument('--content', type=str,
                    dest='content', help='content image path',
                    metavar='CONTENT', required=True)
parser.add_argument('--styles', type=str,
                    dest='styles', help='one or more style image paths',
                    nargs='+', metavar='STYLE', required=True)
Both repositories implement the neural style transfer algorithm, but they differ in their implementation languages and features. The jcjohnson version uses Torch and Lua, while the anishathalye version is implemented in Python using TensorFlow. The anishathalye version offers more flexibility with multiple GPU support and additional features, but may require more setup. The jcjohnson version might be easier to use for beginners due to its simpler setup and more extensive documentation.
TensorFlow CNN for fast style transfer ⚡🖥🎨🖼
Pros of fast-style-transfer
- Significantly faster processing time for style transfer
- Real-time style transfer capability for video streams
- Pre-trained models available for immediate use
Cons of fast-style-transfer
- Limited flexibility in adjusting style parameters
- Potentially lower quality results for complex styles
- Requires training a separate model for each style
Code Comparison
neural-style:
local cmd = torch.CmdLine()
cmd:option('-style_image', 'examples/inputs/seated-nude.jpg', 'Style target image')
cmd:option('-content_image', 'examples/inputs/tubingen.jpg', 'Content target image')
cmd:option('-output_image', 'out.png', 'Output image')
local opt = cmd:parse(arg)
fast-style-transfer:
parser = argparse.ArgumentParser()
parser.add_argument('--checkpoint', type=str, help='Checkpoint directory or file')
parser.add_argument('--in-path', type=str, help='Input image path')
parser.add_argument('--out-path', type=str, help='Output image path')
args = parser.parse_args()
Both repositories focus on neural style transfer, but fast-style-transfer prioritizes speed and real-time processing at the cost of some flexibility and potentially lower quality results for complex styles. neural-style offers more control over the style transfer process but requires longer processing times. The code snippets show different approaches to handling command-line arguments, with neural-style using Torch and fast-style-transfer using Python's argparse.
Code and data for paper "Deep Photo Style Transfer": https://arxiv.org/abs/1703.07511
Pros of deep-photo-styletransfer
- Produces more photorealistic results, preserving the structure of the original photo
- Includes a photorealism regularization for better content preservation
- Offers improved color preservation compared to neural-style
Cons of deep-photo-styletransfer
- Requires more computational resources and time to process images
- Less flexible for artistic stylization, as it focuses on photorealistic results
- More complex setup and dependencies compared to neural-style
Code Comparison
neural-style:
local content_image = image.load(params.content_image, 3)
local style_image = image.load(params.style_image, 3)
local content_layers = params.content_layers or {21}
local style_layers = params.style_layers or {2,7,12,17,22}
deep-photo-styletransfer:
content_im = imread(content_image_path);
style_im = imread(style_image_path);
content_seg = imread(content_seg_path);
style_seg = imread(style_seg_path);
The code snippets show that deep-photo-styletransfer requires additional inputs for segmentation masks, which are used to achieve more precise photorealistic results. neural-style has a simpler input structure, focusing on content and style images only.
Style transfer, deep learning, feature transform
Pros of FastPhotoStyle
- Faster processing time, especially for high-resolution images
- Produces more photorealistic results with better preservation of content details
- Supports both photo-to-photo and sketch-to-photo style transfer
Cons of FastPhotoStyle
- Requires more computational resources and a powerful GPU for optimal performance
- Less flexibility in terms of artistic style manipulation compared to neural-style
- More complex setup and dependencies
Code Comparison
neural-style:
th neural_style.lua -style_image <style.jpg> -content_image <content.jpg>
FastPhotoStyle:
python demo.py --content <content.jpg> --style <style.jpg> --output <output.jpg>
Key Differences
- FastPhotoStyle focuses on photorealistic style transfer, while neural-style is more versatile for artistic styles
- FastPhotoStyle uses a two-stage approach (style swap and smoothing), whereas neural-style relies on a single optimization process
- FastPhotoStyle is implemented in Python with PyTorch, while neural-style uses Lua and Torch
Use Cases
- neural-style: Artistic style transfer, creating unique visual effects
- FastPhotoStyle: Realistic photo editing, color grading, and style matching between photographs
TensorFlow (Python API) implementation of Neural Style
Pros of neural-style-tf
- Implemented in TensorFlow, offering better GPU utilization and potential for distributed computing
- Supports multiple style images for blended styles
- Includes additional features like color preservation and masked styling
Cons of neural-style-tf
- May have a steeper learning curve for those unfamiliar with TensorFlow
- Potentially slower setup process due to TensorFlow dependencies
- Less extensive documentation compared to neural-style
Code Comparison
neural-style (Lua/Torch):
local img = image.load(params.image, 3)
local img = image.scale(img, params.image_size, 'bilinear')
local imgs = preprocess(img):float()
neural-style-tf (Python/TensorFlow):
content_image = utils.load_image(args.content_image)
style_images = [utils.load_image(style) for style in args.style_images]
initial_image = utils.get_initial_image(args.initial_image, content_image)
Both repositories implement the neural style transfer algorithm, but neural-style-tf offers more flexibility and features at the cost of potentially increased complexity. The choice between them may depend on the user's familiarity with the respective frameworks and specific requirements for the style transfer task.
Convert  designs to code with AI

Introducing Visual Copilot: A new AI model to turn Figma designs to high quality code using your components.
Try Visual CopilotREADME
neural-style
This is a torch implementation of the paper A Neural Algorithm of Artistic Style by Leon A. Gatys, Alexander S. Ecker, and Matthias Bethge.
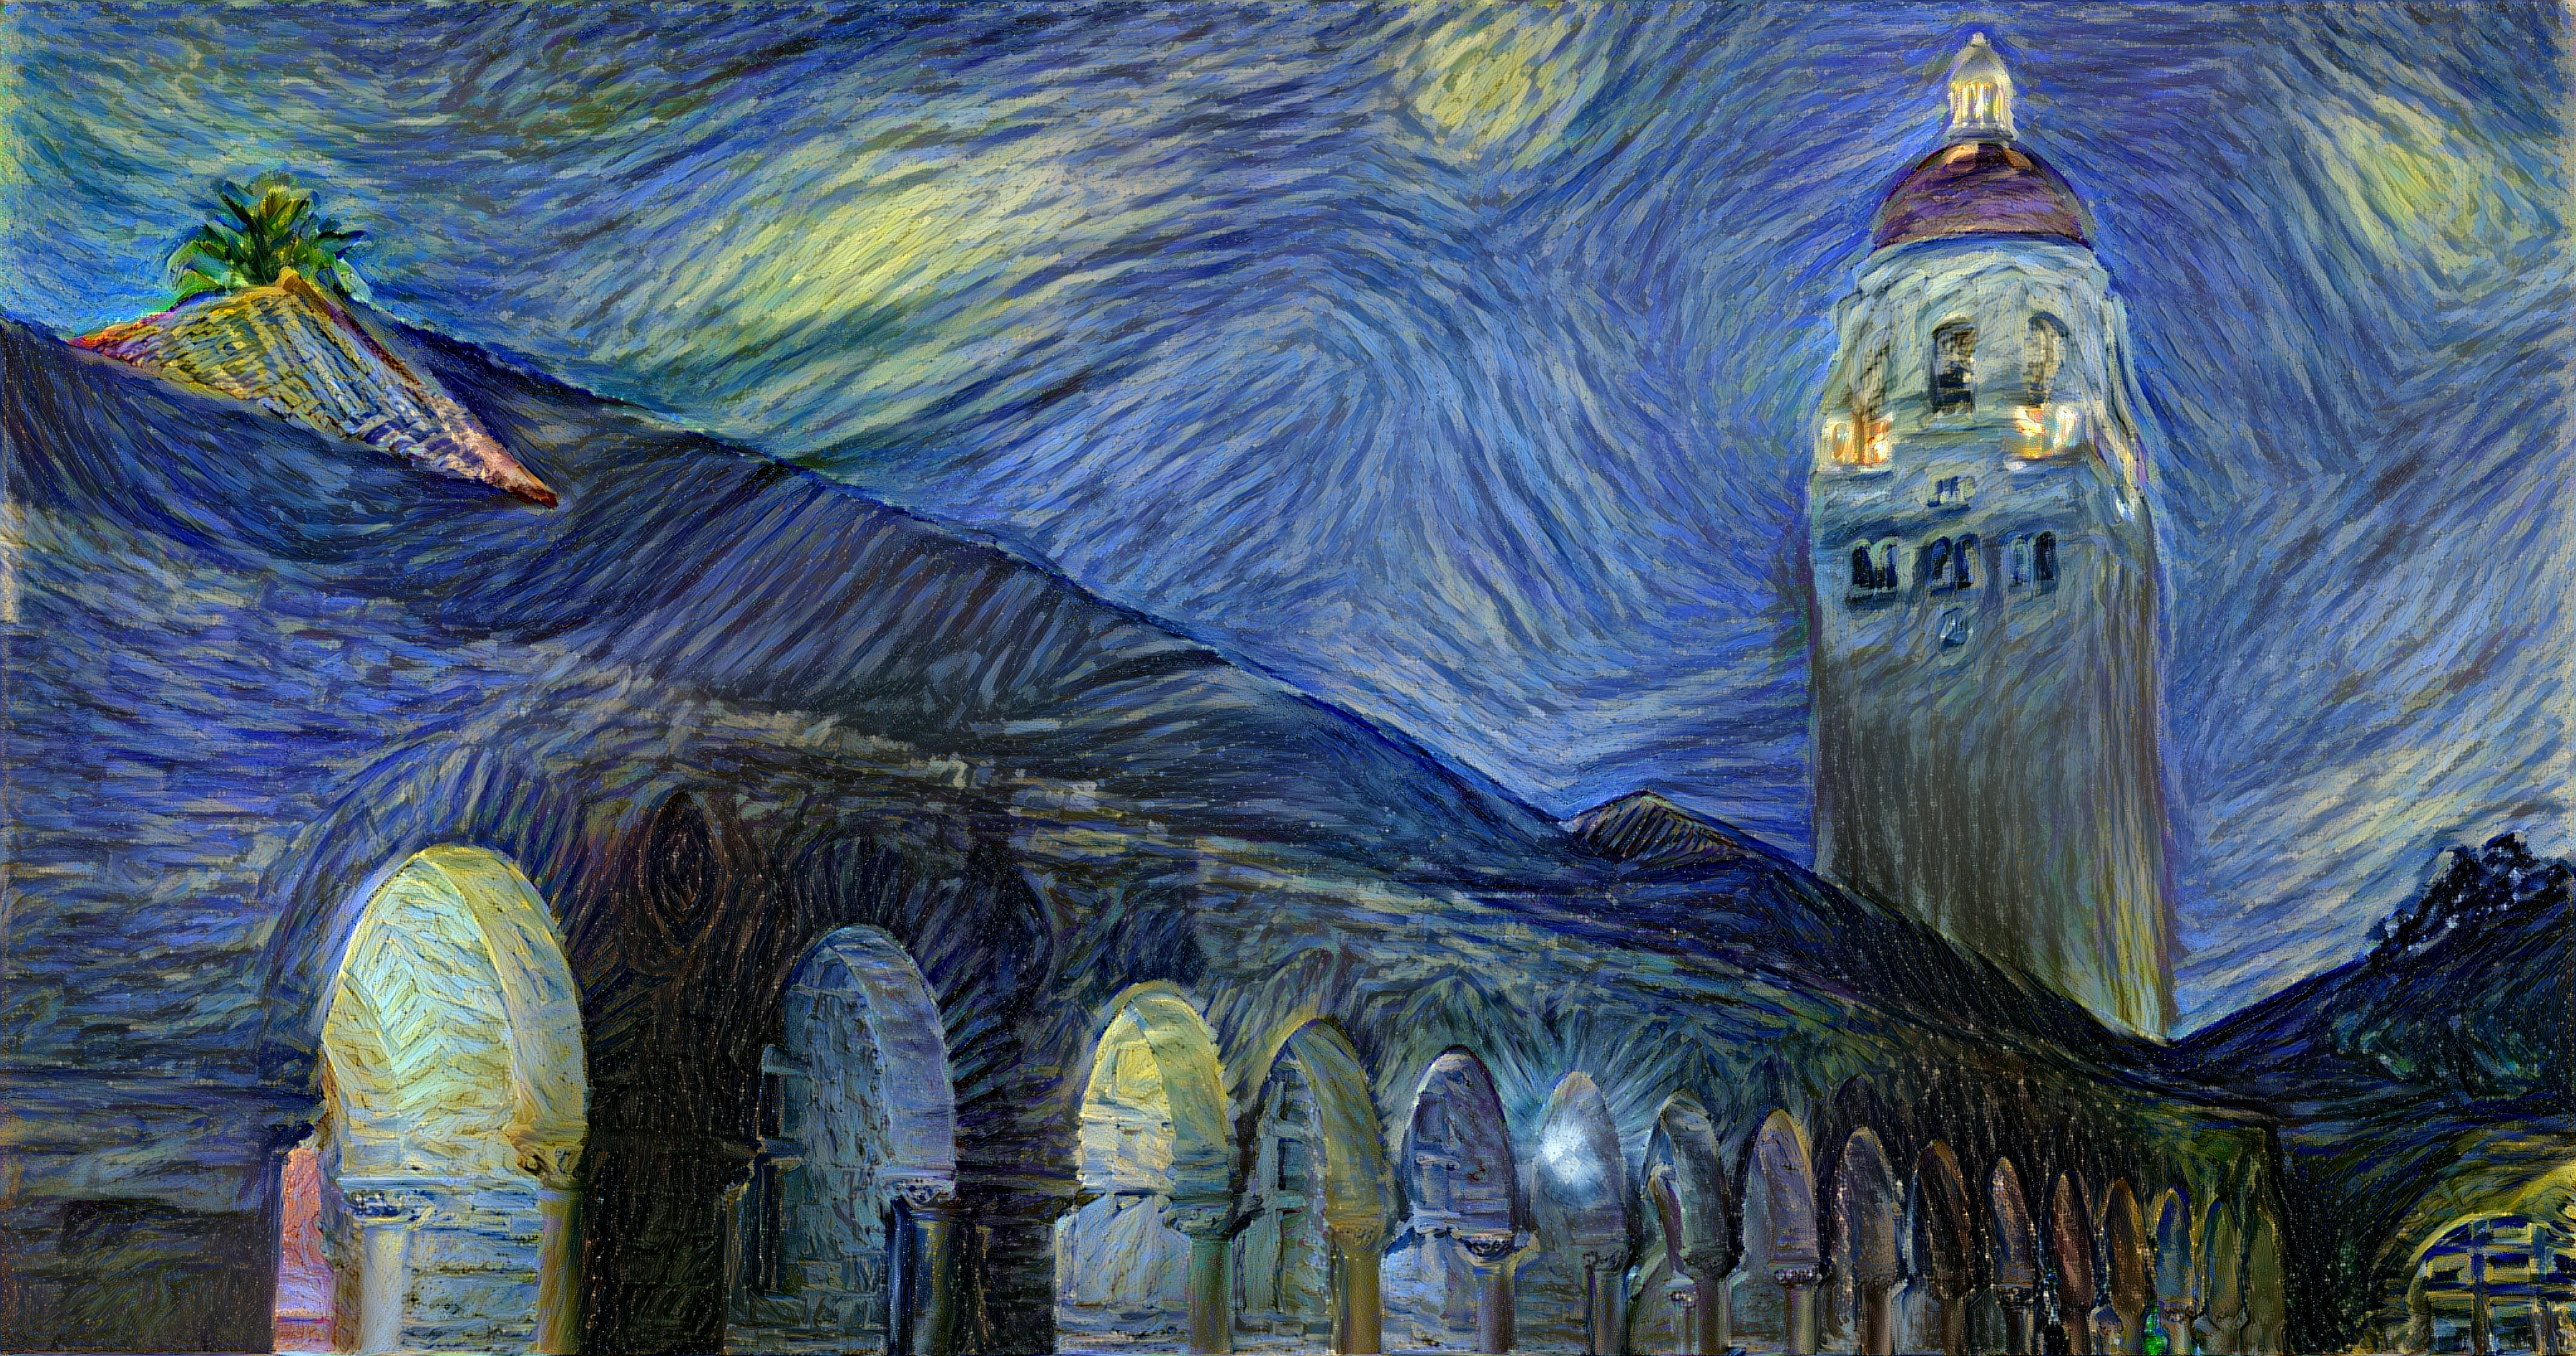
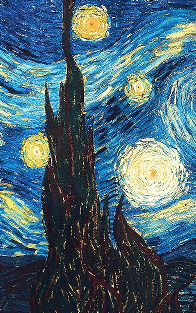
The paper presents an algorithm for combining the content of one image with the style of another image using convolutional neural networks. Here's an example that maps the artistic style of The Starry Night onto a night-time photograph of the Stanford campus:

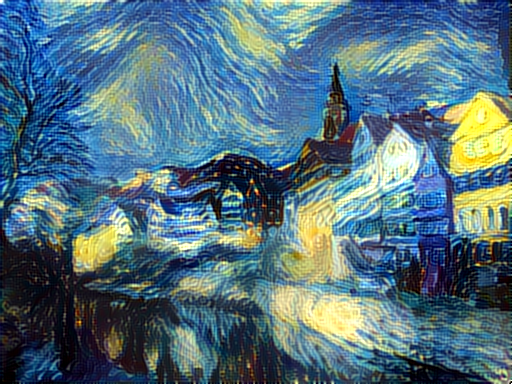
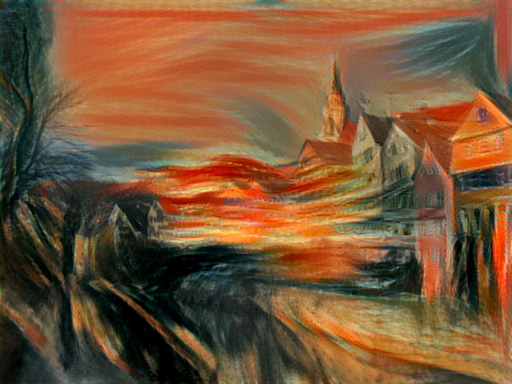
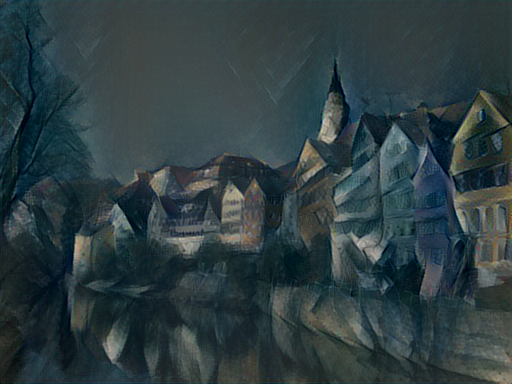
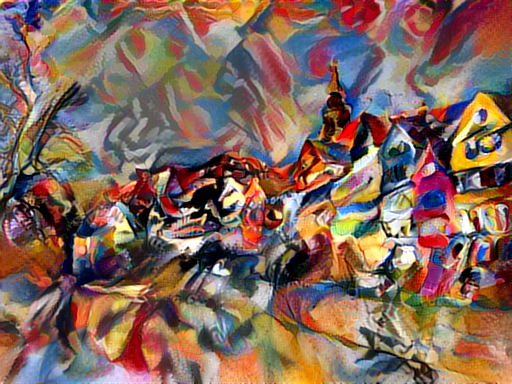
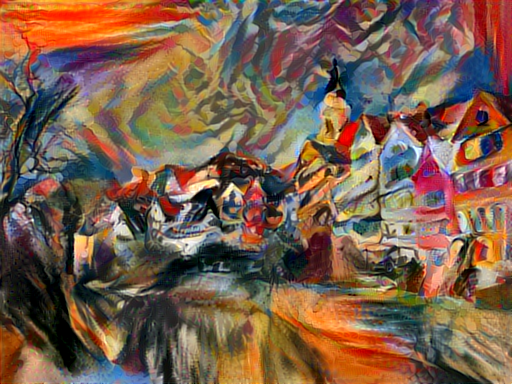
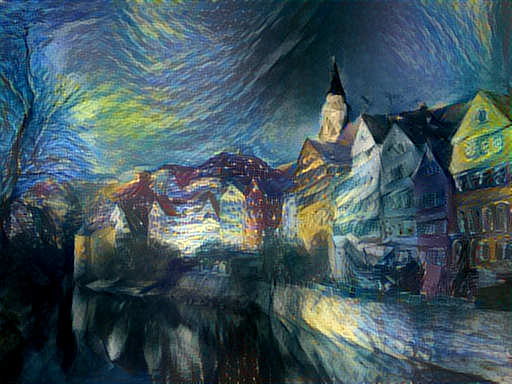
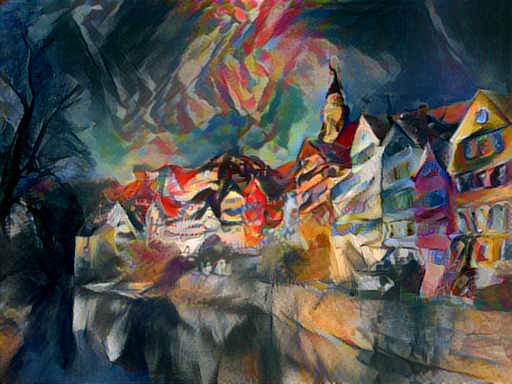
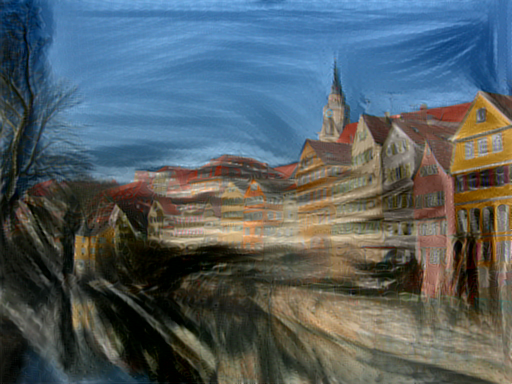
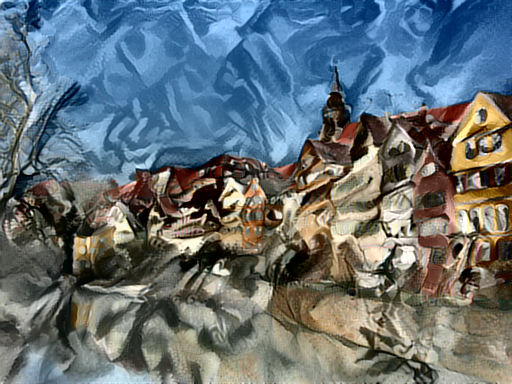
Applying the style of different images to the same content image gives interesting results. Here we reproduce Figure 2 from the paper, which renders a photograph of the Tubingen in Germany in a variety of styles:
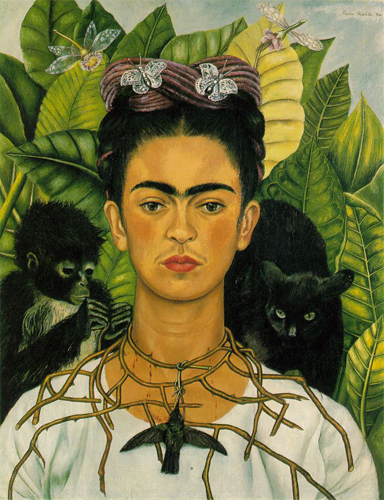
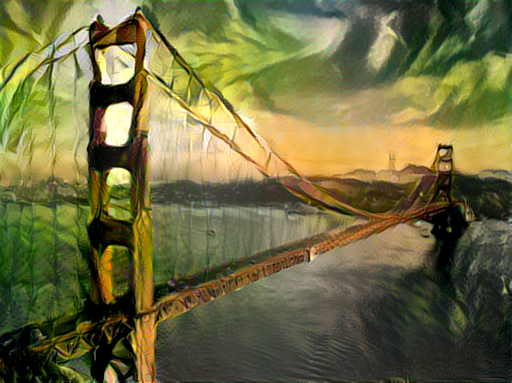
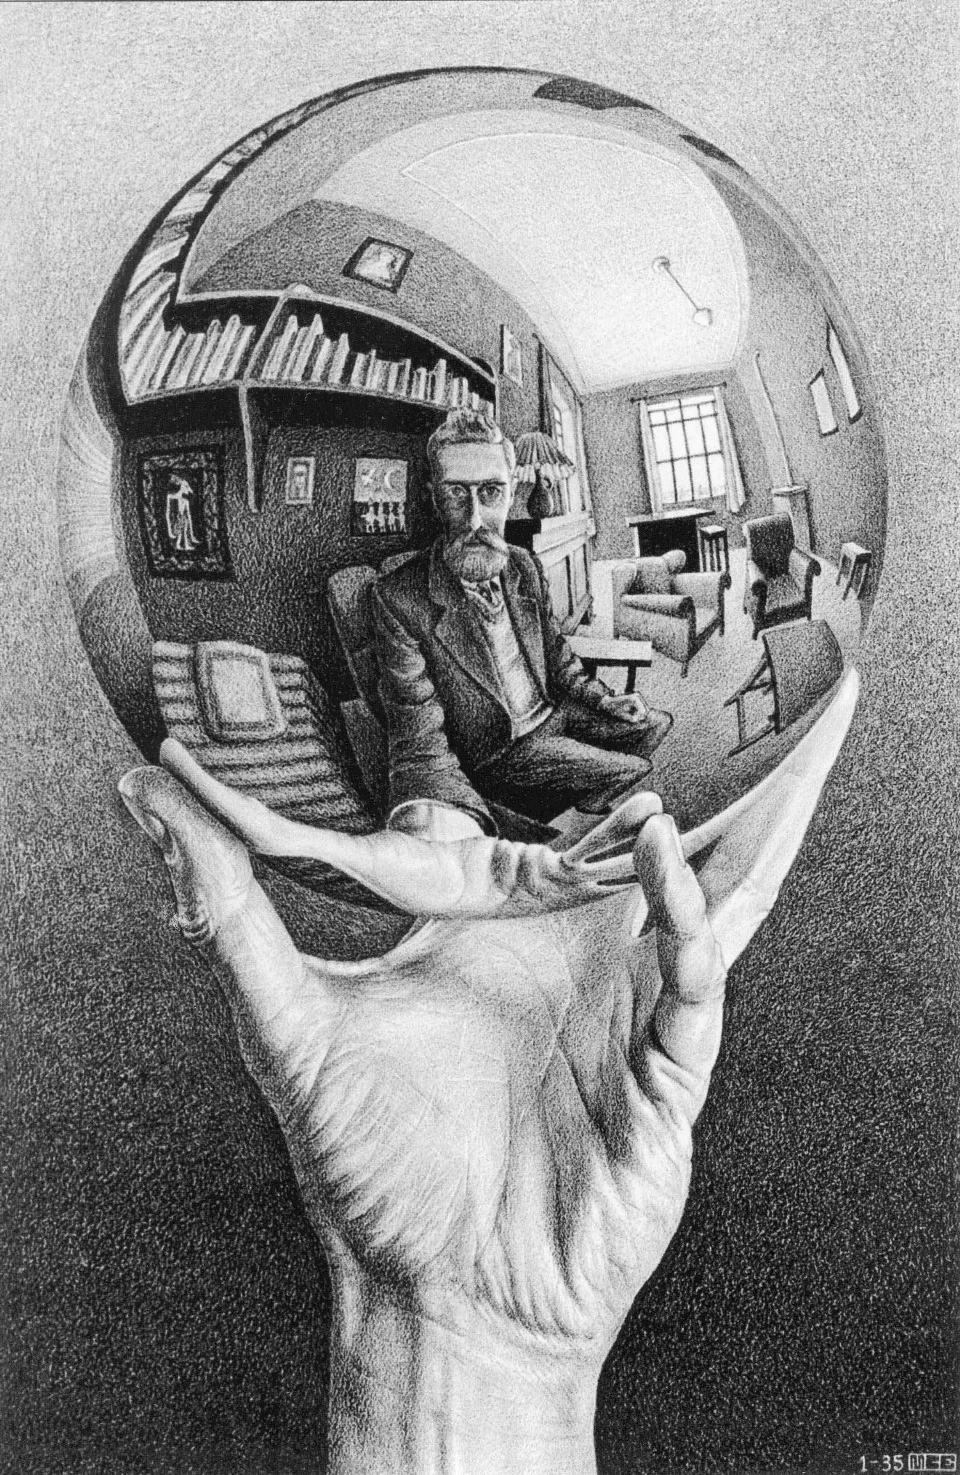
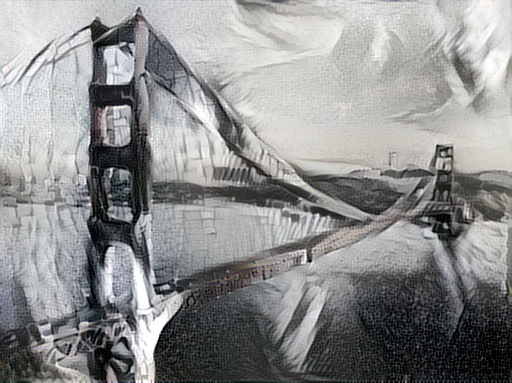
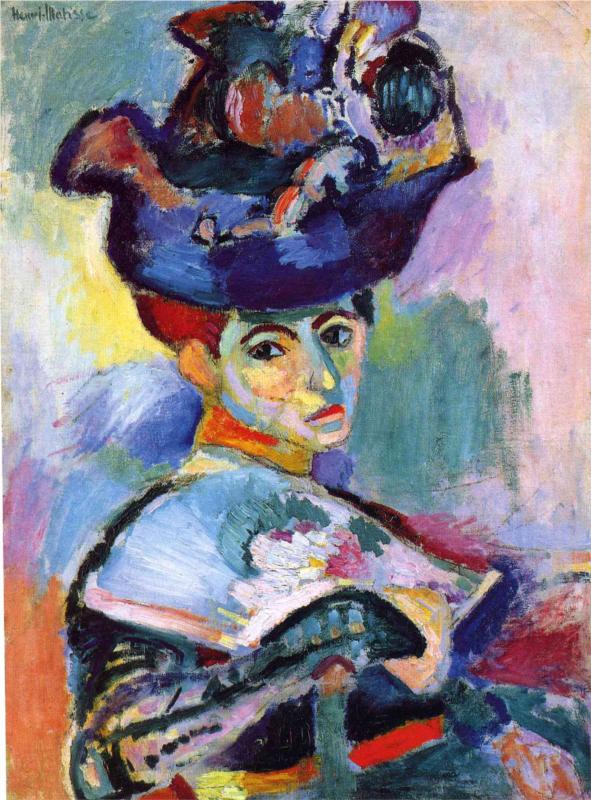
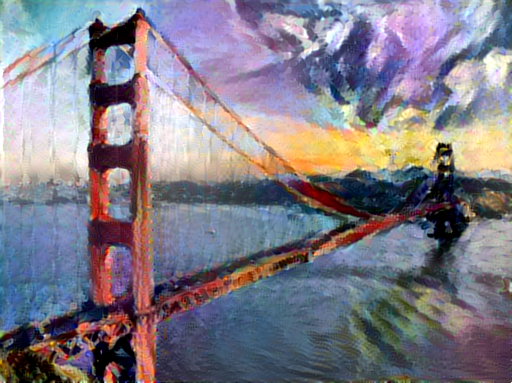
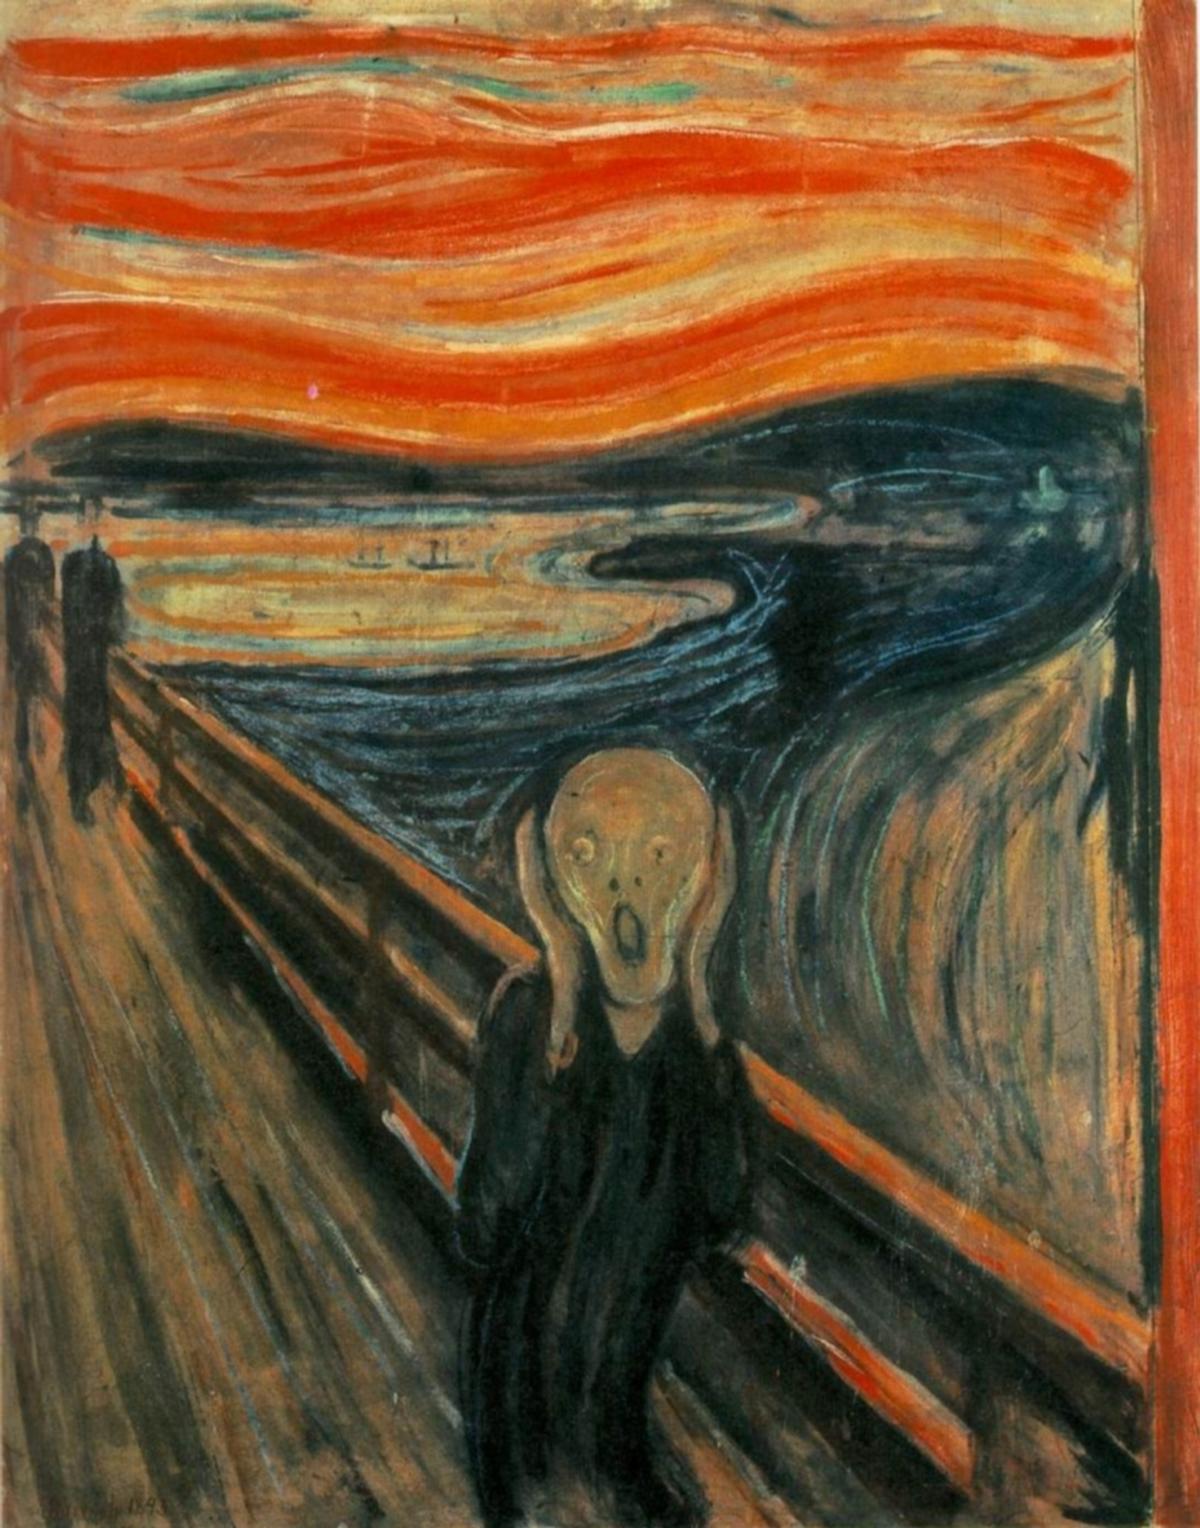
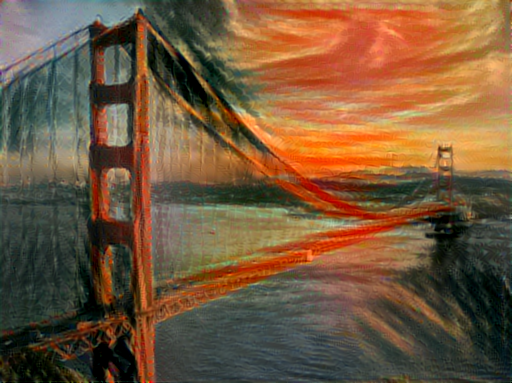
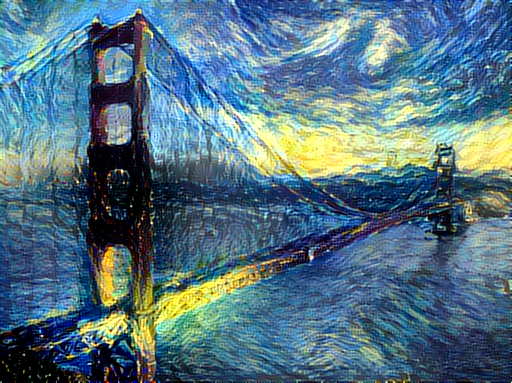
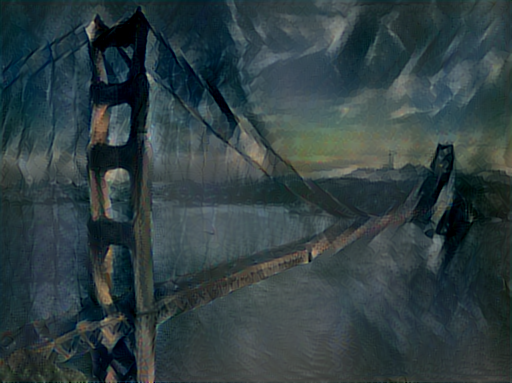
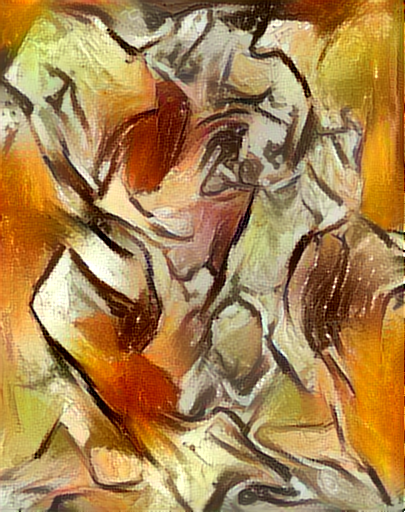
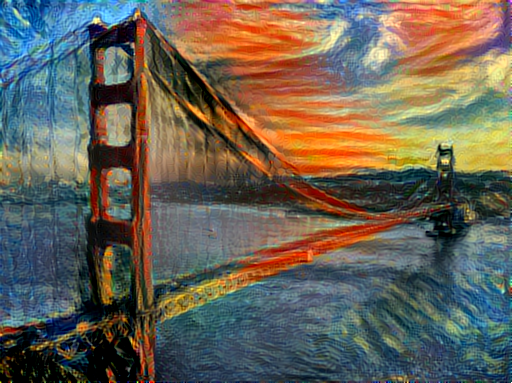
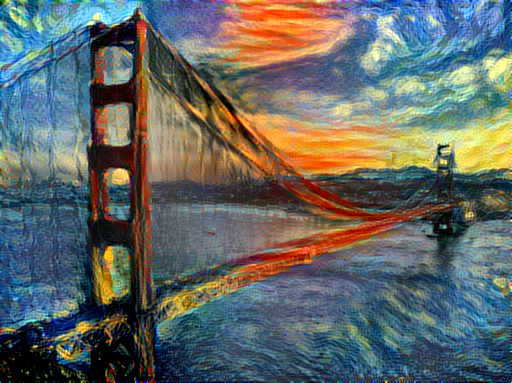
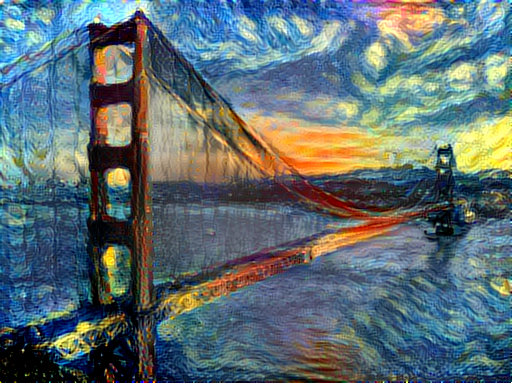
Here are the results of applying the style of various pieces of artwork to this photograph of the golden gate bridge:
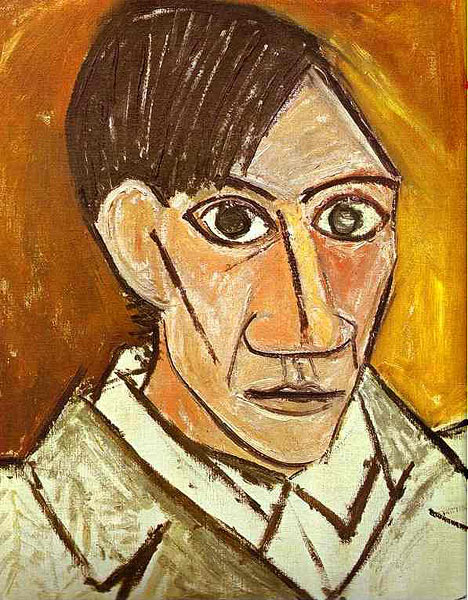
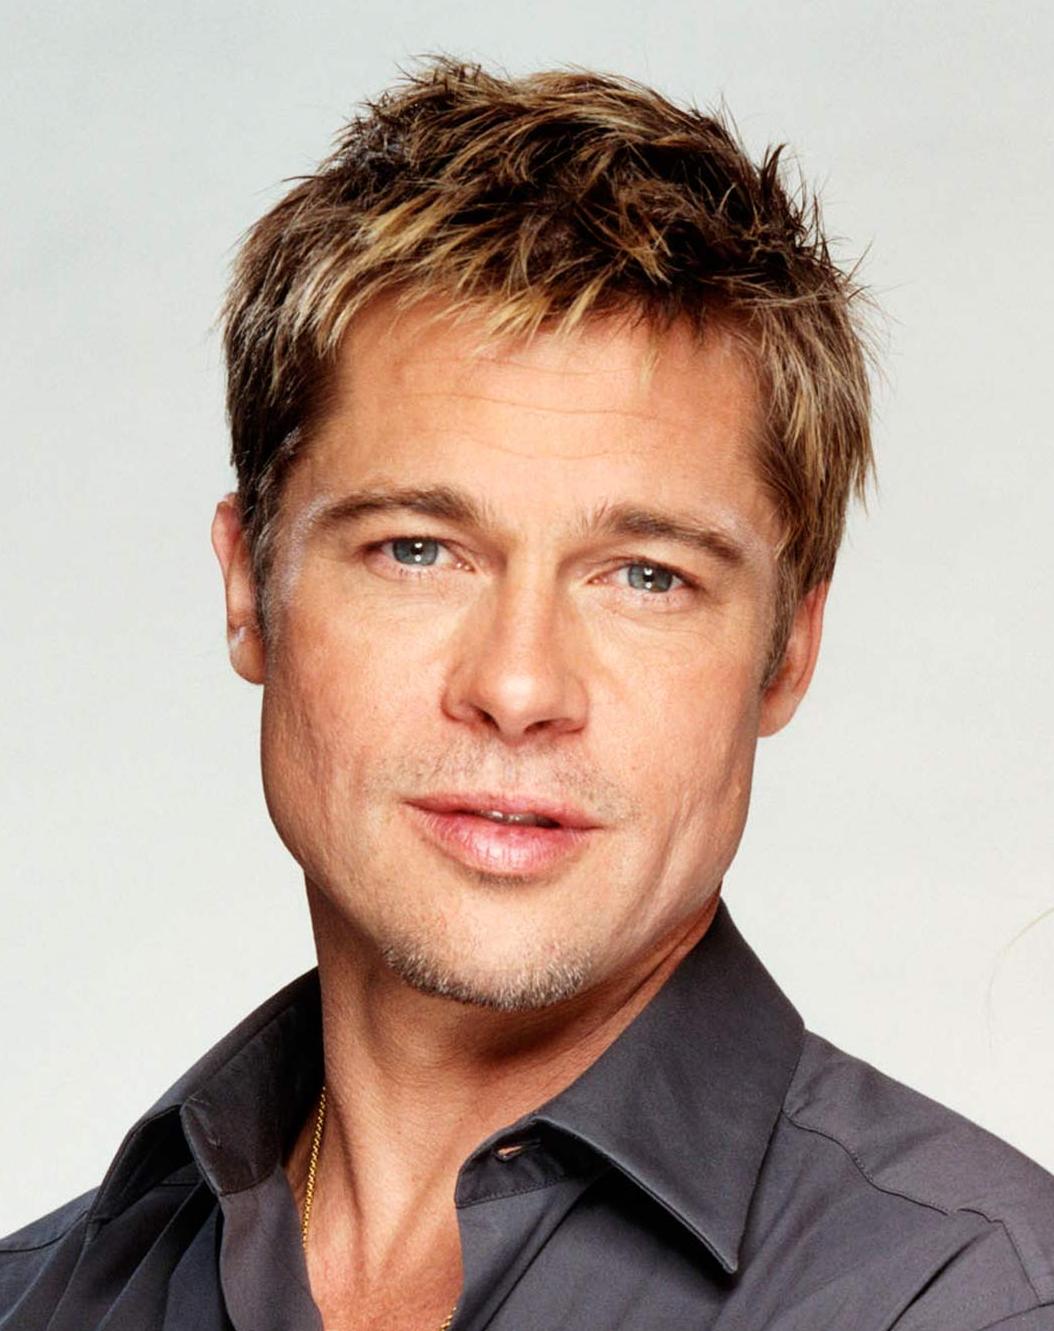
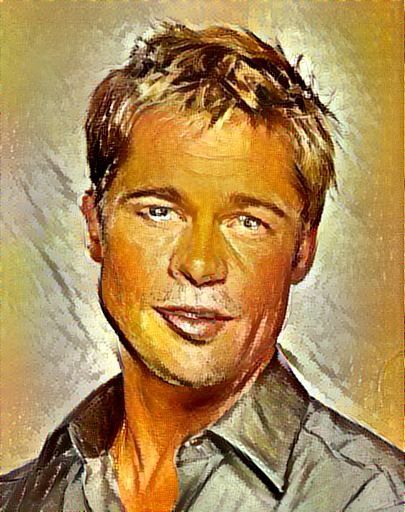
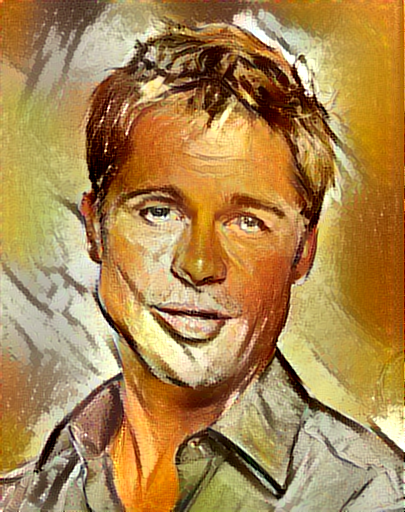
Content / Style Tradeoff
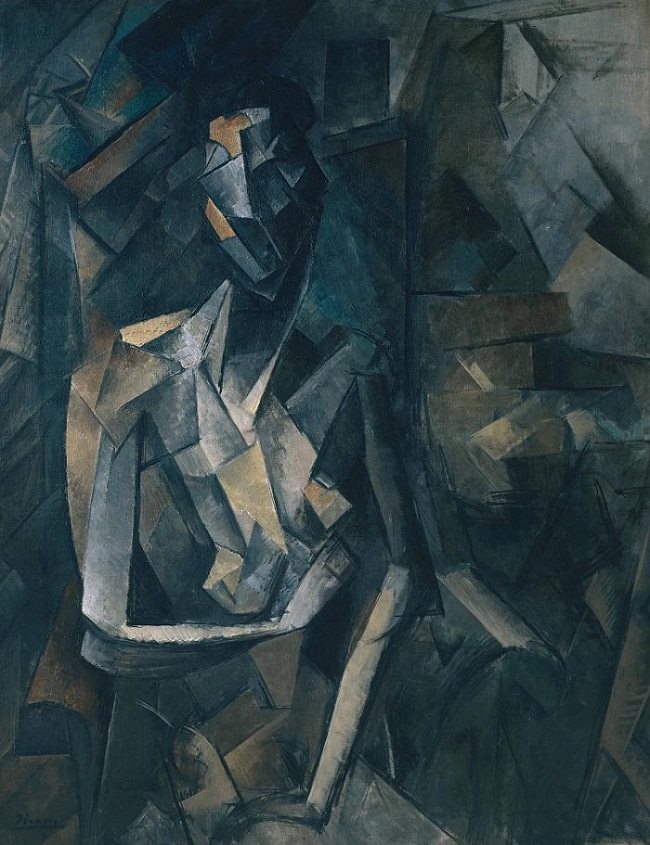
The algorithm allows the user to trade-off the relative weight of the style and content reconstruction terms, as shown in this example where we port the style of Picasso's 1907 self-portrait onto Brad Pitt:

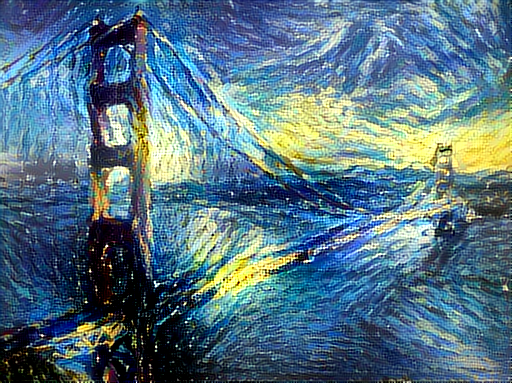
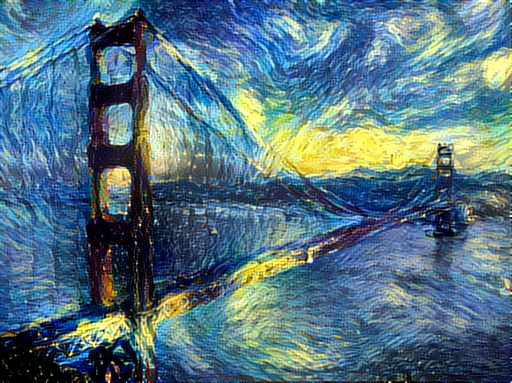
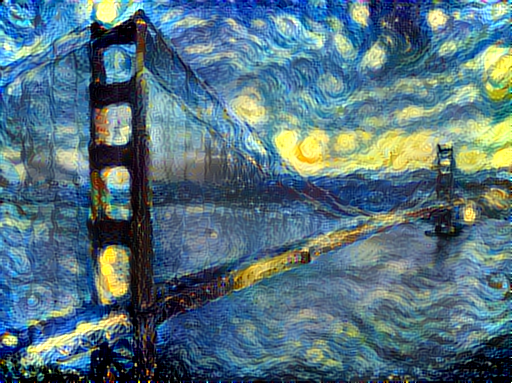
Style Scale
By resizing the style image before extracting style features, we can control the types of artistic
features that are transfered from the style image; you can control this behavior with the -style_scale flag.
Below we see three examples of rendering the Golden Gate Bridge in the style of The Starry Night.
From left to right, -style_scale is 2.0, 1.0, and 0.5.
Multiple Style Images
You can use more than one style image to blend multiple artistic styles.
Clockwise from upper left: "The Starry Night" + "The Scream", "The Scream" + "Composition VII", "Seated Nude" + "Composition VII", and "Seated Nude" + "The Starry Night"

Style Interpolation
When using multiple style images, you can control the degree to which they are blended:
Transfer style but not color
If you add the flag -original_colors 1 then the output image will retain the colors of the original image;
this is similar to the recent blog post by deepart.io.

Setup:
Dependencies:
Optional dependencies:
- For CUDA backend:
- CUDA 6.5+
- cunn
- For cuDNN backend:
- For OpenCL backend:
After installing dependencies, you'll need to run the following script to download the VGG model:
sh models/download_models.sh
This will download the original VGG-19 model. Leon Gatys has graciously provided the modified version of the VGG-19 model that was used in their paper; this will also be downloaded. By default the original VGG-19 model is used.
If you have a smaller memory GPU then using NIN Imagenet model will be better and gives slightly worse yet comparable results. You can get the details on the model from BVLC Caffe ModelZoo and can download the files from NIN-Imagenet Download Link
You can find detailed installation instructions for Ubuntu in the installation guide.
Usage
Basic usage:
th neural_style.lua -style_image <image.jpg> -content_image <image.jpg>
OpenCL usage with NIN Model (This requires you download the NIN Imagenet model files as described above):
th neural_style.lua -style_image examples/inputs/picasso_selfport1907.jpg -content_image examples/inputs/brad_pitt.jpg -output_image profile.png -model_file models/nin_imagenet_conv.caffemodel -proto_file models/train_val.prototxt -gpu 0 -backend clnn -num_iterations 1000 -seed 123 -content_layers relu0,relu3,relu7,relu12 -style_layers relu0,relu3,relu7,relu12 -content_weight 10 -style_weight 1000 -image_size 512 -optimizer adam

To use multiple style images, pass a comma-separated list like this:
-style_image starry_night.jpg,the_scream.jpg.
Note that paths to images should not contain the ~ character to represent your home directory; you should instead use a relative
path or a full absolute path.
Options:
-image_size: Maximum side length (in pixels) of of the generated image. Default is 512.-style_blend_weights: The weight for blending the style of multiple style images, as a comma-separated list, such as-style_blend_weights 3,7. By default all style images are equally weighted.-gpu: Zero-indexed ID of the GPU to use; for CPU mode set-gputo -1.
Optimization options:
-content_weight: How much to weight the content reconstruction term. Default is 5e0.-style_weight: How much to weight the style reconstruction term. Default is 1e2.-tv_weight: Weight of total-variation (TV) regularization; this helps to smooth the image. Default is 1e-3. Set to 0 to disable TV regularization.-num_iterations: Default is 1000.-init: Method for generating the generated image; one ofrandomorimage. Default israndomwhich uses a noise initialization as in the paper;imageinitializes with the content image.-optimizer: The optimization algorithm to use; eitherlbfgsoradam; default islbfgs. L-BFGS tends to give better results, but uses more memory. Switching to ADAM will reduce memory usage; when using ADAM you will probably need to play with other parameters to get good results, especially the style weight, content weight, and learning rate; you may also want to normalize gradients when using ADAM.-learning_rate: Learning rate to use with the ADAM optimizer. Default is 1e1.-normalize_gradients: If this flag is present, style and content gradients from each layer will be L1 normalized. Idea from andersbll/neural_artistic_style.
Output options:
-output_image: Name of the output image. Default isout.png.-print_iter: Print progress everyprint_iteriterations. Set to 0 to disable printing.-save_iter: Save the image everysave_iteriterations. Set to 0 to disable saving intermediate results.
Layer options:
-content_layers: Comma-separated list of layer names to use for content reconstruction. Default isrelu4_2.-style_layers: Comma-separated list of layer names to use for style reconstruction. Default isrelu1_1,relu2_1,relu3_1,relu4_1,relu5_1.
Other options:
-style_scale: Scale at which to extract features from the style image. Default is 1.0.-original_colors: If you set this to 1, then the output image will keep the colors of the content image.-proto_file: Path to thedeploy.txtfile for the VGG Caffe model.-model_file: Path to the.caffemodelfile for the VGG Caffe model. Default is the original VGG-19 model; you can also try the normalized VGG-19 model used in the paper.-pooling: The type of pooling layers to use; one ofmaxoravg. Default ismax. The VGG-19 models uses max pooling layers, but the paper mentions that replacing these layers with average pooling layers can improve the results. I haven't been able to get good results using average pooling, but the option is here.-backend:nn,cudnn, orclnn. Default isnn.cudnnrequires cudnn.torch and may reduce memory usage.clnnrequires cltorch and clnn-cudnn_autotune: When using the cuDNN backend, pass this flag to use the built-in cuDNN autotuner to select the best convolution algorithms for your architecture. This will make the first iteration a bit slower and can take a bit more memory, but may significantly speed up the cuDNN backend.
Frequently Asked Questions
Problem: Generated image has saturation artifacts:

Solution: Update the image packge to the latest version: luarocks install image
Problem: Running without a GPU gives an error message complaining about cutorch not found
Solution:
Pass the flag -gpu -1 when running in CPU-only mode
Problem: The program runs out of memory and dies
Solution: Try reducing the image size: -image_size 256 (or lower). Note that different image sizes will likely
require non-default values for -style_weight and -content_weight for optimal results.
If you are running on a GPU, you can also try running with -backend cudnn to reduce memory usage.
Problem: Get the following error message:
models/VGG_ILSVRC_19_layers_deploy.prototxt.cpu.lua:7: attempt to call method 'ceil' (a nil value)
Solution: Update nn package to the latest version: luarocks install nn
Problem: Get an error message complaining about paths.extname
Solution: Update torch.paths package to the latest version: luarocks install paths
Problem: NIN Imagenet model is not giving good results.
Solution: Make sure the correct -proto_file is selected. Also make sure the correct parameters for -content_layers and -style_layers are set. (See OpenCL usage example above.)
Problem: -backend cudnn is slower than default NN backend
Solution: Add the flag -cudnn_autotune; this will use the built-in cuDNN autotuner to select the best convolution algorithms.
Memory Usage
By default, neural-style uses the nn backend for convolutions and L-BFGS for optimization.
These give good results, but can both use a lot of memory. You can reduce memory usage with the following:
- Use cuDNN: Add the flag
-backend cudnnto use the cuDNN backend. This will only work in GPU mode. - Use ADAM: Add the flag
-optimizer adamto use ADAM instead of L-BFGS. This should significantly reduce memory usage, but may require tuning of other parameters for good results; in particular you should play with the learning rate, content weight, style weight, and also consider using gradient normalization. This should work in both CPU and GPU modes. - Reduce image size: If the above tricks are not enough, you can reduce the size of the generated image;
pass the flag
-image_size 256to generate an image at half the default size.
With the default settings, neural-style uses about 3.5GB of GPU memory on my system;
switching to ADAM and cuDNN reduces the GPU memory footprint to about 1GB.
Speed
Speed can vary a lot depending on the backend and the optimizer.
Here are some times for running 500 iterations with -image_size=512 on a Maxwell Titan X with different settings:
-backend nn -optimizer lbfgs: 62 seconds-backend nn -optimizer adam: 49 seconds-backend cudnn -optimizer lbfgs: 79 seconds-backend cudnn -cudnn_autotune -optimizer lbfgs: 58 seconds-backend cudnn -cudnn_autotune -optimizer adam: 44 seconds-backend clnn -optimizer lbfgs: 169 seconds-backend clnn -optimizer adam: 106 seconds
Here are the same benchmarks on a Pascal Titan X with cuDNN 5.0 on CUDA 8.0 RC:
-backend nn -optimizer lbfgs: 43 seconds-backend nn -optimizer adam: 36 seconds-backend cudnn -optimizer lbfgs: 45 seconds-backend cudnn -cudnn_autotune -optimizer lbfgs: 30 seconds-backend cudnn -cudnn_autotune -optimizer adam: 22 seconds
Multi-GPU scaling
You can use multiple GPUs to process images at higher resolutions; different layers of the network will be
computed on different GPUs. You can control which GPUs are used with the -gpu flag, and you can control
how to split layers across GPUs using the -multigpu_strategy flag.
For example in a server with four GPUs, you can give the flag -gpu 0,1,2,3 to process on GPUs 0, 1, 2, and
3 in that order; by also giving the flag -multigpu_strategy 3,6,12 you indicate that the first two layers
should be computed on GPU 0, layers 3 to 5 should be computed on GPU 1, layers 6 to 11 should be computed on
GPU 2, and the remaining layers should be computed on GPU 3. You will need to tune the -multigpu_strategy
for your setup in order to achieve maximal resolution.
We can achieve very high quality results at high resolution by combining multi-GPU processing with multiscale generation as described in the paper Controlling Perceptual Factors in Neural Style Transfer by Leon A. Gatys, Alexander S. Ecker, Matthias Bethge, Aaron Hertzmann and Eli Shechtman.
Here is a 3620 x 1905 image generated on a server with four Pascal Titan X GPUs:
The script used to generate this image can be found here.
Implementation details
Images are initialized with white noise and optimized using L-BFGS.
We perform style reconstructions using the conv1_1, conv2_1, conv3_1, conv4_1, and conv5_1 layers
and content reconstructions using the conv4_2 layer. As in the paper, the five style reconstruction losses have
equal weights.
Citation
If you find this code useful for your research, please cite:
@misc{Johnson2015,
  author = {Johnson, Justin},
  title = {neural-style},
  year = {2015},
  publisher = {GitHub},
  journal = {GitHub repository},
  howpublished = {\url{https://github.com/jcjohnson/neural-style}},
}
Top Related Projects
Neural style in TensorFlow! 🎨
TensorFlow CNN for fast style transfer ⚡🖥🎨🖼
Code and data for paper "Deep Photo Style Transfer": https://arxiv.org/abs/1703.07511
Style transfer, deep learning, feature transform
TensorFlow (Python API) implementation of Neural Style
Convert designs to code with AI
Introducing Visual Copilot: A new AI model to turn Figma designs to high quality code using your components.
Try Visual Copilot