
Top Related Projects

Log activity inside your Laravel app
Associate files with Eloquent models
Quick Overview
Laravel Notify is a package for Laravel that provides an easy way to add notifications to your web application. It offers a variety of notification types and styles, allowing developers to quickly implement attractive and informative notifications without extensive custom styling or JavaScript.
Pros
- Easy integration with Laravel projects
- Multiple notification types (success, error, info, warning)
- Customizable styles and animations
- Supports both session-based and JavaScript-based notifications
Cons
- Limited to Laravel framework
- May require additional styling for perfect integration with custom designs
- Dependency on external CSS and JavaScript files
- Limited advanced customization options compared to more complex notification libraries
Code Examples
- Basic usage:
notify()->success('Welcome to Laravel Notify!');
This code creates a simple success notification.
- Custom notification with title:
notify()->preset('custom-preset')
         ->title('Custom Notification')
         ->message('This is a custom notification message.');
This example demonstrates creating a custom notification with a title and message.
- JavaScript-based notification:
$notify = notify()->success('This notification was sent from JavaScript!')->toJsObject();
This code prepares a notification to be triggered via JavaScript.
Getting Started
-
Install the package via Composer:
composer require mckenziearts/laravel-notify -
Publish the package assets:
php artisan vendor:publish --provider="Mckenziearts\Notify\LaravelNotifyServiceProvider" -
Include the styles and scripts in your layout file:
<!DOCTYPE html> <html> <head> @notifyCss </head> <body> @include('notify::components.notify') @notifyJs </body> </html> -
Use the notification in your controller or view:
notify()->success('Laravel Notify is awesome!');
Competitor Comparisons
Log activity inside your Laravel app
Pros of Laravel Activity Log
- Comprehensive activity logging system for Laravel applications
- Highly customizable with support for multiple log models and custom attributes
- Integrates well with Laravel's Eloquent ORM for easy querying and retrieval of logs
Cons of Laravel Activity Log
- Focused solely on activity logging, lacking notification features
- May require more setup and configuration compared to simpler notification systems
- Potentially higher learning curve for developers new to activity logging concepts
Code Comparison
Laravel Activity Log:
activity()
   ->performedOn($article)
   ->causedBy($user)
   ->withProperties(['custom' => 'properties'])
   ->log('Article was updated');
Laravel Notify:
notify()->success('Laravel Notify is awesome!');
notify()->error('Oops! Something went wrong.');
notify()->info('This is a simple info notification.');
Summary
Laravel Activity Log is a robust solution for tracking and logging user activities within Laravel applications, offering extensive customization options. On the other hand, Laravel Notify focuses on providing a simple and elegant way to display notifications to users. While Activity Log excels in detailed activity tracking, Notify shines in its ease of use for quick user feedback. The choice between the two depends on whether the primary need is comprehensive activity logging or straightforward user notifications.
Associate files with Eloquent models
Pros of Laravel Media Library
- Comprehensive media management with advanced features like file conversions and responsive images
- Extensive documentation and community support
- Seamless integration with Laravel's Eloquent ORM
Cons of Laravel Media Library
- Steeper learning curve due to its extensive feature set
- May be overkill for simple file upload needs
- Requires more configuration and setup compared to simpler alternatives
Code Comparison
Laravel Media Library:
$model->addMedia($pathToFile)->toMediaCollection('images');
$model->getMedia('images')->first()->getUrl('thumb');
Laravel Notify:
notify()->success('Laravel Notify is awesome!');
notify()->error('Oops! Something went wrong.');
Summary
Laravel Media Library is a powerful media management solution for Laravel applications, offering advanced features and seamless integration with Eloquent. It's ideal for projects requiring complex media handling but may be excessive for simpler needs.
Laravel Notify, on the other hand, focuses on providing an easy-to-use notification system for Laravel applications. It's more lightweight and straightforward to implement, making it suitable for projects that primarily need user notifications rather than comprehensive media management.
Choose Laravel Media Library for robust media handling capabilities, and Laravel Notify for quick and simple user notifications in your Laravel projects.
Convert  designs to code with AI

Introducing Visual Copilot: A new AI model to turn Figma designs to high quality code using your components.
Try Visual CopilotREADME


Introduction
Laravel Notify is a package that lets you add custom notifications to your project. A diverse range of notification design is available.

Android Version
If you need Android version please try this package Aesthetic Dialogs. Happy Coding ð¨ð¾âð»
:film_strip: Video Tutorial
Installation
You can install the package using composer
$ composer require mckenziearts/laravel-notify
Then add the service provider to config/app.php. In Laravel versions 5.5 and beyond, this step can be skipped if package auto-discovery is enabled.
'providers' => [
    ...
    Mckenziearts\Notify\LaravelNotifyServiceProvider::class
    ...
];
You can publish the configuration file and assets by running:
$ php artisan vendor:publish --provider="Mckenziearts\Notify\LaravelNotifyServiceProvider"
Now that we have published a few new files to our application we need to reload them with the following command:
$ composer dump-autoload
Usage
- Add styles links with
@notifyCss - Add scripts links with
@notifyJs - use
notify()helper function inside your controller to set a toast notification for info, success, warning or error - Include notify partial to your master layout
@include('notify::components.notify')
If you are on Laravel 8 or greater, you can use the tag syntax.
<x:notify-messages />
Basic
Within your controllers, before you perform a redirect call the notify method with a message.
public function store()
{
    notify()->success('Laravel Notify is awesome!');

    return Redirect::home();
}
A complete example:
<!doctype html>
<html>
    <head>
        <title>Laravel Notify</title>
        @notifyCss
    </head>
    <body>


        <x-notify::notify />
        @notifyJs
    </body>
</html>
Type of notifications
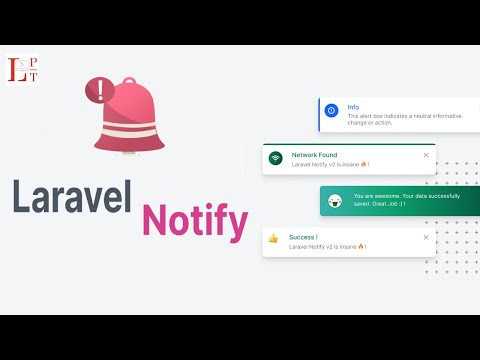
Laravel Notify actually display 5 types of notifications
toastnotification, (The default notification for Laravel Notify)
notify()->success('Welcome to Laravel Notify â¡ï¸') or notify()->success('Welcome to Laravel Notify â¡ï¸', 'My custom title')
connectifynotification, example of basic usage
connectify('success', 'Connection Found', 'Success Message Here')
drakify(ð) notification, displays an alert only
drakify('success') // for success alert
or
drakify('error') // for error alert
smilifynotification, displays a simple custom toast notification using the smiley (ð) emoticon
smilify('success', 'You are successfully reconnected')
emotifynotification, displays a simple custom toast notification using a vector emoticon
emotify('success', 'You are awesome, your data was successfully created')
Preset Notifications
If you have a specific notification that is used across multiple different places in your system, you can define it as a preset notification in your config file. This makes it easier to maintain commonly used notifications in one place. Read how to define preset messages in the Config section below.
As an example, to use a preset notification you have defined called 'common-notification', use the following:
notify()->preset('common-notification')
You can override any of the values that are set in the config if you need to. For example, this could be useful if you have a common notification across, but you want to change the icon in one particular place that it's used without having to manually write out a new notification.
To do this, simply pass in an array that has the key of the attribute that you want to override and the value you want to override it with.
As an example, we could override the 'title' of our 'common-notification' by using the following:
notify()->preset('common-notification', ['title' => 'This is the overridden title'])
Config
Config file are located at config/notify.php after publishing provider element.
Some awesome stuff. To active dark mode update the theme config, or add global variable NOTIFY_THEME on your .env file
'theme' => env('NOTIFY_THEME', 'dark'),
You can define preset notifications in the config file using the following structure:
'preset-messages' => [
    'user-updated' => [
        'message' => 'The user has been updated successfully.',
        'type'    => 'success',
        'model'   => 'connect',
        'title'   => 'User Updated',
    ],
    'user-deleted' => [
        'message' => 'The user has been deleted successfully.',
        'type'    => 'success',
        'model'   => 'connect',
        'title'   => 'User Deleted',
    ],
],
The example above shows the config for two preset notifications: 'user-updated' and 'user-deleted'.
Change log
Please see the changelog for more information on what has changed recently.
Contributing
Please see contributing.md for details and a todolist.
Security
If you discover any security related issues, please email author email instead of using the issue tracker.
Credits
License
license. Please see the license file for more information.
Top Related Projects
Log activity inside your Laravel app
Associate files with Eloquent models
Convert designs to code with AI
Introducing Visual Copilot: A new AI model to turn Figma designs to high quality code using your components.
Try Visual Copilot