
Top Related Projects

Force-directed graph layout using velocity Verlet integration.

⚠️ This project is not maintained anymore! Please go to https://github.com/visjs
:dizzy: Display dynamic, automatically organised, customizable network views.

Graph theory (network) library for visualisation and analysis

Beautiful Graphs

♾ A Graph Visualization Framework in JavaScript.
Quick Overview
Force-Graph is a JavaScript library for creating interactive 2D and 3D force-directed graph visualizations. It leverages the d3-force physics engine to simulate the graph layout and provides a simple API for customizing node and link appearances, as well as handling user interactions.
Pros
- Easy to use API with minimal setup required
- Supports both 2D and 3D graph visualizations
- Highly customizable with numerous configuration options
- Smooth performance even with large datasets
Cons
- Limited built-in layout algorithms beyond force-directed
- Documentation could be more comprehensive for advanced use cases
- Dependency on Three.js for 3D rendering may increase bundle size
- Learning curve for complex customizations
Code Examples
Creating a basic 2D force graph:
const Graph = ForceGraph()
  (document.getElementById('graph'))
    .graphData(myData)
    .nodeId('id')
    .nodeLabel('name')
    .linkSource('source')
    .linkTarget('target');
Customizing node appearance:
const Graph = ForceGraph()
  (document.getElementById('graph'))
    .graphData(myData)
    .nodeColor(node => node.group)
    .nodeVal(node => node.size)
    .nodeLabel(node => node.name);
Adding interactivity to the graph:
const Graph = ForceGraph()
  (document.getElementById('graph'))
    .graphData(myData)
    .onNodeClick(node => {
      // Center view on node
      Graph.centerAt(node.x, node.y, 1000);
      Graph.zoom(2, 1000);
    });
Getting Started
-
Install the library:
npm install force-graph -
Import and use in your project:
import ForceGraph from 'force-graph'; const myData = { nodes: [{ id: 'node1' }, { id: 'node2' }], links: [{ source: 'node1', target: 'node2' }] }; const Graph = ForceGraph() (document.getElementById('graph')) .graphData(myData); -
Customize as needed using the available API methods.
Competitor Comparisons
Force-directed graph layout using velocity Verlet integration.
Pros of d3-force
- More flexible and customizable, allowing for fine-grained control over force simulations
- Part of the larger D3.js ecosystem, integrating seamlessly with other D3 modules
- Lightweight and focused solely on force simulation calculations
Cons of d3-force
- Steeper learning curve, requiring more in-depth knowledge of D3.js
- Requires additional code to render visualizations, as it only handles force calculations
- Less out-of-the-box functionality for graph visualization
Code Comparison
d3-force:
const simulation = d3.forceSimulation(nodes)
  .force("link", d3.forceLink(links).id(d => d.id))
  .force("charge", d3.forceManyBody())
  .force("center", d3.forceCenter(width / 2, height / 2));
force-graph:
const Graph = ForceGraph()
  (document.getElementById('graph'))
    .graphData(data)
    .nodeId('id')
    .nodeVal('val')
    .linkSource('source')
    .linkTarget('target');
Summary
d3-force provides more flexibility and integration with D3.js but requires more setup and coding. force-graph offers a higher-level API with more built-in features for graph visualization, making it easier to use out of the box. The choice between them depends on the specific requirements of the project and the developer's familiarity with D3.js.
⚠️ This project is not maintained anymore! Please go to https://github.com/visjs
Pros of vis
- More comprehensive library with multiple visualization types (networks, timelines, graphs)
- Extensive documentation and examples
- Larger community and longer development history
Cons of vis
- Heavier library size due to broader feature set
- Less focused on force-directed graphs specifically
- Steeper learning curve for simple force graph implementations
Code Comparison
vis:
var nodes = new vis.DataSet([
  {id: 1, label: 'Node 1'},
  {id: 2, label: 'Node 2'}
]);
var edges = new vis.DataSet([
  {from: 1, to: 2}
]);
var container = document.getElementById('mynetwork');
var data = {nodes: nodes, edges: edges};
var options = {};
var network = new vis.Network(container, data, options);
force-graph:
const Graph = ForceGraph()
  .graphData({
    nodes: [{id: 'Node 1'}, {id: 'Node 2'}],
    links: [{source: 'Node 1', target: 'Node 2'}]
  })
  .nodeLabel('id')
  .onNodeClick(node => console.log(node));
force-graph offers a more concise API for creating force-directed graphs, while vis requires more setup but provides greater flexibility for various visualization types.
:dizzy: Display dynamic, automatically organised, customizable network views.
Pros of vis-network
- More comprehensive and feature-rich library with additional network visualization options
- Extensive documentation and examples for various use cases
- Supports both 2D and 3D network visualizations
Cons of vis-network
- Steeper learning curve due to its extensive API and configuration options
- Larger file size and potentially higher performance overhead for simpler visualizations
Code Comparison
vis-network:
var nodes = new vis.DataSet([
  { id: 1, label: 'Node 1' },
  { id: 2, label: 'Node 2' }
]);
var edges = new vis.DataSet([
  { from: 1, to: 2 }
]);
var container = document.getElementById('mynetwork');
var data = { nodes: nodes, edges: edges };
var options = {};
var network = new vis.Network(container, data, options);
force-graph:
const Graph = ForceGraph()
  .graphData({
    nodes: [{ id: 'Node 1' }, { id: 'Node 2' }],
    links: [{ source: 'Node 1', target: 'Node 2' }]
  })
  .nodeLabel('id')
  .onNodeClick(node => console.log(node));
force-graph offers a more concise and straightforward API for basic force-directed graph visualizations, while vis-network provides a more verbose but highly customizable approach for complex network visualizations.
Graph theory (network) library for visualisation and analysis
Pros of Cytoscape.js
- More comprehensive graph theory algorithms and analysis tools
- Extensive documentation and large community support
- Flexible styling options and support for various graph layouts
Cons of Cytoscape.js
- Steeper learning curve due to its extensive feature set
- Potentially slower performance for large graphs compared to Force-Graph
- More complex setup and configuration for basic use cases
Code Comparison
Force-Graph:
const Graph = ForceGraph3D()
  (document.getElementById('3d-graph'))
    .graphData(myData)
    .nodeLabel('id')
    .nodeAutoColorBy('group')
    .linkDirectionalParticles("value");
Cytoscape.js:
var cy = cytoscape({
  container: document.getElementById('cy'),
  elements: myData,
  style: [ // Define styles here ],
  layout: { name: 'cose' }
});
Both libraries offer straightforward ways to create and customize graphs, but Force-Graph's API is more concise for simple use cases. Cytoscape.js requires more setup but provides greater flexibility for complex graph applications.
Beautiful Graphs
Pros of ngraph
- More flexible and modular architecture, allowing for custom physics engines and renderers
- Better performance for large-scale graphs with thousands of nodes
- Supports both 2D and 3D graph layouts out of the box
Cons of ngraph
- Steeper learning curve due to its modular nature
- Less built-in interactivity features compared to force-graph
- Requires more setup and configuration for basic use cases
Code Comparison
force-graph:
const Graph = ForceGraph()
  .graphData(data)
  .nodeId('id')
  .nodeVal('val')
  .nodeLabel('name')
  .linkSource('source')
  .linkTarget('target');
ngraph:
const graph = createGraph();
data.nodes.forEach(node => graph.addNode(node.id));
data.links.forEach(link => graph.addLink(link.source, link.target));
const layout = createLayout(graph);
const renderer = createRenderer(graph, layout);
Both force-graph and ngraph are powerful graph visualization libraries, but they cater to different use cases. force-graph offers a more straightforward API with built-in interactivity, making it ideal for quick prototyping and simpler graph visualizations. ngraph, on the other hand, provides greater flexibility and performance for complex, large-scale graph scenarios, but requires more setup and customization. The choice between the two depends on the specific requirements of your project, such as graph size, performance needs, and desired level of customization.
♾ A Graph Visualization Framework in JavaScript.
Pros of G6
- More comprehensive graph visualization toolkit with a wider range of graph types and layouts
- Extensive documentation and examples, making it easier for developers to get started
- Better performance for large-scale graph rendering
Cons of G6
- Steeper learning curve due to its more complex API and extensive features
- Larger file size and potentially higher resource consumption
Code Comparison
G6:
import G6 from '@antv/g6';

const graph = new G6.Graph({
  container: 'mountNode',
  width: 800,
  height: 600,
});

graph.data(data);
graph.render();
Force-Graph:
import ForceGraph from 'force-graph';

const graph = ForceGraph()
  .graphData(data)
  .width(800)
  .height(600);

document.getElementById('mountNode').appendChild(graph);
Both libraries allow for easy graph creation and rendering, but G6 offers more configuration options out of the box, while Force-Graph provides a simpler API for basic force-directed graphs.
Convert  designs to code with AI

Introducing Visual Copilot: A new AI model to turn Figma designs to high quality code using your components.
Try Visual CopilotREADME
force-graph


Force-directed graph rendered on HTML5 canvas.
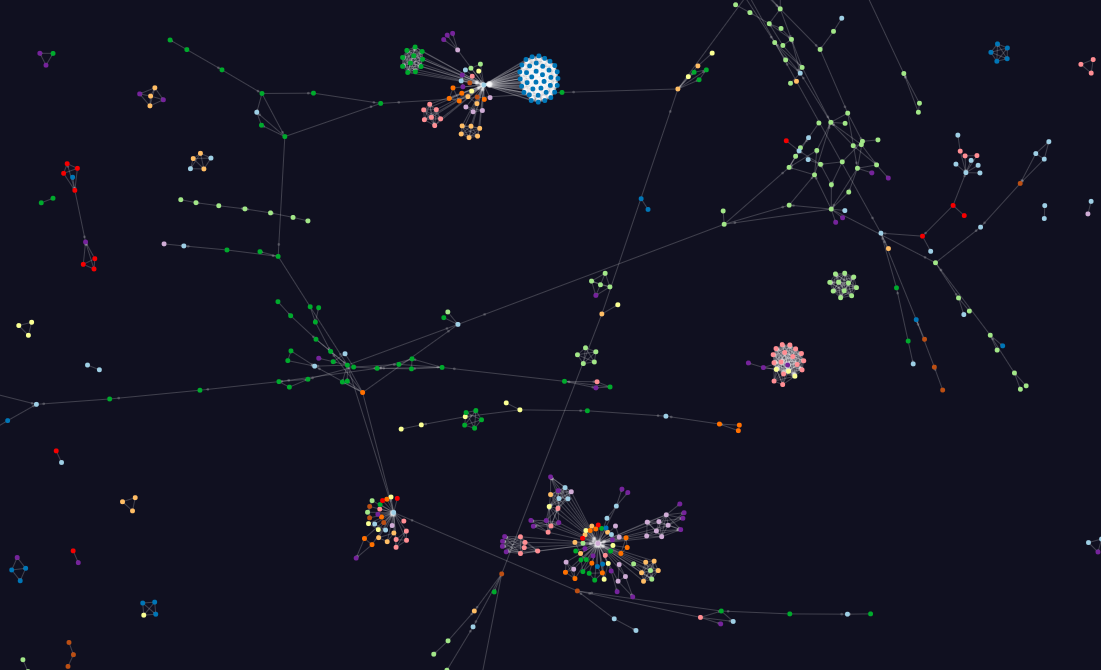
A web component to represent a graph data structure in a 2-dimensional canvas using a force-directed iterative layout. Uses HTML5 canvas for rendering and d3-force for the underlying physics engine. Supports canvas zooming/panning, node dragging and node/link hover/click interactions.
See also the 3D version.
And check out the React bindings.
Examples
- Basic (source)
- Load JSON (source)
- Medium size graph (~4k elements) (source)
- Large size graph (~75k elements) (source)
- Text as nodes (source)
- Images as nodes (source)
- Directional links (using arrows) (source)
- Directional links (using moving particles) (source)
- Curved lines and self links (source)
- Automatic curvature for overlapping links (source)
- Text in links (source)
- Dash odd links (source)
- Highlight nodes/links (source)
- Multiple Node Selection (source)
- Auto-colored nodes/links (source)
- Custom node shapes (source)
- Pre-computed layout (using dagre) (source)
- Zoom/pan viewport (source)
- Click to focus on node (source)
- Click to expand/collapse nodes (source)
- Fix nodes after dragging (source)
- Fit graph to canvas (source)
- Dynamic data changes (source)
- Beeswarm chart (source)
- Node collision detection (source)
- Emit link particles on demand (source)
- Force-directed tree (DAG mode) (source)
- Expandable Tree (source)
- yarn.lock dependency graph (DAG mode) (source)
- Usage as UI to construct graphs (source)
â¤ï¸ Support This Project
If you find this module useful and would like to support its development, you can buy me a â. Your contributions help keep open-source sustainable!

Quick start
import ForceGraph from 'force-graph';
or using a script tag
<script src="//cdn.jsdelivr.net/npm/force-graph"></script>
then
const myGraph = new ForceGraph(<myDOMElement>)
  .graphData(<myData>);
API reference
Data input
| Method | Description | Default |
|---|---|---|
| graphData([data]) | Getter/setter for graph data structure (see below for syntax details). Can also be used to apply incremental updates. | { nodes: [], links: [] } |
| nodeId([str]) | Node object accessor attribute for unique node id (used in link objects source/target). | id |
| linkSource([str]) | Link object accessor attribute referring to id of source node. | source |
| linkTarget([str]) | Link object accessor attribute referring to id of target node. | target |
Container layout
| Method | Description | Default |
|---|---|---|
| width([px]) | Getter/setter for the canvas width. | <window width> |
| height([px]) | Getter/setter for the canvas height. | <window height> |
| backgroundColor([str]) | Getter/setter for the chart background color. | <transparent> |
Node styling
| Method | Description | Default |
|---|---|---|
| nodeRelSize([num]) | Getter/setter for the ratio of node circle area (square px) per value unit. | 4 |
| nodeVal([num, str or fn]) | Node object accessor function, attribute or a numeric constant for the node numeric value (affects circle area). | val |
| nodeLabel([str or fn]) | Node object accessor function or attribute for name (shown in label). Supports plain text, HTML string content or an HTML element. | name |
| nodeVisibility([boolean, str or fn]) | Node object accessor function, attribute or a boolean constant for whether to display the node. | true |
| nodeColor([str or fn]) | Node object accessor function or attribute for node color (affects circle color). | color |
| nodeAutoColorBy([str or fn]) | Node object accessor function (fn(node)) or attribute (e.g. 'type') to automatically group colors by. Only affects nodes without a color attribute. | |
| nodeCanvasObject([fn]) | Callback function for painting a custom canvas object to represent graph nodes. Should use the provided canvas context attribute to perform drawing operations for each node. The callback function will be called for each node at every frame, and has the signature: .nodeCanvasObject(<node>, <canvas context>, <current global scale>). | default node object is a circle, sized according to val and styled according to color. |
| nodeCanvasObjectMode([str or fn]) | Node object accessor function or attribute for the custom drawing mode. Use in combination with nodeCanvasObject to specify how to customize nodes painting. Possible values are:
| () => 'replace' |
Link styling
| Method | Description | Default |
|---|---|---|
| linkLabel([str or fn]) | Link object accessor function or attribute for name (shown in label). Supports plain text, HTML string content or an HTML element. | name |
| linkVisibility([boolean, str or fn]) | Link object accessor function, attribute or a boolean constant for whether to display the link line. A value of false maintains the link force without rendering it. | true |
| linkColor([str or fn]) | Link object accessor function or attribute for line color. | color |
| linkAutoColorBy([str or fn]) | Link object accessor function (fn(link)) or attribute (e.g. 'type') to automatically group colors by. Only affects links without a color attribute. | |
| linkLineDash([num[], str or fn]) | Link object accessor function, attribute or number array (e.g. [5, 15]) to determine if a line dash should be applied to this rendered link. Refer to the HTML canvas setLineDash API for example values. Either a falsy value or an empty array will disable dashing. | null |
| linkWidth([num, str or fn]) | Link object accessor function, attribute or a numeric constant for the link line width. Keep in mind that link widths remain visually contant through various zoom levels, where as node sizes scale relatively. | 1 |
| linkCurvature([num, str or fn]) | Link object accessor function, attribute or a numeric constant for the curvature radius of the link line. Curved lines are represented as bezier curves, and any numeric value is accepted. A value of 0 renders a straight line. 1 indicates a radius equal to half of the line length, causing the curve to approximate a semi-circle. For self-referencing links (source equal to target) the curve is represented as a loop around the node, with length proportional to the curvature value. Lines are curved clockwise for positive values, and counter-clockwise for negative values. Note that rendering curved lines is purely a visual effect and does not affect the behavior of the underlying forces. | 0 |
| linkCanvasObject([fn]) | Callback function for painting a custom canvas object to represent graph links. Should use the provided canvas context attribute to perform drawing operations for each link. The callback function will be called for each link at every frame, and has the signature: .linkCanvasObject(<link>, <canvas context>, <current global scale>). | default link object is a line, styled according to width and color. |
| linkCanvasObjectMode([str or fn]) | Link object accessor function or attribute for the custom drawing mode. Use in combination with linkCanvasObject to specify how to customize links painting. Possible values are:
| () => 'replace' |
| linkDirectionalArrowLength([num, str or fn]) | Link object accessor function, attribute or a numeric constant for the length (in px) of the arrow head indicating the link directionality. The arrow is displayed directly over the link line, and points in the direction of source > target. A value of 0 hides the arrow. | 0 |
| linkDirectionalArrowColor([str or fn]) | Link object accessor function or attribute for the color of the arrow head. | color |
| linkDirectionalArrowRelPos([num, str or fn]) | Link object accessor function, attribute or a numeric constant for the longitudinal position of the arrow head along the link line, expressed as a ratio between 0 and 1, where 0 indicates immediately next to the source node, 1 next to the target node, and 0.5 right in the middle. | 0.5 |
| linkDirectionalParticles([num, str or fn]) | Link object accessor function, attribute or a numeric constant for the number of particles (small circles) to display over the link line. The particles are distributed equi-spaced along the line, travel in the direction source > target, and can be used to indicate link directionality. | 0 |
| linkDirectionalParticleSpeed([num, str or fn]) | Link object accessor function, attribute or a numeric constant for the directional particles speed, expressed as the ratio of the link length to travel per frame. Values above 0.5 are discouraged. | 0.01 |
| linkDirectionalParticleWidth([num, str or fn]) | Link object accessor function, attribute or a numeric constant for the directional particles width (diameter). | 4 |
| linkDirectionalParticleColor([str or fn]) | Link object accessor function or attribute for the directional particles color. | color |
| emitParticle(link) | An alternative mechanism for generating particles, this method emits a non-cyclical single particle within a specific link. The emitted particle shares the styling (speed, width, color) of the regular particle props. A valid link object that is included in graphData should be passed as a single parameter. |
Render control
| Method | Description | Default |
|---|---|---|
| autoPauseRedraw([boolean]) | Getter/setter for performance optimization to automatically pause redrawing the canvas at every frame whenever the simulation engine is halted. If you have custom dynamic objects that rely on a constant redraw of the canvas, it's recommended to switch this option off. | true |
| pauseAnimation() (alias: stopAnimation) | Pauses the rendering cycle of the component, effectively freezing the current view and cancelling all user interaction. This method can be used to save performance in circumstances when a static image is sufficient. | |
| resumeAnimation() | Resumes the rendering cycle of the component, and re-enables the user interaction. This method can be used together with pauseAnimation for performance optimization purposes. | |
| centerAt([x], [y], [ms]) | Getter/setter for the coordinates of the center of the viewport. This method can be used to perform panning on the canvas programmatically. Each of the x, y coordinates is optional, allowing for motion in just one dimension. An optional 3rd argument defines the duration of the transition (in ms) to animate the canvas motion. A value of 0 (default) centers immediately in the final position. | 0,0 |
| zoom([num], [ms]) | Getter/setter for the canvas zoom amount. The zoom is defined in terms of the scale transform of each px. A value of 1 indicates unity, larger values zoom in and smaller values zoom out. An optional 2nd argument defines the duration of the transition (in ms) to animate the canvas motion. A value of 0 (default) jumps immediately to the final position. | By default the zoom is set to a value inversely proportional to the amount of nodes in the system. |
| zoomToFit([ms], [px], [nodeFilterFn]) | Automatically zooms/pans the canvas so that all of the nodes fit inside it. If no nodes are found no action is taken. It accepts three optional arguments: the first defines the duration of the transition (in ms) to animate the canvas motion (default: 0ms). The second argument is the amount of padding (in px) between the edge of the canvas and the outermost node (default: 10px). The third argument specifies a custom node filter: node => <boolean>, which should return a truthy value if the node is to be included. This can be useful for focusing on a portion of the graph. | (0, 10, node => true) |
| minZoom([num]) | Getter/setter for the lowest zoom out level permitted. | 0.01 |
| maxZoom([num]) | Getter/setter for the highest zoom in level permitted. | 1000 |
| onRenderFramePre(fn) | Callback function to invoke at every frame, immediately before any node/link is rendered to the canvas. This can be used to draw additional external items on the canvas. The canvas context and the current global scale are included as parameters: .onRenderFramePre(<canvas context>, <global scale>). | - |
| onRenderFramePost(fn) | Callback function to invoke at every frame, immediately after the last node/link is rendered to the canvas. This can be used to draw additional external items on the canvas. The canvas context and the current global scale are included as parameters: .onRenderFramePost(<canvas context>, <global scale>). | - |
Force engine (d3-force) configuration
| Method | Description | Default |
|---|---|---|
| dagMode([str]) | Apply layout constraints based on the graph directionality. Only works correctly for DAG graph structures (without cycles). Choice between td (top-down), bu (bottom-up), lr (left-to-right), rl (right-to-left), radialout (outwards-radially) or radialin (inwards-radially). | |
| dagLevelDistance([num]) | If dagMode is engaged, this specifies the distance between the different graph depths. | auto-derived from the number of nodes |
| dagNodeFilter([fn]) | Node accessor function to specify nodes to ignore during the DAG layout processing. This accessor method receives a node object and should return a boolean value indicating whether the node is to be included. Excluded nodes will be left unconstrained and free to move in any direction. | node => true |
| onDagError([fn]) | Callback to invoke if a cycle is encountered while processing the data structure for a DAG layout. The loop segment of the graph is included for information, as an array of node ids. By default an exception will be thrown whenever a loop is encountered. You can override this method to handle this case externally and allow the graph to continue the DAG processing. Strict graph directionality is not guaranteed if a loop is encountered and the result is a best effort to establish a hierarchy. | throws exception |
| d3AlphaMin([num]) | Getter/setter for the simulation alpha min parameter. | 0 |
| d3AlphaDecay([num]) | Getter/setter for the simulation intensity decay parameter. | 0.0228 |
| d3VelocityDecay([num]) | Getter/setter for the nodes' velocity decay that simulates the medium resistance. | 0.4 |
| d3Force(str, [fn]) | Getter/setter for the internal forces that control the d3 simulation engine. Follows the same interface as d3-force's simulation.force. Three forces are included by default: 'link' (based on forceLink), 'charge' (based on forceManyBody) and 'center' (based on forceCenter). Each of these forces can be reconfigured, or new forces can be added to the system. | |
| d3ReheatSimulation() | Reheats the force simulation engine, by setting the alpha value to 1. Only applicable if using the d3 simulation engine. | |
| warmupTicks([int]) | Getter/setter for number of layout engine cycles to dry-run at ignition before starting to render. | 0 |
| cooldownTicks([int]) | Getter/setter for how many build-in frames to render before stopping and freezing the layout engine. | Infinity |
| cooldownTime([num]) | Getter/setter for how long (ms) to render for before stopping and freezing the layout engine. | 15000 |
| onEngineTick(fn) | Callback function invoked at every tick of the simulation engine. | - |
| onEngineStop(fn) | Callback function invoked when the simulation engine stops and the layout is frozen. | - |
Interaction
| Method | Description | Default |
|---|---|---|
| onNodeClick(fn) | Callback function for node (left-button) clicks. The node object and the event object are included as arguments onNodeClick(node, event). | - |
| onNodeRightClick(fn) | Callback function for node right-clicks. The node object and the event object are included as arguments onNodeRightClick(node, event). | - |
| onNodeHover(fn) | Callback function for node mouse over events. The node object (or null if there's no node under the mouse line of sight) is included as the first argument, and the previous node object (or null) as second argument: onNodeHover(node, prevNode). | - |
| onNodeDrag(fn) | Callback function for node drag interactions. This function is invoked repeatedly while dragging a node, every time its position is updated. The node object is included as the first argument, and the change in coordinates since the last iteration of this function are included as the second argument in format {x,y}: onNodeDrag(node, translate). | - |
| onNodeDragEnd(fn) | Callback function for the end of node drag interactions. This function is invoked when the node is released. The node object is included as the first argument, and the change in coordinates from the node's initial postion are included as the second argument in format {x,y}: onNodeDragEnd(node, translate). | - |
| onLinkClick(fn) | Callback function for link (left-button) clicks. The link object and the event object are included as arguments onLinkClick(link, event). | - |
| onLinkRightClick(fn) | Callback function for link right-clicks. The link object and the event object are included as arguments onLinkRightClick(link, event). | - |
| onLinkHover(fn) | Callback function for link mouse over events. The link object (or null if there's no link under the mouse line of sight) is included as the first argument, and the previous link object (or null) as second argument: onLinkHover(link, prevLink). | - |
| linkHoverPrecision([int]) | Whether to display the link label when hovering the link closely (low value) or from far away (high value). | 4 |
| onBackgroundClick(fn) | Callback function for click events on the empty space between the nodes and links. The event object is included as single argument onBackgroundClick(event). | - |
| onBackgroundRightClick(fn) | Callback function for right-click events on the empty space between the nodes and links. The event object is included as single argument onBackgroundRightClick(event). | - |
| onZoom(fn) | Callback function for zoom/pan events. The current zoom transform is included as single argument onZoom({ k, x, y }). Note that onZoom is triggered by user interaction as well as programmatic zooming/panning with zoom() and centerAt(). | - |
| onZoomEnd(fn) | Callback function for on 'end' of zoom/pan events. The current zoom transform is included as single argument onZoomEnd({ k, x, y }). Note that onZoomEnd is triggered by user interaction as well as programmatic zooming/panning with zoom() and centerAt(). | - |
| nodePointerAreaPaint([fn]) | Callback function for painting a canvas area used to detect node pointer interactions. The provided paint color uniquely identifies the node and should be used to perform drawing operations on the provided canvas context. This painted area will not be visible, but instead be used to detect pointer interactions with the node. The callback function has the signature: .nodePointerAreaPaint(<node>, <color>, <canvas context>, <current global scale>). | default interaction area is a circle centered on the node and sized according to val. |
| linkPointerAreaPaint([fn]) | Callback function for painting a canvas area used to detect link pointer interactions. The provided paint color uniquely identifies the link and should be used to perform drawing operations on the provided canvas context. This painted area will not be visible, but instead be used to detect pointer interactions with the link. The callback function has the signature: .linkPointerAreaPaint(<link>, <color>, <canvas context>, <current global scale>). | default interaction area is a straight line between the source and target nodes. |
| enableNodeDrag([boolean]) | Getter/setter for whether to enable the user interaction to drag nodes by click-dragging. If enabled, every time a node is dragged the simulation is re-heated so the other nodes react to the changes. Only applicable if enablePointerInteraction is true. | true |
| enableZoomInteraction([boolean or fn]) | Getter/setter for whether to enable zooming user interactions. When a predicate function is provided, the mouse event is passed as an argument. | true |
| enablePanInteraction([boolean or fn]) | Getter/setter for whether to enable panning user interactions. When a predicate function is provided, the mouse event is passed as an argument. | true |
| enablePointerInteraction([boolean]) | Getter/setter for whether to enable the mouse tracking events. This activates an internal tracker of the canvas mouse position and enables the functionality of object hover/click/drag and tooltip labels, at the cost of performance. If you're looking for maximum gain in your graph performance it's recommended to switch off this property. | true |
Utility
| Method | Description |
|---|---|
| getGraphBbox([nodeFilterFn]) | Returns the current bounding box of the nodes in the graph, formatted as { x: [<num>, <num>], y: [<num>, <num>] }. If no nodes are found, returns null. Accepts an optional argument to define a custom node filter: node => <boolean>, which should return a truthy value if the node is to be included. This can be useful to calculate the bounding box of a portion of the graph. |
| screen2GraphCoords(x, y) | Utility method to translate viewport coordinates to the graph domain. Given a pair of x,y screen coordinates, returns the current equivalent {x, y} in the domain of graph node coordinates. |
| graph2ScreenCoords(x, y) | Utility method to translate node coordinates to the viewport domain. Given a pair of x,y graph coordinates, returns the current equivalent {x, y} in viewport coordinates. |
Input JSON syntax
{
    "nodes": [
        {
          "id": "id1",
          "name": "name1",
          "val": 1
        },
        {
          "id": "id2",
          "name": "name2",
          "val": 10
        },
        ...
    ],
    "links": [
        {
            "source": "id1",
            "target": "id2"
        },
        ...
    ]
}
Top Related Projects
Force-directed graph layout using velocity Verlet integration.
⚠️ This project is not maintained anymore! Please go to https://github.com/visjs
:dizzy: Display dynamic, automatically organised, customizable network views.
Graph theory (network) library for visualisation and analysis
Beautiful Graphs
♾ A Graph Visualization Framework in JavaScript.
Convert designs to code with AI
Introducing Visual Copilot: A new AI model to turn Figma designs to high quality code using your components.
Try Visual Copilot