
Top Related Projects

The Most Powerful Swipe Layout!

Side menu with some categories to choose.
You can easily add awesome animated context menu to your app.

:octocat: 📃 FoldingCell is a material design expanding content cell inspired by folding paper material made by @Ramotion

A menu which can ... BOOM! - Android
Quick Overview
SwipeRevealLayout is an Android custom view that provides a swipeable layout, allowing users to reveal hidden options or actions by swiping. It's designed to be flexible and easy to integrate into existing Android applications, offering a smooth and intuitive user experience for implementing swipe-to-reveal functionality.
Pros
- Easy to implement and customize
- Supports both left and right swiping
- Smooth animations and gesture handling
- Compatible with RecyclerView and ListView
Cons
- Limited documentation and examples
- Not actively maintained (last update was in 2018)
- May require additional effort to implement more complex swipe behaviors
- Potential performance issues with large lists
Code Examples
- Basic SwipeRevealLayout setup:
<com.chauthai.swipereveallayout.SwipeRevealLayout
    android:layout_width="match_parent"
    android:layout_height="wrap_content"
    app:mode="same_level"
    app:dragEdge="right">

    <LinearLayout
        android:layout_width="wrap_content"
        android:layout_height="match_parent">
        <!-- Your secondary layout here -->
    </LinearLayout>

    <FrameLayout
        android:layout_width="match_parent"
        android:layout_height="match_parent">
        <!-- Your main layout here -->
    </FrameLayout>

</com.chauthai.swipereveallayout.SwipeRevealLayout>
- Programmatically open/close the layout:
SwipeRevealLayout swipeLayout = findViewById(R.id.swipe_layout);
swipeLayout.open(true);
swipeLayout.close(true);
- Adding a swipe listener:
swipeLayout.setSwipeListener(new SwipeRevealLayout.SwipeListener() {
    @Override
    public void onClosed(SwipeRevealLayout view) {
        // Handle closed state
    }

    @Override
    public void onOpened(SwipeRevealLayout view) {
        // Handle opened state
    }

    @Override
    public void onSlide(SwipeRevealLayout view, float slideOffset) {
        // Handle sliding
    }
});
Getting Started
- Add the dependency to your
build.gradlefile:
dependencies {
    implementation 'com.chauthai.swipereveallayout:swipe-reveal-layout:1.4.1'
}
- Add SwipeRevealLayout to your layout XML:
<com.chauthai.swipereveallayout.SwipeRevealLayout
    android:layout_width="match_parent"
    android:layout_height="wrap_content"
    app:mode="same_level"
    app:dragEdge="right">
    <!-- Add your main and secondary layouts here -->
</com.chauthai.swipereveallayout.SwipeRevealLayout>
- Customize the SwipeRevealLayout in your Java/Kotlin code as needed, using the examples provided above.
Competitor Comparisons
The Most Powerful Swipe Layout!
Pros of AndroidSwipeLayout
- More comprehensive and feature-rich, offering multiple swipe directions and layouts
- Higher star count and wider adoption in the Android community
- Includes built-in animations and customizable swipe actions
Cons of AndroidSwipeLayout
- Last updated in 2017, potentially outdated for newer Android versions
- More complex implementation due to its extensive features
- Larger library size, which may impact app performance
Code Comparison
SwipeRevealLayout:
SwipeRevealLayout swipeLayout = (SwipeRevealLayout) findViewById(R.id.swipe_layout);
swipeLayout.setSwipeListener(new SwipeRevealLayout.SwipeListener() {
    @Override
    public void onOpened(SwipeRevealLayout view) {
        // Handle opened state
    }
});
AndroidSwipeLayout:
SwipeLayout swipeLayout = (SwipeLayout) findViewById(R.id.swipe_layout);
swipeLayout.addSwipeListener(new SwipeLayout.SwipeListener() {
    @Override
    public void onOpen(SwipeLayout layout) {
        // Handle opened state
    }
});
Both libraries offer similar basic functionality for implementing swipeable layouts in Android applications. SwipeRevealLayout focuses on simplicity and ease of use, while AndroidSwipeLayout provides more advanced features and customization options. The choice between the two depends on the specific requirements of your project and the level of complexity you're willing to manage.
Side menu with some categories to choose.
Pros of Side-Menu.Android
- More visually appealing with animated transitions and customizable design
- Offers a full-screen side menu experience
- Includes additional UI components like circular reveal effect
Cons of Side-Menu.Android
- Less flexible for non-menu swipe actions
- May be overkill for simple swipe-to-reveal functionality
- Potentially higher learning curve due to more complex implementation
Code Comparison
Side-Menu.Android:
val menuFragment = SideMenu()
supportFragmentManager.beginTransaction()
    .replace(R.id.menu_frame, menuFragment)
    .commit()
SwipeRevealLayout:
val swipeLayout = findViewById<SwipeRevealLayout>(R.id.swipe_layout)
swipeLayout.setLockDrag(false)
swipeLayout.setSwipeListener(object : SwipeRevealLayout.SwipeListener { ... })
Side-Menu.Android focuses on creating a full-screen menu experience with more complex animations, while SwipeRevealLayout provides a simpler, more versatile swipe-to-reveal functionality that can be applied to various UI elements. Side-Menu.Android may be better suited for apps requiring a rich, animated menu interface, whereas SwipeRevealLayout is more appropriate for implementing swipe actions on individual list items or other UI components.
You can easily add awesome animated context menu to your app.
Pros of Context-Menu.Android
- More visually appealing and customizable animations
- Offers a unique circular menu layout
- Better suited for complex menu structures
Cons of Context-Menu.Android
- Steeper learning curve due to its unique implementation
- May not be as suitable for simple swipe-to-reveal actions
- Less frequently updated compared to SwipeRevealLayout
Code Comparison
SwipeRevealLayout:
SwipeRevealLayout swipeLayout = findViewById(R.id.swipe_layout);
swipeLayout.setLockDrag(true);
swipeLayout.setSwipeListener(new SwipeRevealLayout.SwipeListener() {
    @Override
    public void onOpened(SwipeRevealLayout view) {
        // Handle opened state
    }
});
Context-Menu.Android:
MenuAdapter menuAdapter = new MenuAdapter(context, menuItems);
ContextMenuDialogFragment dialogFragment = ContextMenuDialogFragment.newInstance(menuParams, menuAdapter);
dialogFragment.show(getSupportFragmentManager(), ContextMenuDialogFragment.TAG);
Both libraries offer unique approaches to revealing hidden content or menus in Android applications. SwipeRevealLayout focuses on simple swipe gestures to reveal content, while Context-Menu.Android provides a more elaborate circular menu system. The choice between the two depends on the specific requirements of your project, such as visual design preferences and the complexity of the menu structure needed.
:octocat: 📃 FoldingCell is a material design expanding content cell inspired by folding paper material made by @Ramotion
Pros of folding-cell-android
- More visually appealing and interactive UI element
- Supports complex content reveal animations
- Customizable folding animation parameters
Cons of folding-cell-android
- More complex implementation and setup
- Potentially higher performance overhead
- Limited to specific use cases (e.g., list items)
Code Comparison
SwipeRevealLayout:
SwipeRevealLayout swipeLayout = findViewById(R.id.swipe_layout);
swipeLayout.setLockDrag(true);
swipeLayout.setSwipeListener(new SwipeRevealLayout.SwipeListener() {
    @Override
    public void onOpened(SwipeRevealLayout view) {
        // Handle opened state
    }
});
folding-cell-android:
final FoldingCell fc = findViewById(R.id.folding_cell);
fc.setOnClickListener(new View.OnClickListener() {
    @Override
    public void onClick(View v) {
        fc.toggle(false);
    }
});
SwipeRevealLayout offers a simpler implementation for basic swipe-to-reveal functionality, while folding-cell-android provides a more visually striking folding animation effect. SwipeRevealLayout is more versatile and can be used in various layouts, whereas folding-cell-android is primarily designed for list items. The choice between the two depends on the specific UI requirements and desired user interaction in your Android application.
A menu which can ... BOOM! - Android
Pros of BoomMenu
- Offers a variety of animation styles and customization options for button expansion
- Supports multiple button types (text, image, or both) within the same menu
- Provides easy-to-use builder pattern for menu creation
Cons of BoomMenu
- More complex implementation due to numerous customization options
- Potentially higher performance overhead for elaborate animations
- Limited to circular or semi-circular button layouts
Code Comparison
SwipeRevealLayout:
SwipeRevealLayout swipeLayout = findViewById(R.id.swipe_layout);
swipeLayout.setLockDrag(true);
swipeLayout.setSwipeListener(new SwipeRevealLayout.SwipeListener() {
    @Override
    public void onOpened(SwipeRevealLayout view) {
        // Handle opened state
    }
});
BoomMenu:
BoomMenuButton bmb = findViewById(R.id.bmb);
bmb.addBuilder(new HamButton.Builder()
    .normalImageRes(R.drawable.icon)
    .normalText("Text")
    .listener(new OnBMClickListener() {
        @Override
        public void onBoomButtonClick(int index) {
            // Handle click event
        }
    })
);
Both libraries provide Android UI components for revealing hidden content, but SwipeRevealLayout focuses on swipe gestures, while BoomMenu emphasizes animated button expansion. SwipeRevealLayout is simpler to implement and more suitable for list items, whereas BoomMenu offers more visual flair and is better suited for floating action buttons or menu icons.
Convert  designs to code with AI

Introducing Visual Copilot: A new AI model to turn Figma designs to high quality code using your components.
Try Visual CopilotREADME
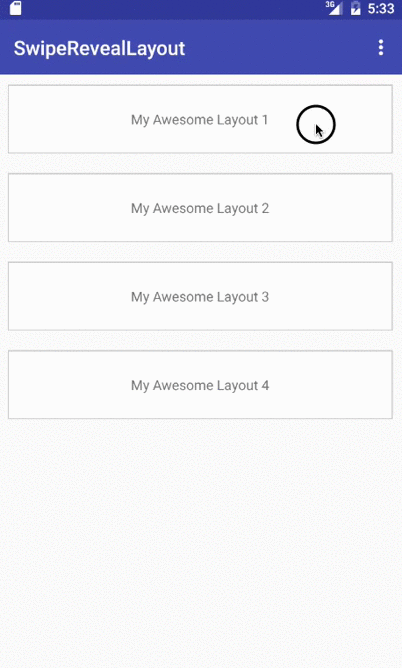
SwipeRevealLayout
A layout that you can swipe/slide to show another layout.
Demo
Overview
Drag mode
Drag mode normal:

Drag mode same_level:

Features
- Flexible, easy to use with RecyclerView, ListView or any view that requires view binding.
- Four drag edges (left, right, top, bottom).
- Two drag modes:
- Normal (the secondary view is underneath the main view).
- Same level (the secondary view sticks to the edge of the main view).
- Able to open one row at a time.
- Minimum api level 9.
Usage
Dependencies
dependencies {
    compile 'com.chauthai.swipereveallayout:swipe-reveal-layout:1.4.1'
}
Layout file
<com.chauthai.swipereveallayout.SwipeRevealLayout
        android:layout_width="match_parent"
        android:layout_height="match_parent"
        app:mode="same_level"
        app:dragEdge="left">

        <!-- Your secondary layout here -->
        <FrameLayout
            android:layout_width="wrap_content"
            android:layout_height="match_parent" />

        <!-- Your main layout here -->
        <FrameLayout
            android:layout_width="match_parent"
            android:layout_height="match_parent" />

</com.chauthai.swipereveallayout.SwipeRevealLayout>
app:mode can be normal or same_level
app:dragEdge can be left, right, top or bottom
Use with RecyclerView, ListView, GridView...
In your Adapter class:
public class Adapter extends RecyclerView.Adapter {
  // This object helps you save/restore the open/close state of each view
  private final ViewBinderHelper viewBinderHelper = new ViewBinderHelper();

  public Adapter() {
    // uncomment the line below if you want to open only one row at a time
    // viewBinderHelper.setOpenOnlyOne(true);
  }

  @Override
  public void onBindViewHolder(ViewHolder holder, int position) {
    // get your data object first.
    YourDataObject dataObject = mDataSet.get(position);

    // Save/restore the open/close state.
    // You need to provide a String id which uniquely defines the data object.
    viewBinderHelper.bind(holder.swipeRevealLayout, dataObject.getId());

    // do your regular binding stuff here
  }
}
Optional, to restore/save the open/close state when the device's orientation is changed:
Adapter class:
public class YourAdapter extends RecyclerView.Adapter {
  ...

  public void saveStates(Bundle outState) {
      viewBinderHelper.saveStates(outState);
  }

  public void restoreStates(Bundle inState) {
      viewBinderHelper.restoreStates(inState);
  }
}
Activity class:
public class YourActivity extends Activity {
  ...

  @Override
  protected void onSaveInstanceState(Bundle outState) {
      super.onSaveInstanceState(outState);
      if (adapter != null) {
          adapter.saveStates(outState);
      }
  }

  @Override
  protected void onRestoreInstanceState(Bundle savedInstanceState) {
      super.onRestoreInstanceState(savedInstanceState);
      if (adapter != null) {
          adapter.restoreStates(savedInstanceState);
      }
  }
}
Useful Methods/Attributes
app:minDistRequestDisallowParent: The minimum distance (in px or dp) to the closest drag edge that the SwipeRevealLayout will disallow the parent to intercept touch event. It basically means the minimum distance to swipe until a RecyclerView (or something similar) cannot be scrolled.
setSwipeListener(SwipeListener swipeListener): set the listener for the layout. You can use the full interface SwipeListener or a simplified listener class SimpleSwipeListener
open(boolean animation), close(boolean animation): open/close the layout. If animation is set to false, the listener will not be called.
isOpened(), isClosed(): check if the layout is fully opened or closed.
setMinFlingVelocity(int velocity): set the minimum fling velocity (dp/sec) to cause the layout to open/close.
setDragEdge(int edge): Change the edge where the layout can be dragged from.
setLockDrag(boolean lock): If set to true, the user cannot drag/swipe the layout.
viewBinderHelper.lockSwipe(String... id), viewBinderHelper.unlockSwipe(String... id): Lock/unlock layouts which are binded to the binderHelper.
viewBinderHelper.setOpenOnlyOne(boolean openOnlyOne): If openOnlyOne is set to true, you can only open one row at a time.
viewBinderHelper.openLayout(String id): Open a layout. id is the id of the data object which is bind to the layout.
viewBinderHelper.closeLayout(String id): Close a layout. id is the id of the data object which is bind to the layout.
License
 The MIT License (MIT)

 Copyright (c) 2016 Chau Thai

 Permission is hereby granted, free of charge, to any person obtaining a copy
 of this software and associated documentation files (the "Software"), to deal
 in the Software without restriction, including without limitation the rights
 to use, copy, modify, merge, publish, distribute, sublicense, and/or sell
 copies of the Software, and to permit persons to whom the Software is
 furnished to do so, subject to the following conditions:

 The above copyright notice and this permission notice shall be included in all
 copies or substantial portions of the Software.

 THE SOFTWARE IS PROVIDED "AS IS", WITHOUT WARRANTY OF ANY KIND, EXPRESS OR
 IMPLIED, INCLUDING BUT NOT LIMITED TO THE WARRANTIES OF MERCHANTABILITY,
 FITNESS FOR A PARTICULAR PURPOSE AND NONINFRINGEMENT. IN NO EVENT SHALL THE
 AUTHORS OR COPYRIGHT HOLDERS BE LIABLE FOR ANY CLAIM, DAMAGES OR OTHER
 LIABILITY, WHETHER IN AN ACTION OF CONTRACT, TORT OR OTHERWISE, ARISING FROM,
 OUT OF OR IN CONNECTION WITH THE SOFTWARE OR THE USE OR OTHER DEALINGS IN THE
 SOFTWARE.
Top Related Projects
The Most Powerful Swipe Layout!
Side menu with some categories to choose.
You can easily add awesome animated context menu to your app.
:octocat: 📃 FoldingCell is a material design expanding content cell inspired by folding paper material made by @Ramotion
A menu which can ... BOOM! - Android
Convert designs to code with AI
Introducing Visual Copilot: A new AI model to turn Figma designs to high quality code using your components.
Try Visual Copilot