 VerticalStepperForm
Vertical Stepper Form Library for Android. It follows Google Material Design guidelines.
Top Related Projects

Step indicator for onboarding or simple viewpager

A simple library to add carousel view in android app.

This library allows to use Material steppers inside Android applications.
Quick Overview
VerticalStepperForm is an Android library that provides a customizable vertical stepper form implementation. It allows developers to create multi-step forms with a vertical layout, guiding users through a series of steps or questions in a visually appealing and intuitive manner.
Pros
- Easy integration with existing Android projects
- Highly customizable appearance and behavior
- Supports both linear and non-linear navigation between steps
- Includes built-in validation and error handling
Cons
- Limited to vertical layout only, no horizontal stepper option
- May require additional effort to adapt to complex form scenarios
- Documentation could be more comprehensive
- Relatively small community and fewer updates compared to some larger libraries
Code Examples
- Basic stepper form setup:
val verticalStepperForm = findViewById<VerticalStepperForm>(R.id.vertical_stepper_form)
val stepList = listOf(
    Step("Step 1", "Description 1", Step1Content()),
    Step("Step 2", "Description 2", Step2Content()),
    Step("Step 3", "Description 3", Step3Content())
)

verticalStepperForm.setup(stepList, lastStepNextButtonText = "FINISH").init()
- Customizing step appearance:
verticalStepperForm.setup(stepList, lastStepNextButtonText = "FINISH")
    .style(StepperStyle.progress)
    .stepNumberColors(normalColor = Color.GRAY, activeColor = Color.BLUE)
    .displayBottomNavigation(false)
    .init()
- Adding step validation:
class Step1Content : StepContentView {
    override fun verifyStep(): StepValidationResult {
        // Perform validation logic
        return if (isValid) {
            StepValidationResult.Valid
        } else {
            StepValidationResult.Invalid("Error message")
        }
    }
}
Getting Started
- Add the dependency to your app's
build.gradle:
dependencies {
    implementation 'com.ernestoyaquello.stepperform:vertical-stepper-form:2.4.1'
}
- Add the
VerticalStepperFormview to your layout XML:
<ernestoyaquello.com.verticalstepperform.VerticalStepperForm
    android:id="@+id/vertical_stepper_form"
    android:layout_width="match_parent"
    android:layout_height="match_parent" />
- Create step content views and set up the form in your activity or fragment:
class MainActivity : AppCompatActivity() {
    override fun onCreate(savedInstanceState: Bundle?) {
        super.onCreate(savedInstanceState)
        setContentView(R.layout.activity_main)

        val verticalStepperForm = findViewById<VerticalStepperForm>(R.id.vertical_stepper_form)
        val stepList = listOf(
            Step("Step 1", "Description 1", Step1Content()),
            Step("Step 2", "Description 2", Step2Content()),
            Step("Step 3", "Description 3", Step3Content())
        )

        verticalStepperForm.setup(stepList, lastStepNextButtonText = "FINISH").init()
    }
}
Competitor Comparisons
Step indicator for onboarding or simple viewpager
Pros of stepper-indicator
- Horizontal layout, suitable for top-of-screen progress indicators
- Customizable colors and styles for steps and labels
- Lightweight and focused on step indication rather than form handling
Cons of stepper-indicator
- Limited to horizontal orientation
- Does not include built-in form handling or validation
- Less comprehensive documentation compared to VerticalStepperForm
Code Comparison
VerticalStepperForm:
verticalStepperForm.setup(this, steps).init()
stepper-indicator:
stepperIndicator.setStepCount(5)
stepperIndicator.setCurrentStep(2)
Summary
VerticalStepperForm offers a comprehensive vertical stepper form solution with built-in form handling and validation. It's ideal for multi-step forms with complex data entry requirements.
stepper-indicator provides a simpler, more flexible horizontal step indicator that can be easily integrated into existing layouts. It's better suited for progress tracking in apps where form handling is managed separately.
Choose VerticalStepperForm for full-featured vertical forms, and stepper-indicator for customizable horizontal progress indicators in various app contexts.
A simple library to add carousel view in android app.
Pros of CarouselView
- Focuses on image/view carousel functionality, providing a more specialized and potentially polished solution for this specific use case
- Offers auto-play and infinite loop options, enhancing user experience for image galleries or slideshows
- Supports both XML and code-based implementations, offering flexibility in integration
Cons of CarouselView
- Limited to carousel functionality, whereas VerticalStepperForm provides a more versatile form-building solution
- May require additional customization for complex layouts or non-image content
- Less actively maintained, with fewer recent updates compared to VerticalStepperForm
Code Comparison
VerticalStepperForm (Java):
verticalStepperForm = findViewById(R.id.vertical_stepper_form);
verticalStepperForm.setup(this, steps).init();
CarouselView (XML):
<com.synnapps.carouselview.CarouselView
    android:id="@+id/carouselView"
    android:layout_width="match_parent"
    android:layout_height="200dp"
    app:fillColor="#FFFFFFFF"
    app:pageColor="#00000000"
    app:radius="6dp"
    app:slideInterval="3000"
    app:strokeColor="#FF777777"
    app:strokeWidth="1dp"/>
Both libraries offer easy integration, but VerticalStepperForm provides a more programmatic approach, while CarouselView allows for extensive XML configuration.
This library allows to use Material steppers inside Android applications.
Pros of android-material-stepper
- More customizable with various step types (text, progress bar, dots)
- Supports both vertical and horizontal layouts
- Actively maintained with recent updates
Cons of android-material-stepper
- Slightly more complex implementation
- Requires more setup code
- Less focused on vertical stepper forms specifically
Code Comparison
VerticalStepperForm:
verticalStepperForm.setup(this, steps).init()
android-material-stepper:
StepperLayout.newInstance(context)
    .setAdapter(StepperAdapter())
    .setStepperType(StepperType.DOTS)
    .build()
VerticalStepperForm provides a simpler setup with a single method call, while android-material-stepper offers more configuration options but requires more setup code.
Both libraries provide easy-to-use APIs for creating stepper forms in Android applications. VerticalStepperForm is more focused on vertical layouts, making it simpler to implement for that specific use case. android-material-stepper offers more flexibility in terms of layout and step types, but may require more initial setup and customization.
Choose VerticalStepperForm for quick implementation of vertical stepper forms, or android-material-stepper for more customizable and versatile stepper layouts in your Android app.
Convert  designs to code with AI

Introducing Visual Copilot: A new AI model to turn Figma designs to high quality code using your components.
Try Visual CopilotREADME
𪦠RIP: This library is now archived
It was nice while it lasted, but this library has endured too much hardship already. First Kotlin, then Compose...
If you must, the rest of this outdated readme continues below.
Vertical Stepper Form Library
This Android library implements a highly customizable vertical stepper form.
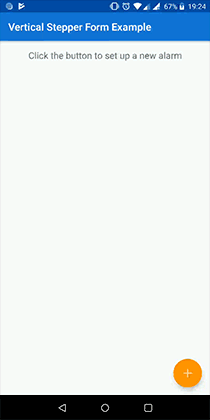
Demo
Support This Library
The creation (and maintenance) of this library requires time and effort. If you find it useful and want to support it, please use the link below:

How To Use It
1. Reference The Library
Add the library to your project via mavenCentral by adding the following in the app's build.gradle file:
dependencies {
    implementation 'com.ernestoyaquello.stepperform:vertical-stepper-form:2.7.0'
}
Make sure you are using AndroidX instead of the old support libraries; otherwise this library might not work.
2. Add The Form To Your Layout
Add the view VerticalStepperFormView to your layout using XML. For design purposes, it is recommended that you don't put anything else than this view in the layout of the screen that will contain the form:
<!-- new_user_form_activity.xml -->
<ernestoyaquello.com.verticalstepperform.VerticalStepperFormView
    xmlns:android="http://schemas.android.com/apk/res/android"
    xmlns:app="http://schemas.android.com/apk/res-auto"
    android:id="@+id/stepper_form"
    android:layout_width="match_parent"
    android:layout_height="match_parent"
    app:form_circle_background_color="@color/colorPrimary"
    app:form_next_button_background_color="@color/colorPrimary"
    app:form_next_button_pressed_background_color="@color/colorPrimaryDark"/>
As you can see in this example, only the properties form_circle_background_color, form_next_button_background_color and form_next_button_pressed_background_color are being used to configure the form, but there are plenty of other ones that you can use to customize it as you please.
3. Define Your Steps
Each one of the fields of your form must be defined as a step.
To define a step, create a class that extends Step<T>, where T will be the type of the step's data (e.g., String if the data of the step is the user's name, Integer if it is the user's age, etc). For instance:
public class UserNameStep extends Step<String> {

    private EditText userNameView;

    public UserNameStep(String stepTitle) {
        super(stepTitle);
    }

    @Override
    protected View createStepContentLayout() {
        // Here we generate the view that will be used by the library as the content of the step.
        // In this case we do it programmatically, but we could also do it by inflating an XML layout.
        userNameView = new EditText(getContext());
        userNameView.setSingleLine(true);
        userNameView.setHint("Your Name");
        ...
        userNameView.addTextChangedListener(new TextWatcher() {
            ...
            @Override
            public void onTextChanged(CharSequence s, int start, int before, int count) {
                // Whenever the user updates the user name text, we update the state of the step.
                // The step will be marked as completed only if its data is valid, which will be
                // checked automatically by the form with a call to isStepDataValid().
                markAsCompletedOrUncompleted(true);
            }
        });

        return userNameView;
    }

    @Override
    protected IsDataValid isStepDataValid(String stepData) {
        // The step's data (i.e., the user name) will be considered valid only if it is longer than
        // three characters. In case it is not, we will display an error message for feedback.
        // In an optional step, you should implement this method to always return a valid value.
        boolean isNameValid = stepData.length() >= 3;
        String errorMessage = !isNameValid ? "3 characters minimum" : "";

        return new IsDataValid(isNameValid, errorMessage);
    }

    @Override
    public String getStepData() {
        // We get the step's data from the value that the user has typed in the EditText view.
        Editable userName = userNameView.getText();
        return userName != null ? userName.toString() : "";
    }

    @Override
    public String getStepDataAsHumanReadableString() {
        // Because the step's data is already a human-readable string, we don't need to convert it.
        // However, we return "(Empty)" if the text is empty to avoid not having any text to display.
        // This string will be displayed in the subtitle of the step whenever the step gets closed.
        String userName = getStepData();
        return !userName.isEmpty() ? userName : "(Empty)";
    }

    @Override
    protected void onStepOpened(boolean animated) {
        // This will be called automatically whenever the step gets opened.
    }

    @Override
    protected void onStepClosed(boolean animated) {
        // This will be called automatically whenever the step gets closed.
    }

    @Override
    protected void onStepMarkedAsCompleted(boolean animated) {
        // This will be called automatically whenever the step is marked as completed.
    }

    @Override
    protected void onStepMarkedAsUncompleted(boolean animated) {
        // This will be called automatically whenever the step is marked as uncompleted.
    }

    @Override
    protected void restoreStepData(String stepData) {
        // To restore the step after a configuration change, we restore the text of its EditText view.
        userNameView.setText(stepData);
    }
}
Most of the methods showed above will be called automatically by the library. For example, every time the user opens a step, the callback onStepOpened() will be invoked and the open step will be marked as completed or uncompleted automatically depending on the value returned by isStepDataValid(). Then, the callback onStepMarkedAsCompleted(), if applicable, will also be invoked.
It is worth noting that each step has a reference to the context accessible through getContext() and a reference to the form accessible through getFormView(), as well as several other useful methods.
4. Set Up The Form And Initialize It
Once you have defined all your steps, you will need to find the view of the form to set it up and initialize it:
public class CreateUserAccountActivity extends Activity implements StepperFormListener {

    private UserNameStep userNameStep;
    private UserEmailStep userEmailStep;
    private UserAgeStep userAgeStep;

    private VerticalStepperFormView verticalStepperForm;

    @Override
    protected void onCreate(Bundle savedInstanceState) {
        super.onCreate(savedInstanceState);
        setContentView(R.layout.new_user_form_activity);

        // Create the steps.
        userNameStep = new UserNameStep("User Name");
        userEmailStep = new UserEmailStep("User Email");
        userAgeStep = new UserAgeStep("User Age");

        // Find the form view, set it up and initialize it.
        verticalStepperForm = findViewById(R.id.stepper_form);
        verticalStepperForm
            .setup(this, userNameStep, userEmailStep, userAgeStep)
            .init();
    }

    @Override
    public void onCompletedForm() {
        // This method will be called when the user clicks on the last confirmation button of the
        // form in an attempt to save or send the data.
    }

    @Override
    public void onCancelledForm() {
        // This method will be called when the user clicks on the cancel button of the form.
    }

    @Override
    public void onStepAdded(int index, Step<?> addedStep) {
        // This will be called when a step is added dynamically through the form method addStep().
    }

    @Override
    public void onStepRemoved(int index) {
        // This will be called when a step is removed dynamically through the form method removeStep().
    }
}
As you can see in the code above, we set up the form by passing several parameters through the method setup():
- An implementation of the interface
StepperFormListener(in this case, this listener is implemented by the activity, so we just sendthisas a parameter). - The steps that will be displayed in the form:
userNameStep,userEmailStepanduserAgeStepin our example.
However, we can also customize the form just before initializing it:
verticalStepperForm
    .setup(this, userNameStep, userEmailStep, userAgeStep)
    .allowNonLinearNavigation(true)
    .displayBottomNavigation(false)
    .lastStepNextButtonText("Create User")
    ...
    .init();
There are many methods available to customize the form, but all the configuration options that you can specify via code are also available in XML, so it is up to you to set up the form in one way or another.
About The Listener
These are the two most important methods of the StepperFormListener:
onCompletedForm()
This method will get called when the user clicks on the last confirmation button of the form in an attempt to save/send the information, so we can use it to save or send the data of the form. It is worth noting that it will only get invoked if all the steps are marked as completed.
Just before calling this method, the form disables the navigation between steps, as well as all the buttons. To revert the form to normal (for example, because the data couldn't be saved and we want to re-activate the buttons of the form), it is necessary to call verticalStepperForm.cancelFormCompletionOrCancellationAttempt().
onCancelledForm()
This method will get called when the user clicks on the optional cancellation button of the last step in order to avoid saving/sending the data. We can use it to ask the user to confirm the cancellation, after which we could just close the form screen and navigate away from it.
Right before calling this method, the form disables the navigation between steps, as well as all the buttons. To revert the form to normal (for example, because the user decides not to cancel it), it is necessary to call verticalStepperForm.cancelFormCompletionOrCancellationAttempt().
Further Details
Check out the sample application code to see a more complete example of how this library can be used to create vertical stepper forms.
Contribution
Feel free to contribute to this library, any help will be welcomed!
License
Licensed under the Apache License, Version 2.0 (the "License");
you may not use this file except in compliance with the License.
You may obtain a copy of the License at

   http://www.apache.org/licenses/LICENSE-2.0

Unless required by applicable law or agreed to in writing, software
distributed under the License is distributed on an "AS IS" BASIS,
WITHOUT WARRANTIES OR CONDITIONS OF ANY KIND, either express or implied.
See the License for the specific language governing permissions and
limitations under the License.
Top Related Projects
Step indicator for onboarding or simple viewpager
A simple library to add carousel view in android app.
This library allows to use Material steppers inside Android applications.
Convert designs to code with AI
Introducing Visual Copilot: A new AI model to turn Figma designs to high quality code using your components.
Try Visual Copilot