Top Related Projects
Dribbble app built with React Native
Cross-Platform React Native UI Toolkit
:boom: React Native UI Library based on Eva Design System :new_moon_with_face::sparkles:Dark Mode
Mobile-first, accessible components for React Native & Web to build consistent UI across Android, iOS and Web.
UI Components Library for React Native
Material Design for React Native (Android & iOS)
Quick Overview
30-days-of-react-native is a project that showcases 30 different React Native app examples, one for each day. It aims to help developers learn React Native by providing practical, real-world examples of various UI components and functionalities commonly used in mobile app development.
Pros
- Provides a wide range of practical examples for learning React Native
- Includes implementations of popular UI components and features
- Offers a structured approach to learning, with one example per day
- Code is well-organized and easy to understand for beginners
Cons
- Some examples may be outdated due to changes in React Native or dependencies
- Limited documentation for each example
- Not actively maintained, with the last update being several years ago
- May not cover the latest React Native best practices or features
Code Examples
- Day 1 - A simple stop watch:
import React, { useState, useEffect } from 'react';
import { StyleSheet, Text, View, TouchableHighlight } from 'react-native';

const StopWatch = () => {
  const [timeElapsed, setTimeElapsed] = useState(0);
  const [timerOn, setTimerOn] = useState(false);

  useEffect(() => {
    let interval;
    if (timerOn) {
      interval = setInterval(() => {
        setTimeElapsed(prevTime => prevTime + 1);
      }, 1000);
    }
    return () => clearInterval(interval);
  }, [timerOn]);

  const startTimer = () => setTimerOn(true);
  const stopTimer = () => setTimerOn(false);
  const resetTimer = () => {
    setTimerOn(false);
    setTimeElapsed(0);
  };

  return (
    <View style={styles.container}>
      <Text style={styles.timeText}>{timeElapsed}</Text>
      <TouchableHighlight onPress={startTimer} style={styles.button}>
        <Text>Start</Text>
      </TouchableHighlight>
      <TouchableHighlight onPress={stopTimer} style={styles.button}>
        <Text>Stop</Text>
      </TouchableHighlight>
      <TouchableHighlight onPress={resetTimer} style={styles.button}>
        <Text>Reset</Text>
      </TouchableHighlight>
    </View>
  );
};

const styles = StyleSheet.create({
  // ... styles omitted for brevity
});

export default StopWatch;
- Day 2 - A weather app component:
import React, { useState, useEffect } from 'react';
import { StyleSheet, Text, View, Image } from 'react-native';

const WeatherApp = () => {
  const [weatherData, setWeatherData] = useState(null);

  useEffect(() => {
    // Fetch weather data from an API
    fetchWeatherData();
  }, []);

  const fetchWeatherData = async () => {
    // API call implementation omitted for brevity
    // setWeatherData(result);
  };

  if (!weatherData) return <Text>Loading...</Text>;

  return (
    <View style={styles.container}>
      <Text style={styles.city}>{weatherData.city}</Text>
      <Text style={styles.temperature}>{weatherData.temperature}°C</Text>
      <Image source={{ uri: weatherData.iconUrl }} style={styles.icon} />
      <Text style={styles.description}>{weatherData.description}</Text>
    </View>
  );
};

const styles = StyleSheet.create({
  // ... styles omitted for brevity
});

export default WeatherApp;
Getting Started
To get started with this project:
-
Clone the repository:
git clone https://github.com/fangwei716/30-days-of-react-native.git -
Navigate to the project directory:
cd 30-days-of-react-native -
Install dependencies:
npm install -
Run the project:
npx react-native run-ios
# or
Competitor Comparisons
Dribbble app built with React Native
Pros of react-native-dribbble-app
- Focuses on a specific, real-world application (Dribbble client)
- Implements more advanced features like authentication and API integration
- Provides a more cohesive and complete app experience
Cons of react-native-dribbble-app
- Less diverse in terms of React Native concepts covered
- May be more challenging for beginners due to its complexity
- Less frequently updated compared to 30-days-of-react-native
Code Comparison
30-days-of-react-native:
import React from 'react';
import { View, Text, StyleSheet } from 'react-native';

const Day1 = () => (
  <View style={styles.container}>
    <Text style={styles.text}>Day 1</Text>
  </View>
);
react-native-dribbble-app:
import React, { Component } from 'react';
import { View, StyleSheet } from 'react-native';
import { connect } from 'react-redux';
import { fetchShots } from '../actions/shots';

class ShotsScreen extends Component {
  componentDidMount() {
    this.props.dispatch(fetchShots());
  }
}
The code comparison shows that 30-days-of-react-native focuses on simpler, standalone components, while react-native-dribbble-app implements more complex state management and API interactions using Redux.
Cross-Platform React Native UI Toolkit
Pros of React Native Elements
- Comprehensive UI toolkit with a wide range of pre-built components
- Active development and maintenance, ensuring compatibility with the latest React Native versions
- Extensive documentation and community support
Cons of React Native Elements
- Larger package size due to the extensive component library
- May require additional customization to fit specific design requirements
- Learning curve for developers unfamiliar with the library's API
Code Comparison
30 Days of React Native:
<View style={styles.container}>
  <Text style={styles.title}>Day 1: Stop Watch</Text>
  <Timer />
  <TouchableHighlight style={styles.button}>
    <Text style={styles.buttonText}>Start</Text>
  </TouchableHighlight>
</View>
React Native Elements:
import { Button, Text } from 'react-native-elements';

<View>
  <Text h1>Stop Watch</Text>
  <Timer />
  <Button title="Start" onPress={handleStart} />
</View>
The 30 Days of React Native project focuses on providing daily examples and tutorials for learning React Native, while React Native Elements offers a comprehensive UI toolkit for building React Native applications. The code comparison shows how React Native Elements simplifies component usage with pre-styled elements, reducing the need for custom styling.
:boom: React Native UI Library based on Eva Design System :new_moon_with_face::sparkles:Dark Mode
Pros of react-native-ui-kitten
- Comprehensive UI library with a wide range of customizable components
- Active development and maintenance, with regular updates and bug fixes
- Extensive documentation and examples for easy implementation
Cons of react-native-ui-kitten
- Steeper learning curve due to its extensive feature set
- Larger bundle size, which may impact app performance
- Less focused on specific use cases compared to 30-days-of-react-native
Code Comparison
30-days-of-react-native:
import React from 'react';
import { View, Text, StyleSheet } from 'react-native';

const DayOne = () => (
  <View style={styles.container}>
    <Text style={styles.text}>Day 1: Hello, React Native!</Text>
  </View>
);
react-native-ui-kitten:
import React from 'react';
import { Layout, Text } from '@ui-kitten/components';

const DayOne = () => (
  <Layout style={{ flex: 1, justifyContent: 'center', alignItems: 'center' }}>
    <Text category='h1'>Day 1: Hello, UI Kitten!</Text>
  </Layout>
);
The code comparison shows that react-native-ui-kitten provides pre-styled components like Layout and Text with built-in theming capabilities, while 30-days-of-react-native uses standard React Native components with custom styles.
Mobile-first, accessible components for React Native & Web to build consistent UI across Android, iOS and Web.
Pros of NativeBase
- Comprehensive UI component library with a wide range of pre-built components
- Customizable theme system for consistent styling across the app
- Active development and regular updates
Cons of NativeBase
- Steeper learning curve due to its extensive API and customization options
- Larger bundle size compared to minimal projects like 30-days-of-react-native
Code Comparison
NativeBase example:
import { Box, Text, Button } from 'native-base';

function MyComponent() {
  return (
    <Box>
      <Text>Hello World</Text>
      <Button>Click me</Button>
    </Box>
  );
}
30-days-of-react-native example:
import React from 'react';
import { View, Text, TouchableOpacity } from 'react-native';

function MyComponent() {
  return (
    <View>
      <Text>Hello World</Text>
      <TouchableOpacity><Text>Click me</Text></TouchableOpacity>
    </View>
  );
}
NativeBase provides a more abstracted and feature-rich approach with pre-styled components, while 30-days-of-react-native uses basic React Native components, requiring more manual styling but offering more flexibility for learning purposes.
UI Components Library for React Native
Pros of react-native-ui-lib
- Comprehensive UI component library with a wide range of pre-built elements
- Actively maintained with regular updates and improvements
- Extensive documentation and examples for easy implementation
Cons of react-native-ui-lib
- Steeper learning curve due to the large number of components and customization options
- Potentially larger bundle size when including the entire library
- May require more setup and configuration compared to simpler projects
Code Comparison
react-native-ui-lib:
import { View, Text, Button } from 'react-native-ui-lib';

const MyComponent = () => (
  <View>
    <Text text60>Hello World</Text>
    <Button label="Click Me" onPress={() => {}} />
  </View>
);
30-days-of-react-native:
import React from 'react';
import { View, Text, TouchableOpacity } from 'react-native';

const MyComponent = () => (
  <View>
    <Text style={{ fontSize: 20 }}>Hello World</Text>
    <TouchableOpacity onPress={() => {}}>
      <Text>Click Me</Text>
    </TouchableOpacity>
  </View>
);
The react-native-ui-lib example showcases its pre-built components with built-in styling, while the 30-days-of-react-native example uses more basic React Native components with custom styling. The former offers a more streamlined development process for complex UIs, while the latter provides a simpler, more hands-on approach to learning React Native basics.
Material Design for React Native (Android & iOS)
Pros of react-native-paper
- Comprehensive UI component library with Material Design implementation
- Active development and maintenance with regular updates
- Extensive documentation and community support
Cons of react-native-paper
- Larger bundle size due to the extensive component library
- May require additional configuration for custom styling
- Learning curve for developers unfamiliar with Material Design principles
Code Comparison
30-days-of-react-native example (Day 1 - Stop Watch):
<View style={styles.watchFace}>
  <Text style={styles.sectionTime}>{!this.state.startTime ? "00:00:00" : this.state.sectionTime}</Text>
  <Text style={styles.totalTime}>{this.state.totalTime}</Text>
</View>
react-native-paper example (Button component):
import { Button } from 'react-native-paper';

<Button icon="camera" mode="contained" onPress={() => console.log('Pressed')}>
  Press me
</Button>
30-days-of-react-native focuses on providing daily examples of React Native implementations, while react-native-paper offers a complete UI component library. The former is ideal for learning and exploring React Native capabilities, while the latter is better suited for building production-ready applications with consistent design patterns.
react-native-paper provides ready-to-use components following Material Design guidelines, which can speed up development for projects requiring a polished UI. However, 30-days-of-react-native offers more flexibility in terms of custom implementations and learning opportunities for developers who want to understand the inner workings of React Native components.
Convert  designs to code with AI

Introducing Visual Copilot: A new AI model to turn Figma designs to high quality code using your components.
Try Visual CopilotREADME
30 Days of React Native
30 days of React Native examples/demos.

This project is inspired by
100 Days of Swift (http://samvlu.com/) &
30DaysofSwift (https://github.com/allenwong/30DaysofSwift)
Upgrade to RN@0.34
This is a branch under development to upgrade RN to v0.40 & compatible with Xcode 8.
Change
- Remove cocoapodes & libraries that do not support Andriod
- Use Navigator instead of NavigatorIOS
Installation
Require node.js, npm install -g react-native-cli , xcode
#1 $ npm install
IOS
#2 run ios/ThirtyDaysOfReactNative.xcodeproj
Android
# TODO
Compatibility
Not tested yet.
Running on Device
https://facebook.github.io/react-native/docs/running-on-device-ios.html#content
Known Bugs
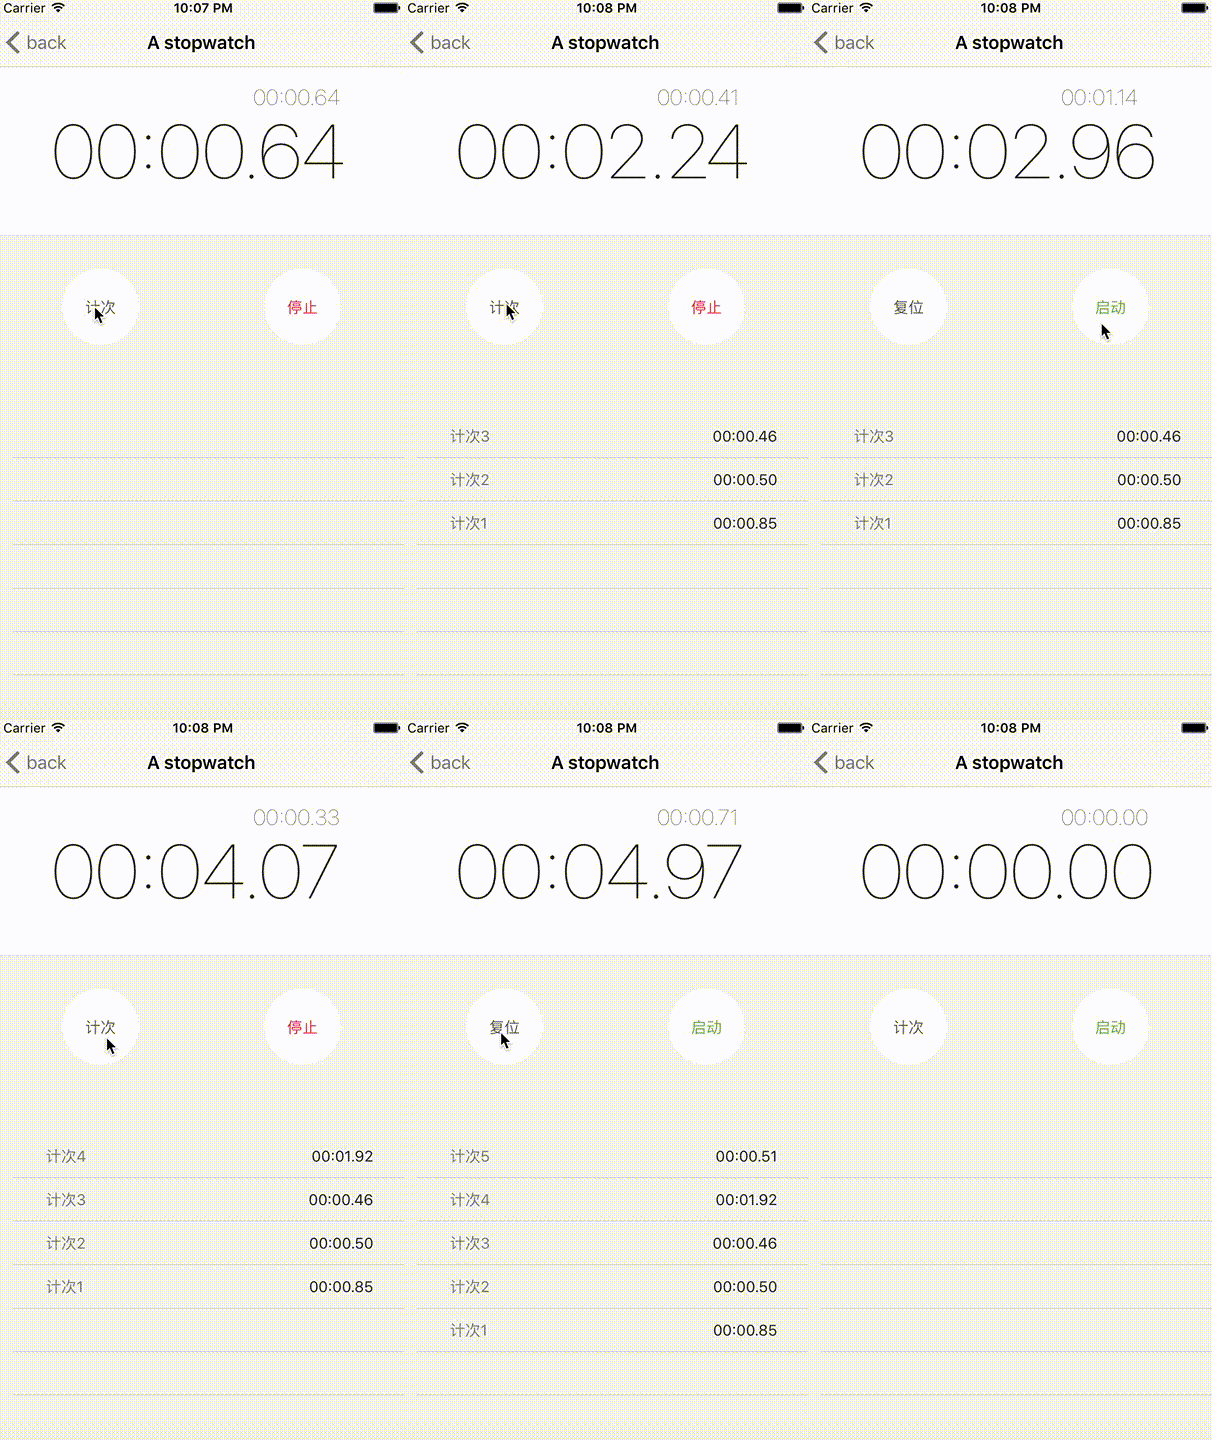
Day 1
An IOS-system-like stop watch.
Fully functioned as the system app.
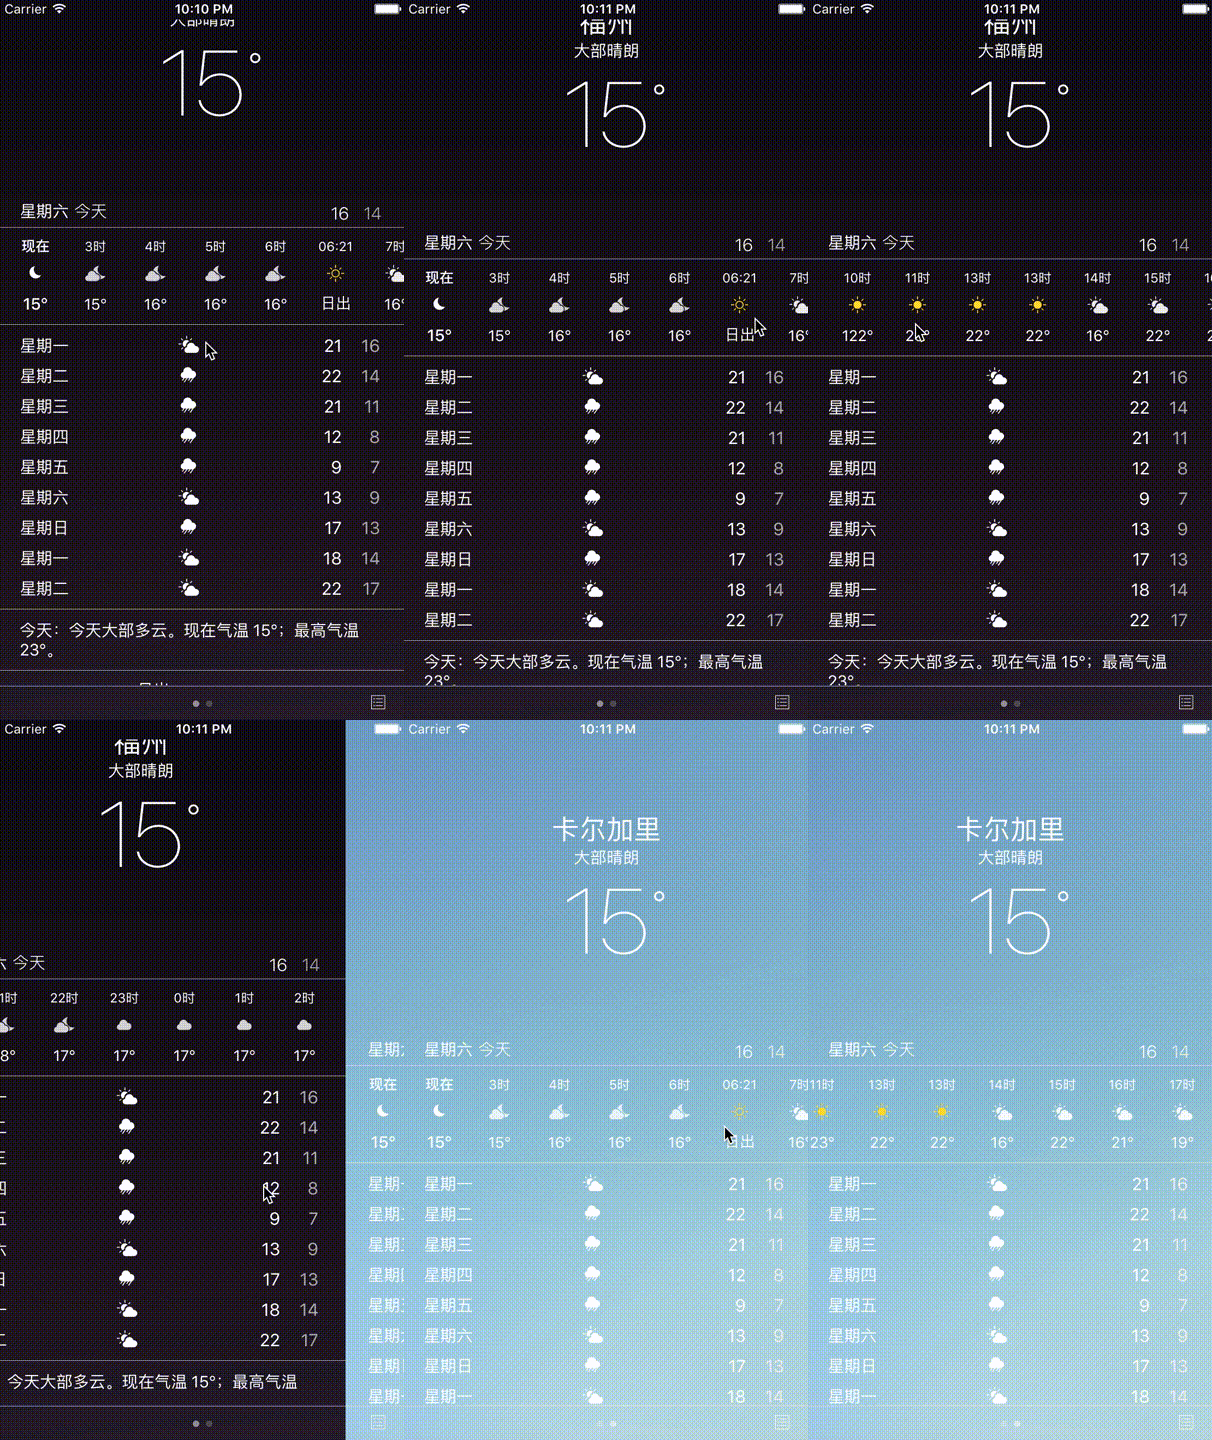
Day 2
An IOS-system-like weather app.
The animation is partially done.
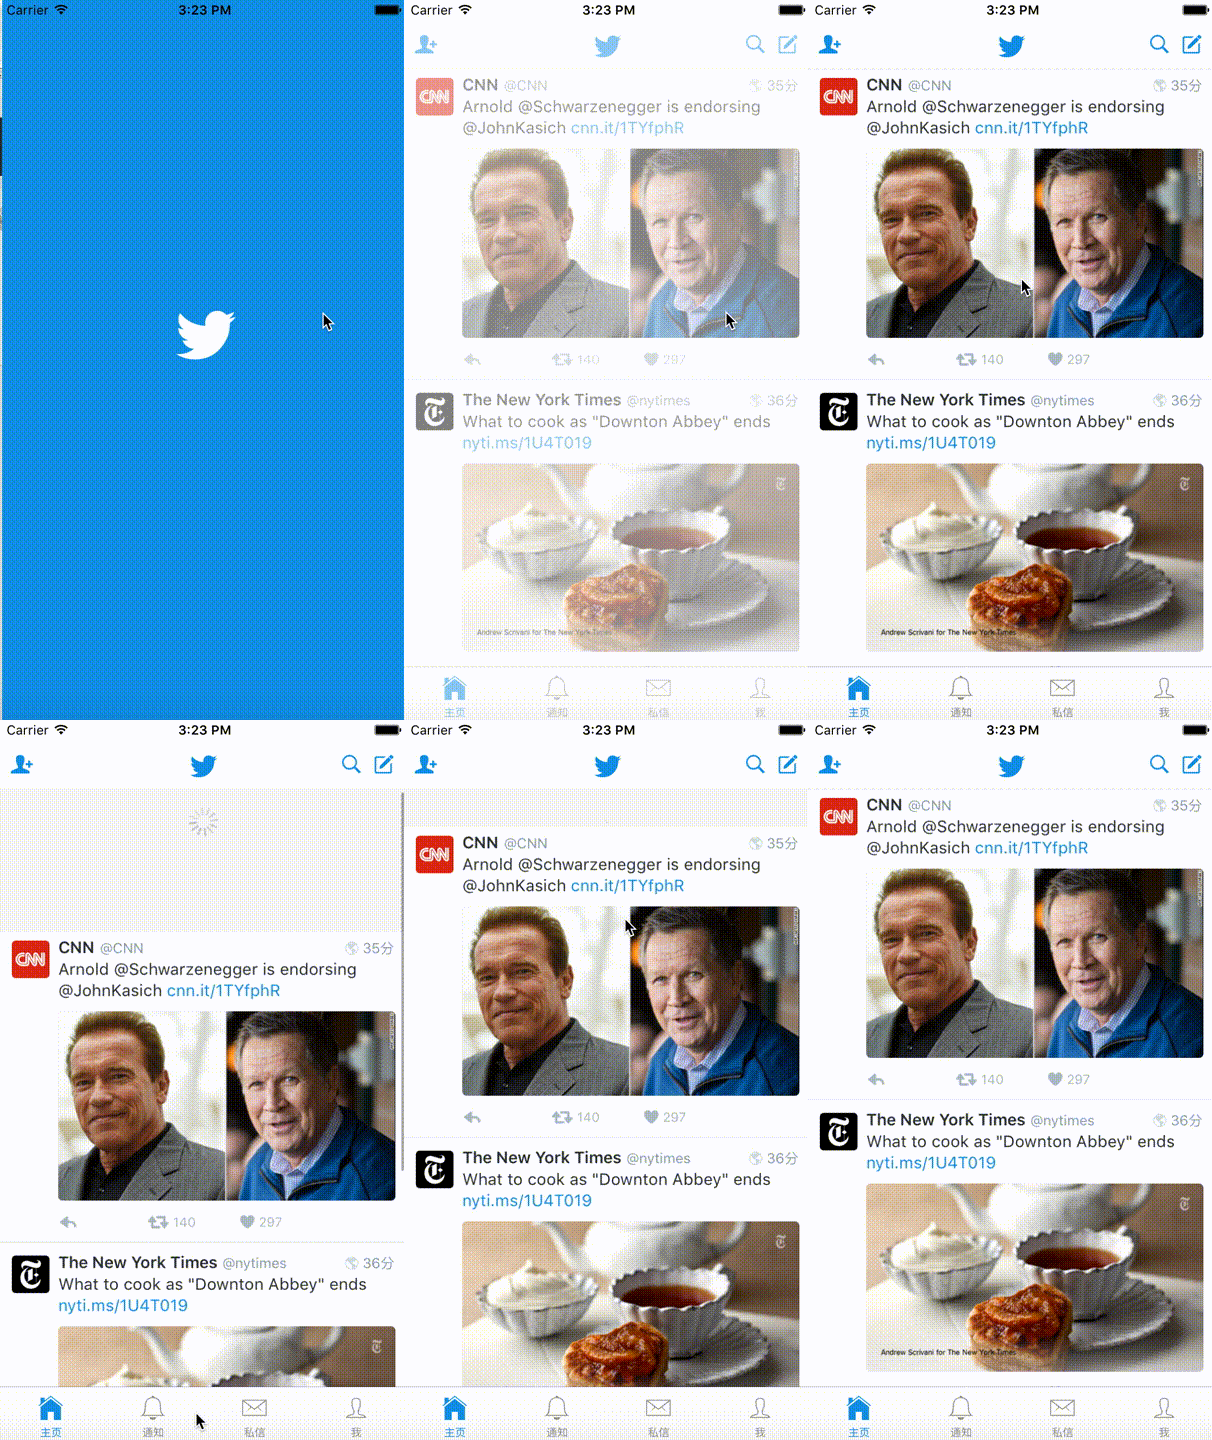
Day 3
The Twitter app entrance animation.
Day 4
TO BE UPDATED
Day 5
MapView and find Geo location.

Day 6
TO BE UPDATED
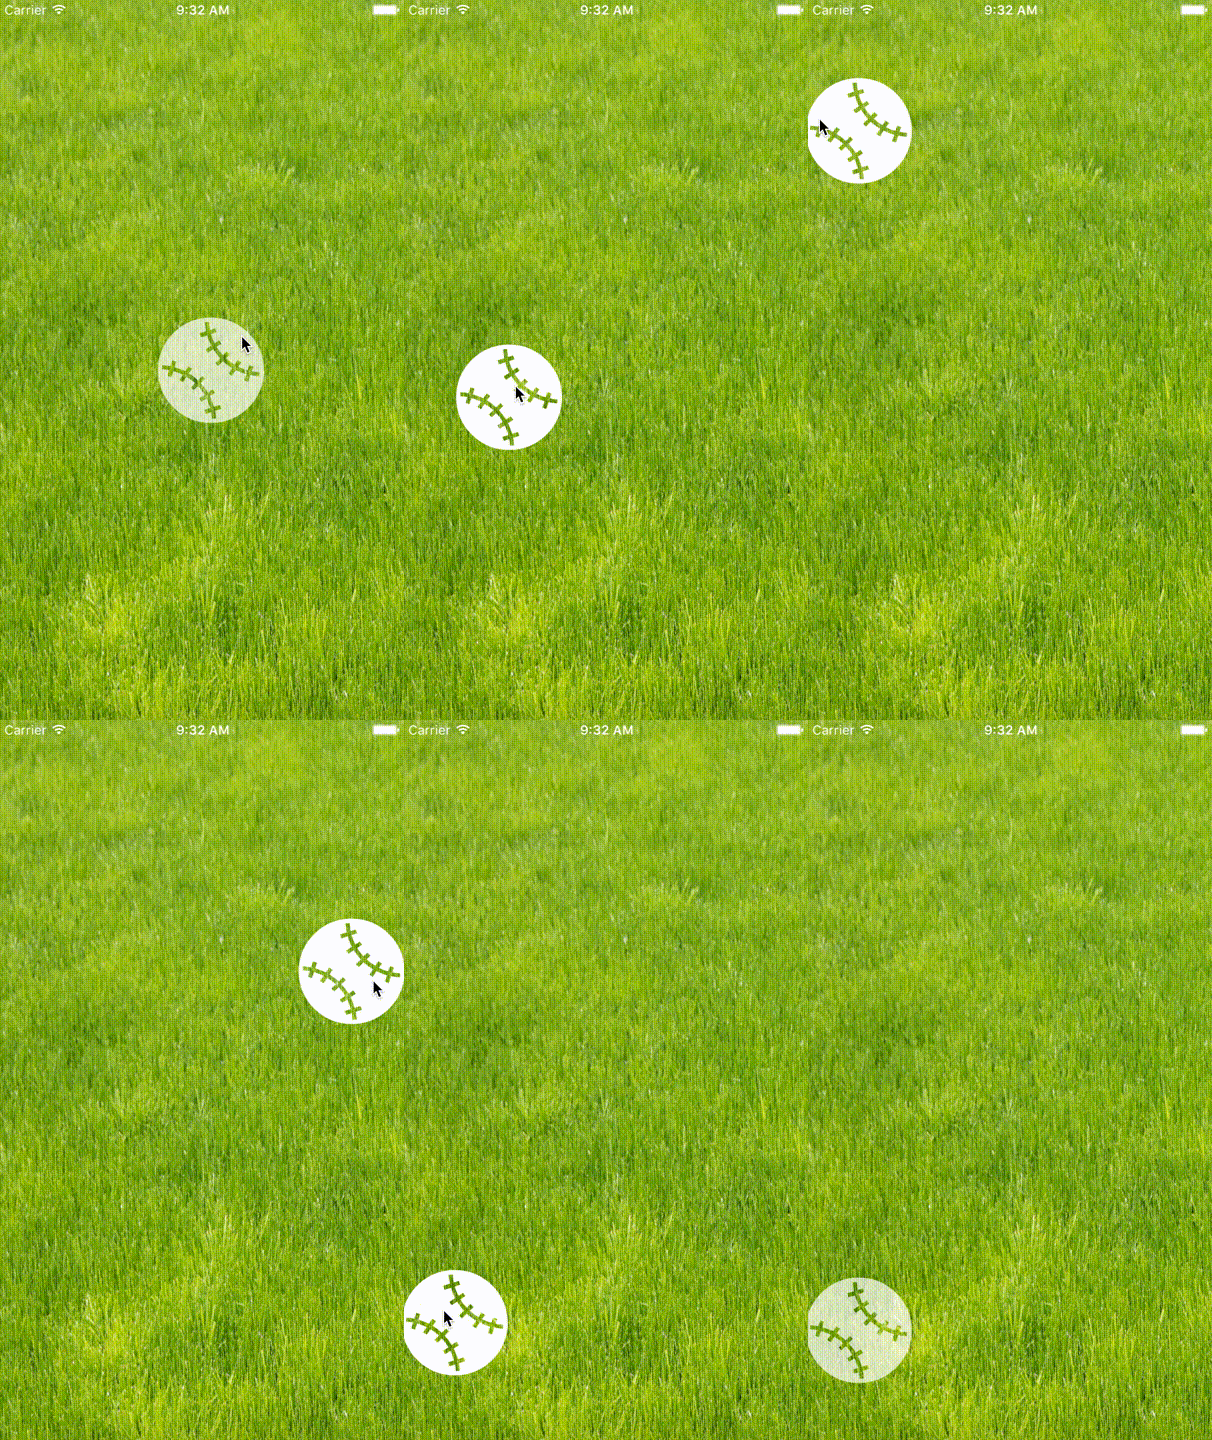
Day 7
Pan gesture basic. Move a baseball around.
Day 8
Google map style swipe menu

Day 9
Layout of Twitter user page
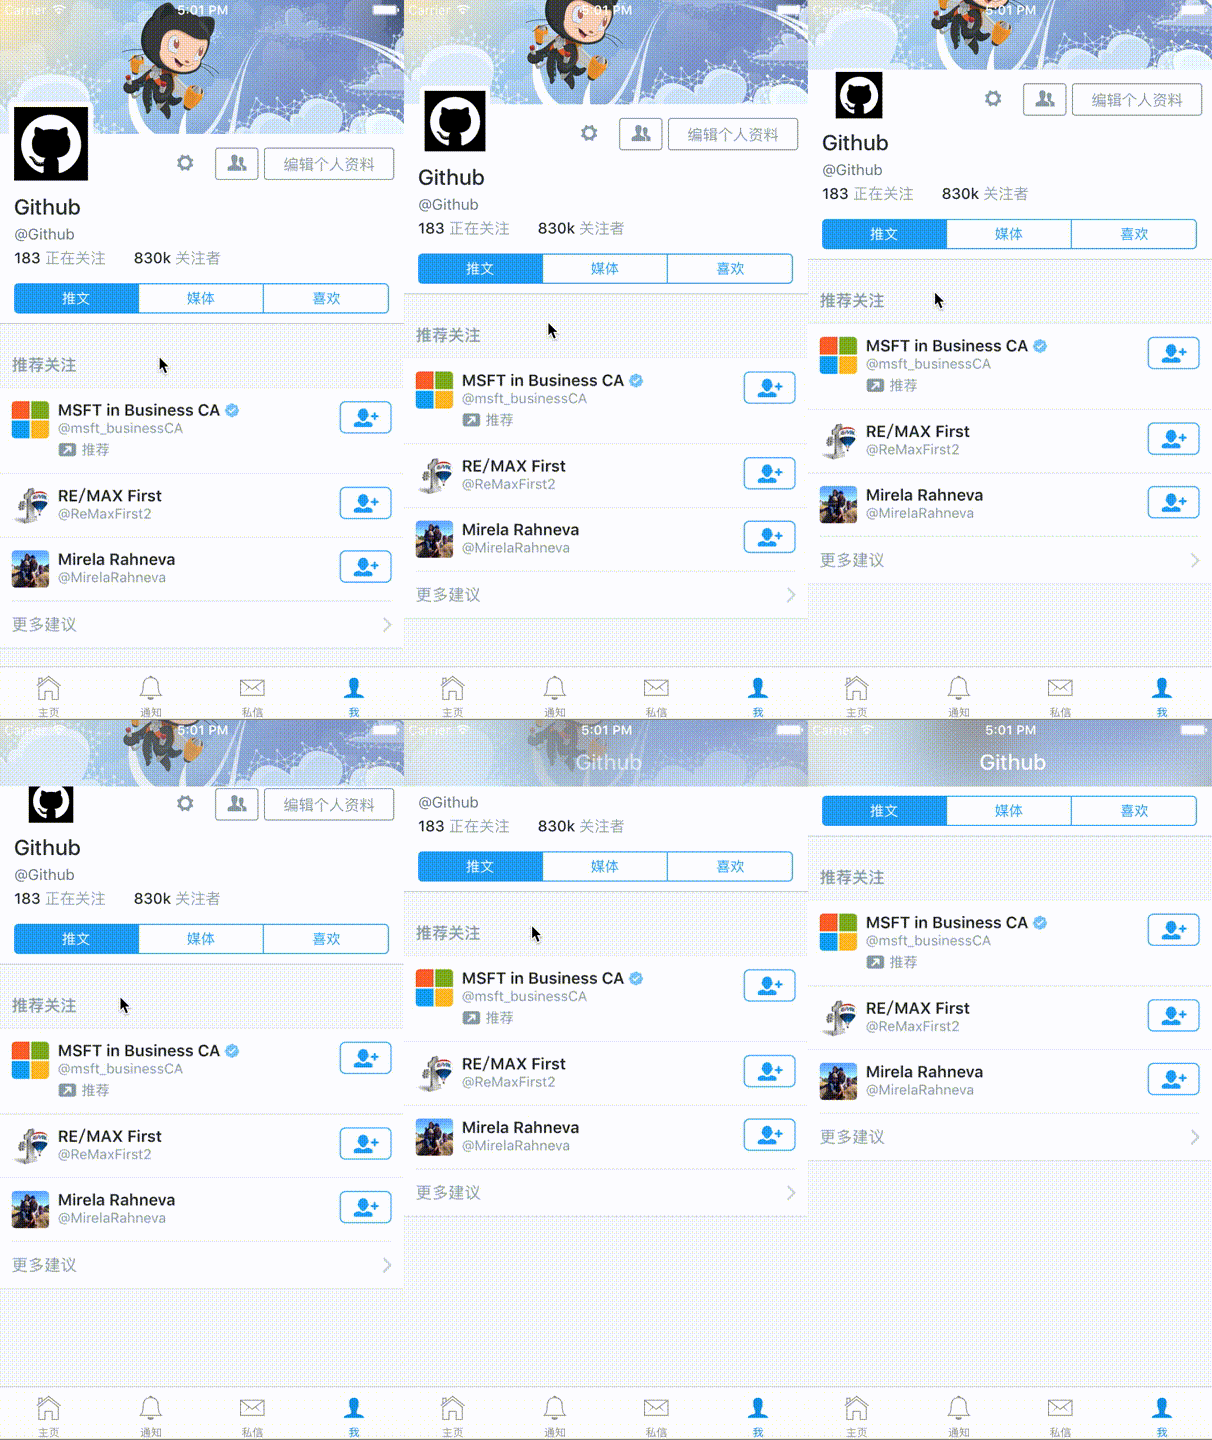
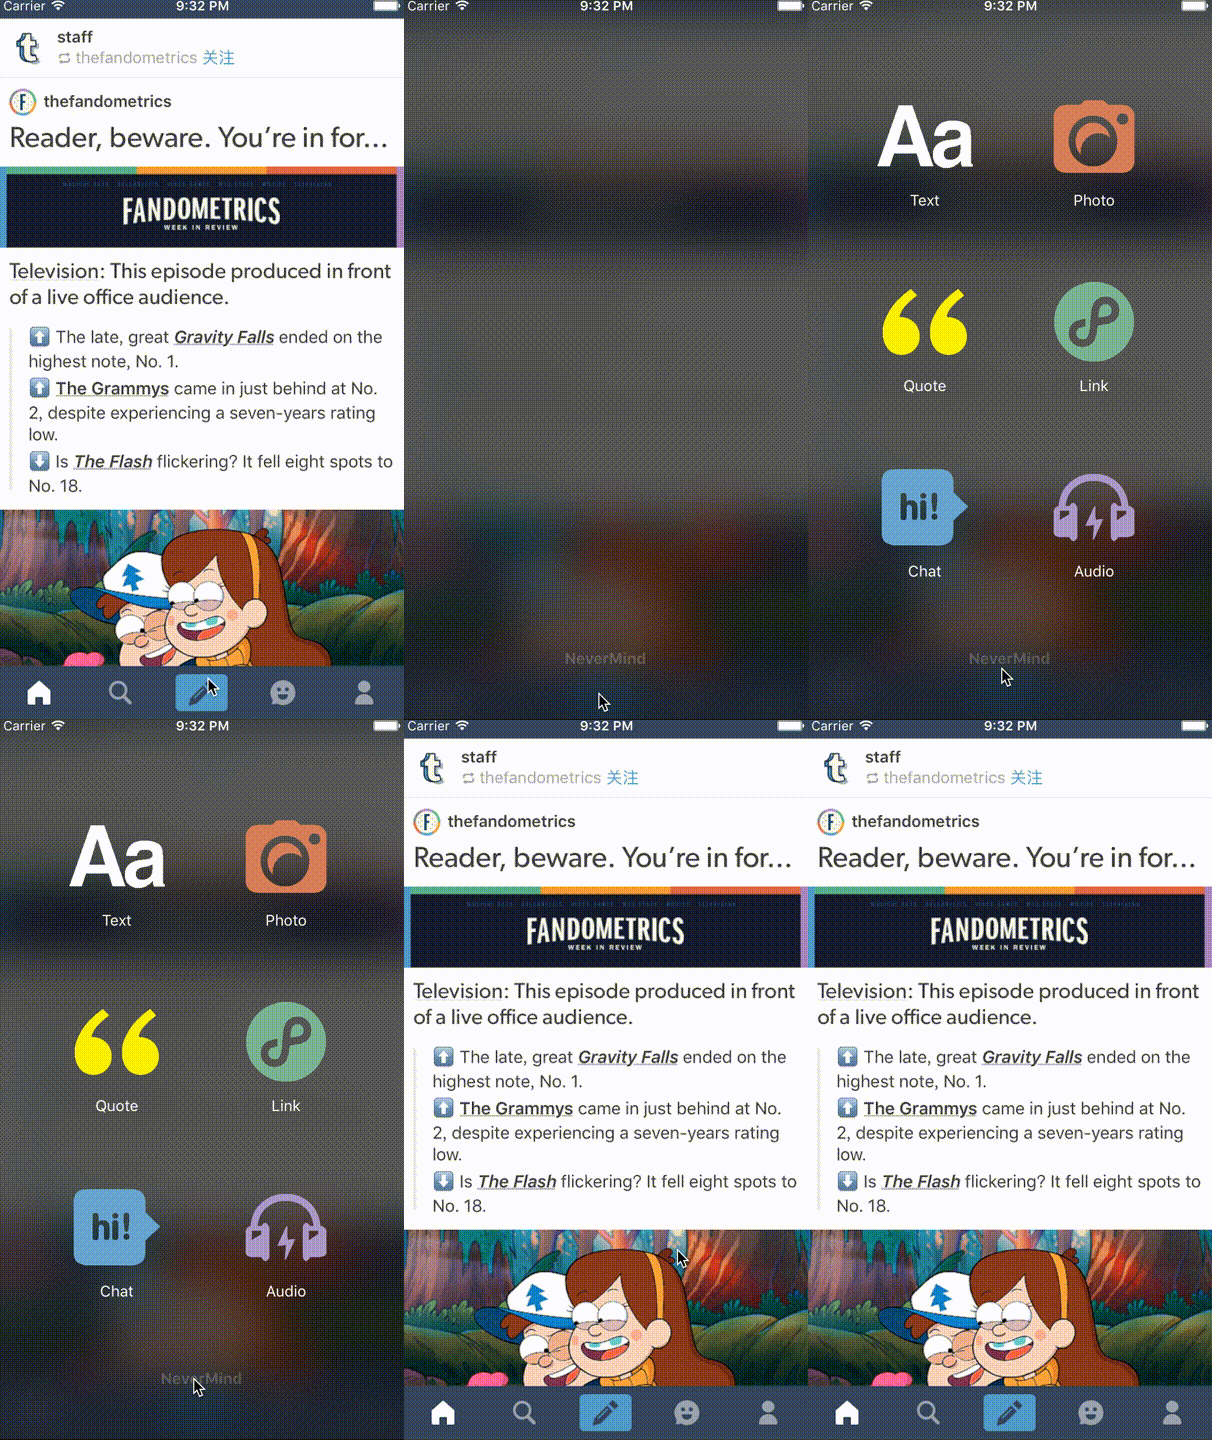
Day 10
Tumblr menu animation
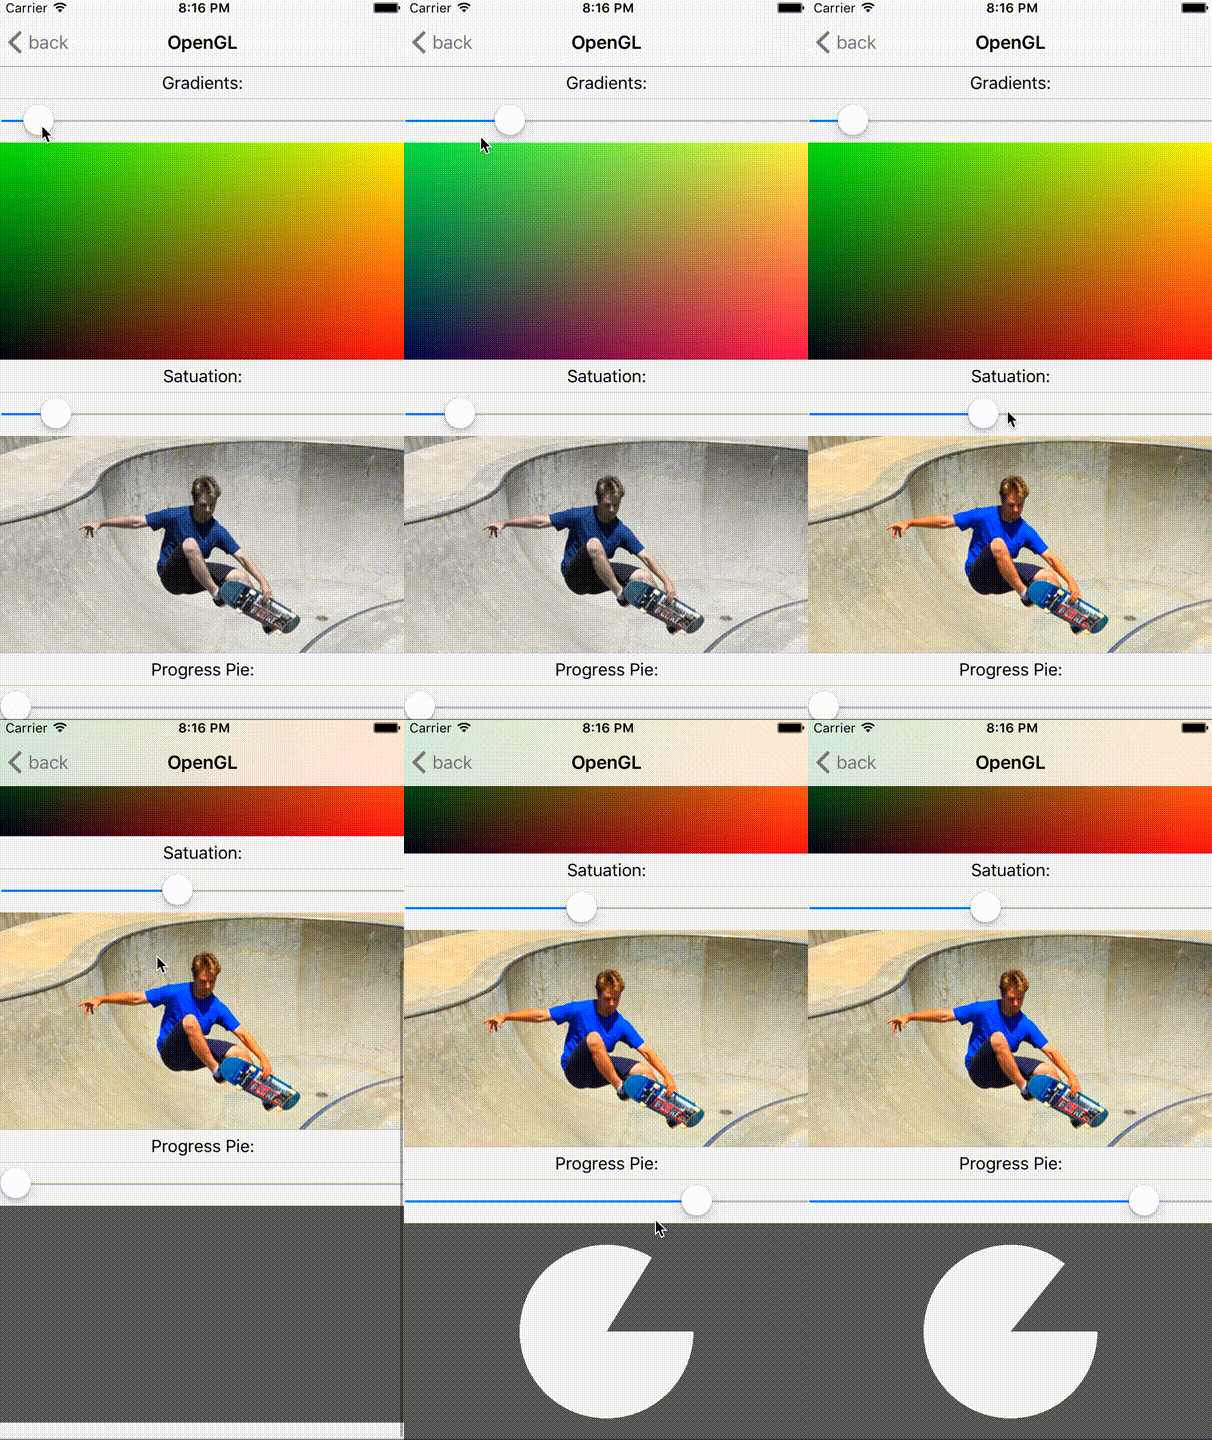
Day 11
Using OpenGL with React native
Reference: https://github.com/ProjectSeptemberInc/gl-react-native
Day 12
TO BE UPDATED
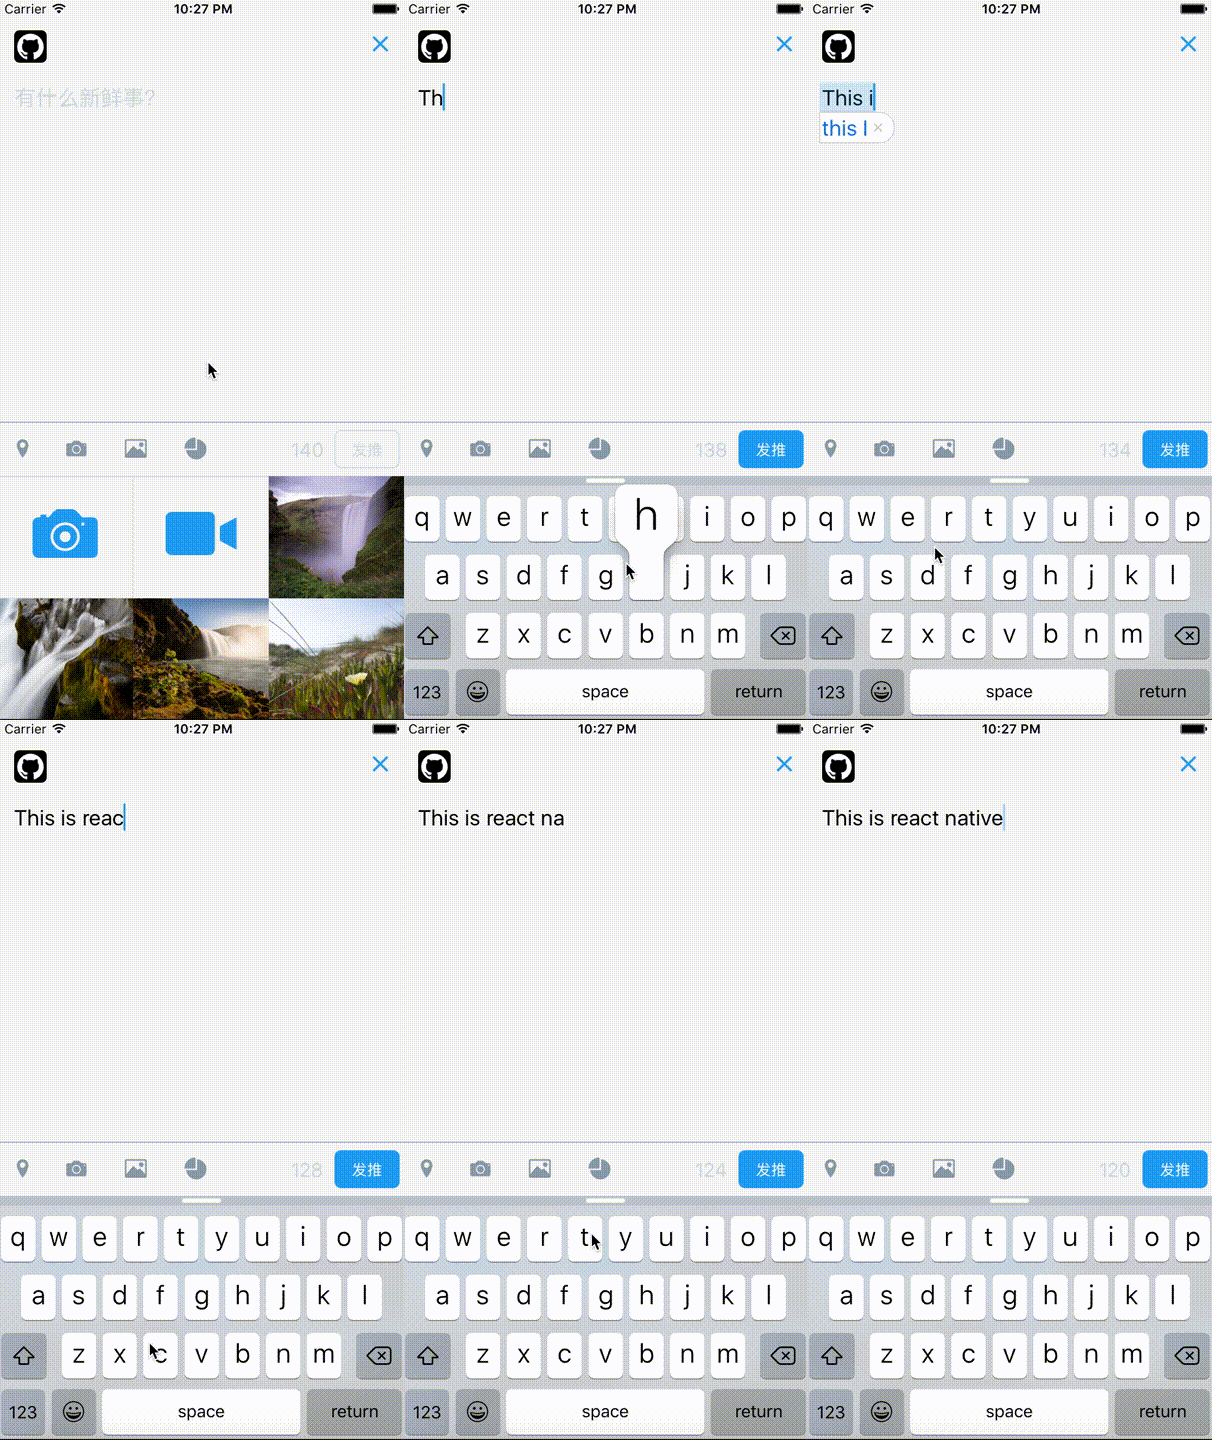
Day 13
A tweet UI
Day 14
A tinder swipe
Reference:https://github.com/meteor-factory/react-native-tinder-swipe-cards

Day 15
TO BE UPDATED
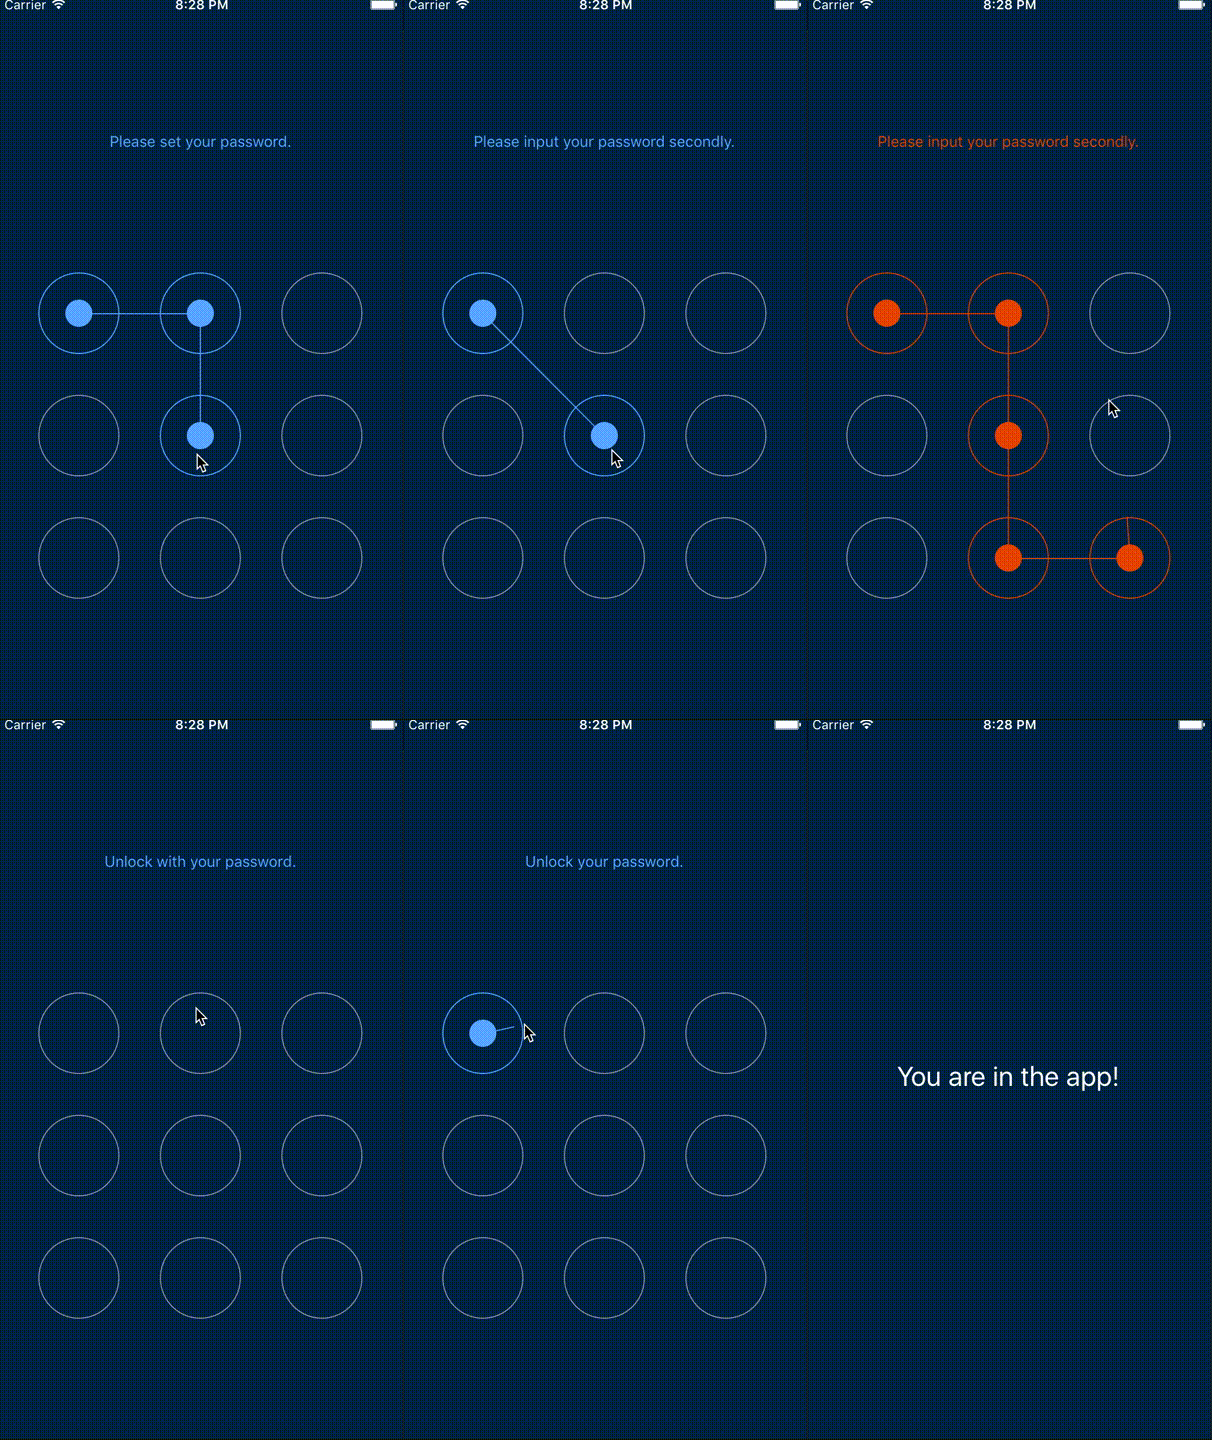
Day 16
Unlock with gesture
Reference:https://github.com/spikef/react-native-gesture-password
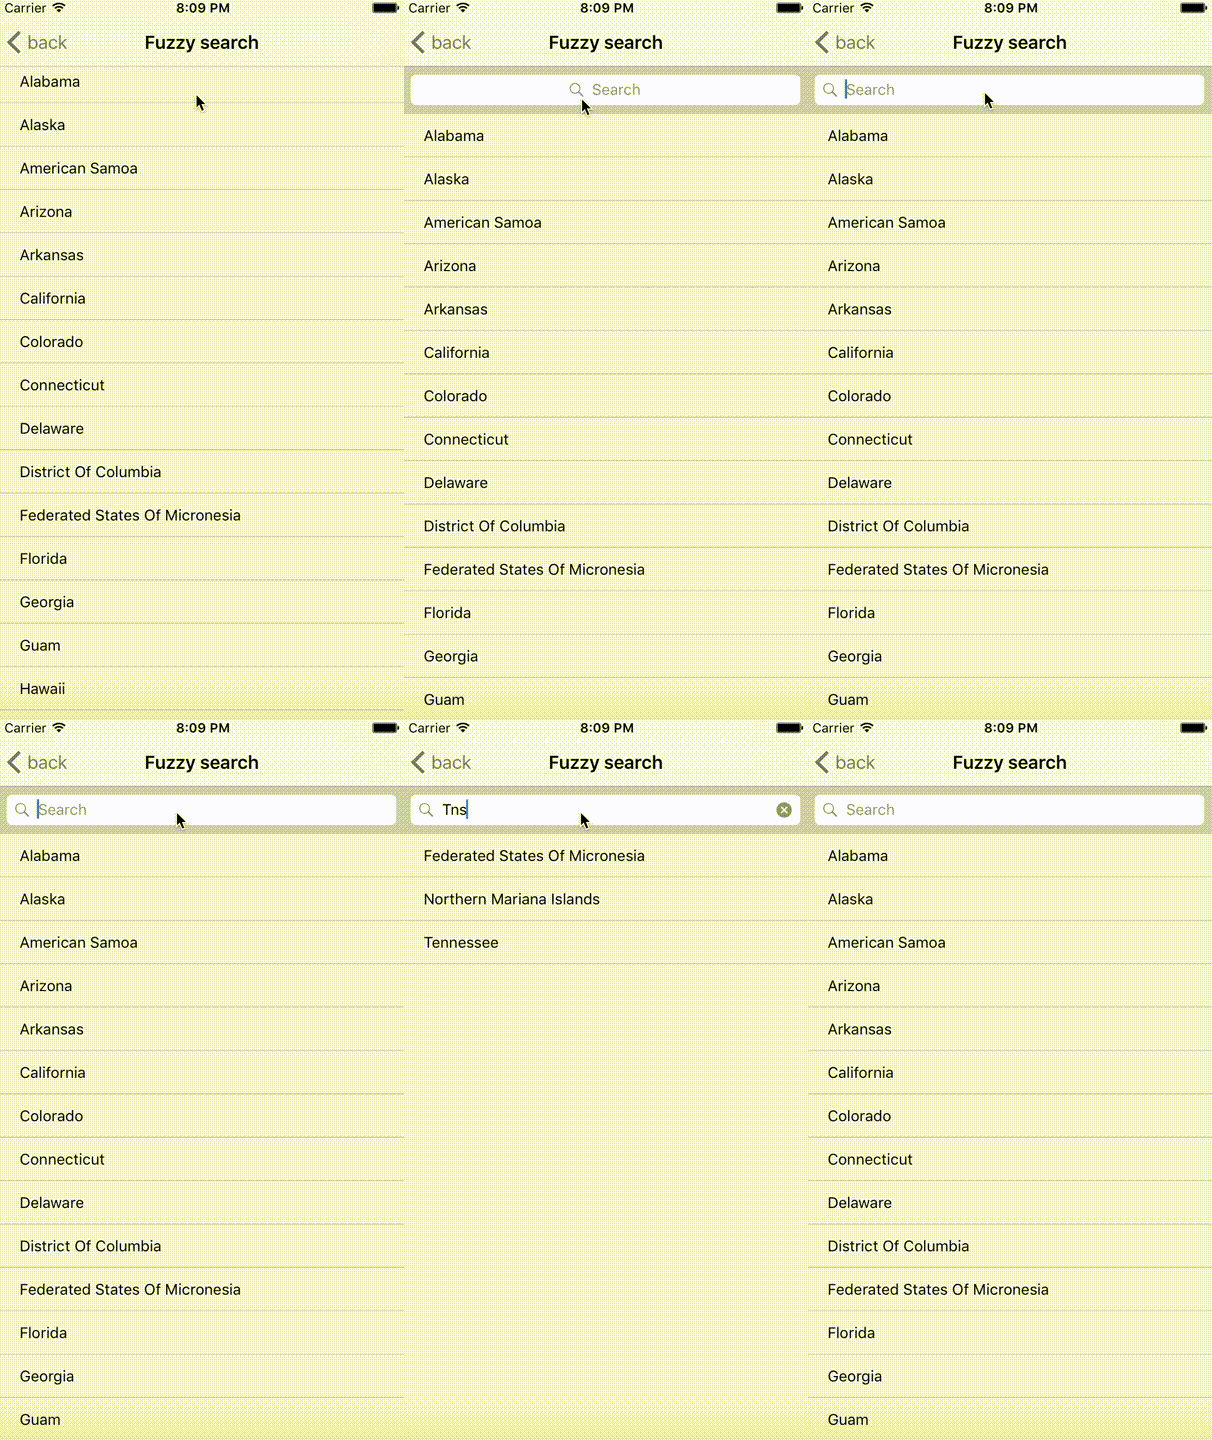
Day 17
Native search bar and Fuzzy search
Reference:https://github.com/umhan35/react-native-search-bar
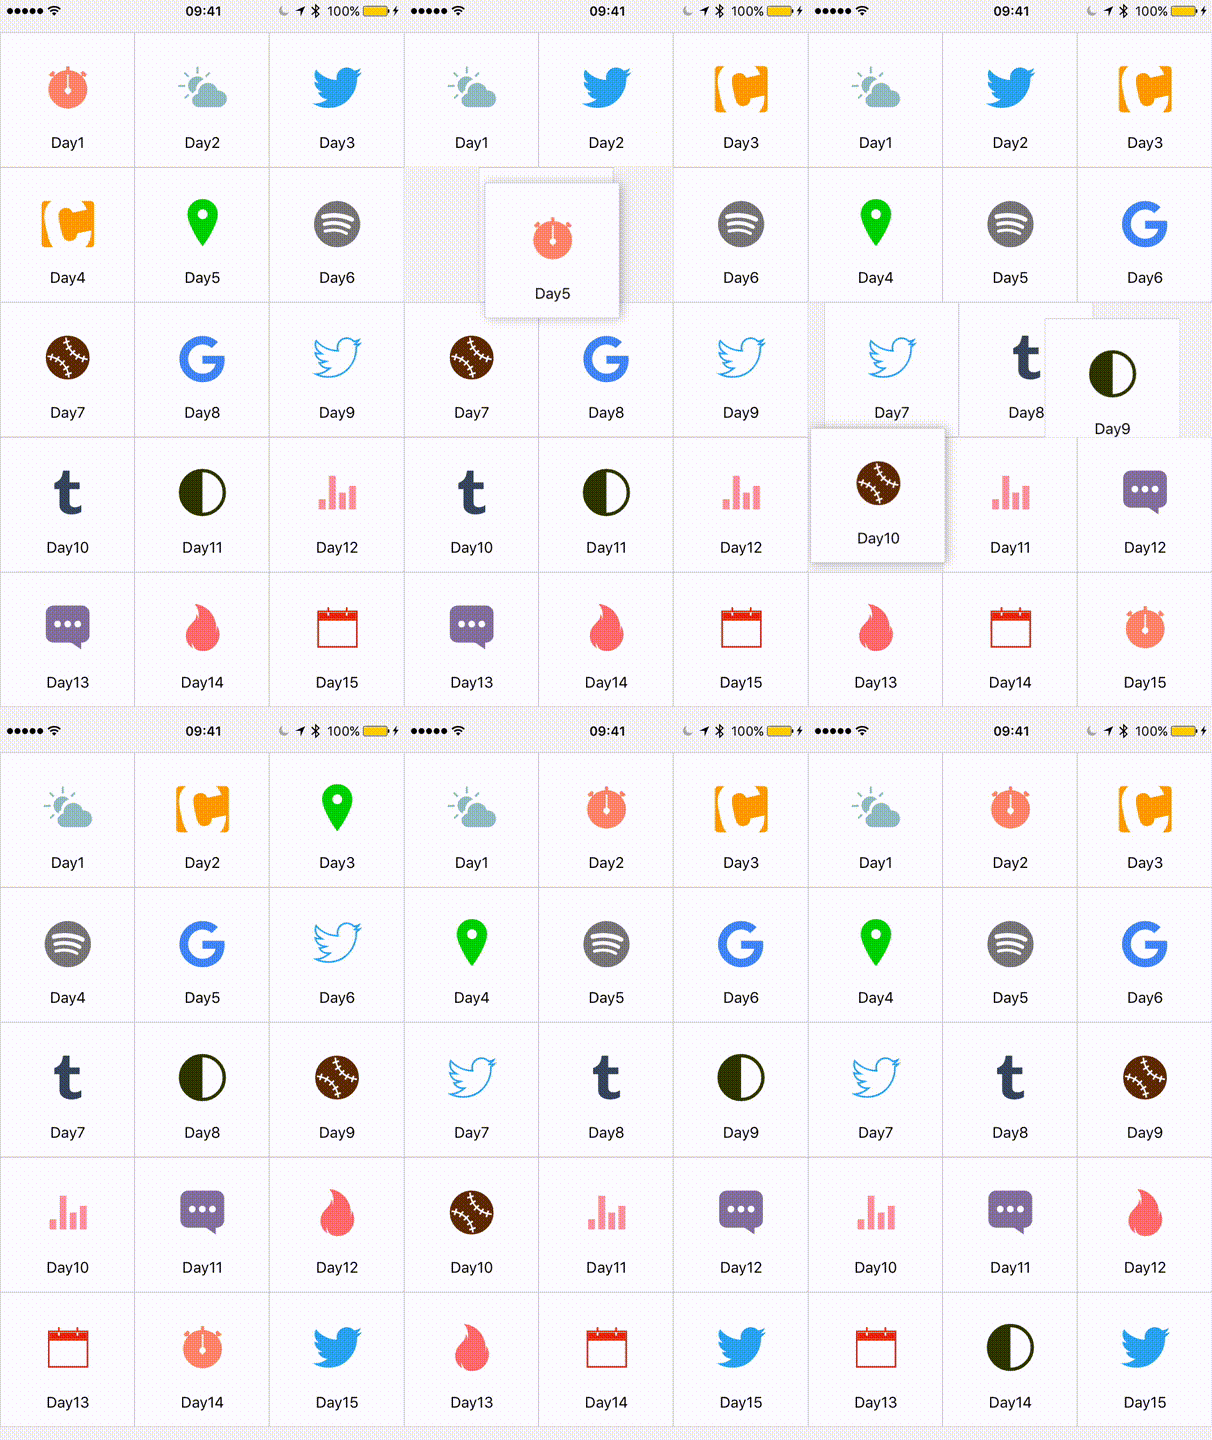
Day 18
Sortable. drag and reorder the blocks.
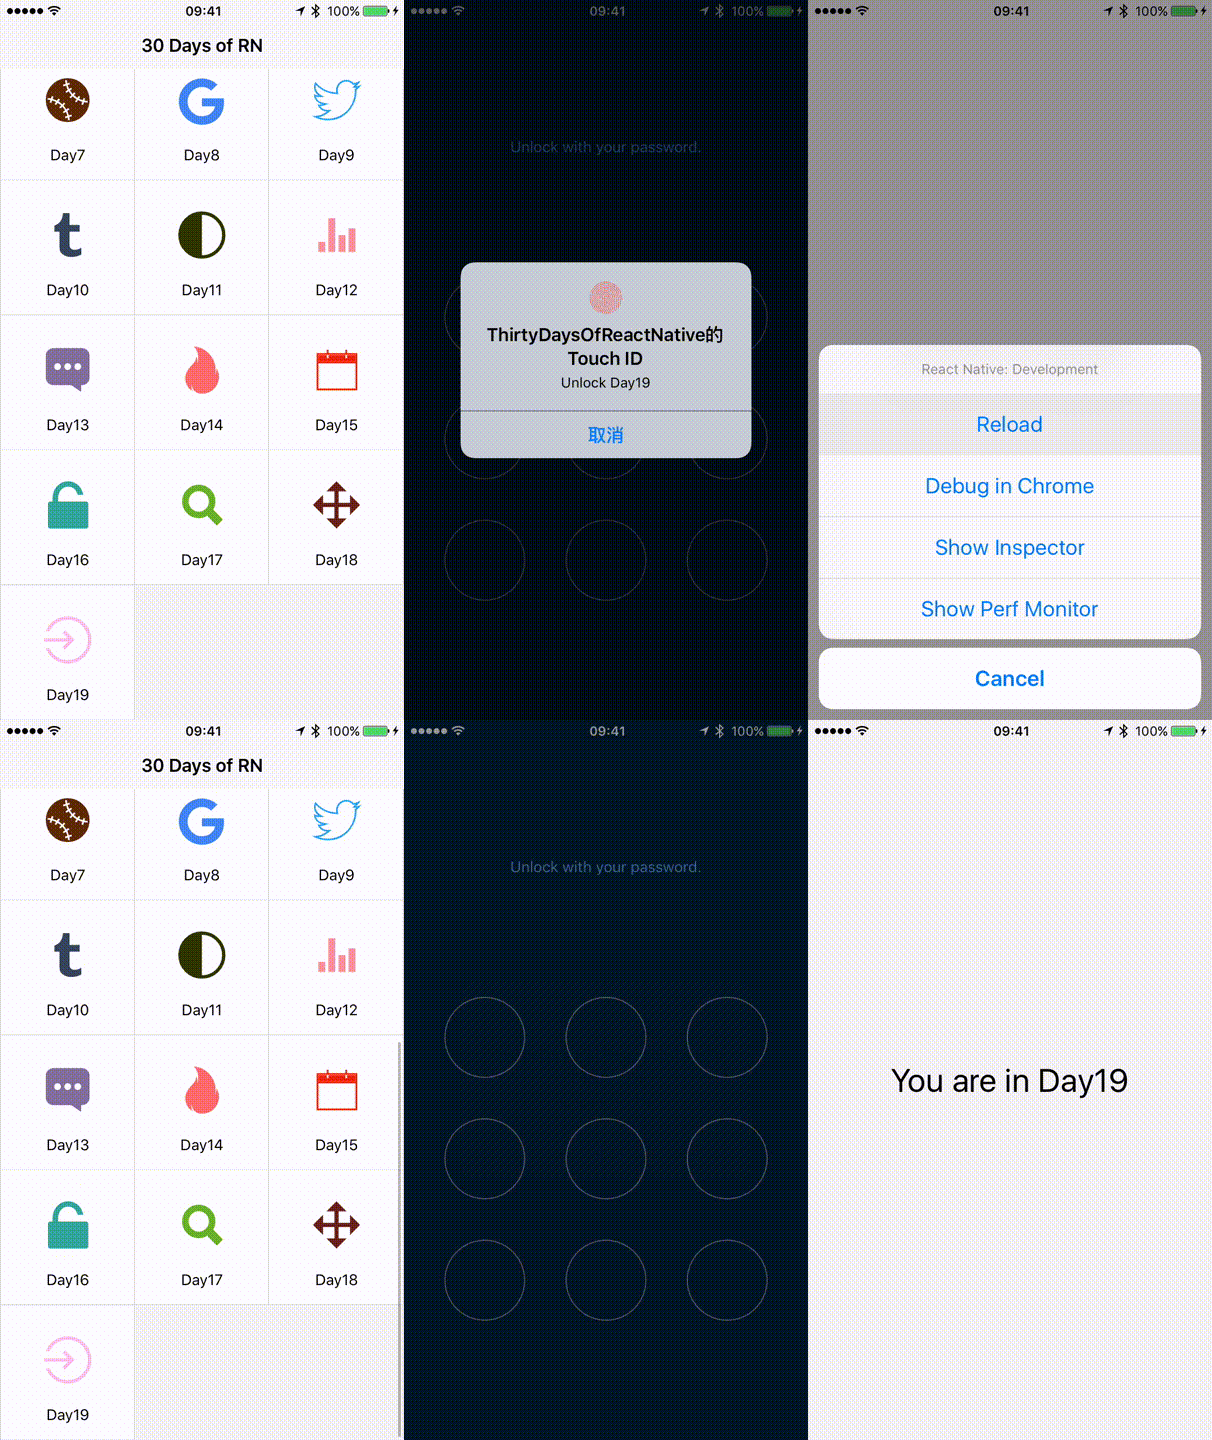
Day 19
Unlock app with touchID
Reference:https://github.com/naoufal/react-native-touch-id
Day 20
Sigle page Reminder
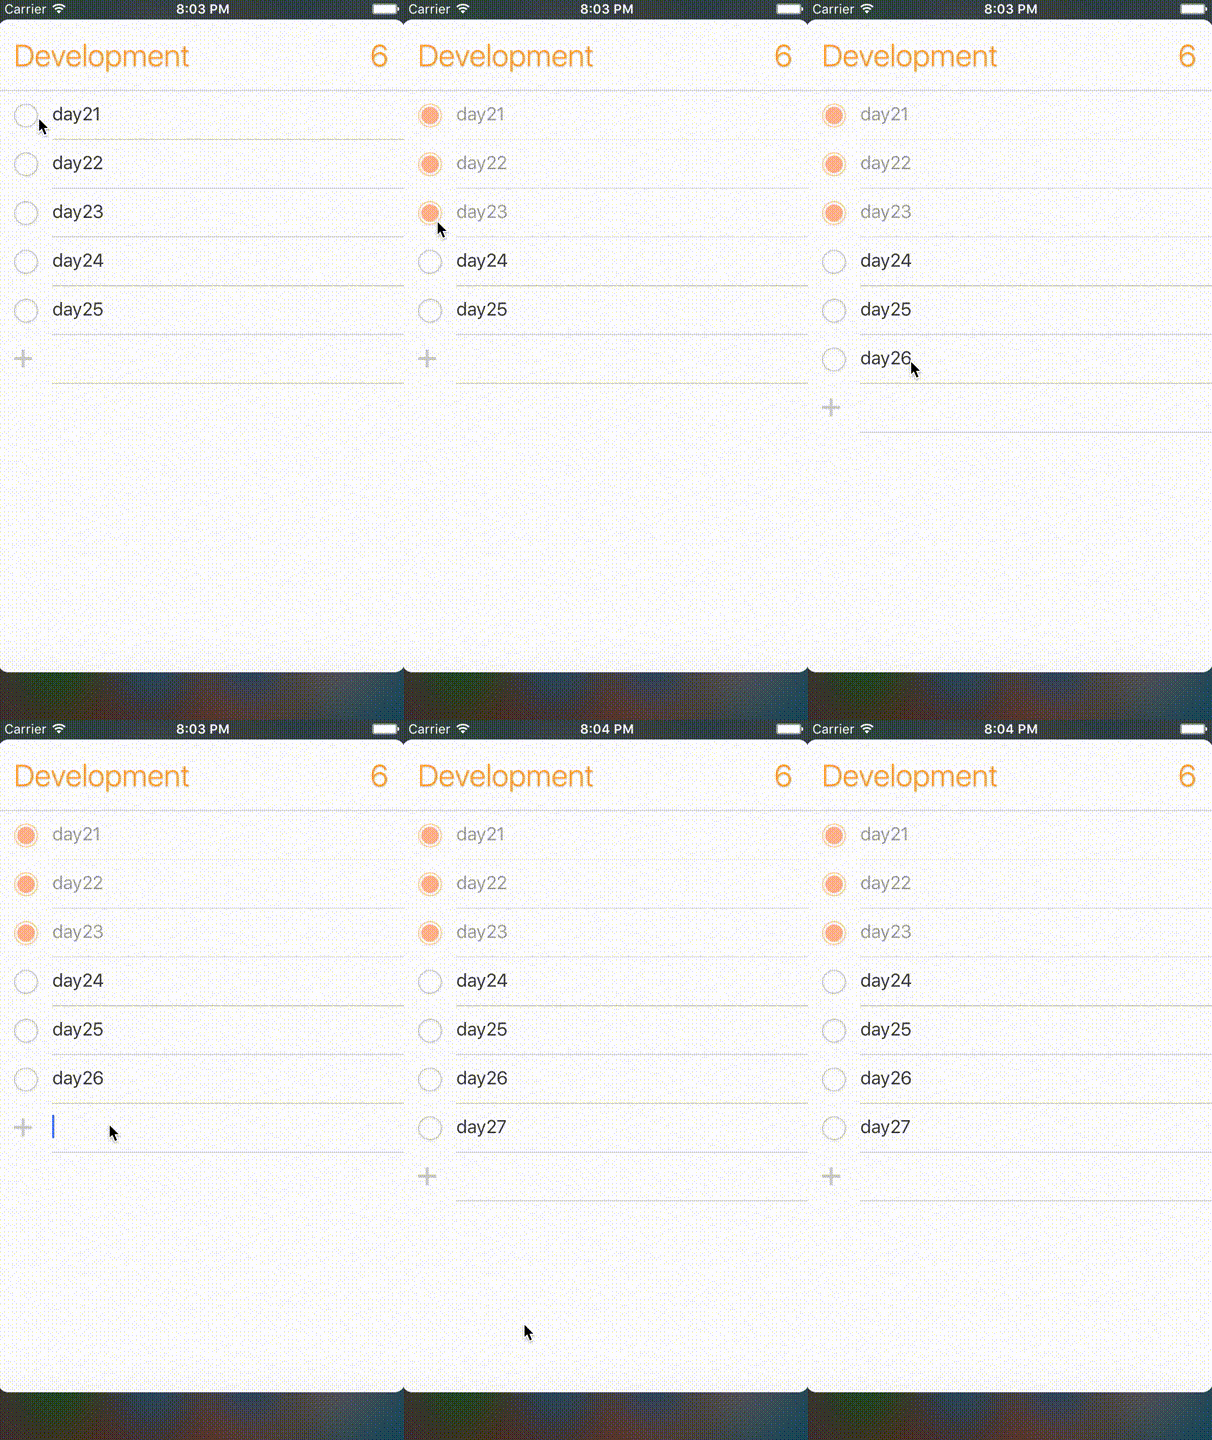
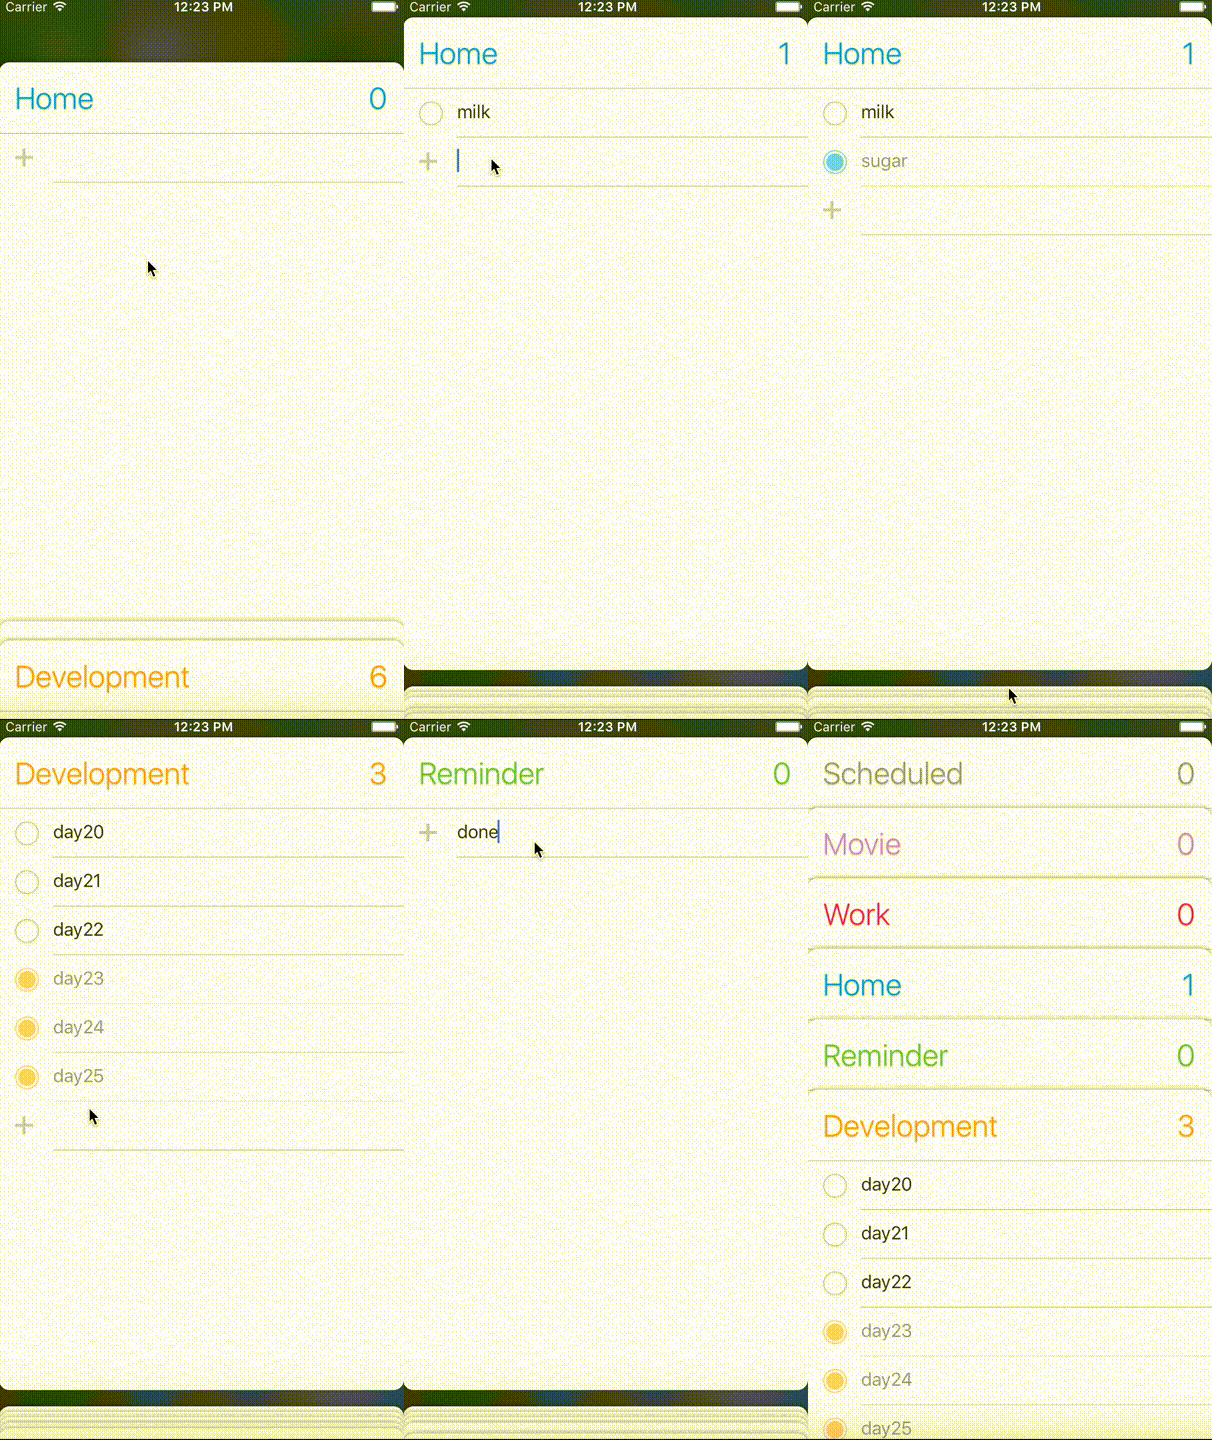
Day 21
Multi page Reminder
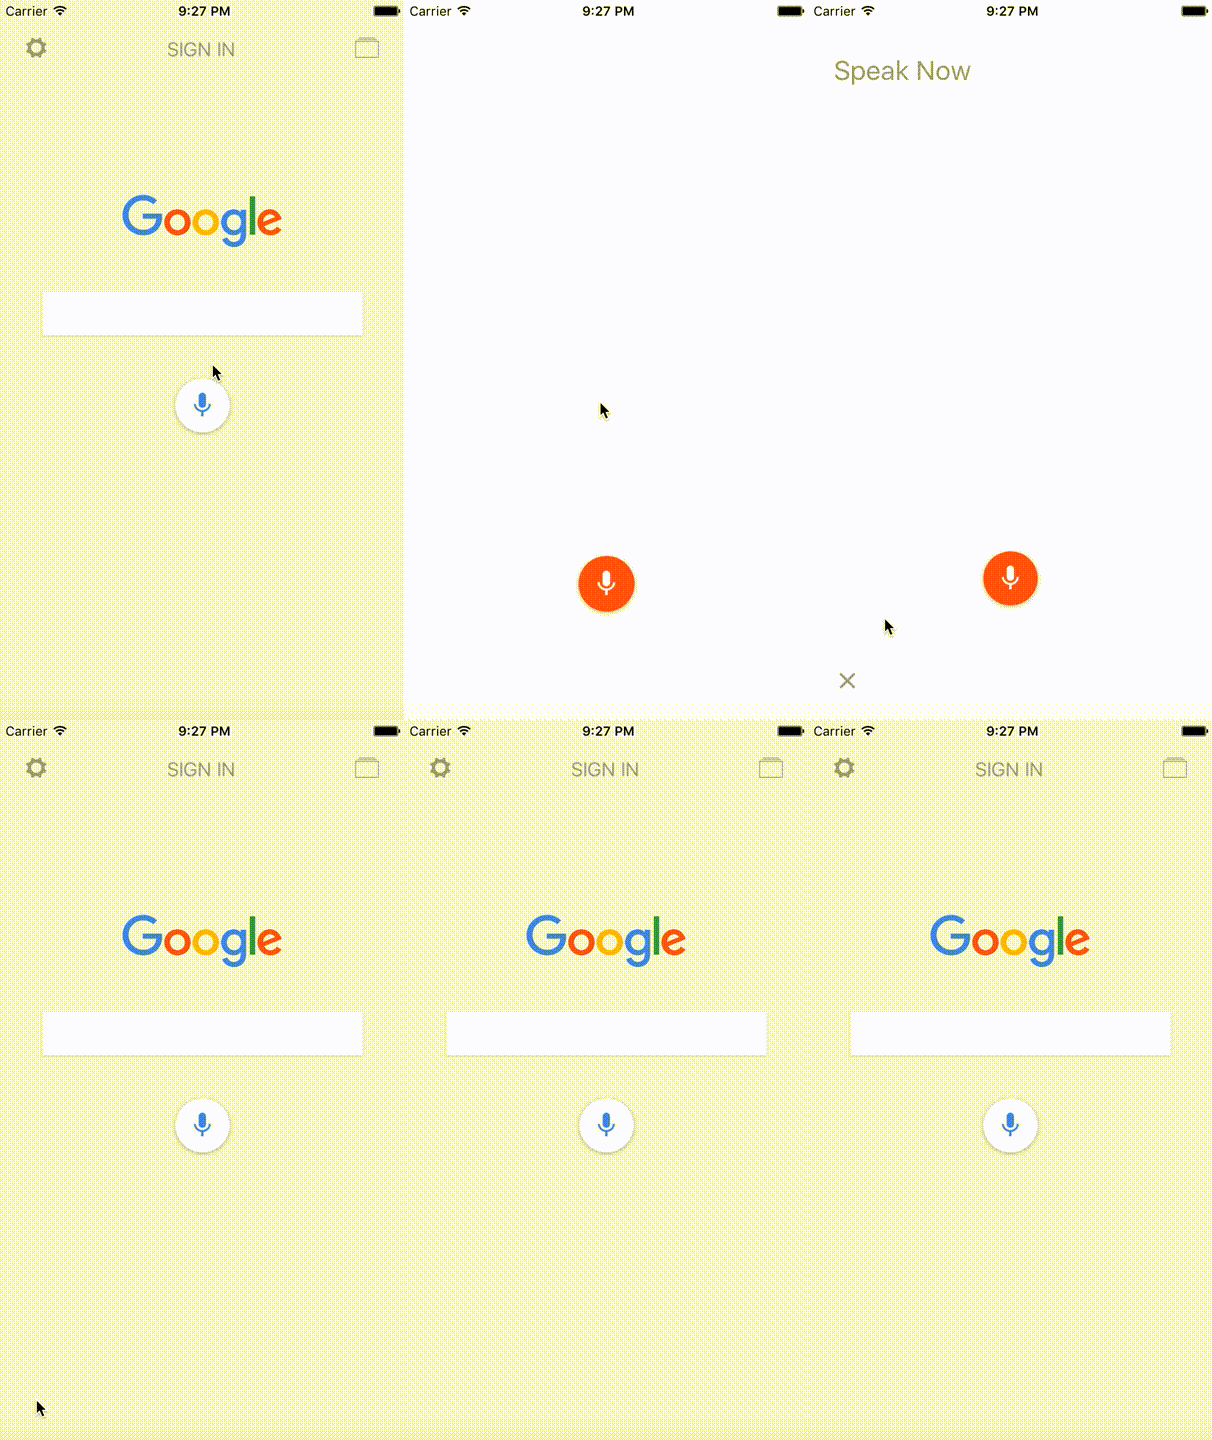
Day 22
Google Now
Day 23
Local WebView An example using D3.js

Day 24
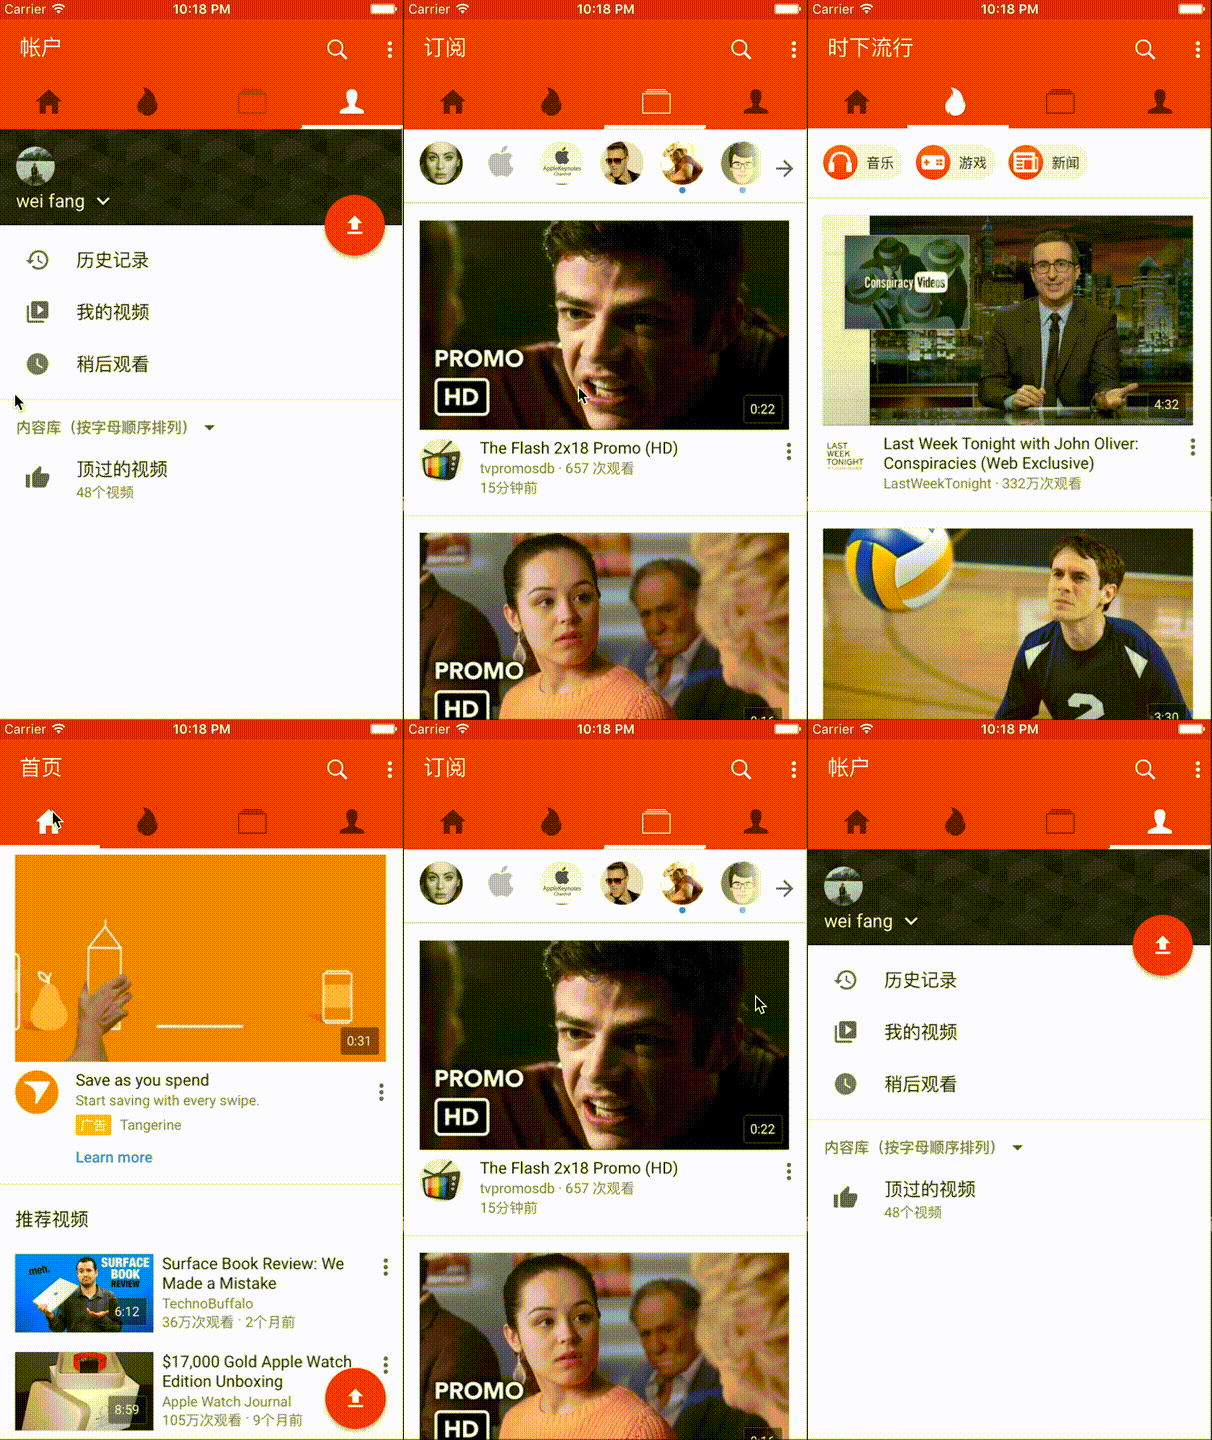
Youtube scrollable tab
Reference: https://github.com/brentvatne/react-native-scrollable-tab-view
Day 25
TO BE UPDATED
Day 26
TO BE UPDATED
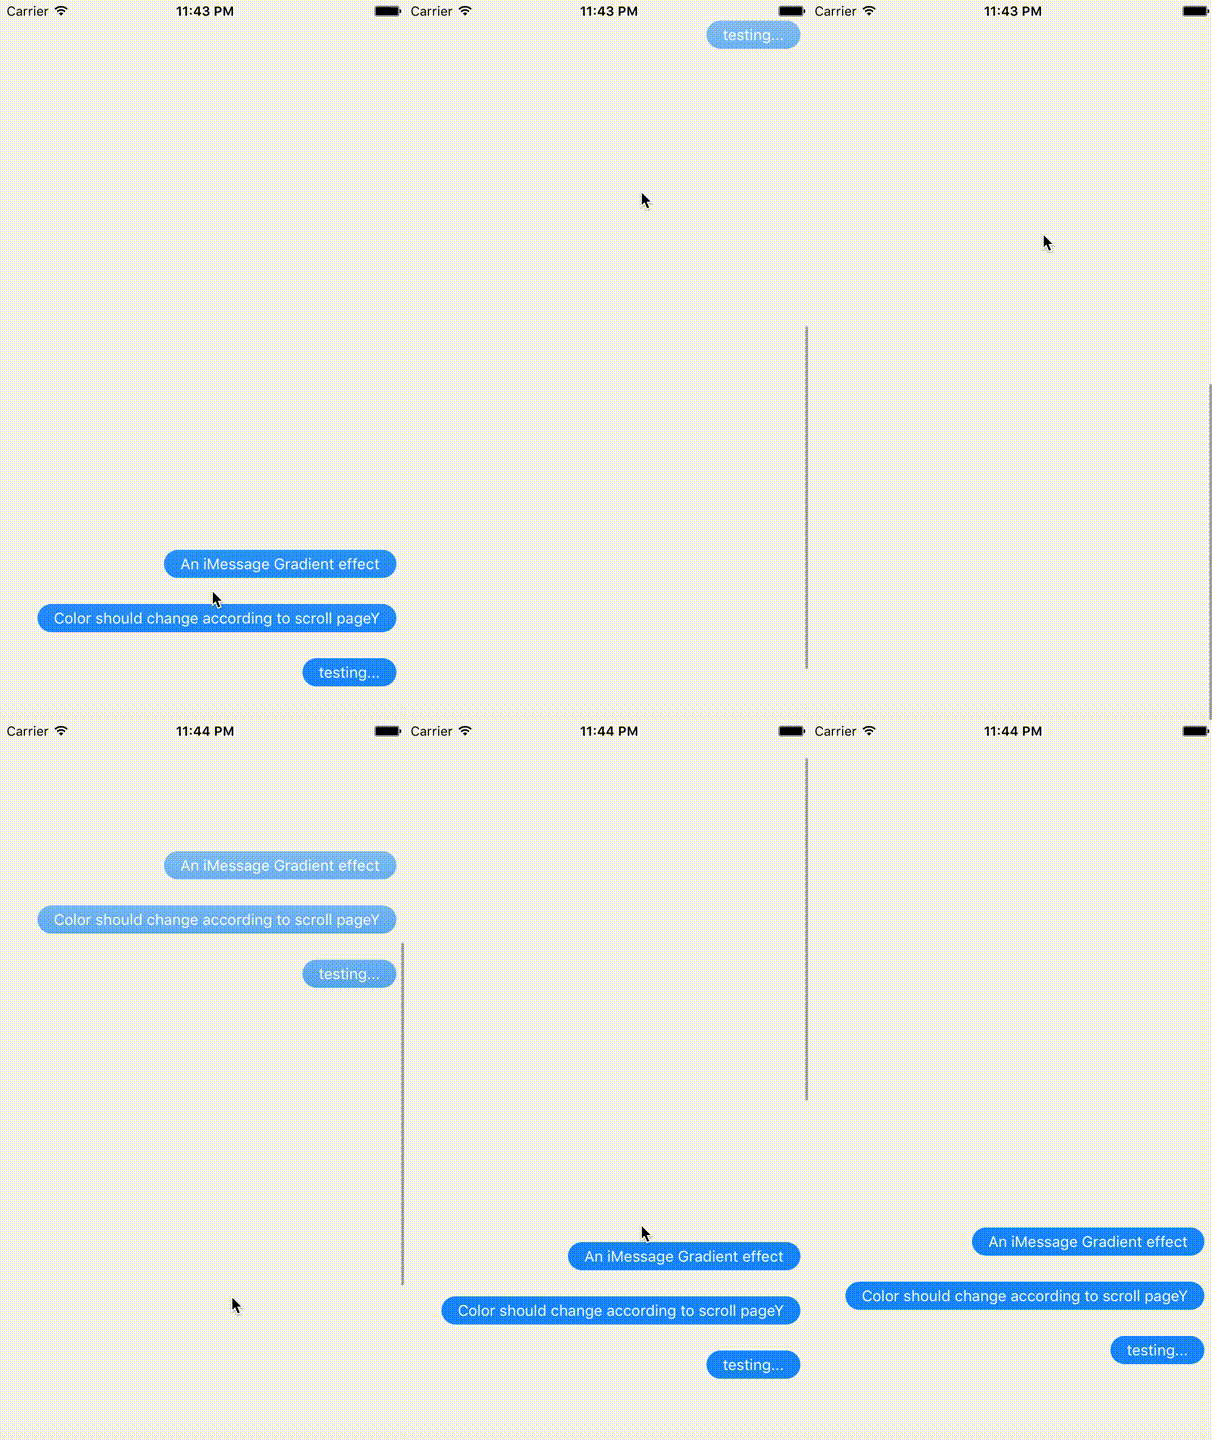
Day 27
iMessage Gradient. The chat bubble changes its gradient color with its pageY.
Reference: https://github.com/brentvatne/react-native-linear-gradient
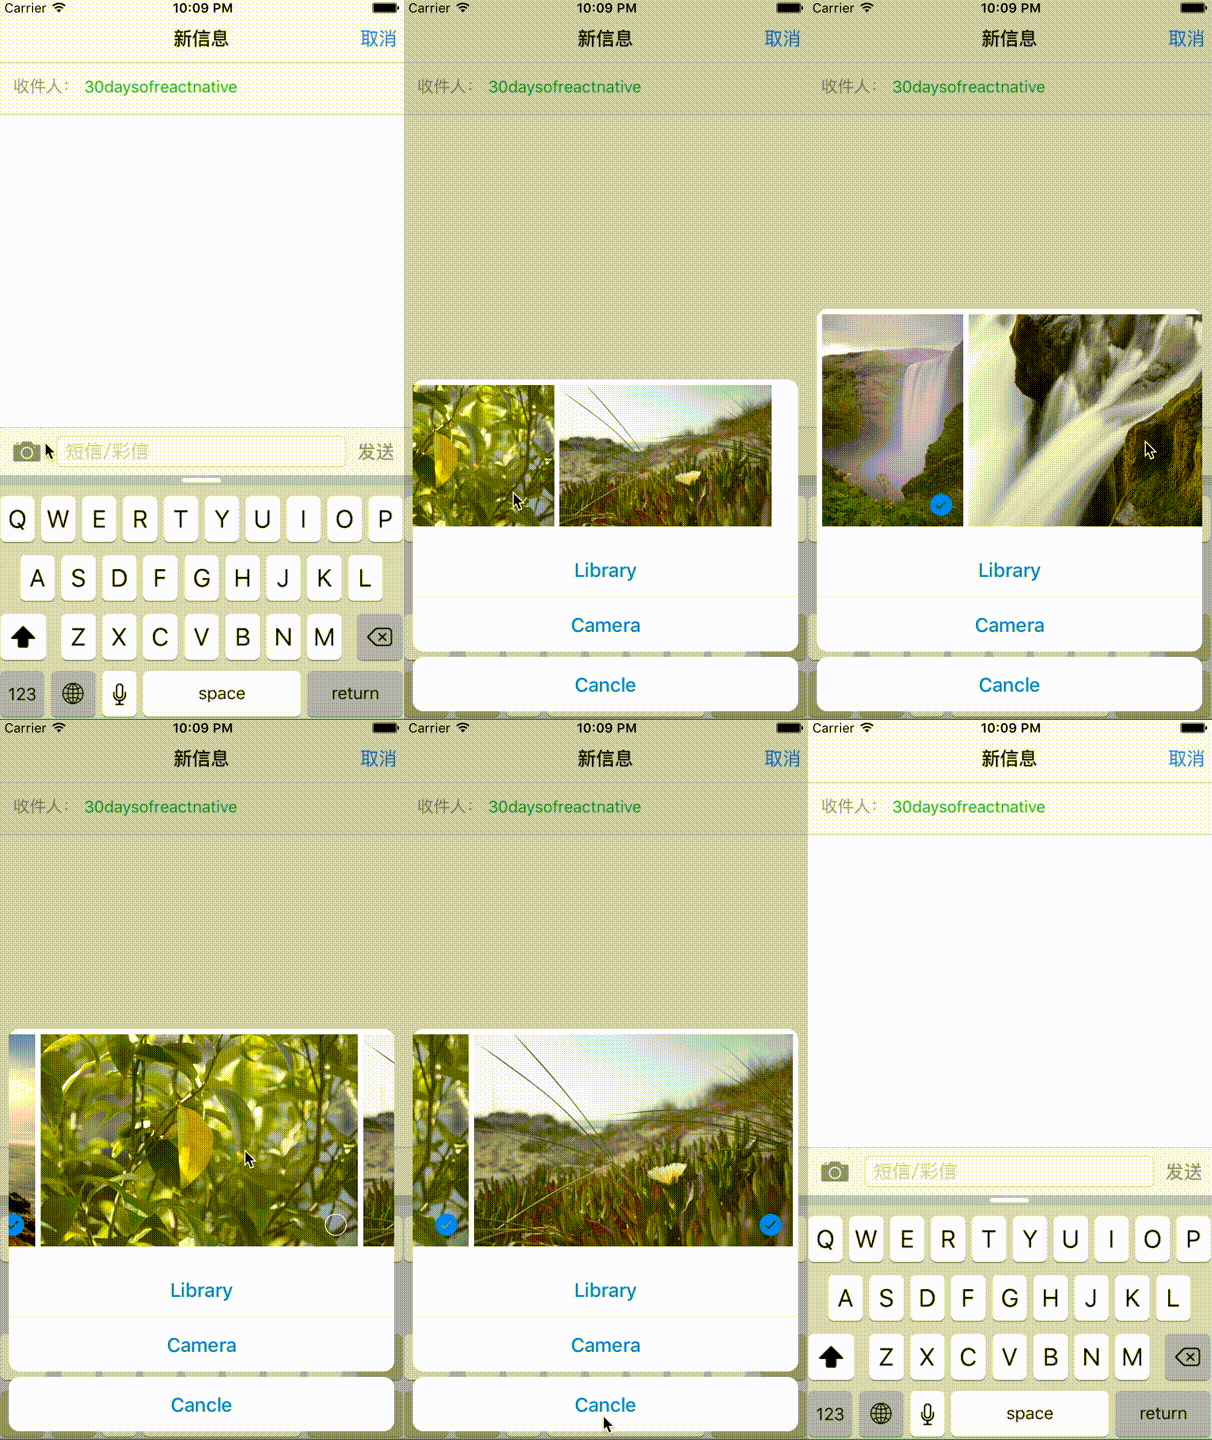
Day 28
iMessage Image Picker.
Day 29
TO BE UPDATED
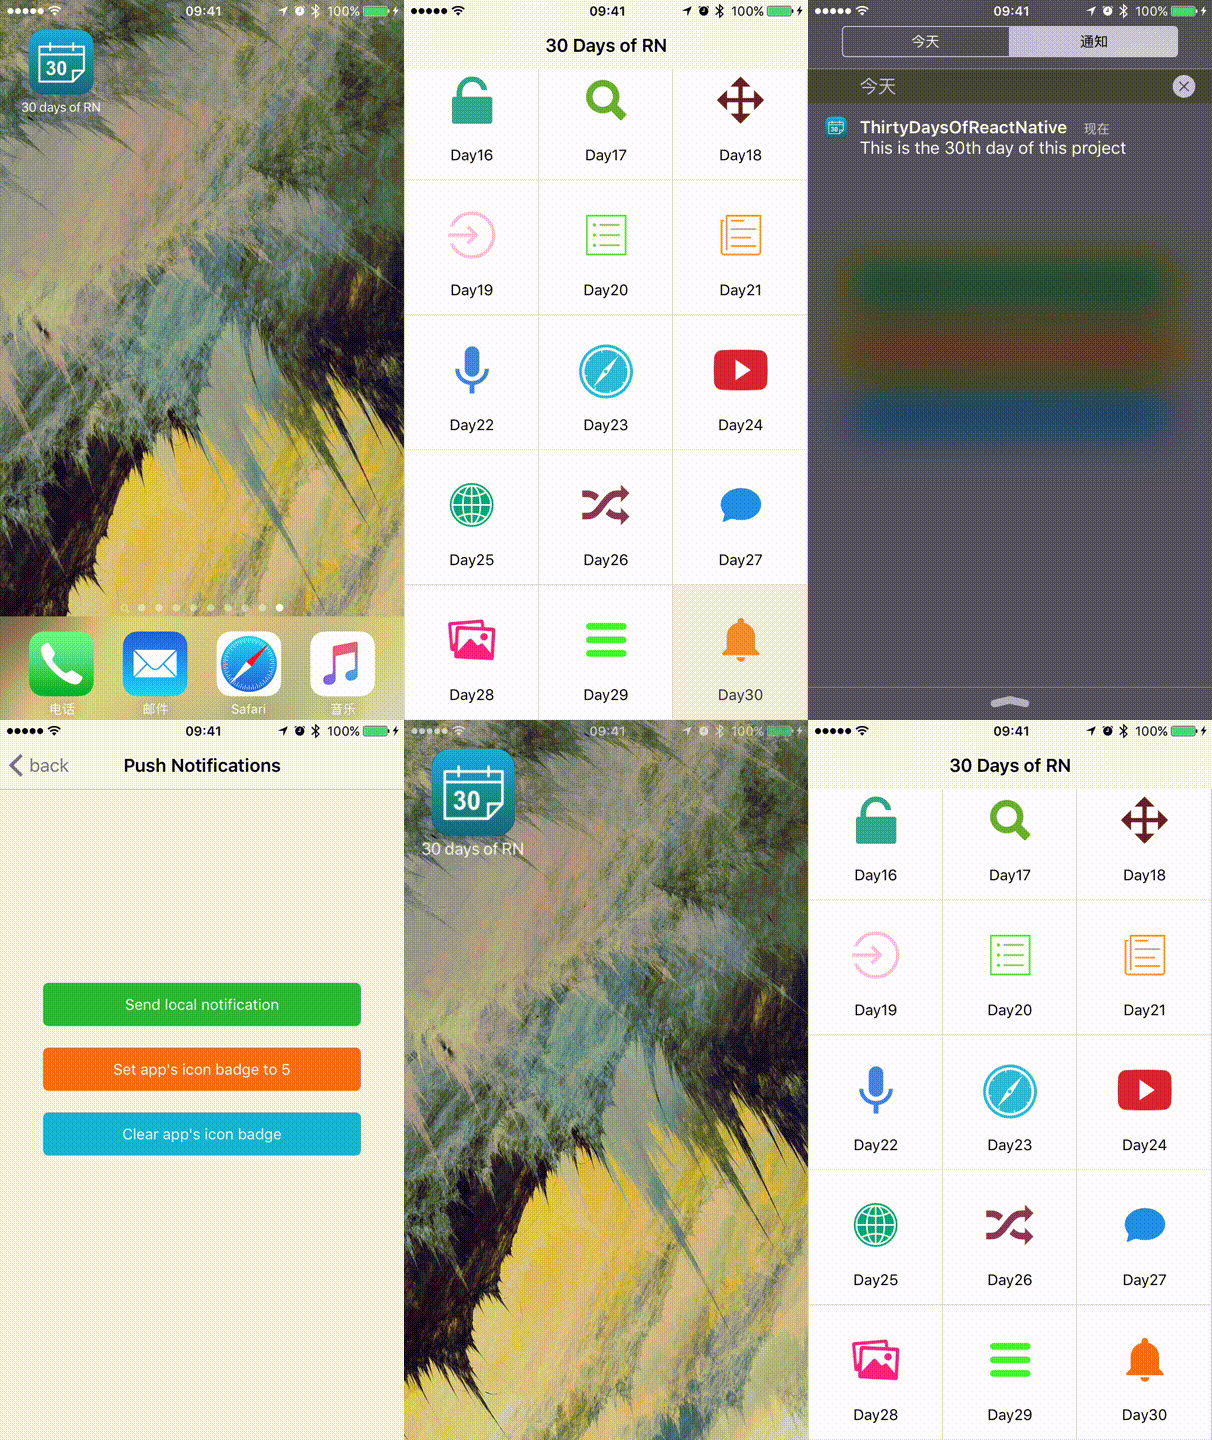
Day 30
Push Notification.
License
ThirtyDaysOfReactNative is under the MIT license.
Top Related Projects
Dribbble app built with React Native
Cross-Platform React Native UI Toolkit
:boom: React Native UI Library based on Eva Design System :new_moon_with_face::sparkles:Dark Mode
Mobile-first, accessible components for React Native & Web to build consistent UI across Android, iOS and Web.
UI Components Library for React Native
Material Design for React Native (Android & iOS)
Convert  designs to code with AI

Introducing Visual Copilot: A new AI model to turn Figma designs to high quality code using your components.
Try Visual Copilot