 style-transfer
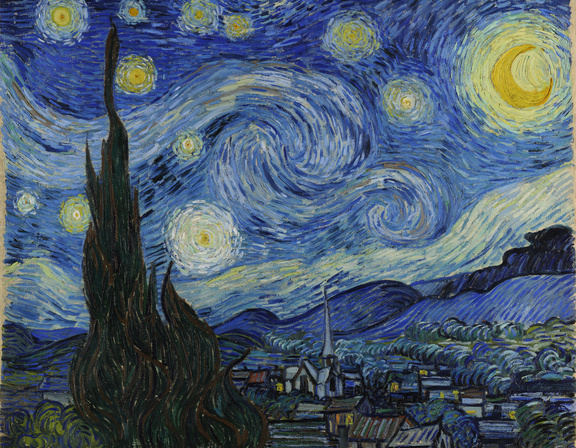
An implementation of "A Neural Algorithm of Artistic Style" by L. Gatys, A. Ecker, and M. Bethge. http://arxiv.org/abs/1508.06576.
Top Related Projects

Torch implementation of neural style algorithm

TensorFlow CNN for fast style transfer ⚡🖥🎨🖼

Code and data for paper "Deep Photo Style Transfer": https://arxiv.org/abs/1703.07511

Style transfer, deep learning, feature transform

TensorFlow (Python API) implementation of Neural Style
Quick Overview
The fzliu/style-transfer repository is a Python implementation of neural style transfer algorithms. It allows users to apply the artistic style of one image to the content of another image using deep learning techniques. The project is based on the original paper by Gatys et al. and includes various optimizations and improvements.
Pros
- Implements multiple style transfer algorithms, including the original method and faster approximations
- Provides pre-trained models for quick style transfer without lengthy training
- Includes a user-friendly command-line interface for easy usage
- Supports both CPU and GPU processing for flexibility
Cons
- Requires significant computational resources, especially for high-resolution images
- Limited documentation and examples for advanced usage scenarios
- Dependency on older versions of some libraries, which may cause compatibility issues
- Lack of recent updates or maintenance
Code Examples
- Basic style transfer:
from style_transfer import StyleTransfer

st = StyleTransfer()
st.transfer("content.jpg", "style.jpg", "output.jpg")
- Adjusting style weight:
st = StyleTransfer()
st.transfer("content.jpg", "style.jpg", "output.jpg", style_weight=1000)
- Using a specific model:
st = StyleTransfer(model="vgg19")
st.transfer("content.jpg", "style.jpg", "output.jpg")
Getting Started
-
Clone the repository:
git clone https://github.com/fzliu/style-transfer.git cd style-transfer -
Install dependencies:
pip install -r requirements.txt -
Run style transfer:
python style_transfer.py --content path/to/content.jpg --style path/to/style.jpg --output output.jpg
For more advanced usage and options, refer to the project's README and documentation.
Competitor Comparisons
Torch implementation of neural style algorithm
Pros of neural-style
- More comprehensive documentation and usage instructions
- Supports multiple style images for blended styles
- Includes pre-trained VGG models for easier setup
Cons of neural-style
- Slower processing time compared to style-transfer
- Requires more computational resources
- Less flexibility in customizing the style transfer process
Code Comparison
neural-style:
local cmd = torch.CmdLine()
cmd:option('-style_image', 'examples/inputs/seated-nude.jpg', 'Style target image')
cmd:option('-content_image', 'examples/inputs/tubingen.jpg', 'Content target image')
cmd:option('-output_image', 'out.png', 'Output image')
cmd:option('-image_size', 512, 'Maximum height / width of generated image')
style-transfer:
parser.add_argument('--style_img', type=str, required=True, help='path to style image')
parser.add_argument('--content_img', type=str, required=True, help='path to content image')
parser.add_argument('--output_img', type=str, default='output.jpg', help='path to output image')
parser.add_argument('--max_size', type=int, default=512, help='maximum width or height of the output image')
The code comparison shows that neural-style uses Lua with Torch, while style-transfer uses Python. Both repositories allow users to specify input images, output paths, and image size constraints, but with slightly different parameter names and default values.
TensorFlow CNN for fast style transfer ⚡🖥🎨🖼
Pros of fast-style-transfer
- Significantly faster processing time for style transfer
- Real-time style transfer capability for video streams
- Includes pre-trained models for immediate use
Cons of fast-style-transfer
- Limited flexibility in adjusting style parameters
- May produce less detailed or accurate results in some cases
- Requires more computational resources for training
Code Comparison
style-transfer:
def style_transfer(content_image, style_image, content_weight, style_weight):
    # Implementation using optimization-based approach
    # Iteratively adjusts the output image
fast-style-transfer:
def fast_style_transfer(content_image, model):
    # Implementation using a pre-trained feed-forward network
    # Single forward pass through the network
The main difference lies in the approach: style-transfer uses an optimization-based method, iteratively adjusting the output image, while fast-style-transfer employs a feed-forward network for quicker processing. The latter sacrifices some flexibility for speed, making it more suitable for real-time applications but potentially less adaptable to specific style nuances.
Code and data for paper "Deep Photo Style Transfer": https://arxiv.org/abs/1703.07511
Pros of deep-photo-styletransfer
- Focuses on photorealistic style transfer, maintaining the structure and details of the original photo
- Implements a photorealistic regularization method for better results
- Includes a CUDA implementation for faster processing
Cons of deep-photo-styletransfer
- More complex setup and dependencies compared to style-transfer
- Requires more computational resources due to the advanced algorithms
- Limited to photorealistic style transfer, less versatile for artistic styles
Code Comparison
style-transfer:
def style_transfer(content_image, style_image, iterations=1000):
    net = build_vgg16(content_image)
    content_features = net(content_image)
    style_features = net(style_image)

    target = nn.Parameter(content_image.clone())
    optimizer = optim.LBFGS([target])
deep-photo-styletransfer:
function styleTransfer(content, style, contentMask, styleMask)
    local cnn = loadcaffe.load(params.proto_file, params.model_file, params.backend):float()
    local content_image = image.load(content, 3)
    local style_image = image.load(style, 3)

    local content_layers = params.content_layers
    local style_layers = params.style_layers
The code snippets show that style-transfer uses Python and PyTorch, while deep-photo-styletransfer uses Lua and Torch. The latter implements more advanced features for photorealistic results, while the former focuses on general style transfer.
Style transfer, deep learning, feature transform
Pros of FastPhotoStyle
- Faster processing time due to NVIDIA GPU optimization
- Produces more photorealistic results
- Includes a user-friendly GUI for easier use
Cons of FastPhotoStyle
- Requires NVIDIA GPU for optimal performance
- More complex setup and dependencies
- Limited flexibility in customizing the style transfer process
Code Comparison
FastPhotoStyle:
from photo_style import stylize
stylized = stylize(content, style, cuda=True)
style-transfer:
from style_transfer import transfer_style
stylized = transfer_style(content_image, style_image)
FastPhotoStyle uses a more streamlined API with GPU acceleration, while style-transfer offers a simpler implementation but may be slower.
Both repositories provide neural style transfer capabilities, but FastPhotoStyle focuses on photorealistic results and leverages NVIDIA hardware for improved performance. style-transfer, on the other hand, offers a more straightforward implementation that may be easier to understand and modify for beginners or those without specialized hardware.
FastPhotoStyle is better suited for production environments or projects requiring high-quality, realistic outputs, while style-transfer may be more appropriate for educational purposes or smaller-scale applications where photorealism is less critical.
TensorFlow (Python API) implementation of Neural Style
Pros of neural-style-tf
- Implemented in TensorFlow, offering potential performance benefits and easier integration with TensorFlow-based projects
- Supports multiple style images for blended style transfer
- Includes options for content-aware style transfer and color preservation
Cons of neural-style-tf
- May require more setup and dependencies due to TensorFlow requirements
- Potentially more complex to use for beginners compared to the Caffe-based implementation
Code Comparison
style-transfer (Caffe):
net = caffe.Net(args.model_def, args.model_weights, caffe.TEST)
style_layers = ["conv1_1", "conv2_1", "conv3_1", "conv4_1", "conv5_1"]
content_layers = ["conv4_2"]
neural-style-tf (TensorFlow):
vgg = vgg19.VGG19(include_top=False, weights='imagenet')
style_layers = ['block1_conv1', 'block2_conv1', 'block3_conv1', 'block4_conv1', 'block5_conv1']
content_layers = ['block4_conv2']
Both repositories implement neural style transfer, but neural-style-tf offers more features and flexibility at the cost of potentially increased complexity. The code comparison shows similar layer selection approaches, with neural-style-tf using TensorFlow's VGG19 implementation.
Convert  designs to code with AI

Introducing Visual Copilot: A new AI model to turn Figma designs to high quality code using your components.
Try Visual CopilotREADME
style-transfer
Introduction
This repository contains a pyCaffe-based implementation of "A Neural Algorithm of Artistic Style" by L. Gatys, A. Ecker, and M. Bethge, which presents a method for transferring the artistic style of one input image onto another. You can read the paper here: http://arxiv.org/abs/1508.06576.
Neural net operations are handled by Caffe, while loss minimization and other miscellaneous matrix operations are performed using numpy and scipy. L-BFGS is used for minimization.
Requirements
- Python >= 2.7
- CUDA >= 6.5 (highly recommended)
- Caffe
CUDA will enable GPU-based computation in Caffe.
Download
To run the code, you must have Caffe installed and the appropriate Python bindings in your PYTHONPATH environment variable. Detailed installation instructions for Caffe can be found here.
All of the necessary code is contained in the file style.py. You can try it on your own style and content image by running the following command:
python style.py -s <style_image> -c <content_image> -m <model_name> -g 0
The prototxts which come with the vanilla Caffe install aren't quite compatible with this code - working ones have already been added to this repository as a result of this. To get the pretrained models, simply run:
bash scripts/download_models.sh
This will grab the convnet models from the links provided in the Caffe Model Zoo. You may also specify the exact model you'd like to download by running:
bash scripts/download_models.sh <model_name>
Here, <model_name> must be one of vgg16, vgg19, googlenet, or caffenet.
Sample
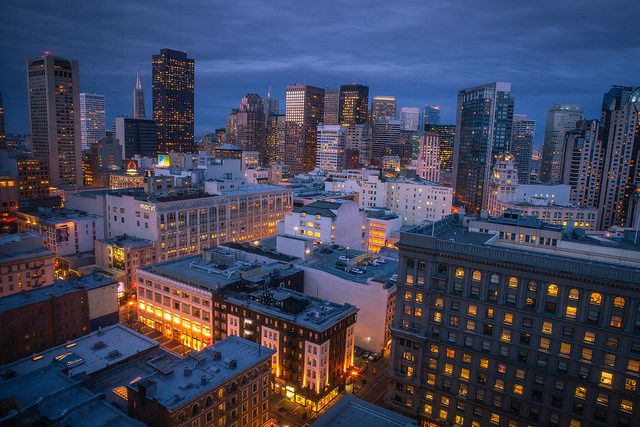
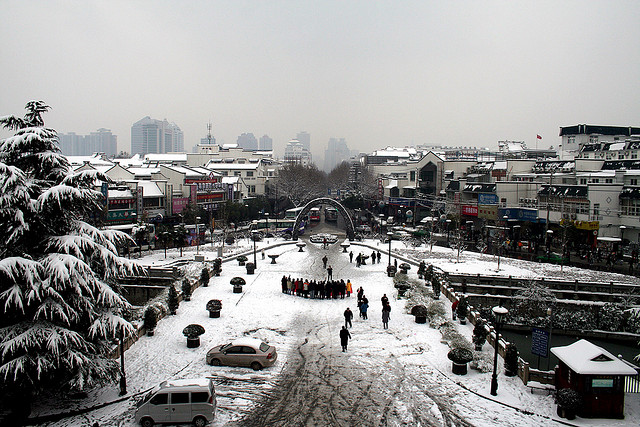
Original images: San Francisco by Anh Dinh, Nanjing in winter snow, 2008 by Emma Gawen, and Blade Runner's Johannesburg by Andrew Moore. All images were released under the Creative Comments license. Each output image was initialized with the content image, and 500 BFGS iterations under the VGG model were performed in each instance.
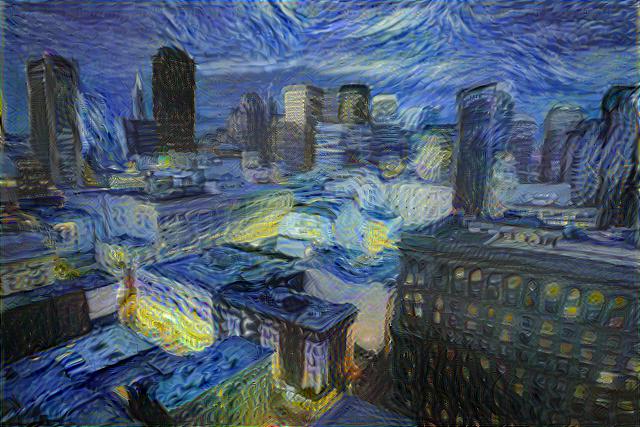
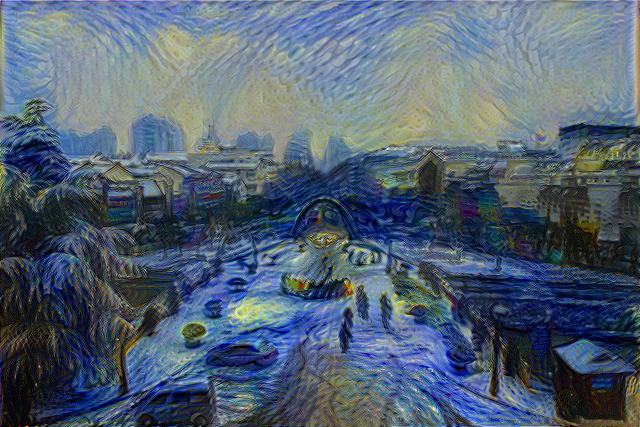
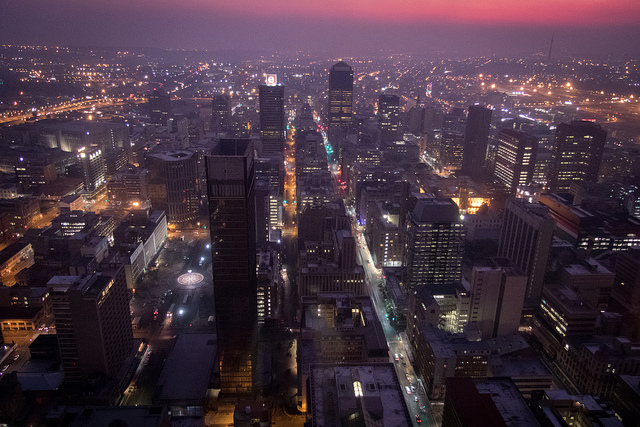
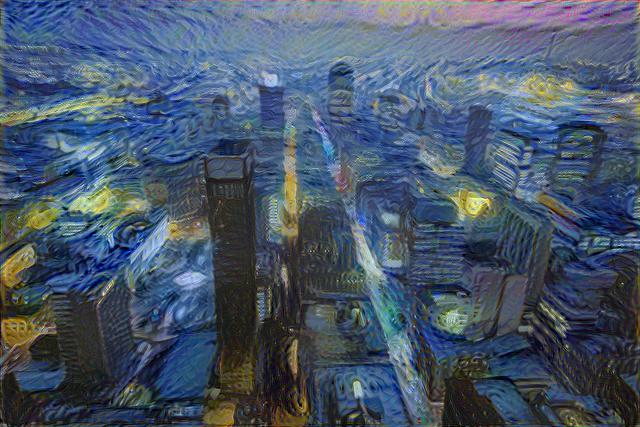
These results can also be found in the images folder in the repository root.
A more in-depth set of examples can be found here.
Top Related Projects
Torch implementation of neural style algorithm
TensorFlow CNN for fast style transfer ⚡🖥🎨🖼
Code and data for paper "Deep Photo Style Transfer": https://arxiv.org/abs/1703.07511
Style transfer, deep learning, feature transform
TensorFlow (Python API) implementation of Neural Style
Convert designs to code with AI
Introducing Visual Copilot: A new AI model to turn Figma designs to high quality code using your components.
Try Visual Copilot